Advertisement
Quick Links
Advertisement

Related Manuals for Audiovox D1718


Summary of Contents for Audiovox D1718
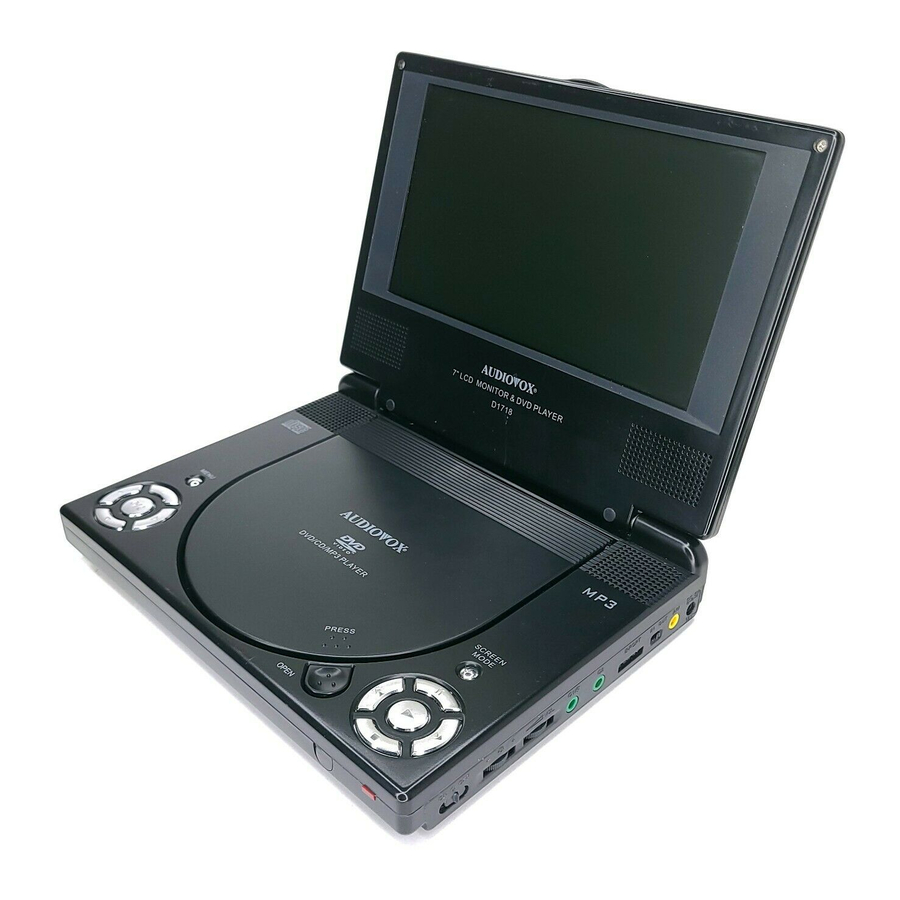
- Page 1 D1718 PORTABLE 7" LCD MONITOR AND DVD PLAYER...
- Page 2 Notice: This Product incorporates copyright protection technology that is pro- tected by method claims of certain U.S. Patents and other intellectual property rights owned by Macrovision Corporation and other rights owners. Use of this copyright protection technology must be autho- rized by Macrovision Corporation, and is intended for home and other limited viewing uses only unless otherwise authorized by Macrovision Corporation.
-
Page 3: Installation
A. Introduction Thank you for selecting the D1718 portable DVD player. The main features include a 7" Screen (16:9 Aspect Ratio) Liquid Crystal Dis- play (LCD) monitor and a DVD player. The unit applies the latest state of the art electronics and is designed for use in hotels, offices home or vehicle. - Page 4 5. Cleaning Unit When cleaning, make sure the system is unplugged from the power source. Do not use liquid cleaners or aerosol cleaners. Use a cloth lightly dampened with water for cleaning the exterior of the system only. 6. Disc Do not use irregularly shaped discs such as heart or star-shaped discs as they may cause the unit to malfunction.
- Page 5 2. Powering the system in a car Plug one end of the DC power adapter into the DC 9V jack on the unit, then plug the other end into the lighter socket. 3. Powering the system with rechargeable Battery Please refer to Rechargeable Battery Installation and Use (Pages 32 and 33).
- Page 6 E. Controls, Indicators, and Connectors 1. Unit View (Refer to Figure 2) 1) Menu Button 2) Up/Down/Left/Right/OK Buttons 3) Open Button 4) Previous/Next/Pause/ Stop/Play Buttons 5) Screen Mode Button 6) Remote Sensor 7) Power Indicator Figure 2 8) Power On/Off Switch 9) Brightness Up/Down Control 10) Volume Up/Down Control 11) Headphone Jack 1...
- Page 7 2. Remote Control View (Refer to Figure 3) 1) Setup Button 2) Up Button 3) Previous Button 4) Enter Button 5) Reverse Scan /Left Button 6) Down Button 7) Numeric Keypad 8) Display Button 9) Zoom Button 10) Subtitle Button 11) Next Button 12) A-B Repeat Button 13) Forward Scan /Right Button...
- Page 8 G. SETUP Press ‘SETUP’ to display the Main screen of the SETUP Menu on the screen. Press ‘SETUP’ again to exit the SETUP Menu and the unit will resume it’s last playback mode. Figure 4. Main SETUP Menu Screen 1) Press “Setup”, the ‘GENERAL SETUP PAGE’ will display on screen. Figure 5.
- Page 9 * NORMAL/PS: When the player is connected to a normal TV, and a wide picture is shown on the full screen. * NORMAL/LB: When the player is connected to a normal TV, and a wide picture is shown on the screen with a black strip at both the top and bottom of the screen.
- Page 10 c). Select ‘SCREEN SAVER’ using the DOWN button. Figure 8. SCREEN SAVER Display *ON: enables screen saver *OFF: disables screen saver (off) *NOTE: The DVD player will enter the Screen Saver mode after approximately five minutes if the same image remains on the screen.
- Page 11 a).Select “Brightness by using the UP or DOWN buttons ,then press “Enter”you can change the Brightness by pressing the LEFT or RIGHT buttons. To exit “Brightness Setting”, press “Enter”again to return the main Menu. Figure 11. BRIGHTNESS Screen Display b).Select “Contrast” by using the UP or DOWN buttons,then press “Enter”...
- Page 12 d).Select “Saturation “ by using the UP or DOWN buttons, then press “Enter” you can adjust the Saturation by pressing the LEFT or RIGHT buttons. Figure 14. SATURATION (Color) Screen Display To exit “Saturation” Setting, press “Enter”again to return to the main Menu 3).With no disc inside the player, select “password”...
- Page 13 Figure 17. PASSWORD VERIFY Input Screen Display NOTE: The Default Password is 3308 . This password is always effective even after you have selected your own password and changed it. To avoid the possibility of others using the default password to set the parental level and change the password, you can record this default password in another area and delete it from this manual.
- Page 14 b. Select ‘SUBTITLE’ using the DOWN button, then press RIGHT to enter the submenu. Select the desired subtitle language or SUBTITLE OFF using the UP or DOWN buttons , then press ‘ENTER’ to confirm the setting. Press ‘LEFT’ to return. Figure 19.
- Page 15 d. Select ‘PARENTAL’ using the DOWN button, then press RIGHT to enter the submenu. Figure 21. PARENTAL Preference Screen Display Select the parental level you desire using the UP or DOWN but- tons for discs with lock-out function or multiple rating levels. These are listed from the lowest level (1 Kid Safe) to the highest level (Adult).
- Page 16 1. Basic Operation POWER OPEN PLAY PAUSE STOP NEXT PREVIOUS FORWARD REVERSE LEFT/RIGHT/UP/DOWN ENTER NUMBERS RETURN MENU REPEAT DISPLAY ANGLE SUBTITLE AUDIO ZOOM SETUP Turn the unit on/off Remove/load the disc Start Play/Execute item or setting Still Picture (1 time) Stop at the present playing point / (2 times) Stop playing Go to the next chapter, track or scene dur- ing play back...
- Page 17 2. MENU A DVD is divided into sections called titles and chapters. When you play a DVD, a root menu of the disc will appear on the screen of your TV or Monitor. The contents of the menu vary from disc to disc. Press MENU during playback to display the menu.
- Page 18 c. Press ‘DISPLAY’ a 3rd time to display the Elapsed Time for the chapter. The heading will disappear automatically in 3 seconds. Figure 25. Chapter Elapsed Time Screen Display d. Press ‘DISPLAY’ a 4th time to display the Remaining Time for the chapter.
- Page 19 Figure 27. Angle Screen Display 3. SUBTITLE During disc playback press ‘SUB’ to select the subtitle language you desire*, with the current Subtitle Language Number (1) and the total Number of Subtitle Languages (2) displayed. If there are multiple languages press ‘SUB’ again to select another subtitle lan- guage.
- Page 20 4. AUDIO During playback press ‘AUDIO’ to select the audio language you desire*, with the current Audio Channel Number (1) and the total number of Audio Channels (2) displayed. Press AUDIO again to se- lect another audio language. The audio display will disappear auto- matically if the ‘AUDIO’...
- Page 21 6. A-B REPEAT a. During playback press ‘A-B’ to set the Starting Point A. Figure 31. A-B Repeat Starting Point Screen Display b.Press ‘A-B’ a second time to set the Ending Point B and the player will repeatedly play the part between Point A and Point Figure 32.
- Page 22 7. REPEAT a. During playback press ‘REPEAT’ once to repeatedly play the cur- rent chapter. Figure 34. Chapter Repeat ON Screen Display b.During playback press ‘REPEAT’ again to repeatedly play the current title. Figure 35. Title Repeat ON Screen Display c.
-
Page 23: Playing Audio Cds
d. Press “REPEAT” a 4th time, to resume normal play. Figure 37. Repeat Off Screen Display 4. PLAYING AUDIO CDS When playing an audio CD press the DISPLAY button on the remote to view time information. The options below show you what information is available using this function. -
Page 24: Using The Repeat Feature
c. Press ‘DISPLAY’ two times and TOTAL ELAPSED appears along with the current track playing and the total time that the CD has been playing. Figure 40. TOTAL ELAPSED Screen Display d. Press ‘DISPLAY’ three times and TOTAL REMAIN appears along with the current track playing and the amount of time remaining on the CD. -
Page 25: Playing Mp3 Discs
5. PLAYING MP3 DISCS MP3 is a format for storing digital audio. An audio CD-quality song is compressed into the MP3 format with very little loss of audio quality while taking up much less disc space. CD-R /RW discs that have been encoded in MP3 format are compatible with this system. - Page 26 Use the ( NEXT ) button to move to the next song. Press the (PREVIOUS) button to move to the beginning of the previous song. USING THE REPEAT FEATURE The default mode for the Repeat feature is OFF. Pressing REPEAT consecutively changes the repeat options: •...
- Page 27 6. Playing JPEG file 1) Load the JPEG Disc into tray. 2) Select JPEG file by pressing “UP/DOWN” button. 3) You can preview the JPEG file by pressing “Play” or “ENTER”. 4) Pressing the “Left Key“ will rotate the picture 90 degrees counterclocckwise.
- Page 28 k. Press “display” 11th time, “COMPRESS TO CENTER H” will display on the screen, the picture will refresh from top and bot- tom to center. l. Press “display” 12th time, “COMPRESS TO CENTER V” will display on the screen, the picture will refresh from right and left to center.
- Page 29 2. AV In Connecting to a Game or Camcorder. ( Refer to Figure 44) a. Slide the AV In/Out switch to In. b. Connect one end of the supplied audio/video adapter cable (1/8”) plug into the unit’s DVD’s AV jack, and connect the other end to the AUDIO OUTPUT jacks on your Game or Camcorder through an optional RCA cable (white = left channel, red = right channel, Yellow = Video).
- Page 30 1) Optional Game Controller ( Refer to Figure 45) Please refer to the operation manual provided with the Game Controller. *Note: Do not use the “AV Jack” and “E Port” at the same time when in “AV IN” mode. Unplug the game controller when using the A/V input jack.
-
Page 31: Specifications
3. Connecting Optional Headphones Simply plug the optional headphones into either Headphone 1 jack or Headphone 2 jack on the right side of the D1718. ( Refer to Figure 46) Plugging into Headphone jack 1 will disable the internal speakers. - Page 32 10. Rechargeable Battery Installation and Use The player utilizes a set of long-life Ni-Mh batteries for a portable power supply. Ni-MH batteries feature high storage capacity and low level of degradation. This means the Ni-MH batteries do not have “Memory Effect” and thus can be recharged safely regardless of whether the battery is fully or only partially discharged.
- Page 33 Installing the Battery Pack: 1. First, make sure the player is off and that the AC power supply has been disconnected. 2. Close the player cover. 3. Align the battery pack pins with the holes on the rear of the unit. 4.
-
Page 34: 90-Day Limited Warranty
AUDIOVOX ELECTRONICS CORP. (the Company) warrants to the original retail purchaser of this product that should this product or any part thereof, under normal use and conditions, be proven defective in material or workmanship within ninety (90) days from the date of original purchase, such defect(s) will be repaired or replaced with reconditioned product (at the Company's option) without charge for parts and repair labor. - Page 35 © 2007 Audiovox Electronics Corporation 128-7998...
Need help?
Do you have a question about the D1718 and is the answer not in the manual?
Questions and answers