Venmar VCS500 SERIES Installation Instructions Manual

Venmar VCS500 SERIES Installation Instructions Manual

Intended for domestic cooking only

Advertisement

INSTALLATION INSTRUCTIONS
HB0181
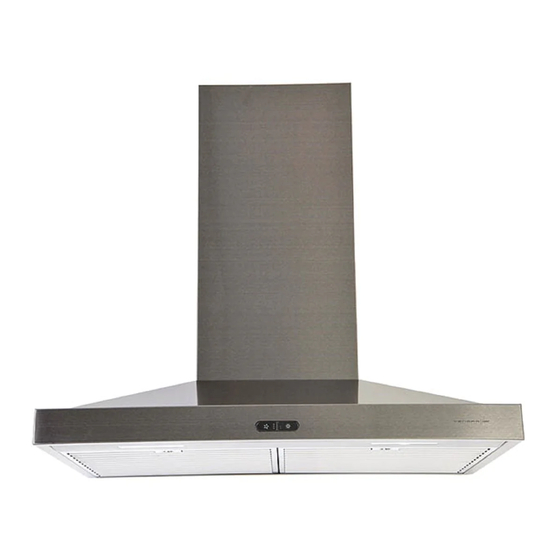
VCS500 AND VCS550 SERIES
!
!
INTENDED FOR DOMESTIC COOKING ONLY
READ AND SAVE THESE INSTRUCTIONS
INSTALLER: LEAVE THIS MANUAL WITH HOMEOWNER.
HOMEOWNER: USE AND CARE INFORMATION ON PAGE 11.
Venmar Ventilation ULC, 550 Lemire Blvd., Drummondville QC J2C 7W9 1-800-567-3855
REGISTER YOUR PRODUCT ONLINE AT: www.bnv.ca
For additional information - visit www.venmar.ca
22745 rev. 04

Advertisement

Table of Contents
loading
Need help?

Need help?

Do you have a question about the VCS500 SERIES and is the answer not in the manual?

Questions and answers

Subscribe to Our Youtube Channel

Summary of Contents for Venmar VCS500 SERIES

  • Page 1 READ AND SAVE THESE INSTRUCTIONS INSTALLER: LEAVE THIS MANUAL WITH HOMEOWNER. HOMEOWNER: USE AND CARE INFORMATION ON PAGE 11. Venmar Ventilation ULC, 550 Lemire Blvd., Drummondville QC J2C 7W9 1-800-567-3855 REGISTER YOUR PRODUCT ONLINE AT: www.bnv.ca For additional information - visit www.venmar.ca...
  • Page 2: To Reduce The Risk Of Fire, Electric Shock Or Injury To Persons, Observe The Following

    Use proper pan size. Always use cookware appropriate for the 9. To reduce the risk of fire and electrical shock, the Venmar Chef size of the surface element. VCS500 and VCS550 Series models should only be installed with their own built-in blowers.
  • Page 3: Prepare The Installation

    1. PREPARE THE INSTALLATION WARNING When performing installation, servicing or cleaning the unit, it is recommended to wear safety glasses and gloves. NOTE: Before proceeding to the installation, check the contents of the box. If items are missing or damaged, contact the manufacturer. Make sure that the following items are included: - Hood - Accessories...
  • Page 4: Remove Grease Filters

    2. SELECT INSTALLATION TYPE (CONT'D) Refer to illustrations below to locate duct opening according to discharge type chosen (grey parts to be installed later). ERTICAL DISCHARGE ORIZONTAL DISCHARGE ” ” 9¾” 3” 3¼” ” 3¼” 9¾” 12¾” 24” ” WIDTH HOOD 30”...
  • Page 5 4. CHOOSE THE OPENING ( CONT'D OR HORIZONTAL DISCHARGE From outside the unit, remove the knockout from back of hood (see illustration beside). HR0123 5. BLOWER REMOVAL (HORIZONTAL DISCHARGE ONLY) The VCS500 and VCS550 Series range hoods are factory shipped with the blower mounted for a vertical discharge configuration. For a horizontal discharge configuration, disassemble the blower from the inner top of the hood (see procedure below).
  • Page 6: Wiring Installation

    6. INSTALL ADAPTER/DAMPER (6” ROUND OR 3¼” X 10”) 6” 3¼” 10” ERTICAL DISCHARGE ROUND ERTICAL DISCHARGE HJ0126 HJ0125 Mount the 6” round adapter/damper (included in bag) using 4 no. 8 x 3/8” screws (included) or the 3¼” x 10” adapter/damper to the hood using 2 no.
  • Page 7: Install Hood Mounting Bracket

    8. INSTALL HOOD MOUNTING BRACKET WARNING ALL STUDS When cutting or drilling into wall, do not damage electrical wiring and other hidden utilities. RAMING BEHIND DRYWALL Construct wood wall framing that is even with the surface of wall studs. Wood wall framing must be at least 1/2” thick and 3” high. Fasten wood wall framing to wall studs for a solid installation.
  • Page 8: Prepare Decorative Flue

    11. REINSTALL BLOWER (HORIZONTAL DISCHARGE ONLY) 1) Position the blower on the inner back of the hood, as shown on the right. 2) Using a 5/16” socket, or a Robertson or a Phillips no. 2 screwdriver and the 4 screws previously removed, secure the blower to the hood.
  • Page 9: Install Decorative Flue

    14. INSTALL DECORATIVE FLUE Carefully slide in place decorative flue base (notches end first) in the groove (shaded part in inset at right) behind the exterior wall of the top of the hood. HO0272 PPER FLUE MOUNTING BRACKET RONT VIEW Slide up the upper flue until it is aligned with its mounting bracket.
  • Page 10 16. LIGHTING VCS500 The lighting of VCS500 Series range hood is produced by two shielded halogen bulbs (120 V, 50 W, with GU10 base), included. WARNING Do not touch lamps during or soon after operation. Burns may occur. In order to prevent the risk of personal injury, only install shielded halogen lamps.
  • Page 11: Operation

    17. CARE WARNING Before servicing or cleaning the unit, switch power off at service panel and lock service panel to prevent power from being switched on accidentally. When the service disconnecting means cannot be locked, securely fasten a prominent warning device, such as a tag, to the service panel. Grease Filters Hybrid and micromesh filters should be cleaned monthly.
  • Page 12: Operation ( Cont ' D )

    18. OPERATION ( CONT VCS550 BLOWER BUTTON When blower is OFF, press this button to turn ON the blower at the last saved speed. If there was no speed saved, the blower will be set on LOW speed. NOTE: When LOW speed is activated from OFF, the blower starts on MEDIUM speed for a very short lapse of time, and then resume to LOW speed.
  • Page 13: Wiring Diagrams

    19. WIRING DIAGRAMS VCS500 LIGHTS SWITCH YEL (LOW) COLOR CODE BLU (HIGH) BLACK BLUE BROWN GREY ORANGE WHITE YELLOW MOTOR SWITCH RED (LOW) FAN MOTOR BLK (HIGH) LINE NEUTRAL GROUND HE0257A VCS550 OVERRIDE COLOR CODE BLACK BLUE BROWN GREY ORANGE USER INTERFACE WHITE MOUNTED TO J10...
  • Page 14: Warranty

    To contact Venmar Ventilation ULC warranty service call 1-800-567-3855 in Canada. In order to qualify for a warranty claim, the owner of a Venmar Chef Series range hood must have the model and serial number along with a proof of the original purchase date. At the time of requesting service, describe the nature of any defect in the product or part.
  • Page 15: Service Parts

    Any third party replacement part used may cause serious damage and drastically reduce the performance level of your unit, which will result in premature failing. Venmar Ventilation ULC recommends to contact a certified service depot for all...
  • Page 16 Any third party replacement part used may cause serious damage and drastically reduce the performance level of your unit, which will result in premature failing. Venmar Ventilation ULC recommends contacting a certified service depot for all...

This manual is also suitable for:

Vcs550 series

Table of Contents