Table of Contents
Advertisement
Advertisement
Table of Contents

Summary of Contents for Yaesu ZCUT-10
- Page 1 INSTRUCTION MANUAL...
-
Page 2: Please Read Before Use
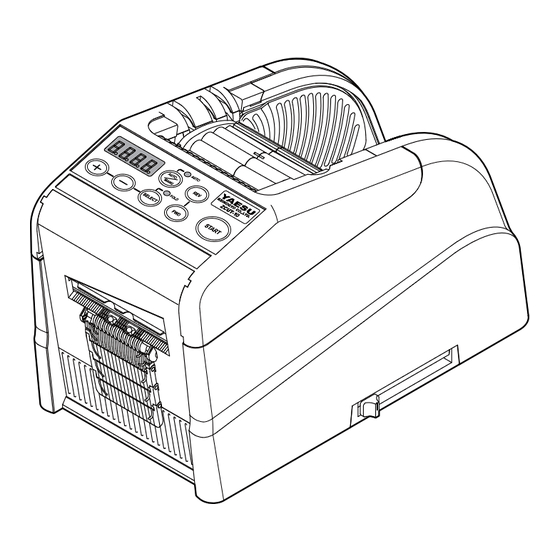
Please read before use Thank you very much for purchasing our tape dispenser ZCUT-10. Most of the function is the same as ZCUT-9GR, but the function to fold the tape edge is added. This is most effective feature to remove a tape very easily in prod- uction process required or end customers removing a tape. -
Page 3: Safety Instructions
Safety Instructions The safety guidelines in this Instruction Manual must be observed in order to prevent damage to the machine or injury to the operator or other persons. The safety guidelines presciribed "Warning " and "Caution" describe possible injury or damage that may be suffered from operating or maintaining the machine in a manner other than as described in this Instruction Manual. - Page 4 Warning Do not plug in, unplug the cord, or operate the machine with wet hands. Failure to observe this may result in injury due to electric shock. Never insert your finger, or any other body part, or any foreign object into the machine. Failure to observe this may result in injury.
-
Page 5: Identification Of Parts
Identification Of Parts HOLD DOWN ROLLER UNIT ROLLER LOCK LEVER UPPER CASE CONTROL PANEL SENSOR BLADE UNIT TAPE OUTLET FLEXIBLE TAPE SUPPORT TAPE HOLDER ADJUST LEVER CONTROL PANEL START BUTTON LED (Blue LED) AUTO / MANUAL MODE REV BUTTON BUTTON DISPLAY SELECT BUTTON FWD BUTTON... - Page 6 Identification Of Parts TAPE FEED ROLLER TAPE INLET TAPE HOLDER HOLD DOWN ROLLER REL- AC CORD INLET EASE BUTTON LOWER TAPE HOLDER POWER SWITCH SPARE FUSE FUSE HOLDER FUSE BOTTOM OF BODY BLADE UNIT RELEASE LEVER SEPARATOR ASSIST STAND BLADE OIL GUIDE PLATE...
- Page 7 Load the Tape ◆Plug in the AC CORD to the AC CORD INLET. AC CORD INLET ◆Make sure the POWER SWITCH is off then plug into an appropriate grounded AC outlet. ◆Turn the POWER SWITCH on. When the POWER SWITCH is turned on, a buzzer will has a sound. At this moment, the mode is set to MANUAL.
-
Page 8: Mode Setting
Set the Tape Length ◆Make sure that DISPLAY indicating <cutting length>. INDICATE CUTTING LENGTH The cutting length is always indicates in some alphabets like A,b,C,d,E,F. ◆Set the cutting length. SELECT Set your needed length by using +/- BUTTON. A~F The cutting length is adjustable in between 5 mm to 999 mm. Can set six different length by using SELECT BUTTON. - Page 9 Programing Function 順送りカット機能 Function that cuts the material registered from A to F accordingly. Set a cutting length As refer to the following figure, operation will keep working. This function may apply every mode. ◆Please follow the instruction on page 7. ◆Set the cutting length from A to F as you prefer.
-
Page 10: Other Functions
How to Manage a Curling Tape ◆Press the HOLD DOWN ROLLER RELEASE BUTTON in order to open the HOLD DOWN ROLLER UNIT. ◆Extend the ROLLER LOCK LEVER so that the roller will not turn. ◆Close the HOLD DOWN ROLLER UNIT. With the rollers locked, the tension may cause the length to vary. -
Page 11: Maintenance
Replace the Blade Unit REMOVE BLADE UNIT Only Blade is not accepted to be replaced. It needs to change with the whole Blade Unit. ◆Turn the POWER SWITCH off. ◆Remove the BLADE UNIT by releasing the BLADE UNIT RELEASE LEVER. ◆Install the new BLADE UNIT into the body. -
Page 12: Error Messages
When tape jammed is happened 1) When operating by manual mode, tape doesn’t come properly even if pressing START BUTTON. 2) When operating by auto mode, the next tape doesn’t come even if taking the tape ready. 3) Tape doesn’t come even if you hear the sound of motor working. Please take the following procedure when you find the problems as mentioned above. - Page 13 E-03 Motor is Stopped Indicates that the motor is stopped because of overload. ◆Press the START BUTTON to clear the error message. CLEAR THE ERROR START ◆Press the REV BUTTON to remove the tape. ◆Turn the POWER SWITCH off. REMOVE THE TAPE ◆Check the BLADE UNIT and TAPE OUTLET carefully.
-
Page 14: Troubleshooting
Trouble Shooting Before returning the machine for repair, please check the followings. The POWER SWITCH is Check whether the AC CORD plug in the outlet firmly. The AC CORD is loosen. on, but the machine can Replace new FUSE. The FUSE has been blown. not run. -
Page 15: Warranty
Warranty We warrant to the original purchaser of the product that will be free form defects in material or workmanship for as long as the original purchaser owns the product, when given normal wear and proper usage. The limited warranty for the machine shall be for a period of 180 days form the date of purchase. - Page 16 YAESU KEIKOGYO CO., LTD. 39-8, Senju Motomachi, Adachi-Ku, Tokyo, 120-0041, Japan Phone 81-3-3888-8751 81-3-3888-1592 PLEASE VISIT OUR WEB SITE http://www.yaesu1965.com/ 14L08...


Need help?
Do you have a question about the ZCUT-10 and is the answer not in the manual?
Questions and answers