Table of Contents
Advertisement
Available languages
Available languages
Manual de instalación y uso
Manual de instalação e uso
Notice d'installation et utilisation
Notice d'installation et utilisation
Instructions and installation manual
Instructions and installation manual
HAVERLAND
www.haverland.com
SMARTBOX
NO SUMINISTRADA
NÃO INCLUIDA
NON FOURNI
NOT SUPPLIED
Wi_V1.4_2017_MOOR@ESPFUK2017
Castellano
Português
Français
English
Advertisement
Table of Contents

Related Manuals for Haverland Wi SmartWave


Summary of Contents for Haverland Wi SmartWave
- Page 1 Manual de instalación y uso Manual de instalação e uso Notice d’installation et utilisation Notice d’installation et utilisation Instructions and installation manual Instructions and installation manual SMARTBOX Castellano Português NO SUMINISTRADA NÃO INCLUIDA Français NON FOURNI NOT SUPPLIED HAVERLAND English www.haverland.com Wi_V1.4_2017_MOOR@ESPFUK2017...
-
Page 2: Table Of Contents
CASTELLANO: PORTUGUÊS: ÍNDICE: CONTEÚDO: * ADVERTENCIAS GENERALES ..* ADVERTÊNCIAS GERAIS ....1. Introducción ......1. Introdução ......1.1 Descripción ....1.1 Descrição ....1.2 Características ..... 1.2 Características..... 1.3 Panel mandos/Pantalla ... 1.3 Painel de comandos / Ecrã 2. Instalación ......2. - Page 3 FRANÇAIS: ENGLISH: INDEX: INDEX: * Avertissements généraux ..* GENERAL WARNINGS ....1. Introduction ......1. Introduction ......1.1 Description ....1.1 Description ....1.2 Caractéristiques.... 1.2 Characteristics .... 1.3 Panneau de commandes.. 1.3 Panel Controls / Screen . 2. Installation ......2.
-
Page 4: Advertencias Generales
Advertencias generales CASTELLANO • Por favor, lea las instrucciones explicativas para su colocado o instalado en su posición de funcionamiento montaje. normal prevista y que sean supervisados o hayan recibido instrucciones relativas al uso del aparato de • Para desconectar el emisor de la red eléctrica saque una forma segura y entiendan los riesgos que el aparato la clavija de alimentación del enchufe. -
Page 5: Introducción
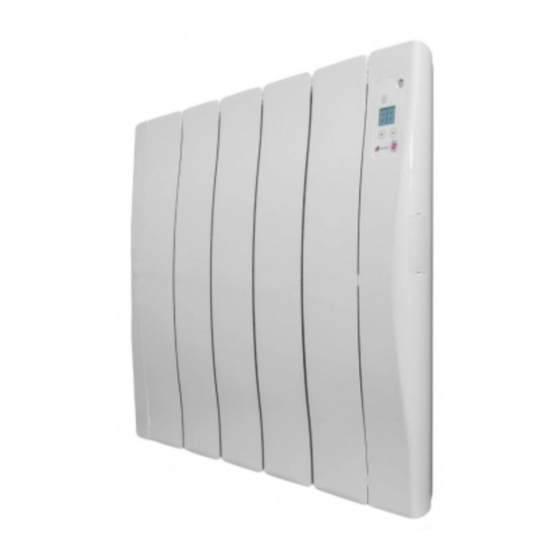
8. Disminuir Introducción 9. Pantalla: - Temperatura ambiente - Temperatura seleccionada 1.1 Descripción - Reloj y día 10. Standby Los emisores Wi son una nueva gama de Instalación emisores térmicos que incorporan el termostato autoprogramable inteligente i2Control. 2.1 Normas Importantes: 1.2 Características •... -
Page 6: Pasos
TORNILLOS 5,5 x 50 mm 5) Atornillar en cada soporte, los dos tornillos de M. 6 x 40. 2 TORNILLOS M. 6 x 40 mm 2.3 Pasos: 1) Es indispensable que el emisor SE FIJE FIRMEMENTE A UNA PARED FIRME Y NIVELADA. 2) Saque del interior de la caja de embalaje la plantilla donde se indica la posición de los taladros. -
Page 7: Funcionamiento
Funcionamiento = TEMPERATURA ECONOMÍA 3.1 Su emisor está confi gurado! = TEMPERATURA ANTI-HIELO * Su emisor está listo para aprender sus hábitos de vida y para calentar SIN NECESIDAD DE PROGRAMAR NADA. * Según nuestra presencia, aprenderá un patrón para cada día de la semana, semana a semana. -
Page 8: Modos De Funcionamiento
NOTA: Parámetros de serie: * Perfil Confort “PC”: 1) Reloj y día actual programado de serie. En este perfil prima el confort y el bienestar. 2) Temperatura de confort = 20 ºC. 1) Si hay detección: Modo Confort. 3) Temperatura de economía = 16 ºC. 4) Modo de funcionamiento activado = Modo 2) Si NO hay detección >... -
Page 9: Temperaturas De Confort, Antihielo Y Economía
4. Pulse cualquiera de los botones más de una vez para cambiar la temperatura ajustada. La temperatura anti-hielo (5 ºC) es invariable. Notas: 3.4 Temperaturas de Confort, Anti- • El rango de la temperatura de confort es de 18 a 28 ºC. -
Page 10: Standby
3.7 Standby 3. A continuación el símbolo “n” aparece en la pantalla. Para encender y apagar el emisor pulse NOTA: Esperé. A continuación, el valor visualizado para los ON = 1 bip de sonido. minutos parpadea. OFF = 2 bip de sonido. Aparece un punto luminoso en el lado izquierdo de la pantalla. -
Page 11: Indicador Sensor Conectado
Técnica al teléfono 91 324 40 60 (Horario: funciones de su emisor. Lunes a Viernes de 9 a 20 h) o enviar un correo Programe su emisor desde la aplicación App electrónico a info@haverland.com solicitando Haverland. la información necesaria sobre el procedimiento a seguir. -
Page 12: Advertências Gerais
PORTUGUÊS Advertências gerais • Leia as instruções de montagem. sido colocado ou instalado na posição prevista de funcionamento normal e desde que estejam sob • Para desligar o emissor térmico da rede eléctrica, supervisão ou tenham recebido instruções relativas retire a ficha de alimentação da tomada. Nunca a uma utilização segura e compreendam os riscos do puxe o cabo. -
Page 13: Introdução
7. Aumentar Introdução 8. Diminuir 9. Ecrã: - Temperatura ambiente 1.1 Descrição - Temperatura seleccionada - Relógio e dia Os Wi são uma nova gama de emissores térmicos 9. Standby que integram o termóstato inteligente i2Control. Instalação 1.2 Características • Termóstato i2Control auto-programável. Não 2.1 Normas: precisa que você... -
Page 14: Passos
PARAFUSOS 5,5 x 50 mm 5) Aparafusar em cada suporte, os dois parafusos de M6 x 40. 2 PARAFUSOS M. 6 x 40 mm 2.3 Passos: 1) É indispensável FIXAR O EMISSOR FIRMEMENTE A UMA PAREDE SÓLIDA E NIVELADA. 2) Retire do interior da caixa de embalagem o molde que indica a posição dos furos. -
Page 15: Funcionamento
Funcionamento = TEMPERATURA ECONOMIA 3.1 O emissor está confi gurado! > 12 h = TEMPERATURA ANTI GELO * O emissor está preparado para aprender os seus hábitos de vida e para aquecer SEM QUALQUER NECESSIDADE DE PROGRAMAÇÃO. * De acordo com a sua presença, aprenderá um padrão para cada dia da semana, semana a semana. -
Page 16: Modos De Funcionamento
* Perfil Conforto “PC”: NOTA: Parâmetros de série: Neste perfil prima o conforto e o bem-estar: 1) Relógio e dia actual programado de série. 1) Se houver detenção: Modo Conforto. 2) Temperatura de conforto = 20 ºC 2) Se NÃO houver detecção > 30 minutos 3) Temperatura de economia = 16 ºC = Modo Economia. -
Page 17: Temperaturas De Conforto, Anti-Gelo Y Economia
4. Carregue em qualquer dos botões mais de uma vez para mudar a temperatura A temperatura anti-gelo (5 ºC) não pode ser regulada. alterada. 3.4 Temperaturas de Conforto, Anti- Notas: gelo e Economia • O intervalo da temperatura de conforto varia de 18 O termóstato tem três temperaturas de pré-regulação ºC a 28 ºC. -
Page 18: Standby
3.7 Standby 3. A seguir o símbolo “n” aparece no ecrã. Para ligar e desligar o emissor carregue Aguarde. NOTA: A seguir, o valor visualizado para os minutos fi ca intermitente. ON = 1 bipe sonoro. OFF = 2 bipes sonoros. Aparece um ponto luminoso no lado esquerdo do ecrã. -
Page 19: Indicador Sensor Ligado
6. Smartbox (não incluída) Esteja onde esteja, controle à distancia todas as funções do emissor. Programe o seu emissor a partir da App Haverland Controlo 3G Wifi na palma da sua mão com noutra Smartbox (não incluída). Consulte com seu estabelecimento o envie um correio a i2control@haverland.com . -
Page 20: Avertissements Généraux
Avertissements généraux FRANÇAIS • Veuillez lire les instructions explicatives pour son d’usage de l’appareil. Les enfants doivent être montage. supervisés pour s’assurer qu’ils ne jouent pas avec l’appareil. • Pour déconnecter l’émetteur du réseau électrique, retirer la prise d’alimentation de la prise. Ne tirez •... -
Page 21: Introduction
8. Diminuer Introduction 9. Écran : - Température ambiante - Température sélectionnée 1.1 Description - Horloge et jour 10. Standby Les Wi sont une nouvelle gamme d’émetteurs thermiques qui incorporent le thermostat intelligent Installation i2Control. 1.2 Caractéristiques 2.1 Normes: • Thermostat i2Control auto programmable. Il n’est •... -
Page 22: Pas À Suivre
5,5 x 50 mm 5) Visser dans chaque support, les 2 vis de M. 6 x 40. 2 VIS M. 6 x 40 mm 2.3 Pas à suivre : 1) L’émetteur doit être fixé obligatoirement FERMEMENT À UN MUR FERME ET NIVELÉ. 2) Retirez de l’intérieur de l’emballage le patron qui indique la position des perforations. -
Page 23: Fonctionnement
Fonctionnement = TEMPÉRATURE ÉCONOMIE 3.1 Votre émetteur est confi guré! > 12 h = TEMPÉRATURE ANTIGEL * Votre émetteur est prêt pour apprendre vos habitudes de vie et pour chauffer SANS BESOIN DE PROGRAMMER QUOI QUE CE SOIT. * Selon notre présence, il déterminera un patron pour chaque jour de la semaine ainsi que semaine après semaine. -
Page 24: Modes De Fonctionnement
N.B. : Paramètres de série : * Profil Confort “PC”: 1) Horloge et jour actuel programmés de série. Ce profil apporte principalement le confort et le bien être. 2) Température de confort = 20 ºC. Ce profil permet principalement d´économiser de 3) Température d’économie = 16 ºC l´énergie 4) Mode de fonctionnement activé... -
Page 25: Températures De Confort Antigel Et Économie
1) TEMPÉRATURE CONFORT = 20 ºC 4. Appuyez sur n´importe quel bouton plus d´une fois pour changer la température ajustée. 2) TEMPÉRATURE ÉCONOMIE = 16 ºC 3) TEMPÉRATURE ANTIGEL = 5 º C N.B. : La température antigel (5 ºC) est invariable. •... -
Page 26: Standby
3.7 Standby 3. A continuation, le symbole “n” apparaît á l´écran. Pour allumer et éteindre l’émetteur appuyez Patientez. N.B. : A continuation, la valeur affi chée pour les minutes clignote. ON = 1 bit de son. OFF = 2 bit de son. Apparaît une lumière à... -
Page 27: Connecté
Contrôlez à distance toutes les fonctions de votre émetteur depuis n’importe quel endroit. Programmer votre émetteur depuis l’App Haverland. Contrôle 3G Wifi sur la paume de votre main. Confort et économie en temp réel. Consultez auprès de votre distributeur ou à travers de i2control@haverland.com Page 27... -
Page 28: General Warnings
General Warnings ENGLISH • Please read the explanatory instructions covering supervised or have received instructions on how to installation. use the unit in a safe manner and understand the risks involved. • To disconnect mains power from the heater remove the plug from the wall socket, but never •... -
Page 29: Introduction
9. Screen: Introduction - Ambient temperature - Selected temperature - Clock and day 1.1 Description 9. Standby The Wi is a new range heater employing that incorporates the smart i2Control thermostat. Installation 1.2 Characteristics 2.1 Regulations: • i2Control auto-programmable thermostat. You do not have to programme your heater. -
Page 30: Steps
SCREWS 5,5 x 50 mm 5) Screw the two M6 x 40 screws into each bracket. 2 SCREWS M. 6 x 40 mm 2.3 Steps : 1) It is essential that the heater IS FIRMLY FIXED TO A FIRM WALL AND LEVELLED. 2) Remove the template indicating the drill holes from the packing case. -
Page 31: Operation
Operation = ECONOMY TEMPERATURE 3.1 Your heater is confi gured! > 12 h = ANTI-FROST TEMPERATURE * Your heater is now ready to learn your life style habits and to provide heat WITHOUT ANY NEED TO PROGRAMME ANYTHING. * According to your presence, it will learn a template for each day of the week, week by week. -
Page 32: Operating Modes
NOTE: Factory-set parameters: * Comfort profile “PC”: 1) Cloak and current day are factory set. This profile prioritizes comfort and welfare. 2) Comfort temperature = 20 ºC. 1) If there is detection: Comfort mode. 3) Economy temperature = 16 ºC 4) Activated operating mode = “Learning”... -
Page 33: Comfort, Anti-Frost And Economy Temperatures
4. Press either of buttons more than once to change the adjusted temperature. The anti-frost temperature (5 ºC) cannot be changed. NOTES : 3.4 Comfort, Anti- frost and Economy Temperatures • The comfort temperature range is from 18 to 28 ºC. The thermostat has three pre-adjusted temperatures. -
Page 34: Standby
3.7 Standby 3. Then, “n” appears on the screen. To switch the heater on and off press Wait. NOTES : Then, the value indicating the minutes will fl ash: ON = 1 sound bit. OFF = 2 sound bits. A light spot appears on the left side of the screen. -
Page 35: Battery
PRODUCTS. 6. Smartbox (not supplied) Wherever you are, you can remotely control your radiator. Program your radiator using Haverland’s App. 3G Wifi control in the palm of your hand Comfort and savings (monitoring). Contact your distributor or write to i2control@ haverland.com...
Need help?
Do you have a question about the Wi SmartWave and is the answer not in the manual?
Questions and answers