Table of Contents
Advertisement
Quick Links
Advertisement
Table of Contents

Related Manuals for Qtum HD1049

Summary of Contents for Qtum HD1049
- Page 1 HD1049 – Installation and User manual HD1049 HD-SDI Digital Video Recorder...
- Page 2 HD1049 installation and user manual This page is intentionally left blank...
-
Page 3: Safety Precautions
HD1049 installation and user manual CE Information The product must be installed according to the currently valid installation regulations for EMC to guarantee the designed use and to prevent EMC problems. The device supplied with this manual is according to the EC, EMC Directive, 89/336/EEC &... - Page 4 HD1049 installation and user manual This page is intentionally left blank...
-
Page 5: Table Of Contents
HD1049 installation and user manual Contents OVERVIEW ........................ 7 1. C ....................... 7 ONTENTS OF PACKING 2. F .......................... 8 EATURES INSTALLATION ......................9 1. F ........................9 RONT ANEL 2. R ....................10 ANEL ONNECTIONS 3. R ......................11... - Page 6 HD1049 installation and user manual 4. N ......................... 42 ETWORK 4-1. DDNS ..............................42 4-2. IP SET ..............................42 4-3. NTP ................................ 43 4-4. LIVE ................................ 43 4-5. BANDWIDTH ............................43 5. E ..........................44 VENT 5-1. E-Mail Registration ..........................44 5-2.
-
Page 7: Overview
HD1049 installation and user manual Overview 1. Contents of packing Battery User Manual Power Cable Remote Controller Mouse Installation... -
Page 8: Features
HD1049 installation and user manual 2. Features ● Convenience - User-friendly GUI (Graphical User Interface) - Easy-to-use menu structure - Easy-to-use recorded data search (Time, Date, Motion, and Alarm) - Easy-to control via Front Panel, IR remote control and USB 2.0 mouse. -
Page 9: Installation
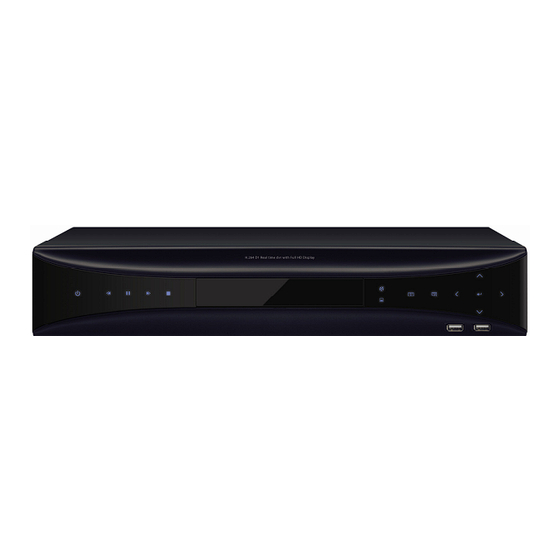
HD1049 installation and user manual Installation 1. Front Panel ⑬ ⑪ ⑩ ⑫ ① ② ③ ④ ⑤ ⑧ ⑭ ⑮ ⑨ ⑥ ⑦ ① Power System Power On/Off ② Reverse Play / Rewind Reverse play of recorded data. When in play mode press again to enter fast rewind mode. -
Page 10: Rear Panel Connections
HD1049 installation and user manual 2. Rear Panel Connections ① ② ③ ④ ⑤ ⑥ ⑦ ⑧⑨ ⑩ ⑪ ① USB 2.0 USB 2.0 connector for mouse control ② VGA VIDEO OUT VGA Video Output ③ HDMI OUT HDMI Video Output ④... -
Page 11: Remote Control
HD1049 installation and user manual 3. Remote Control ① POWER : Power on/off ② P/T/Z : Entering PTZ Setup menu directly ① ② ③ ③ REC : Start & Stop Recording ④ Numbers and letters (1 to 9) ⑤ INFO : Direct access system infomation... -
Page 12: Connection Guide
HD1049 installation and user manual 4. Connection Guide HD-SDI Camera Mouse HDMI Speaker Sensor Siren Controller Monitor System Monitor Keyboard (Client) Connecting the monitor There are four available monitor outputs on DVR. ● HDMI output : Connect to the HDMI port of the monitor. -
Page 13: Connecting Audio
HD1049 installation and user manual Connecting audio To record audio on the DVR, connect to the audio source. ● Audio input : Connect to the audio out of the microphone. To listen to live or recorded audio, connect to an amplified speaker system. -
Page 14: Turning On The Dvr
HD1049 installation and user manual ● Telemetry (+) : Connect to RS485 Rx(+) of PTZ camera. ● Telemetry (-) : Connect to RS485 Rx(-) of PTZ camera. Connecting to a remote keyboard This RS485 connector is for a control keyboard. -
Page 15: Operation
HD1049 installation and user manual Operation 1. Navigation You can navigate the on screen menus using the front panel buttons, remote controller or mouse. 1-1. Mouse Control Right clicking the mouse brings up the following popup menu. ① Setup Menu ②... -
Page 16: Monitoring
HD1049 installation and user manual 2. Monitoring 2-1. OSD Description The Status Bar on screen shows HDD capacity, network connection, current time, etc. ⑥ ⑤ ② ③ ④ ① ① HDD capacity : Used capacity / Total capacity ② Mouse connection ③... -
Page 17: Using Digital Zoom
HD1049 installation and user manual 2-3. Using Digital Zoom The zoom feature will allow you to zoom in and out on your screen making it significantly easier to view the image. ① Left-click and drag the mouse to set the desired area for zoom in live or playback mode. -
Page 18: Playback
HD1049 installation and user manual 3. Playback Click the right button on the mouse, the popup menu will be displayed on screen. To begin playback, press the Play button on the popup menu. 3-1. OSD Description The Control Bar on screen shows Playback control buttons, Display mode buttons, Playback time, etc. - Page 19 HD1049 installation and user manual Single Frame Advance During the pause mode, press the Forward Play button(⑥) to view the frame directly after the frame displayed on screen. Single Frame Rewind During the pause mode, press the Reverse Play button(⑤) to view the frame directly before the frame displayed on screen.
-
Page 20: Ptz Control
HD1049 installation and user manual 4. PTZ Control The user can control PTZ cameras via RS485 communication. The PTZ domes can be wired in a Daisy chain. Daisy Chain configuration The telemetry function of DVR can be controlled via 4 different methods: 1. - Page 21 HD1049 installation and user manual ① Multiscreen Display : Changing the display mode ② Tilt Up / Zoom In ③ Tilt Down / Zoom Out ④ Pan Left / Focus Near ⑤ Pan Right / Focus Far ⑥ PTZ Camera Selection ⑦...
-
Page 22: Ptz Control By Remote Keyboard
HD1049 installation and user manual 4-2. PTZ Control by remote keyboard 1. Select Dome from the keyboard, ensure the keyboard is in Pan and Tilt mode. 2. Use the joystick to move the camera. * For more detail, please refer to your keyboard manual. -
Page 23: Setup Menu
HD1049 installation and user manual Setup Menu Main Menu Display Camera Covert Camera Name OSD Setting Live Setting Camera Status Recording Global Watermark HDD Overwrite Frame Audio Event Pre-Alarm Duration Action Schedule Holiday Time Duration Basic System Language Disk Auto Delete Mode... - Page 24 HD1049 installation and user manual Network DDNS DDNS User ID User Password Domain Dynamic IP IP SET Gate Way Net Mask DNS Server Live DSL ID DSL PW Bandwidth DVR Port Web Port Event E-Mail Registration SMTP Mode E-Mail Out...
-
Page 25: Display
HD1049 installation and user manual 1. Display Use this menu to specify cameras as covert and edit the camera name and to set up a Sequence of the screen. 1-1. Camera Covert Cameras can be hidden from the viewer in live or play back mode. -
Page 26: Osd Setting
HD1049 installation and user manual 1-3. OSD Setting Selecting how long the graphic information is displayed on the screen. Status Bar The status bar at the bottom of the screen can be set to be permanently on or to disappear after a period of time. -
Page 27: Live Setting
HD1049 installation and user manual Password Entry The password entry display can be set to time out after a period of time. Blending The transparency of the menu window can be set between 0 and 6, 0 is solid, 6 being very transparnt. -
Page 28: Recording
HD1049 installation and user manual 2. Recording 2-1. Global Watermark Generally this should be set to on, this allows the supplied software to verify the downloaded information to ensure it has not been tampered with or changed. HDD Overwrite Generally this should be set to on to ensure that the DVR does not stop recording when the hard drives are full. -
Page 29: Frame
HD1049 installation and user manual 2-2. Frame This configures the FPS for each schedule – Day/ Night/ Weekend & Holiday/ Time/ Instant recording. ⑥⑦ ⑧⑨ ⑩⑪ ⑫ ①② ③④⑤ In Schedule Setup, users can define the recording schedule : ① Day ②... -
Page 30: Event
HD1049 installation and user manual 2-3. Event When an event comes in the DVR records he image according to its settings(Frame menu) and triggers an alarm(Action). ① ② ③ ④⑤ ① Motion On/Off : Specify whether to use motion input or not. -
Page 31: Action
HD1049 installation and user manual 2-4. Action ① ② ③ ① Channel ▲ Channel 1~8 ▼ Channel 9~16 ② Relay On/Off Associate an alarm relay with a channel. ③ Preset on Alarm Enable PTZ camera to move to a preset position when an event occurs. -
Page 32: Schedule
HD1049 installation and user manual 2-5. Schedule ① ② ① Night Set night time. Ex. If 18:00 to 6:00 is defined as night time, 6:00 to 18:00 is defined as daytime. ② Weekend Define weekend. 2-6. Holiday Define Holiday (1) Press ADD button. -
Page 33: Time
HD1049 installation and user manual ① ② ③ ④ ⑤ (3) Press OK button when finished setting the holiday. 2-7. Time The time recording allows the DVR to be set to only record at particular times of the day. (1) Press ADD button. -
Page 34: Duration
HD1049 installation and user manual (2) Set the recording time pressing the buttons. ① Day ② Start Time ③ End Time ④ Channel (3) Press OK button when finished setting the recording time. (4) Repeat the above steps to set up more recording times. -
Page 35: System
HD1049 installation and user manual 3. System 3-1. Basic User can set Language, Auto Delete Mode, Date Format, Time/DST Set, Video Type, System ID. Also, Initialisation and system Information is available. Language The default is English. Italian, French, Hungarian, Slovak, German, Russian, Chinese, Dutch, Spanish, Portuguese, Japanese Danish and Polish are available. - Page 36 HD1049 installation and user manual PLAYBACK FOLLOWING TIME CHANGE The DVR uses the time and date to index video on the hard disk drive so you can find it later. Changing the time can cause the DVR to work improperly, when you try to play back video. If you set the hour ahead, this is not a problem.
-
Page 37: Disk
HD1049 installation and user manual Information The Information Screen shows the hard disk size, current firmware revisions, IP address and MAC address 3-2. Disk Format Formatting of the drive is used when new drives are installed or you need to wipe all information on the disk. -
Page 38: Account
HD1049 installation and user manual Smart – Turn to on to enable feature Temperature – Using the on screen keyboard set the temperature at which the warning is to be reported. (recommended setting 45) Message Box - The message box can be turned on or off to give a visible warning. -
Page 39: Program Update
HD1049 installation and user manual Shutdown – Allows the ability to turn the power off from the front panel Once the above has been set, ensure that the Activate box has been ticked. Automatic timed log out The system can be set to automatically log out a user after a certain amount of time if no key presses have been made. -
Page 40: Sensor
HD1049 installation and user manual Enter “menu”-> “System Set”-> “Program Update”. If the system recognizes the new firmware then, “New program found” will be displayed on the screen. Next press the “SELECT” button. Processing percentage will be displayed. NOTE 1. If the system doesn’t recognize the new firmware, “New program not found” will be displayed. -
Page 41: Ptz Controller
HD1049 installation and user manual 3-7. PTZ Controller The DVR needs to be setup to accept the VKBD3im, VKBD4 or QSC1000 keyboard, as a default this will be set to the correct Protocol and Baud rate, the ID RS485 Address my need to be adjusted dependant on the number of PTZ cameras on the system. -
Page 42: Network
HD1049 installation and user manual 4. Network With in the Network menu the DDNS (Dynamic Domain Named Server), IP addresses, NTP and Live can be set. 4-1. DDNS What is DDNS? DDNS is a service that maps Internet domain names to IP addresses. DDNS serves a similar purpose to DNS: DDNS allows anyone hosting a Web or FTP server to advertise a public name to prospective users. -
Page 43: Ntp
HD1049 installation and user manual 4-3. NTP The Network Time Protocol Setting allows the DVR time to be synchronised with an external time server. The default is NTP OFF. When turned on the Type of service can be selected, options are Default (time.bora.net), Domain and IP. -
Page 44: Event
HD1049 installation and user manual 5. Event This section is used to inform the user as to an event occurring, this can be by the sounding of a buzzer or by sending an E-mail to a predefined address. 5-1. E-Mail Registration... -
Page 45: E-Mail Out
HD1049 installation and user manual 5-3. E-mail Out As well as e-mail on event activations the DVR can be set to send a report on the following occurrences: Alarm, Motion, Video Loss, Power Loss and Smart (Hard disk monitoring). 5-4. Beep Out... -
Page 46: Searching Recorded Data
HD1049 installation and user manual Searching Recorded Data The user can search the recorded video on the DVR to find SEARCH a specific time or event. To access the search option, click the SEARCH icon on the popup menu. Search Menu... -
Page 47: Search
HD1049 installation and user manual 1. Search 1-1. Date/Time Search If you select date/time search, the following will be shown. Use the numerical number on the front panel or the mouse to select the time and date required, then select Play. -
Page 48: Calendar Search
HD1049 installation and user manual 1-3. Calendar Search Following screen is displayed when “Calendar” search is selected The Calendar search gives a graphical representation of when video is recorded on the hard drive. The year and month can be selected. This... -
Page 49: Bookmark Search
HD1049 installation and user manual 1-4. Bookmark Search It is possible to edit the bookmark. To exit this mode at any time press Search. This will step back one stage at a time. To Exit Playback and return to Live press the Stop button. -
Page 50: Archiving Evidence To Dvd/Cd Or Usb
HD1049 installation and user manual 2. Archiving Evidence to DVD/CD or USB Once the required video has been found, it may be necessary to down load it for evidential purposes. This can be done either onto the internal CD/DVD-R writer or via the USB port. - Page 51 HD1049 installation and user manual From / To (⑥) You can set up the start and stop time which is required to be backed up to the internal CD/DVD-R or USB device. Enter the start & end time using the keyboard on screen.
-
Page 52: Log
HD1049 installation and user manual 3. Log The log file contains information on the following: Power : Power on, Power off, Power fail Record : Rec fail, Rec start, Rec stop, Rec error, Rec full Operation : Play start, Play stop, HDD format, Menu set... -
Page 53: Client Viewer Software
HD1049 installation and user manual Client Viewer software Each DVR comes with license free viewer software to view the DVR across a network. To be able to do this the recommended minimum specification for the PC is as follows: Minimum PC specification >... - Page 54 HD1049 installation and user manual Logging on The following window will appear. To connect to the E4000, enter the units: IP address; DVR Port (2000 ids default), ID and Password. Then, click “OK”, to start the live monitoring. Description field is the name of area / Building / location of the DVR, this should be typed in he first time the unit is connected to, this will store it in the address book.
- Page 55 HD1049 installation and user manual Explanation of Screen Buttons...
-
Page 56: Live Monitoring
HD1049 installation and user manual 1. Live Monitoring The software is best viewed with the PC monitor resolution, set to: 1024 x 768. Split Screen options (1/4/6/7/8/9/10/13/16) Spilt Screens can be viewed during both live and playback. The splits screens available are: full screen, 4, 6, 7, 8, 9, 10, 13 and 16 way. - Page 57 HD1049 installation and user manual Full Screen on/ off When the full screen button is selected, a tool bar offering the various split screen options, and the Exit key will be displayed at the bottom of the screen. OSD on/off...
- Page 58 HD1049 installation and user manual Image Save / Load SAVE: This icon is used to save a still image in either JPEG or BMP or TIF format. There is no change on the main screen when the “Save” icon is pressed.
-
Page 59: Remote Search
HD1049 installation and user manual 2. Remote Search Search(Date/Time/Event/Calendar), Archive(Remote Archive), Log(Remote Log) are available. 2-1. Search This Remote Search is able to play back video on the PC direct from the hard disk storage on the Quantum Plus. There are 3 options for as follows. - Page 60 HD1049 installation and user manual Calendar Select the date required (as long as the date is highlighted in Blue there is recorded data on from that day). There are 3 options for selecting the required time once the date has been selected.
-
Page 61: Archive
HD1049 installation and user manual Select Channel Channels can be included or excluded dependent on query. This is available within Search, Backup and Logs. 2-2. Archive Remote Archive – Date/Time Enter the Start and End dates and times, by hovering over the selections, a drop down box will appear. - Page 62 HD1049 installation and user manual Remote Archive – Calendar Select the date required (Days with recorded video a data present are highlighted in Blue) There are 3 options for selecting the required time once the date has been selected. 1) Drag the Red line along the colour bar (I.e. Blue: Normal Recording) till the required time is reached.
- Page 63 HD1049 installation and user manual The backup procedure is same as Date/Time & Event backup as previous page. * “Prev” to go back to previous stage. *The downloaded data is saved in the follows location. C:\H264HD\Download. Play back down loaded files Open the viewer software but do not connect to a unit, click the cancel button to remove the log on box.
-
Page 64: Remote Log
HD1049 installation and user manual 2-3. Remote Log The Log file can either be viewed or printed. The recorded Event can be played, by selecting it and clicking on Play. The log list can be viewed as a whole or filtered by the following types:... -
Page 65: Remote Setup: (Menu Settings - Same As Dvr)
HD1049 installation and user manual 3. Remote Setup: (Menu settings - Same as DVR) 1. Display 1-1. Camera Covert Cameras can be remotely set into Covert Mode, they are still being recorded but cannot be viewed local to the system, or by any remote user apart from the Administrator on line. - Page 66 HD1049 installation and user manual 1-3. OSD Setting Selecting how long the graphic information is displayed on the screen.
-
Page 67: Recording
HD1049 installation and user manual 2. Recording 2-1. Global 1. Watermark : security tagging of recorded video. 2. HDD Overwrite : When the disk is full it will overwrite the oldest data. 3. Audio : Enable each audio channel for global recording. - Page 68 HD1049 installation and user manual 2-3. Event When an event comes in the DVR records he image according to its settings(Frame menu) and triggers an alarm(Action). 2-4. Action Associate an alarm relay with a channel and enable PTZ camera to move to a preset position when an event occurs.
- Page 69 HD1049 installation and user manual 2-6. Holiday Define holiday. 2-7. Time The time recording allows the DVR to be set to only record at particular times of the day. 2-8. Duration The Duration mode allows the user to set the number of days that they...
-
Page 70: System
HD1049 installation and user manual 3. System 3-1. Basic This section is used to select: Language Auto Delete Mode Date format Time/DST Set Video type System ID 3-2. Account Editing ID & password The DVR allows for : - 1 Administrator level log on... - Page 71 HD1049 installation and user manual 3-3. Sensor Each of the 4 alarm inputs can be configured to be either inactive (NONE), or Normally Open (N.O), or Normally Closed (N.C). 3-4. PTZ Setup Each camera input can be allocated an RS485 ID between 1 and 255.
-
Page 72: Network
HD1049 installation and user manual 4. Network 4-1. NTP NTP setup allows the DVR to have its internal clock synchronised with an External clock. The default setting is “Off” Type allows selection between: Default – Time server is “time.bora.net”. Domain – Where another time server name can be added. - Page 73 HD1049 installation and user manual 5-2. E-mail Out The actions which cause an e-mail response can be defined within this screen. 5-3. Beep Out The internal buzzer can be set to sound on the following occurrences: Alarm activation Motion Detection...
-
Page 74: Local Search (Viewing Downloaded Footage)
HD1049 installation and user manual 4. Local Search (viewing downloaded footage) This allows playback of video which has been downloaded top the PC. 1. Search Searches can be done by Date/Time, Even and Calendar. 1-1. Date/Time Search Hovering over the Date and Time bars will allow drop down boxes to select the required time and Date. - Page 75 HD1049 installation and user manual 1-3. Calendar Search When the Calendar option is chosen this screen will appear, with recording available will be highlighted in Blue. Select the required day. Any downloaded event s will be shown, click on the event, the red line will move to that event.
-
Page 76: Log
HD1049 installation and user manual 2. Log Clicking on Log will display the log file from the unit. This file can be printed, by clicking Print. 3. Info Click on Info. This will display the version of the software client being used. -
Page 77: Local Setup
HD1049 installation and user manual 5. Local Setup This allows the setup of the viewing of the software on the PC. 1. Global This screen allows the following: Draw mode to be set to YUV or RGB Date Format to be set to: DD/MM/YYY, MM/DD/YYYY or YYYY/MM/DD. -
Page 78: Audio Buffer
HD1049 installation and user manual 3. Audio Buffer Audio Buffer settings are there to adjust the audio over the network, this will compensate for different network speeds ( LANs, WANs etc). This can only be adjusted if the LIVE video is switched off. -
Page 79: Pan, Tilt, Zoom, Focus (Remote Telemetry Control)
HD1049 installation and user manual 6. PAN, TILT, Zoom, Focus (Remote telemetry control) When PTZ button is being pressed, PTZ control icon will be pop-up on the live image. 1. PAN/TILT/ZOOM/FOCUS When PAN/TILT button clicked Pan/Tilt control appears, this allows Left, Right,... -
Page 80: Preset/Learn
HD1049 installation and user manual 2. PRESET/LEARN PRESET&LEARN icon The presets button can be activated by clicking on the centre of the control icon, the preset symbol will appear and the Preset selection box will appear. To save a preset, move the camera to the desired position then click “Set”... -
Page 81: Firmware Upgrade
HD1049 installation and user manual 7. Firmware Upgrade User can select Firmware Upgrade menu, if a new version of firmaware exits in the C:/H264CD/Upgrade folder ,then the message ‘New program found!’ will be displayed if there is no file then ‘New program not found!’ message will be displayed. -
Page 82: Appendix
HD1049 installation and user manual Appendix 1. Alarm Sensor Installation 1. Components 1) External Sensor : 1 2) DVR System : 1 2. Inner Circuit for Sensor Input The inner circuit of Quantum DVR is as follows, ① PC817 : Photo Coupler... - Page 83 HD1049 installation and user manual Absolute Maximum Ratings Parameter Symbol Rating Unit Forward current *1Peak forward current I FM Input Reverse voltage Power dissipation Collector-emitter voltage V CEO Emitter-collector voltage V ECO Output Collector current Collector power dissipation Total power dissipation...
- Page 84 HD1049 installation and user manual 3. SENSOR Install Processing ① Please refer the below block diagram.
-
Page 85: Dynamic Ip (Supporting Ddns Server)
HD1049 installation and user manual 2. Dynamic IP (Supporting DDNS Server) With DDNS Server, This allows a user to connect to the unit remotely without the need for a fixed IP address.(Please register your ID & Domain at www.ddns-dvr.com in which you can use their DDNS server as free of charge) 1. - Page 86 HD1049 installation and user manual Fill in all blanks in order to create new account. ID & Password will be emailed to you when the account is setup correctly. Once the DDns-Dvr account has been setup, it is necessary to add the details in the Network section of the E4000’s menus.
-
Page 87: Setup For Dvr Port/ Web Server Port Using Ip Sharing Router (Port Forwarding)
HD1049 installation and user manual 3. Setup for DVR Port/ Web Server Port using IP sharing router (Port Forwarding) 1) To use IP sharing router, “Dynamic IP” should be set to “NO”. - DVR Port : This can be set to any number between 2000 to 65535. -
Page 88: Specification
HD1049 installation and user manual 4. Specification Model HD1040 Camera Input (HD-SDI) 4 Channels Video 1 HDMI(1080p), 1 Output Audio Input 4 RCA Audio Output 1 RCA Sensor In / Alarm Out 4 / 4 Operating System Embeded Linux OS... - Page 89 HD1049 installation and user manual Subject to change without notice QTUM...
Need help?
Do you have a question about the HD1049 and is the answer not in the manual?
Questions and answers