Sony KP-51WS510 Service Manual
Color rear video projection
Hide thumbs
Also See for KP-51WS510:
- Service manual (435 pages) ,
- Operating instructions manual (86 pages) ,
- Specifications (2 pages)
Table of Contents
Advertisement
Quick Links
Download this manual
See also:
Service Manual
HISTORY INFORMATION FOR THE FOLLOWING MANUAL:
SERVICE MANUAL
MODEL NAME
KP-51WS510
KP-57WS510
KP-65WS510
ORIGINAL MANUAL ISSUE DATE: 6/2003
:UPDATED ITEM
REVISION DATE
6/2003
6/30/2003
8/25/2003
9/22/2003
11/2003
9-965-944-05
REMOTE COMMANDER
RM-Y909
US/CND/LATIN NORTH SCC-M10CA
RM-Y909
US/CND/LATIN NORTH SCC-M10BA
RM-Y909
US/CND/LATIN NORTH SCC-M10AA
SUBJECT
No revisions or updates are applicable at this time.
Updated G (Pg. 58) and D (Pg. 77) Schematics,
Added critical symbol to G Board on Exploded View section 6-3. Chassis (Pg. 91)
Updated critical components on Parts Lists (Pgs. 93-136)
Replaced TV Graphic on Front Cover
Updated Table of Contents (Replace Pg. 3 with Pg. 3)
Corrected Diagrams for H2, H1, and H4 Board Removal (Replace Pg. 11 with Pg. 11)
Replaced 2-11. Service Data Lists with 2-11. Adjustable Service Data Lists
(Replace Pg. 19-37 with Pgs. 19-30)
Corrected procedures for 2-12. Registration Adjustment (Replace Pg. 38 with Pg. 31)
Corrected procedures for 2-13-2. Copying All Registration Data to Other Modes and
2-14. Auto Registration Offsets (Replace Pg. 42 with Pg. 35)
Corrected Error Codes 54 & 55, 2-15. Auto Registration Error Codes (Replace Pg. 43 with Pg. 36)
Added 2-16. Auto Registration Diagnostics (Replace Pg. 44 with Pg. 37)
Corrected 3-D-Comb # from 5-3. Block Diagram (Replace Pg. 51 with Pg. 44)
Deleted IC308 Block Diagram from 5-5. IC Block Diagrams (Replace Pg. 84 with Pg. 77)
Corrected semiconductors 5-6. Semiconductors (Replace Pg. 88 with Pg. 81)
Corrected Grille piece on cover exploded view diagrams (Replace Pgs. 89 & 90 with Pgs. 82 & 83)
New CRT's & D Board introduced for KP-57WS510/65WS510 models. Affects S/N's 9,000,001 and up
(Replace History Pg., Front Cover, Exploded View Pgs. 84-85, and Parts Lists Pgs. 122, 126, & 129
Replaced data relating to CR, CG and CB Boards.
Affects Pages 47-49 (Schematics), 85 (Exploded View), 86-88 (Electrical Parts List)
COLOR REAR VIDEO PROJECTION
RA-6A
DESTINATION
CHASSIS NO.
CHASSIS
Advertisement
Chapters
Table of Contents

Related Manuals for Sony KP-51WS510


Summary of Contents for Sony KP-51WS510
- Page 1 HISTORY INFORMATION FOR THE FOLLOWING MANUAL: RA-6A SERVICE MANUAL CHASSIS MODEL NAME REMOTE COMMANDER DESTINATION CHASSIS NO. KP-51WS510 RM-Y909 US/CND/LATIN NORTH SCC-M10CA KP-57WS510 RM-Y909 US/CND/LATIN NORTH SCC-M10BA KP-65WS510 RM-Y909 US/CND/LATIN NORTH SCC-M10AA ORIGINAL MANUAL ISSUE DATE: 6/2003 :UPDATED ITEM REVISION DATE...
- Page 2 Self Diagnosis Supported model RA-6A SERVICE MANUAL CHASSIS MODEL NAME REMOTE COMMANDER DESTINATION CHASSIS NO. KP-51WS510 RM-Y909 US/CND/LATIN NORTH SCC-M10CA KP-57WS510 RM-Y909 US/CND/LATIN NORTH SCC-M10BA KP-65WS510 RM-Y909 US/CND/LATIN NORTH SCC-M10AA KP-65WS510 RM-Y909 COLOR REAR VIDEO PROJECTION 9-965-944-05...
-
Page 3: Table Of Contents
2-11. Adjustable Service Data Lists ..........19 SECTION 6: EXPLODED VIEWS............82 2-12. Registration Adjustment ............31 6-1. Cover (KP-51WS510/57WS510 Only) ........ 82 2-13. PJE Adjustment (Sub Deflection Adjustment) ...... 33 6-2. Cover (KP-65WS510 0nly)........... 83 2-14. Auto Registration Offsets ............. 35 6-3. -
Page 4: Specifications
172 lbs 195 lbs 300 lbs Projection System Screen Size (measured diagonally) 3 picture tubes, 3 lenses, horizontal in-line system 51 inches (KP-51WS510) 57 inches (KP-57WS510) Picture Tube 65 inches (KP-65WS510) 7-inch high-brightness monochrome tubes (6.3 raster size), Supplied Accessories with optical coupling and liquid cooling system. -
Page 5: Warnings And Cautions
Ne les remplacer que par des composants Sony dont le numero de piece est indique dans le present manuel ou dans des supplements publies par Sony. Les reglages de circuit dont l’importance est critique pour la securite du fonctionnement sont identifies dans le present manuel. -
Page 6: Safety Check-Out
KP-51WS510/57WS510/65WS510 SAFETY CHECK-OUT Leakage Test After correcting the original service problem, perform the following The AC leakage from any exposed metal part to earth ground and from safety checks before releasing the set to the customer: all exposed metal parts to any exposed metal part having a return to chassis, must not exceed 0.5 mA (500 microamperes). -
Page 7: Self-Diagnostic Function
KP-51WS510/57WS510/65WS510 Self Diagnosis SELF-DIAGNOSTIC FUNCTION Supported model The units in this manual contain a self-diagnostic function. If an error occurs, the STANDBY/TIMER LED will automatically begin to flash. The number of times the LED flashes translates to a probable source of the problem. A definition of the STANDBY/TIMER LED flash indicators is listed in the instruction manual for the user’s knowledge and reference. - Page 8 KP-51WS510/57WS510/65WS510 Display of Standby/Timer LED Flash Count � ������������������������������������������ ��������������� • ������� ������������������ ������������������ •����������������� ������� •��������������� ������� •������������������������� ������� ��������������������� ����������� ���������������������� ����������� ������������������������ Release of TIMER STAND BY indicator blinking The TIMER/STANDBY indicator blinking display is released by turning OFF the power switch on the TV main unit or removing the plug from the power.
- Page 9 KP-51WS510/57WS510/65WS510 Self-Diagnosis Function Operation Low B and +B line detect DET SHORT, and shut-down POWER ON RELAY. Reset by turning power on/off. In case of +B is loaded approx. 1.5A or more, microcomputer detects it via IC5005. In case of +B becomes approx. 150V or more, POWER ON RELAY shuts down and microcomputer detects it via IC5005.
-
Page 10: Section 1: Disassembly
KP-51WS510/57WS510/65WS510 SECTION 1: DISASSEMBLY 1-1. REAR BOARD REMOVAL 1-2. CHASSIS ASSEMBLY REMOVAL � �������������� ����������� �������������� � ���������� � ������������ � ������������������������ �������������� 1-3. SERVICE POSITION ���������������������������� � ��������������� �������������������� ���������������������������� ����������������������� ������������������������������ ������� ���������������� ������� � ������ ����������������������������������� �������������������������������������������������... -
Page 11: H2 Board Removal
KP-51WS510/57WS510/65WS510 1-4. H2 BOARD REMOVAL Four screws, dome washer HEX tap 4 x 20, Six screws to remove (+BVTP 4x12) speaker grille H2 board Firmly pull Button, multi speaker grille forward to release. 1-5. H1 BOARD REMOVAL Bracket H1 Two screws... -
Page 12: Mirror Cover Removal
KP-51WS510/57WS510/65WS510 1-7. MIRROR COVER REMOVAL 1-8. BEZNET ASSEMBLY REMOVAL � � �������� ��������������������� ����������������������������� ����������������������������� � ������������ ������������� � � �������� ����������������������������� 1-9. SR BOARD REMOVAL 1-10.AD BOARD AND B BOARD REMOVAL � ��������� ������� ����������� � �������� � �... -
Page 13: G Board Removal
KP-51WS510/57WS510/65WS510 1-11. G BOARD REMOVAL � ������ � ���������� ����� � � ����� � ������ �������������� � ������������ ������������� � �������� ������������ 1-12.TERMINAL BOARD, A BOARD, D BOARD, U BOARD, AND UD BOARD REMOVAL � ���������� ���������������� � �������� �... -
Page 14: Picture Tube Removal
KP-51WS510/57WS510/65WS510 1-13.PICTURE TUBE REMOVAL ������� ������������������������� ������������������������������ �������������������������������������� � ������������� ���� ����������������������������� ������������ � ����� � ������������� �� ������������ ���������������� ���������������� ����������������� �� ������������� �� ���������������� � �������� ����������� � ������������������ � ���������� � ��������� � � ������������� ����������������������������� 1-14.HIGH-VOLTAGE CABLE INSTALLATION AND REMOVAL ����������������... -
Page 15: Section 2: Set-Up Adjustments
KP-51WS510/57WS510/65WS510 SECTION 2: SET-UP ADJUSTMENTS 2-3. DEFLECTION YOKE TILT ADJUSTMENT 2-1. SCREEN VOLTAGE ADJUSTMENT (COARSE ADJUSTMENT) 1. Connect the color bar generator monoscope pattern to Video 1 input. 2. Cover the red and blue CRT lenses with lens caps to allow only green 1. -
Page 16: Focus Lens Adjustment
KP-51WS510/57WS510/65WS510 2-4. FOCUS LENS ADJUSTMENT 2-5. FOCUS VR ADJUSTMENT In this adjustment, use the remote commander while in service 1. Set generator to crosshatch. mode. For details on the usage of the service mode and the remote 2. Cover the red and blue CRT lenses with lens caps to allow only green... -
Page 17: 2-Pole Magnet And Centering Magnet Adjustment
KP-51WS510/57WS510/65WS510 2-6. 2-POLE MAGNET AND CENTERING 2-8. 4-POLE MAGNET ADJUSTMENT MAGNET ADJUSTMENT 1. Set the picture mode to PRO and picture to MAX. 2. Receive the Dot signal. 1. Set the picture mode to PRO and picture to MAX. 3. Cover the red and blue CRT lenses with lens caps to allow only green 2. -
Page 18: Electrical Adjustments By Remote Commander
KP-51WS510/57WS510/65WS510 2-10.ELECTRICAL ADJUSTMENTS BY 8. Press “MUTING” then “ENTER” to write the new adjustment data into memory. REMOTE COMMANDER 9. When you want to exit the service mode, turn the power off. All of the circuit adjustments can be made by using the remote commander (RM-Y909). -
Page 19: Adjustable Service Data Lists
Only the Adjustable registers are shown in the initial data list. A complete set of the Initial data, Fixed and Adjustable, can be downloaded at: http://www-ec.sdp.sel.sony.com/padics/Model_Data_List.htm Initial data is also available in an Excel format. Please contact Nita Wardlaw at Nita.Wardlaw@am.sony.com with your request. �������� �... - Page 20 KP-51WS510/57WS510/65WS510 ADJUSTABLE SERVICE DATA LISTS �������� � ���� ����������� ��������� �������� � � � ���� ��� � ��� �� ���� �������������������������������������� �������� � � � ���� ��� � �� ���� ������������������������������������ �������� � � � ���� ��� � �� ����...
- Page 21 KP-51WS510/57WS510/65WS510 ADJUSTABLE SERVICE DATA LISTS �������� � ���� ����������� ��������� ��������������������� ��� �� ��� �������� � � � � ����� � ���������������������������������������� �� ��� �������� �� � ���� � �� �� ���������������������������������������� �� ���� �������� ��� ��� ��� � ����...
- Page 22 KP-51WS510/57WS510/65WS510 ADJUSTABLE SERVICE DATA LISTS �������� � ���� ����������� ��������� �������� ��� ���� ������������� �� �� �� ���� ��� � � ������������� �� �� �� ���� ��� � � �������� �� �� �� ���� ��� � � ���������� �� ��...
- Page 23 KP-51WS510/57WS510/65WS510 ADJUSTABLE SERVICE DATA LISTS �������� � ���� ����������� ��������� �������� ��� ������������� �� �� �� ���� ��� � � ������������� �� �� �� ���� ��� � � �������� �� �� �� ���� ��� � � ���������� �� �� ��...
- Page 24 KP-51WS510/57WS510/65WS510 ADJUSTABLE SERVICE DATA LISTS �������� � ���� ����������� ��������� �������� ��� ������������� � � � ���� ��� � � ���� ��� � � ������������� � � � �������� � � � ���� ��� � � ���������� � � �...
- Page 25 KP-51WS510/57WS510/65WS510 ADJUSTABLE SERVICE DATA LISTS �������� � ���� ����������� ��������� �������� ��� ������������� ���� ���� ���� ���� ��� � � ������������� ���� ���� ���� ��� � ���� � �������� ���� ���� ���� ���� ��� � � ���������� ���� ���� ����...
- Page 26 KP-51WS510/57WS510/65WS510 ADJUSTABLE SERVICE DATA LISTS �������� � ���� ����������� ��������� ������� ��� ������������� � � � ���� ��� � � ������������� � � � ���� ��� � � �������� � � � ���� ��� � � ���������� � � �...
- Page 27 KP-51WS510/57WS510/65WS510 ADJUSTABLE SERVICE DATA LISTS �������� � ���� ����������� ��������� ��� ��� ������� ������������� ��� ��� ��� ���� ��� � � ������������� ��� ��� � ��� ���� ��� � �������� ��� ��� ��� ���� ��� � � ���������� ��� ���...
- Page 28 KP-51WS510/57WS510/65WS510 ADJUSTABLE SERVICE DATA LISTS �������� � ���� ����������� ��������� ��� ������� ������������� � � � ���� ��� � � ������������� � � � ���� ��� � � �������� � � � ���� ��� � � ���������� � � �...
- Page 29 KP-51WS510/57WS510/65WS510 ADJUSTABLE SERVICE DATA LISTS �������� � ���� ����������� ��������� �������� ��� ������������� � � � ���� ��� � � ������������� � � � ���� ��� � � �������� � � � ���� ��� � � ���������� � � �...
-
Page 30: Id Map Table
KP-51WS510/57WS510/65WS510 2-11-1. ID MAP TABLE �� ������ ����� �������� � ��� ��������� �� ��� ��������� � ����� ������� �� � ��� ��������� �� ��������� � ������� ������ ��� ��������� �� ������������� �������� ��� � ��� ��������� �� ����� ������ ��������... -
Page 31: Registration Adjustment
KP-51WS510/57WS510/65WS510 2-12-1.SET-UP FOR ADJUSTMENT 2-12.REGISTRATION ADJUSTMENT MARKING • At the 4 sides of the screen, use a tape measure to locate the middle. *ADJUSTING FLOW START Turn on the power and wait for 10 minutes. : middle Set to the NTSC Full mode DATA SETTING 1. - Page 32 KP-51WS510/57WS510/65WS510 2-12-3.OPERATION METHOD FOR Press Switches marker moving method. PROJECTOR ENGINE MODE Joystick (In Fine Adjustment mode) keys à 1 and 4 buttons Joystick 5 6 3 4 POWER MUTING Commander Function Buttons Mode Description Category up DISPLAY 0 + ENTER READ Reads data to NVM.
-
Page 33: Pje Adjustment (Sub Deflection Adjustment)
KP-51WS510/57WS510/65WS510 2-13.PJE ADJUSTMENT (SUB DEFLECTION 3. Press the “9” button on the remote commander and fine adjustment mode will be active where a green marker appears in ADJUSTMENT) the center of the screen. (In the case of GRN mode) 4. Press down on the joystick, and the marker color will be alternately switched between green (GRN mode) and white. - Page 34 KP-51WS510/57WS510/65WS510 7. Select “GRN SKEW”, and correct the tilt of horizontal lines and 10. Select “GRN MSIZ”, and correct the space intervals for the horizontal vertical lines. section so the screen is equal. GRN SKEW (Horizontally/Vertically) GRN MSIZ (Horizontally) Push the joystick...
-
Page 35: Auto Registration Offsets
KP-51WS510/57WS510/65WS510 2-13-2.COPYING ALL REGISTRATION DATA 15. Make the fine adjustment so that horizontal lines and vertical lines become straight. TO OTHER MODES 16. Press the “9” button on the remote commander to return to coarse 1. Make sure that the adjustment for NTSC Full mode are complete adjustment mode. -
Page 36: Auto Registration Error Codes
KP-51WS510/57WS510/65WS510 2-15.AUTO REGISTRATION ERROR CODES If an error code is displayed after the set has been correctly adjusted, check the following items: position, tilt and sizing. If any of these adjustments are off, even slightly, the auto-registration pattern will not hit the four sensors properly. This occurs when the internal generator patterns are being flashed on the screen for the sensors to read. -
Page 37: Auto Registration Diagnostics
KP-51WS510/57WS510/65WS510 • ERROR CODE SCREEN DISPLAY In service mode, the error will be displayed SENSOR POSITIONS Error codes in normal (customer) mode are not in text format. displayed. You must enter PJE service mode to � � see the error code. -
Page 38: Section 3: Safety-Related Adjustments
KP-51WS510/57WS510/65WS510 SECTION 3: SAFETY-RELATED ADJUSTMENTS D BOARD 3-2. HV HOLD DOWN CIRCUIT OPERATION CHECK AND ADJUSTMENT 3-1. HV REGULATION CIRCUIT CHECK AND ADJUSTMENT When replacing the following components marked with a Y on the When replacing the following components marked with a Y on the... -
Page 39: G Board
KP-51WS510/57WS510/65WS510 G BOARD 3-3. +B MAX VOLTAGE CONFIRMATION The following adjustments should always be performed when replacing IC501, R5032. 1. Supply 130VAC to variable autotransformer. 2. Receive dot signal pattern and set the PICTURE and BRIGHTNESS settings to their minimum. -
Page 40: Section 4: Circuit Adjustments
KP-51WS510/57WS510/65WS510 SECTION 4: CIRCUIT ADJUSTMENTS 4-1. BLUE OFFSET ADJUSTMENT 4-3. P & P SUB CONTRAST ADJUSTMENT (RF) (SCON) 1. Receive the all black (1080i, component) signal with VIDEO 5 input, and set PICTURE to maximum. 1. Receive the signal. ‡... -
Page 41: P & P Sub-Hue And Sub-Color Adjustment (Rf) (Shue, Scol)
KP-51WS510/57WS510/65WS510 4-5. P & P SUB-HUE AND SUB-COLOR ADJUSTMENT (RF) (SHUE, SCOL) 1. Receive the signal. TV terminal (main) : Color-bar (white-75%, 7.5% setup) VIDEO terminal (sub) : Color-bar (white-75%, 7.5% setup) 2. VIDEO MODE : Pro PICTURE : Maximum... -
Page 42: Section 5: Diagrams
KP-51WS510/57WS510/65WS510 SECTION 5: DIAGRAMS : B+ line 5-1. CIRCUIT BOARDS LOCATION : B-line. (Actual measured value may be different). : signal path. (RF) Circled numbers are waveform references. �� The components identified by X in this basic schematic diagram have been carefully factory-selected for each set in order to satisfy regulations regarding X-ray radiation. - Page 43 KP-51WS510/57WS510/65WS510 REFERENCE INFORMATION RESISTOR : RN METAL FILM : RC SOLID ���������������������������������������������� : FPRD NONFLAMMABLE CARBON � � ������������������ � : FUSE NONFLAMMABLE FUSIBLE : RW NONFLAMMABLE WIREWOUND ������� ������ �������������� ������������� : RS NONFLAMMABLE METAL OXIDE ��������� � ����������...
-
Page 44: Block Diagrams
KP-51WS510/57WS510/65WS510 5-3. BLOCK DIAGRAMS BLOCK DIAGRAM (1 OF 3) ����������� ���������� ���� ����� ����� ��� �� �� ���� � �� �� ��� �� � ��� ������� �� � ���� ��� ������ � ���� ��� ���� ���� ���� �������� ������ ����������������� ����... - Page 45 KP-51WS510/57WS510/65WS510 BLOCK DIAGRAM (2 OF 3) IC8002 CONV.OUT1 IC8008 DY(B) H DRIVE MIX+ V.DEF ERR OUT T8004 V.MID +200V D8039 ERR IN +135V V.RET D8022 +135V SLOW VR REG D8037 MUTE VR8022 IC8007 D8008 REF IN IC8001 MIX РCONV.OUT1...
- Page 46 KP-51WS510/57WS510/65WS510 BLOCK DIAGRAM (3 OF 3) 5-1. T6001 D5003 CN6005 CN5002 IC6003 LINE A C IN AC (H) AU 19V D6007 DRIVER FILTER 120V A C F6001 L6001, 60Hz AC (L) A BOARD 6002 CONV VG (H) CN706 D5026 Q6006...
-
Page 47: Schematics And Supporting Information
KP-51WS510/57WS510/65WS510 5-4. SCHEMATICS AND SUPPORTING INFORMATION CR BOARD SCHEMATIC DIAGRAM [R CRT DRIVE] COMPONENT SIDE TO F.BLOCK F GND CN7108 R CRT DRIVE CN7104 :ONE TOUCH R7101 560k TO F.BLOCK 1/2W — R7123 CN7103 1/2W SG7103 DSP-301N :S-MICRO CN7107 TO CG:CN7204... -
Page 48: Cb Board Schematic Diagram
KP-51WS510/57WS510/65WS510 CB BOARD SCHEMATIC DIAGRAM [B CRT DRIVE] COMPONENT SIDE TO F.BLOCK CN7309 F GND B CRT DRIVE TO F.BLOCK CN7305 R7330 :ONE TOUCH — SG7303 1/2W DSP-301N R7304 CN7304 C7305 560k 0.001 R7301 1/2W :S-MICRO :FPRD TO D:CN8022 CN7308... -
Page 49: Cg Board Schematic Diagram
KP-51WS510/57WS510/65WS510 CG BOARD SCHEMATIC DIAGRAM [G CRT DRIVE] COMPONENT SIDE CN7205 TO F.BLOCK :ONE TOUCH F GND G CRT DRIVE CN7209 TO F.BLOCK R7204 560k — 1/2W R7223 1/2W CN7204 SG7203 DSP-301N :S-MICRO TO CR:CN7103 C7203 +200V 0.001 SG7201 CRT_GND... -
Page 50: Board Schematic Diagram
KP-51WS510/57WS510/65WS510 V BOARD SCHEMATIC DIAGRAM [VELOCITY MOD] COMPONENT SIDE � � � � � R9028 C9019 :FPRD Q9005 R9012 CN9001 R9006 R9009 2SC2412K 1.5k R9019 4.7k Q9007 C9009 1/16W BUFFER C9018 1/16W 1/16W 2SC2412K � :CHIP :FPRD R9027 :CHIP :CHIP... -
Page 51: G Board Schematic Diagram
KP-51WS510/57WS510/65WS510 G BOARD SCHEMATIC DIAGRAM ����������������������� �� �� ����������� �� �� �� �� �� �� �� �� �� �� �� �� �� �� ��� �� ��� �� ��� �� ��� �� ��� �� ��� �� ��� �� ��� �� ���... - Page 52 KP-51WS510/57WS510/65WS510 [POWER SUPPLY] [POWER SUPPLY] COMPONENT SIDE CONDUCTOR SIDE � � � � � � � � � � � � ����� ����� ����� ����� � � ����� ����� ����� ����� ����� ����� ����� ����� ����� ������ ����� ����� �����...
-
Page 53: Ud Board Schematic Diagram
KP-51WS510/57WS510/65WS510 UD BOARD SCHEMATIC DIAGRAM Due to the complexity of this board, performing component level field repairs is not recommended. If service is required, complete board replacement is the preferred repair method. Data is provided for reference only. UD BOARD WAVEFORMS ��... - Page 54 KP-51WS510/57WS510/65WS510 [DVI DECODER] [DVI DECODER] COMPONENT SIDE CONDUCTOR SIDE � � � � � � � � � � � � �� � �� ������ ����� ��� ����� ����� ����� ������ ����� ������ ������ � ������ ��� � � �...
-
Page 55: A Board Schematic Diagram (1 Of 3)
KP-51WS510/57WS510/65WS510 A BOARD SCHEMATIC DIAGRAM (1 OF 3) A BOARD WAVEFORMS �� �� ����������� �� �� �� �� �� �� �� �� �� �� �� �� �� �� ��� �� ��� �� ��� �� ��� �� ��� �� ��� ��... -
Page 56: A Board Schematic Diagram (2 Of 3)
KP-51WS510/57WS510/65WS510 A BOARD SCHEMATIC DIAGRAM (2 OF 3) A BOARD WAVEFORMS �� �� ����������� �� �� �� �� �� �� �� �� �� �� �� �� �� �� ��� �� ��� �� ��� �� ��� �� ��� �� ��� ��... -
Page 57: A Board Schematic Diagram (3 Of 3)
KP-51WS510/57WS510/65WS510 A BOARD SCHEMATIC DIAGRAM (3 OF 3) �� �� ����������� �� �� �� �� �� �� �� �� �� �� �� �� �� �� ��� �� ��� �� ��� �� ��� �� ��� �� ��� �� ��� �� ���... - Page 58 KP-51WS510/57WS510/65WS510 A BOARD IC VOLTAGE LIST A BOARD TRANSISTOR LIST ��� �� �� �� ��� ���� ����� ����� �� ��� �� ��� � ��� �� � ����� �� � ����� � � � � � � ��� ���� �� ��...
- Page 59 KP-51WS510/57WS510/65WS510 [TUNER, 3D COMB, AREG, CRT DRIVE, YCT, SYSTEM CONTROL, AUDIO OUTPUT] �������������������� COMPONENT SIDE � � � � � � � � � �� �� �� ����� ���������� ���������� �� ��� �� ��� ���� ��� ���� ��� �� ���...
- Page 60 KP-51WS510/57WS510/65WS510 [TUNER, 3D COMB, AREG, CRT DRIVE, YCT, SYSTEM CONTROL, AUDIO OUTPUT] �������������������� CONDUCTOR SIDE � � � � � � � � � �� �� �� ����� ���������� �� ��� ���� ��� �� ��� ���� ��� ���� ��� ����...
-
Page 61: U Board Schematic Diagram
KP-51WS510/57WS510/65WS510 U BOARD SCHEMATIC DIAGRAM ����������������������� �� �� ����������� �� �� �� �� �� �� �� �� �� �� �� �� �� �� ��� �� ��� �� ��� �� ��� �� ��� �� ��� �� ��� �� ��� �� ���... - Page 62 KP-51WS510/57WS510/65WS510 [AV SWITCH, TERMINAL BLOCK, AUDIO PROCESSOR] COMPONENT SIDE � � � � � � � � � � � � � � � — 62 —...
- Page 63 KP-51WS510/57WS510/65WS510 [AV SWITCH, TERMINAL BLOCK, AUDIO PROCESSOR] CONDUCTOR SIDE � � � � � � � � � � ����� ����� � ����� � � � � — 63 —...
-
Page 64: Ad Board Schematic Diagram
KP-51WS510/57WS510/65WS510 AD BOARD SCHEMATIC DIAGRAM Due to the complexity of this board, performing component level field repairs is not recommended. If service is required, complete board replacement is the preferred repair method. Data is provided for reference only. AD BOARD WAVEFORMS ��... - Page 65 KP-51WS510/57WS510/65WS510 [DIGITAL REGI, PJED CPU, PJE DRIVE] [DIGITAL REGI, PJED CPU, PJE DRIVE] COMPONENT SIDE CONDUCTOR SIDE � � � � � � � � � � ������������ ������� ����� � ���� � � ��� ����� ����� ��� ����� �����...
-
Page 66: B Board Schematic Diagram (1 Of 2)
KP-51WS510/57WS510/65WS510 B BOARD SCHEMATIC DIAGRAM (1 OF 2) Due to the complexity of this board, performing component level field repairs is not recommended. If service is required, complete board replacement is the preferred repair method. Data is provided for reference only. -
Page 67: B Board Schematic Diagram (2 Of 2)
KP-51WS510/57WS510/65WS510 B BOARD SCHEMATIC DIAGRAM (2 OF 2) Due to the complexity of this board, performing component level field repairs is not recommended. If service is required, complete board replacement is the preferred repair method. Data is provided for reference only. - Page 68 KP-51WS510/57WS510/65WS510 [AD-DRC, MID-XA] COMPONENT SIDE � � � � � � � � � �� �� �� ������� ������������ ������� ����� � � ����� � � � � �� �� ��� � � ����� �� ��� � � ��� ���...
- Page 69 KP-51WS510/57WS510/65WS510 [AD-DRC, MID-XA] CONDUCTOR SIDE � � � � � � � � � �� �� �� � ����� ����� ����� ����� ����� ����� ����� ����� ����� ����� ����� ����� ����� ����� ����� ����� ����� ����� ����� ������ �� �����...
-
Page 70: D Board Schematic Diagram
KP-51WS510/57WS510/65WS510 D BOARD SCHEMATIC DIAGRAM D BOARD WAVEFORMS �� �� ����������� �� �� �� �� �� �� �� �� �� �� �� �� �� �� ��� �� ��� �� ��� �� ��� �� ��� �� ��� �� ��� �� ���... - Page 71 KP-51WS510/57WS510/65WS510 [HV DRIVE, POWER SUPPLY, H DRIVE] COMPONENT SIDE � � � � � � � � � �� �� �� ����� ������ � ����� ����� ������ � � ��� � ��� � ����� ���� ������ ��� ����� ����� �����...
- Page 72 KP-51WS510/57WS510/65WS510 [HV DRIVE, POWER SUPPLY, H DRIVE] CONDUCTOR SIDE �������������������� � � � � � � � � � �� �� �� ���������������� ���������������� ����� ���� ������ ��� ������� ��� ������ ��� � � � � ����� ���� ������ ���...
-
Page 73: Sr Board Schematic Diagram
KP-51WS510/57WS510/65WS510 SR BOARD SCHEMATIC DIAGRAM CN9901 :S-MICRO SB9901 SENSOR D9902 TO A:CN10 UDZSTE-17-5.6B SENSOR — 9-965-944-01<RA6>SR [SENSOR] [SENSOR] — COMPONENT SIDE CONDUCTOR SIDE � � � � ������ — � � � � � ������ — H2 BOARD SCHEMATIC DIAGRAM... - Page 74 KP-51WS510/57WS510/65WS510 [FUNCTION KEYS] COMPONENT SIDE � � � � � ������������ � ������� ����� � � ������ ������ � � � � [FUNCTION KEYS] CONDUCTOR SIDE � � � � � � � � — 74 —...
-
Page 75: H1 Board Schematic Diagram
KP-51WS510/57WS510/65WS510 H1 BOARD SCHEMATIC DIAGRAM CN9101 STBY/TIMER R9103 D9101 :S-MICRO SLR-325VCT31 1/16W TO H2:CN9201 :CHIP STBY-TIMER-LED STEREO-LED STEREO R9104 P-ON S9101 D9102 SLR-325VCT31 1/16W :CHIP — STBY 5V POWER IC9101 GP1U28Y IR SENSOR CN9102 TO A:CN16 STBY 5V SIRCS R9102 R9101 —... -
Page 76: H4 Board Schematic Diagram
KP-51WS510/57WS510/65WS510 H4 BOARD SCHEMATIC DIAGRAM C9405 R9407 0.47 D9405 B:CHIP RD10ES-T1B 1/16W :CHIP CN9401 J9401 WHT-L C9403 :S-MICRO R9403 D9404 0.01 B:2012 RD10ES-T1B TO U:CN2002 1/16W :CHIP — D9403 R9406 RD10ES-T1B 1/16W :CHIP V2SW C9402 R9402 0.47 B:CHIP D9402 1/16W... -
Page 77: Ic Block Diagrams
KP-51WS510/57WS510/65WS510 5-5. IC BLOCK DIAGRAMS A BOARD IC305, 307 SN74LV4053ANSR IN/OUT LOGIC LEVEL BINARY TO CONVERSION COMMON 1OF2 DECODERS WITH INHIBIT LOGIC LEVEL BINARY TO CONVERSION OUT/IN 1OF2 COMMON DECODERS WITH INHIBIT LOGIC LEVEL BINARY TO CONVERSION COMMON 1OF2 DECODERS... -
Page 78: B Board
KP-51WS510/57WS510/65WS510 B BOARD IC3305, 3404 TLC2932IPWR LOGIC LOGIC SELECT FIN-A FIN-B 1/2 DIVIDER R BIAS INHIBIT INHIBIT IC3413 SN74LV4053ANSR IN/OUT LOGIC LEVEL BINARY TO CONVERSION 1OF2 COMMON DECODERS WITH INHIBIT LOGIC LEVEL BINARY TO CONVERSION OUT/IN 1OF2 COMMON DECODERS WITH... -
Page 79: Cr Board
KP-51WS510/57WS510/65WS510 CR BOARD IC7101 TDA6120Q n.c. MIRROR CASCODE n.c. 0.7 pF MIRROR out 1x out 4x CURRENT INPUT VIN- CASCODE 5 mA RC + VIN+ CG BOARD IC7201 TDA6120Q n.c. MIRROR CASCODE n.c. 0.7 pF MIRROR out 1x out 4x... -
Page 80: U Board
KP-51WS510/57WS510/65WS510 U BOARD IC2004 CXA2069Q VOUT1 YIN1 YOUT1 TRAP1 COUT1 CIN1 V/YOUT2 TRAP2 COUT2 VOUT3 YOUT3 COUT3 VGND BIAS BIAS AGND LOUT1 ROUT1 LOUT2 ROUT2 LOUT3 ROUT3 DC OUT Logic S2-1 S2-2 S2-3 S2-4 MUTE — 80 —... -
Page 81: Semiconductors
KP-51WS510/57WS510/65WS510 5-6. SEMICONDUCTORS 1SS83TD 2SA1037AK-T146R CXA1726AM D4SBS4-F TC7W08FU(TE12R) BA05T NJM2395AF05 21DP05 2SA1226-T1E3E4 NJM2180M D6SB60L PQ09RF21 D1NL40-TR2 2SC1623-L516 D1NS4 2SD601A-QRS-TX D2L20U DTC114EKA-T146 EL1Z DTC144EKA-T146 Ð 8pin CHIP GP08DPKG23 TOP VIEW 30pin SOP RD10ES-B2 TDA6120Q / N2/S2 RD15ES-B2 Ð CXA2069Q RD18ES-B2 NJM2903M... -
Page 82: Section 6: Exploded Views
DESCRIPTION ASSEMBLY INCLUDES X-4040-804-2 BEZEL (51) ASSY 4-081-063-01 SCREW, DOME WASHER HEX TAP 4X20 (KP-51WS510 ONLY) 4-083-467-01 COVER (51), MIRROR 6-1. COVER (KP-51WS510/57WS510 ONLY) X-4040-796-2 BEZEL (57) ASSY (KP-51WS510 ONLY) (KP-57WS510 ONLY) X-4039-824-1 COVER (57) ASSY, MIRROR �� 7-685-648-79 SCREW +BVTP 3X12 TYPE2 IT-3 3-704-179-01 EMBLEM (NO.9), SONY... -
Page 83: Cover (Kp-65Ws510 0Nly)
DESCRIPTION ASSEMBLY INCLUDES REF.NO. PART NO. DESCRIPTION ASSEMBLY INCLUDES X-4040-807-3 BEZNET (65) ASSY 4-096-136-01 BOARD, FRONT 4-381-079-01 EMBLEM (NO.10), SONY A-1405-147-A H2 BOARD, MOUNTED 6-2. COVER (KP-65WS510 0NLY) 4-090-915-11 SCREEN (65), CONTRAST 4-082-284-01 BUTTON, MULTI 4-089-151-11 PLATE (65WL), DIFFUSION A-1405-148-A H1 BOARD, MOUNTED ��... -
Page 84: Chassis
KP-51WS510/57WS510/65WS510 NOTE: The components identifi ed by shading and mark are critical for safety. NOTE: Les composants identifi es per un trame et une marque sont critiques pour Replace only with part number specifi ed. la securite. Ne les remplacer que par une piece portant le numero specifi e. -
Page 85: Picture Tube
(KP-65WS510 SERIAL # 9,000,001 AND UP ONLY) 7-685-663-71 SCREW +BVTP 4X16 TYPE2 IT-3 A-1604-487-A COUPLER (B) ASSY, CRT 1-451-542-41 DEFLECTION YOKE (KP-51WS510 ONLY) (KP-57WS510/65WS510 SERIAL # 9,000,001 AND UP ONLY) A-1604-493-A COUPLER (B) ASSY, CRT 1-451-536-13 DEFLECTION YOKE (KP-57WS510 ONLY) -
Page 86: Section 7: Electrical Parts List
KP-51WS510/57WS510/65WS510 SECTION 7: ELECTRICAL PARTS LIST NOTE: The components identiÞ ed by shading RESISTORS The components in this manual identiÞ ed by the following mark are critical for safety. Replace only • All resistors are in ohms symbol: indicate parts that have been carefully factory- with part number speciÞ... - Page 87 KP-51WS510/57WS510/65WS510 CR CB NOTE: Les composants identiÞ es per un trame et une NOTE: The components identiÞ ed by shading marque sont critiques pour la securite. Ne les mark are critical for safety. Replace only remplacer que par une piece portant le numero speciÞ e.
- Page 88 KP-51WS510/57WS510/65WS510 CB CG NOTE: Les composants identiÞ es per un trame et une NOTE: The components identiÞ ed by shading marque sont critiques pour la securite. Ne les mark are critical for safety. Replace only remplacer que par une piece portant le numero speciÞ e.
- Page 89 KP-51WS510/57WS510/65WS510 REF.NO. PART NO. DESCRIPTION VALUES REF.NO. PART NO. DESCRIPTION VALUES Q9007 8-729-120-28 TRANSISTOR 2SC1623-L5L6 Q9008 8-729-045-04 TRANSISTOR 2SC5511 Q9009 8-729-045-05 TRANSISTOR 2SA2005 A-1405-146-A V BOARD, MOUNTED 4-382-854-11 SCREW (M3X10), P, SW (+) RESISTOR 7-651-000-50 GREASE,SILICON (G-746) 200G R9002 1-216-805-11...
- Page 90 KP-51WS510/57WS510/65WS510 NOTE: Les composants identifies per un trame et une NOTE: The components identified by shading marque sont critiques pour la securite. Ne les mark are critical for safety. Replace only remplacer que par une piece portant le numero specifie.
- Page 91 KP-51WS510/57WS510/65WS510 NOTE: Les composants identifies per un trame et une NOTE: The components identified by shading marque sont critiques pour la securite. Ne les mark are critical for safety. Replace only remplacer que par une piece portant le numero specifie.
- Page 92 KP-51WS510/57WS510/65WS510 NOTE: Les composants identifies per un trame et une NOTE: The components identified by shading marque sont critiques pour la securite. Ne les mark are critical for safety. Replace only remplacer que par une piece portant le numero specifie.
- Page 93 KP-51WS510/57WS510/65WS510 G UD NOTE: Les composants identifies per un trame et une NOTE: The components identified by shading marque sont critiques pour la securite. Ne les mark are critical for safety. Replace only remplacer que par une piece portant le numero specifie.
- Page 94 KP-51WS510/57WS510/65WS510 REF.NO. PART NO. DESCRIPTION VALUES REF.NO. PART NO. DESCRIPTION VALUES C7059 1-164-156-11 CERAMIC CHIP 0.1µF IC7006 8-759-641-86 BR24C16F-E2 C7060 1-164-156-11 CERAMIC CHIP 0.1µF IC7007 6-702-170-01 PACDN006S C7061 1-164-156-11 CERAMIC CHIP 0.1µF IC7008 6-702-170-01 PACDN006S C7062 1-164-156-11 CERAMIC CHIP 0.1µF...
- Page 95 KP-51WS510/57WS510/65WS510 UD A REF.NO. PART NO. DESCRIPTION VALUES REF.NO. PART NO. DESCRIPTION VALUES R7065 1-216-833-11 METAL CHIP 1/10W 1-164-156-11 CERAMIC CHIP 0.1µF R7066 1-218-694-11 METAL CHIP 1.2K 0.50% 1/10W 1-164-156-11 CERAMIC CHIP 0.1µF 1-164-156-11 CERAMIC CHIP 0.1µF R7067 1-216-833-11 METAL CHIP...
- Page 96 KP-51WS510/57WS510/65WS510 REF.NO. PART NO. DESCRIPTION VALUES REF.NO. PART NO. DESCRIPTION VALUES 1-164-156-11 CERAMIC CHIP 0.1µF C102 1-107-826-11 CERAMIC CHIP 0.1µF 1-126-947-11 ELECT 47µF C103 1-126-964-11 ELECT 10µF 1-162-974-11 CERAMIC CHIP 0.01µF C104 1-164-156-11 CERAMIC CHIP 0.1µF 1-164-156-11 CERAMIC CHIP 0.1µF...
- Page 97 KP-51WS510/57WS510/65WS510 REF.NO. PART NO. DESCRIPTION VALUES REF.NO. PART NO. DESCRIPTION VALUES C304 1-164-315-11 CERAMIC CHIP 470pF C349 1-125-891-11 CERAMIC CHIP 0.47µF C305 1-162-917-11 CERAMIC CHIP 15pF C350 1-126-935-11 ELECT 470µF C306 1-107-826-11 CERAMIC CHIP 0.1µF C351 1-164-156-11 CERAMIC CHIP 0.1µF...
- Page 98 KP-51WS510/57WS510/65WS510 REF.NO. PART NO. DESCRIPTION VALUES REF.NO. PART NO. DESCRIPTION VALUES C393 1-125-891-11 CERAMIC CHIP 0.47µF C468 1-125-891-11 CERAMIC CHIP 0.47µF C394 1-126-933-11 ELECT 100µF C470 1-162-970-11 CERAMIC CHIP 0.01µF C395 1-125-891-11 CERAMIC CHIP 0.47µF C472 1-125-891-11 CERAMIC CHIP 0.47µF...
- Page 99 KP-51WS510/57WS510/65WS510 REF.NO. PART NO. DESCRIPTION VALUES REF.NO. PART NO. DESCRIPTION VALUES C728 1-126-933-11 ELECT 100µF C798 1-165-908-11 CERAMIC CHIP 1µF C730 1-162-915-11 CERAMIC CHIP 10pF 0.50pF 50V C799 1-164-156-11 CERAMIC CHIP 0.1µF C731 1-162-927-11 CERAMIC CHIP 100pF C800 1-162-970-11 CERAMIC CHIP 0.01µF...
- Page 100 KP-51WS510/57WS510/65WS510 REF.NO. PART NO. DESCRIPTION VALUES REF.NO. PART NO. DESCRIPTION VALUES DIODE FILTER 8-719-404-50 DIODE MA111-TX 1-239-848-21 FILTER, LOW PASS 8-719-083-87 DIODE UDZS-TE17-33B 1-239-848-21 FILTER, LOW PASS 8-719-069-55 DIODE UDZSTE-175.6B 1-239-848-21 FILTER, LOW PASS D307 8-719-978-33 DIODE DTZ-TT11-6.8B 1-239-848-21 FILTER, LOW PASS...
- Page 101 KP-51WS510/57WS510/65WS510 NOTE: Les composants identifies per un trame et une NOTE: The components identified by shading marque sont critiques pour la securite. Ne les mark are critical for safety. Replace only remplacer que par une piece portant le numero specifie.
- Page 102 KP-51WS510/57WS510/65WS510 REF.NO. PART NO. DESCRIPTION VALUES REF.NO. PART NO. DESCRIPTION VALUES Q319 8-729-422-27 TRANSISTOR 2SD601A-Q Q367 8-729-122-63 TRANSISTOR 2SA1226-E4 Q320 8-729-422-27 TRANSISTOR 2SD601A-Q Q368 8-729-422-27 TRANSISTOR 2SD601A-Q Q321 8-729-422-27 TRANSISTOR 2SD601A-Q Q369 1-801-806-11 TRANSISTOR DTC144EKA Q322 8-729-422-27 TRANSISTOR 2SD601A-Q Q373...
- Page 103 KP-51WS510/57WS510/65WS510 REF.NO. PART NO. DESCRIPTION VALUES REF.NO. PART NO. DESCRIPTION VALUES 1-216-829-11 METAL CHIP 4.7K 1/10W 1-216-845-11 METAL CHIP 100K 1/10W 1-218-720-11 METAL CHIP 0.50% 1/10W 1-216-813-11 METAL CHIP 1/10W 1-218-722-11 METAL CHIP 0.50% 1/10W 1-216-821-11 METAL CHIP 1/10W 1-218-740-11...
- Page 104 KP-51WS510/57WS510/65WS510 REF.NO. PART NO. DESCRIPTION VALUES REF.NO. PART NO. DESCRIPTION VALUES R121 1-216-839-11 METAL CHIP 1/10W R319 1-216-864-11 SHORT CHIP R122 1-216-822-11 METAL CHIP 1.2K 1/10W R320 1-216-833-11 METAL CHIP 1/10W R123 1-216-833-11 METAL CHIP 1/10W R321 1-216-821-11 METAL CHIP...
- Page 105 KP-51WS510/57WS510/65WS510 REF.NO. PART NO. DESCRIPTION VALUES REF.NO. PART NO. DESCRIPTION VALUES R364 1-216-809-11 METAL CHIP 1/10W R408 1-216-821-11 METAL CHIP 1/10W R365 1-216-809-11 METAL CHIP 1/10W R409 1-216-821-11 METAL CHIP 1/10W R366 1-216-841-11 METAL CHIP 1/10W R410 1-218-673-11 METAL CHIP 0.50% 1/10W...
- Page 106 KP-51WS510/57WS510/65WS510 REF.NO. PART NO. DESCRIPTION VALUES REF.NO. PART NO. DESCRIPTION VALUES R457 1-216-825-11 METAL CHIP 2.2K 1/10W R540 1-216-809-11 METAL CHIP 1/10W R458 1-216-825-11 METAL CHIP 2.2K 1/10W R541 1-218-867-11 METAL CHIP 6.8K 0.50% 1/10W R459 1-216-815-11 METAL CHIP 1/10W...
- Page 107 KP-51WS510/57WS510/65WS510 REF.NO. PART NO. DESCRIPTION VALUES REF.NO. PART NO. DESCRIPTION VALUES R617 1-216-809-11 METAL CHIP 1/10W R744 1-216-821-11 METAL CHIP 1/10W R618 1-216-809-11 METAL CHIP 1/10W R745 1-216-841-11 METAL CHIP 1/10W R619 1-216-821-11 METAL CHIP 1/10W R747 1-216-809-11 METAL CHIP...
- Page 108 KP-51WS510/57WS510/65WS510 A AD REF.NO. PART NO. DESCRIPTION VALUES REF.NO. PART NO. DESCRIPTION VALUES R803 1-216-833-11 METAL CHIP 1/10W R878 1-216-821-11 METAL CHIP 1/10W R804 1-216-837-11 METAL CHIP 1/10W R879 1-216-821-11 METAL CHIP 1/10W R806 1-216-829-11 METAL CHIP 4.7K 1/10W R885...
- Page 109 KP-51WS510/57WS510/65WS510 REF.NO. PART NO. DESCRIPTION VALUES REF.NO. PART NO. DESCRIPTION VALUES C1606 1-164-156-11 CERAMIC CHIP 0.1µF C1661 1-164-156-11 CERAMIC CHIP 0.1µF C1607 1-126-933-11 ELECT 100µF C1663 1-126-933-11 ELECT 100µF C1608 1-164-156-11 CERAMIC CHIP 0.1µF C1664 1-126-933-11 ELECT 100µF C1609 1-162-966-11 CERAMIC CHIP 0.0022µF 10%...
- Page 110 KP-51WS510/57WS510/65WS510 REF.NO. PART NO. DESCRIPTION VALUES REF.NO. PART NO. DESCRIPTION VALUES C1718 1-164-156-11 CERAMIC CHIP 0.1µF C1720 1-162-910-11 CERAMIC CHIP 0.25pF 50V IC1601 8-759-683-55 CM0017AF C1721 1-162-927-11 CERAMIC CHIP 100pF IC1602 8-759-830-08 NJM2068V-TE2 C1722 1-162-910-11 CERAMIC CHIP 0.25pF 50V IC1603...
- Page 111 KP-51WS510/57WS510/65WS510 AD U REF.NO. PART NO. DESCRIPTION VALUES REF.NO. PART NO. DESCRIPTION VALUES R1635 1-216-809-11 METAL CHIP 1/10W R1686 1-216-809-11 METAL CHIP 1/10W R1636 1-216-833-11 METAL CHIP 1/10W R1687 1-216-817-11 METAL CHIP 1/10W R1637 1-216-821-11 METAL CHIP 1/10W R1690 1-218-724-11 METAL CHIP 0.50% 1/10W...
- Page 112 KP-51WS510/57WS510/65WS510 REF.NO. PART NO. DESCRIPTION VALUES REF.NO. PART NO. DESCRIPTION VALUES C2006 1-107-826-11 CERAMIC CHIP 0.1µF C2077 1-126-933-11 ELECT 100µF C2007 1-126-964-11 ELECT 10µF C2078 1-126-933-11 ELECT 100µF C2008 1-126-964-11 ELECT 10µF C2079 1-126-933-11 ELECT 100µF C2012 1-126-964-11 ELECT 10µF...
- Page 113 KP-51WS510/57WS510/65WS510 REF.NO. PART NO. DESCRIPTION VALUES REF.NO. PART NO. DESCRIPTION VALUES D2006 8-719-110-17 DIODE RD10ESB2 IC2004 8-752-080-04 CXA2069Q D2007 8-719-110-17 DIODE RD10ESB2 IC2007 8-752-394-69 CXD2073Q-T4 D2008 8-719-110-17 DIODE RD10ESB2 D2009 8-719-110-17 DIODE RD10ESB2 JACK D2010 8-719-110-17 DIODE RD10ESB2 J2001 1-573-967-12...
- Page 114 KP-51WS510/57WS510/65WS510 REF.NO. PART NO. DESCRIPTION VALUES REF.NO. PART NO. DESCRIPTION VALUES RESISTOR R2044 1-216-853-11 METAL CHIP 470K 1/10W R2045 1-216-853-11 METAL CHIP 470K 1/10W R2001 1-218-665-11 METAL CHIP 0.50% 1/10W R2046 1-216-818-11 METAL CHIP 1/10W R2002 1-216-853-11 METAL CHIP 470K...
- Page 115 KP-51WS510/57WS510/65WS510 REF.NO. PART NO. DESCRIPTION VALUES REF.NO. PART NO. DESCRIPTION VALUES R2090 1-216-821-11 METAL CHIP 1/10W R2159 1-216-832-11 METAL CHIP 8.2K 1/10W R2092 1-216-829-11 METAL CHIP 4.7K 1/10W R2164 1-218-710-11 METAL CHIP 5.6K 0.50% 1/10W R2094 1-216-864-11 SHORT CHIP R2166...
- Page 116 KP-51WS510/57WS510/65WS510 REF.NO. PART NO. DESCRIPTION VALUES REF.NO. PART NO. DESCRIPTION VALUES C3301 1-164-156-11 CERAMIC CHIP 0.1µF C3347 1-164-156-11 CERAMIC CHIP 0.1µF C3302 1-164-156-11 CERAMIC CHIP 0.1µF C3348 1-164-156-11 CERAMIC CHIP 0.1µF C3303 1-126-206-11 ELECT CHIP 100µF 6.3V C3349 1-164-156-11 CERAMIC CHIP 0.1µF...
- Page 117 KP-51WS510/57WS510/65WS510 REF.NO. PART NO. DESCRIPTION VALUES REF.NO. PART NO. DESCRIPTION VALUES C3412 1-164-156-11 CERAMIC CHIP 0.1µF C3458 1-164-156-11 CERAMIC CHIP 0.1µF C3413 1-164-156-11 CERAMIC CHIP 0.1µF C3460 1-162-923-11 CERAMIC CHIP 47pF C3414 1-164-156-11 CERAMIC CHIP 0.1µF C3462 1-164-156-11 CERAMIC CHIP 0.1µF...
- Page 118 KP-51WS510/57WS510/65WS510 REF.NO. PART NO. DESCRIPTION VALUES REF.NO. PART NO. DESCRIPTION VALUES D3302 8-719-069-60 DIODE UDZSTE-179.1B COIL D3401 8-719-914-43 DIODE DAN202K L3001 1-216-295-91 SHORT CHIP D3402 8-719-914-44 DIODE DAP202K L3089 1-414-233-22 FERRITE 0µH D3403 8-719-978-33 DIODE DTZ-TT11-6.8B L3102 1-412-946-11 INDUCTOR 3.9µH...
- Page 119 KP-51WS510/57WS510/65WS510 REF.NO. PART NO. DESCRIPTION VALUES REF.NO. PART NO. DESCRIPTION VALUES Q3307 8-729-120-28 TRANSISTOR 2SC1623-L5L6 R3101 1-216-809-11 METAL CHIP 1/10W Q3308 8-729-026-49 TRANSISTOR 2SA1037AK-T146-R R3102 1-216-809-11 METAL CHIP 1/10W Q3309 8-729-120-28 TRANSISTOR 2SC1623-L5L6 R3103 1-216-822-11 METAL CHIP 1.2K 1/10W Q3310...
- Page 120 KP-51WS510/57WS510/65WS510 REF.NO. PART NO. DESCRIPTION VALUES REF.NO. PART NO. DESCRIPTION VALUES R3334 1-216-809-11 METAL CHIP 1/10W R3383 1-216-817-11 METAL CHIP 1/10W R3335 1-216-833-11 METAL CHIP 1/10W R3384 1-216-809-11 METAL CHIP 1/10W R3337 1-216-820-11 METAL CHIP 1/10W R3410 1-216-833-11 METAL CHIP...
- Page 121 KP-51WS510/57WS510/65WS510 REF.NO. PART NO. DESCRIPTION VALUES REF.NO. PART NO. DESCRIPTION VALUES R3503 1-216-821-11 METAL CHIP 1/10W R3839 1-218-670-11 METAL CHIP 0.50% 1/10W R3504 1-216-821-11 METAL CHIP 1/10W R3840 1-216-803-11 METAL CHIP 1/10W R3505 1-216-821-11 METAL CHIP 1/10W R3841 1-218-670-11 METAL CHIP 0.50% 1/10W...
- Page 122 KP-51WS510/57WS510/65WS510 NOTE: Les composants identifi es per un trame et une NOTE: The components identifi ed by shading marque sont critiques pour la securite. Ne les mark are critical for safety. Replace only remplacer que par une piece portant le numero specifi e.
- Page 123 KP-51WS510/57WS510/65WS510 NOTE: Les composants identifi es per un trame et une NOTE: The components identifi ed by shading marque sont critiques pour la securite. Ne les mark are critical for safety. Replace only remplacer que par une piece portant le numero specifi e.
- Page 124 KP-51WS510/57WS510/65WS510 REF.NO. PART NO. DESCRIPTION VALUES REF.NO. PART NO. DESCRIPTION VALUES CN8004 1-779-890-11 CONNECTOR, BOARD TO BOARD 10P D8032 8-719-302-43 DIODE EL1Z CN8005 1-779-890-11 CONNECTOR, BOARD TO BOARD 10P D8033 8-719-028-72 DIODE RGP02-17EL-6433 CN8006 1-779-890-11 CONNECTOR, BOARD TO BOARD 10P...
- Page 125 KP-51WS510/57WS510/65WS510 NOTE: Les composants identifi es per un trame et une NOTE: The components identifi ed by shading marque sont critiques pour la securite. Ne les mark are critical for safety. Replace only remplacer que par une piece portant le numero specifi e.
- Page 126 KP-51WS510/57WS510/65WS510 REF.NO. PART NO. DESCRIPTION VALUES REF.NO. PART NO. DESCRIPTION VALUES R8025 1-216-829-11 METAL CHIP 4.7K 1/10W R8073 1-214-808-11 METAL 1/2W R8026 1-216-829-11 METAL CHIP 4.7K 1/10W R8075 1-214-808-11 METAL 1/2W R8029 1-216-829-11 METAL CHIP 4.7K 1/10W R8076 1-216-829-11 METAL CHIP 4.7K...
- Page 127 KP-51WS510/57WS510/65WS510 REF.NO. PART NO. DESCRIPTION VALUES REF.NO. PART NO. DESCRIPTION VALUES R8121 1-216-809-11 METAL CHIP 1/10W R8170 1-218-716-11 METAL CHIP 0.50% 1/10W R8123 1-216-821-11 METAL CHIP 1/10W R8171 1-216-809-11 METAL CHIP 1/10W R8124 1-249-377-11 CARBON 0.47 1/4W R8172 1-249-405-11 CARBON...
- Page 128 KP-51WS510/57WS510/65WS510 D SR H2 H1 A component identifi ed by this symbol indicates that it NOTE: The components identifi ed by shading has been carefully factory-selected to satisfy regulations mark are critical for safety. Replace only regarding X-ray radiation. Should replacement be required, with part number specifi...
- Page 129 SWITCH, TACTILE ACCESSORIES AND PACKING 4-041-426-01 BAG, PROTECTION (KP-51WS510 ONLY) 4-076-420-01 BAG, PROTECTION (KP-57WS510/65WS510 ONLY) A-1405-149-A H4 BOARD, MOUNTED 4-094-654-01 CARTON, INDIVIDUAL (KP-51WS510 ONLY) CAPACITOR 4-094-658-01 CARTON, INDIVIDUAL (KP-57WS510 ONLY) C9400 1-126-964-11 ELECT 10µF 4-094-662-01 CARTON, INDIVIDUAL (KP-65WS510 ONLY) C9401...
- Page 130 In an effort to reduce the size of this pdf fi le the tiled schematics are not attached to this Service Manual. To receive a complete set of the tiled schematics for this manual please submit a request to Nita Wardlaw at nita.wardlaw@am.sony.com. COLOR REAR VIDEO PROJECTION...
- Page 132 WARNING Note on Caption Vision This television receiver provides display of television To prevent fire or shock hazard, do not closed captioning in accordance with §15.119 of the FCC expose the projection TV to rain or rules. moisture. Note on convergence adjustment Before you use your projection TV, make sure to adjust CAUTION convergence.
- Page 133 The model and serial numbers are located at the rear of the cabinet, unplug the projection TV immediately and projection TV, below the Sony logo, on the sticker, and have it checked by qualified service personnel before also on the TV box (white label). Record these numbers in operating it further.
-
Page 134: Important Safeguards
IMPORTANT SAFEGUARDS Overloading Do not overload wall outlets, extension cords or convenience receptacles For your protection, please read these instructions beyond their capacity, since this can completely, and keep this manual for future reference. result in fire or electric shock. Carefully observe and comply with all warnings, cautions Always turn the set off when it is not and instructions placed on the set or described in the... - Page 135 KEEP FROM CONTACTING SUCH POWER LINES to the set. Use only a cart or stand OR CIRCUITS AS CONTACT WITH THEM IS recommended by Sony for the ALMOST INVARIABLY FATAL. specific model of TV. No part of the TV set should overhang any edge of Be sure the antenna system is grounded so as to provide the TV cart or stand;...
- Page 136 Lightning Safety Check For added protection for this television receiver during a Upon completion of any service or repairs lightning storm, or when it is left unattended and unused to the set, ask the service technician to for long periods of time, unplug it from the wall outlet perform routine safety checks (as specified and disconnect the antenna.
- Page 137 Contents Introducing the Sony Projection TV Using the Menus Presenting the Sony Projection TV......8 Overview..............51 Using this manual ............9 Using the Video Menu..........52 Using the Audio Menu..........54 Using the Channel Menu ........56 Installing and Connecting the Using the Wide Menu...........58 Projection TV Using the Timer Menu..........60...
-
Page 138: Introducing The Sony Projection Tv
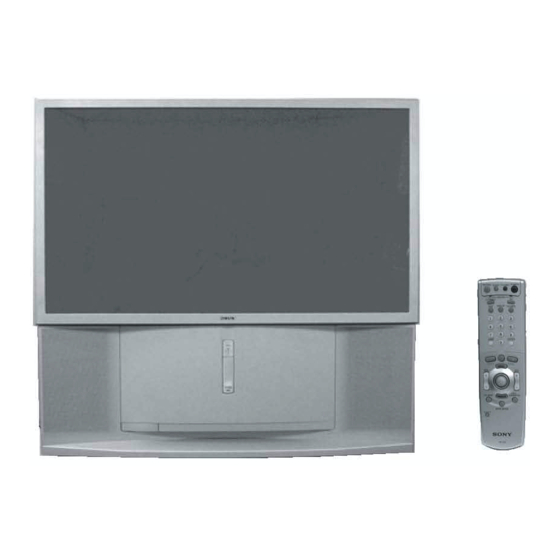
Introducing the Sony Projection TV Presenting the Sony Projection TV Thank you for purchasing the Sony Projection TV. This manual is for models KP-46WT510, KP-51WS510, KP-57WS510, and KP-65WS510. KP-51WS510 is used for illustration purposes, unless indicated otherwise. Features Some of the features that you will enjoy with your new projection TV include: ™... -
Page 139: Using This Manual
Introducing the Sony Projection TV ❑ Wide Screen Mode: Allows you to watch 4:3 normal broadcasts in wide screen mode (16:9 aspect ratio). ❑ Auto Wide: Allows you to select the wide screen mode automatically. ™ ❑ Flash Focus : Allows you to adjust convergence automatically. -
Page 140: Installing And Connecting The Projection Tv
Installing and Connecting the Projection TV Contents The box contains your new projection TV, a remote control and two AA batteries. No peripheral cables are included. If you intend to add additional equipment to your projection TV, please check the hookup instructions for your desired setup before you begin. -
Page 141: Carrying Your Projection Tv
Carrying the projection TV requires four (4) or more people. The projection TV has been equipped with casters for easy movement on a hard surface. Please move your projection TV using the casters. (KP-51WS510, KP-57WS510, and KP-65WS510 only) Handle (KP-65WS510 only) Installing the Projection TV ˚... -
Page 142: Connector Types
Y - Green or B–Y) - Blue or R–Y) - Red CONTROL S cable CONTROL S connections are exclusive to Sony products and allow greater control of all Sony equipment. Push into connection. DVI cable DVI connection for a high-bandwidth copy-protected signal... -
Page 143: Projection Tv Controls And Connectors
Installing and Connecting the Projection TV Projection TV Controls and Connectors Front Panel Menu The front panel menu controls allow access to the on-screen menus without Controls the use of a remote control. Pressing MENU brings up the on-screen menus. The arrow buttons move the on-screen cursor in the menus and by pressing the Select button ( ) selects the menu item. - Page 144 Installing and Connecting the Projection TV Projection TV Rear and Front Panel Rear of projection TV Connectors Front of projection TV...
- Page 145 (VAR/FIX) video component. L (MONO)/R 0 CONTROL S To control other Sony equipment with the projection TV's IN/OUT remote control, connect the CONTROL S IN jack of the equipment to the CONTROL S OUT jack on the projection TV with the CONTROL S cable.
-
Page 146: Basic Connections (Connecting Cable Tv Or Antenna)
Installing and Connecting the Projection TV Basic Connections (Connecting Cable TV or Antenna) Connecting Directly The connection you choose depends on the cable found in your home. Newer homes are equipped with standard coaxial cable (see A); older homes to Cable or an probably have 300-ohm twin lead cable (see B);... - Page 147 Installing and Connecting the Projection TV Cable Box Cable Box and Cable This is the preferred basic cable TV hookup to use if: Connections ❑ Your cable TV company scrambles some channels, but not all of them (pay channels vs. regular cable channels) and you need to use a cable box, and ❑...
- Page 148 Also, set Cable to On in the Channel menu (see page 56). ✍ Setting the Channel Your Sony remote control can be programmed to operate your cable box Fix feature in the Channel (see “Programming the Remote Control” on page 71).
-
Page 149: Connecting A Vcr And Cable
Installing and Connecting the Projection TV Connecting a VCR and Cable Use this hookup if: ❑ You have cable TV that does not require a cable box. Disconnect all power sources before making any connections. Connect the cable TV cable to the VCR’s IN jack. Using a coaxial cable, connect the VCR’s OUT jack to the projection TV’s VHF/UHF jack. -
Page 150: Connecting A Vcr And Cable Box
With this setup you can: ❑ Use the projection TV remote control to change channels on your cable box when the signal is scrambled. To program your Sony remote control to operate your cable box, see “Programming the Remote Control” on page 71. - Page 151 Installing and Connecting the Projection TV YC-15V/30V (not supplied) Coaxial cable VMC-810S/820S (not supplied) VIDEO (yellow) AUDIO-L (white) Cable box S VIDEO AUDIO-R (red) Coaxial cable Rear of projection TV ✍ If your VCR is not equipped with S VIDEO, use a VIDEO cable (yellow) instead of the S VIDEO cable.
-
Page 152: Connecting Two Vcrs For Tape Editing
Installing and Connecting the Projection TV Connecting Two VCRs for Tape Editing If you connect two VCRs, you can record from one VCR to the other while using your projection TV to monitor what is being recorded. Disconnect all power sources before making any connections. Using AUDIO and VIDEO cables, connect the playback VCR’s AUDIO and VIDEO OUT jacks to the recording VCR’s Audio and Video IN jacks. -
Page 153: Connecting A Satellite Receiver
Installing and Connecting the Projection TV Connecting a Satellite Receiver Disconnect all power sources before making any connections. Connect the satellite antenna cable to the satellite receiver’s SATELLITE IN jack. Using AUDIO and S VIDEO cables, connect the satellite receiver’s AUDIO and S VIDEO OUT jacks to the projection TV’s AUDIO and S VIDEO IN jacks. -
Page 154: Connecting A Satellite Receiver With A Vcr
Installing and Connecting the Projection TV Connecting a Satellite Receiver with a VCR Disconnect all power sources before making any connections. Connect the satellite antenna cable to the satellite receiver’s SATELLITE IN jack. Connect the CATV cable to the VCR’s VHF/UHF IN jack. Using a coaxial cable, connect the VCR’s OUT jack to the projection TV’s VHF/UHF jack. -
Page 155: Connecting An Audio Receiver
Installing and Connecting the Projection TV Connecting an Audio Receiver Disconnect all power sources before making any connections. Using audio cables, connect the projection TV’s AUDIO OUT (VAR/FIX) jacks to the audio receiver’s audio LINE IN jacks. Rear of projection TV AUDIO-R AUDIO-L (red) -
Page 156: Connecting A Dvd Player With Component Video Connectors
Installing and Connecting the Projection TV Connecting a DVD Player with Component Video Connectors This is the preferred hookup to use if: ❑ Your DVD player has component (Y, B-Y, R-Y) jacks. Disconnect all power sources before making any connections. Using three separate component video cables, connect the DVD player’s Y, B-Y and R-Y jacks to the Y, P and P... -
Page 157: Connecting A Dvd Player With A/V Connectors
Installing and Connecting the Projection TV Connecting a DVD Player with A/V Connectors Use this hookup if: ❑ Your DVD player does not have component (Y, P ) jacks. ✍ If your DVD player has video component output connectors: for best picture quality use the connection described on page 26. -
Page 158: Connecting A Digital Tv Receiver
Installing and Connecting the Projection TV Connecting a Digital TV Receiver Disconnect all power sources before making any connections. Be sure to read the Using three separate component video cables, connect the Digital TV Set-top box manual. Set-top box’s Y, P and P jacks to the projection TV. -
Page 159: Connecting A Camcorder
Installing and Connecting the Projection TV Connecting a Camcorder For easy connection of the camcorder, the projection TV has front Audio and Video inputs (shown below). However, if you prefer, you can also connect the camcorder to the projection TV’s rear Audio and Video IN jacks. Using AUDIO and S VIDEO cables, connect the camcorder’s Audio and S VIDEO OUT jacks to the projection TV’s AUDIO and S VIDEO IN jacks. -
Page 160: Connecting An Av Receiver
Installing and Connecting the Projection TV Connecting an AV Receiver For greater control of all audio and video equipment, connect an AV receiver. ✍ Change “Video Label” for the VIDEO 1 input to “Receiver” (see page 62). You can connect an AV receiver using both composite video and S Disconnect all power sources before making any connections. -
Page 161: Using The Control S Feature
Using the CONTROL S Feature CONTROL S allows you to control your projection TV system and other Sony equipment with one remote control. In addition to allowing you to control multiple devices with one remote control, the CONTROL S feature... -
Page 162: Setting Up The Projection Tv Automatically
Installing and Connecting the Projection TV Setting Up the Projection TV Automatically After you finish connecting your projection TV, you can run Auto Setup to set up your channels. The Auto Setup screen appears when you turn your projection TV on for the first time after installing it. If you do not want to set up the channels at this time, you can do it later by using the Auto Program feature in the Channel menu (see page 57). -
Page 163: Adjusting The Convergence Automatically - Flash Focus
Installing and Connecting the Projection TV Adjusting the Convergence Automatically – FLASH FOCUS™ – The projection tube image appears on the screen in three colors (red, green and blue). If they do not converge, the color is poor and the picture blurs. Before you use your projection TV, be sure to adjust the convergence. -
Page 164: Adjusting The Convergence Manually
Installing and Connecting the Projection TV Adjusting the Convergence Manually The Manual Convergence feature gives you more control over the TV's picture than the Flash Focus feature, allowing you to fine-tune the color alignment of each section of the TV screen. ✍... - Page 165 Installing and Connecting the Projection TV ❑ Notes on Adjusting For best results, stand about 3 to 5 feet back from the picture when the Convergence adjusting the convergence. Begin with the crosses in the center area of the screen and, once those are adjusted, move to the crosses on the edges Manually of the screen.
-
Page 166: Other Information
75 ohm external terminal for VHF/UHF Television System NTSC, American TV Standard Screen Size (measured diagonally) 46 inches (116.84 cm) (KP-46WT510) 51 inches (129.54 cm) (KP-51WS510) 57 inches (144.78 cm) (KP-57WS510) 65 inches (165 cm) (KP-65WS510) Channel Coverage 2-13 14-69... - Page 167 Dimensions (W × H × D) × 40 × 24 inches (1,086 × 1,017 × 609 mm) (KP-46WT510) 47 × 53 × 25 inches (1,194 × 1,350 × 650 mm) (KP-51WS510) × 54 × 27 inches (1,326 × 1,377 × 690 mm) (KP-57WS510) ×...
Need help?
Do you have a question about the KP-51WS510 and is the answer not in the manual?
Questions and answers