
Related Manuals for Appalachian Stove & Fabricators 52-Bay


Summary of Contents for Appalachian Stove & Fabricators 52-Bay
- Page 1 Appalachian’s 52-Bay INSTALLATION AND OPERATION PROCEDURES FACTORY BUILT FIREPLACE INSERT FREESTANDING - RESIDENTIAL MOBILE HOME MODELS MASONRY FIREPLACE INSERT © 2001 Appalachian Stove & Fabricators, Inc.
-
Page 2: Table Of Contents
VIII. Maintenance............17 1. Ash Removal............17 This manual describes the installation and operation of 2. Care of the Glass..........17 the Appalachian Stove’s Model 52-Bay (360-CR) catalytic 3. Chimney Care.............17 equipped wood heater. This heater meets the United 4. Stove Finish............17 States Environmental Protection Agency’s emission limit 5. -
Page 3: Stove Features And Operating Controls
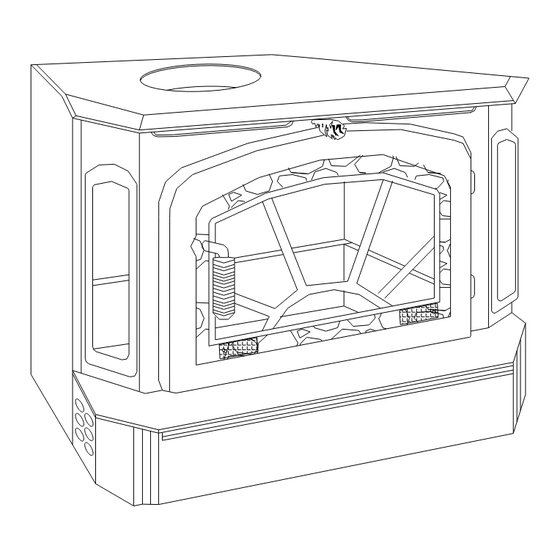
I. FEATURES AND OPERATING CONTROLS 1. Quality steel construction - assures you of years of 8. Warm air deflector - on the top stove edge directs the dependable service. The firebox is constructed of 4 gauge heated air downward and across the floor for maximum plated steel that is completely welded for safe, durable comfort. -
Page 4: Fireplace Insert Installation
II. FIREPLACE INSERT INSTALLATION 1. STOVE COMPONENTS The following components are included with the 52 Bay Fireplace Insert Model: A) 52 Bay Stove B) Blower Assembly C) Adhesive Backed Insulation D) Top Trim Panel (1) E) Side Trim Panels (2) F) Refractory Firebox Liner G) Assembly Screws H) Ash Pan... -
Page 5: Clearance To Combustibles
3. CLEARANCE TO COMBUSTIBLES To ensure a safe installation, the following minimum clearances must be met: A) Minimum of 17” from the stove top to the bottom of the combustible mantel. B) Minimum of 7” from the side wall of the stove to any combustible. -
Page 6: Installing The Stove
6. INSTALLING THE STOVE A) Slide the stove into the fireplace, centering it within the fireplace opening. B) Push the stove back until the trim panels seat firmly against the face of the fireplace, compressing the insulation to accomplish a seal. C) Do not block air inlets on a factory built fireplace. -
Page 7: Freestanding Installation
IV . FREESTANDING INSTALLATION FIGURE 5 STOVE COMPONENTS 2. CLEARANCE TO COMBUSTIBLES 1. STOVE COMPONENTS The 52 Bay stove must be installed with adequate clearance The following components are included with from combustible surfaces to ensure safe operation. Refer to the 52 Bay Fireplace Insert model: FIGURE 6 to determine the applicable clearances for your A) 52 Bay Stove... -
Page 8: Installing The Stove
3. INSTALLING THE STOVE NOTE: Walls or wood frame construction covered with noncombustible veneer, such as brick, are considered COMBUSTIBLE walls. A) If the stove is installed on a combustible floor, a protective pad of 3/8” fireproof millboard, or equivalent, must be placed beneath the pedestal. -
Page 9: Attaching The Stove Pipe
NOTE: The vent opening should be completely inside the pedestal. C) PEDESTAL: Attach using the three (3) drill screws, provided. Drill the holes in the correctly positioned pedestal. The front left corner (blower side of the stove) will not have a screw. The screws will make their own holes in the stove bottom. -
Page 10: (C) Masonry Flue
C) INSTALLATION INTO MASONRY FLUE 1. Masonry flues for use with solid fuel appliances must meet the NATIONAL FIRE PROTECTION ASSOCIATIONS CODE 211 specifications. 2. Connection to the masonry flue is made with a masonry or terra-cotta type thimble cemented firmly in place. -
Page 11: Installing The Brass Trim
V . INSTALLING THE BRASS TRIM 1. STANDARD BRASS (A) Spring damper handle - screw the handle onto the damper rod counter-clockwise. 2. OPTIONAL BRASS A) GOLD PLATED DOOR WEBBING/CAST WEBBING 1. For ease of installation, remove the door from the stove. -
Page 12: Installing The Optional Heat Shielc
VI. INSTALLING THE OPTIONAL HEAT SHIELD 1. Center the heat shield on the back of the stove. 2. Attach the heat shield to the stove using the screws provided. Place the spacer between the heat shield and the stove back. The screw will go through the spacer. -
Page 13: Catalytic Combusters
VII. CATALYTIC COMBUSTORS 1. GENERAL INFORMATION * This catalystic heater may be equipped with a temperature probe to monitor catalyst operation. (A) TAMPER WARNING Proper functioning combustors typically maintain temperatures in excess of 500 degrees Fahrenheit and This wood heater contains a catalytic combustor, which often reach temperatures in excess of 1000 degrees needs periodic inspection and replacement for proper Fahrenheit. -
Page 14: Catalyst Troubleshooting General Info
3. CATALYST TROUBLESHOOTING Creosote accumulation may be caused by one or more of The operation of any wood stove can create problems. the following: a poorly insulated chimney; a non- While the use of a catalyst equipped wood stove will functioning combustor;... -
Page 15: Catalyst Replacement
4. CATALYST REPLACEMENT To replace damaged or non-functioning catalytics follow these steps: A) Loosen the damper tab bolts with 9/16” socket to allow the damper tab to slide back. Lower the cast housing as shown. B) Remove the mixing plate, sealing plate and catalyst. Clean the area where the catalyst sits to remove old gasketing. Inside the stove, check the area where the damper system was located and clean away old gasketing, if necessary. -
Page 16: Stove Operation
VIII. OPERATION Proper operation of your 52 Bay stove will help to 3. REFUELING THE STOVE ensure safe, efficient heating. Review these operating (A) Before attempting to add fuel to the stove, OPEN instructions. the damper control fully by pulling it all the way out. This allows the chimney to carry away the additional 1. -
Page 17: Maintenance
IX. MAINTENANCE 3. CHIMNEY CARE There are areas of the stove and chimney system that When wood is burned slowly, it produces tar and other need periodic maintenance to ensure safe and efficient organic vapors, which combine with expelled moisture operation. -
Page 18: Safety
X. SAFETY XI. WARRANTY The Appalachian Stove is warrantied to be free of defects in 1. If you plan to use an existing chimney with your stove, materials and workmanship for a period of five years from inspect it thoroughly to be sure it is sound and clean. the date of purchase when used in accordance with the Advise your insurance company to be sure your policy recommendations of the manufacturer, with the following... -
Page 21: Warranty Registration
XII. WARRANTY REGISTRATION NAME:________________________________ ADDRESS: ____________________________________________________ ___________________________________________ZIP________________ STOVE MODEL: ______________________________________________ SERIAL NUMBER: ____________________________________________ DATE OF PURCHASE: _________________________________________ DEALER NAME: ______________________________________________ ______________________________________________________________ CITY: __________________________________STATE:________________ HOW DID YOU HEAR ABOUT APPALACHIAN STOVE? ___________ ______________________________________________________________ TYPE OF HEAT YOU PRESENTLY HAVE? ________________________ APPROXIMATE SQUARE FEET OF HOME: ______________________ NUMBER OF ROOMS: _________________________________________ TYPE OF CONSTRUCTION: ___ BRICK...
Need help?
Do you have a question about the 52-Bay and is the answer not in the manual?
Questions and answers
Can you purchase a catalyst shield for a bay 52 free standing wood stove?
How to remove catalytic combustor on Appalachian 52-Bay fireplace insert