
Related Manuals for Appalachian Stove & Fabricators 36-BW


Summary of Contents for Appalachian Stove & Fabricators 36-BW
- Page 1 Appalachian’s 36-BW INSTALLATION AND OPERATION PROCEDURES FIREPLACE INSERT - FREESTANDING © 1995 Appalachian Stove & Fabricators, Inc.
-
Page 2: Table Of Contents
4. Installing the Stove..........6 5. Importance of Proper Draft........6 IV . Freestanding Installation.........7 1. Stove Components..........7 Thank you for purchasing the Model 36-BW stove. 2. Preparation............7 Appalachian Stove welcomes you to the growing ranks of 3. Mounting the Freestanding Kit......8 energy conscious Americans. -
Page 3: Stove Features And Operating Controls
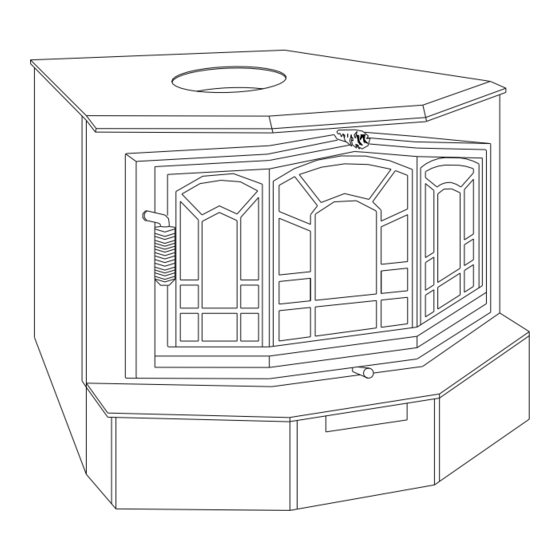
I. FEATURES AND OPERATING CONTROLS Before installing and operating the Model 36-BW stove, 7. Sliding damper - helps increase heat extraction by familiarize yourself with its features. controlling the escape of hot combustion gasses and smoke. The sliding damper is opened by pulling the 1. -
Page 4: Clearances For Installation
FIGURE 2 - FREESTANDING CLEARANCES (Top View) 2. INSTALLATION AS A FREESTANDING UNIT The Model 36-BW stove must be installed with adequate clearance from combustible surfaces to assure safe operation. (FIGURE 2) A) Composition of the wall structure (combustible or non- combustible materials). -
Page 5: Fireplace Insert Installation
G) Ash Pan H) Blower Assembly FIGURE 4 FIREPLACE UNIT STOVE COMPONENTS 2. PREPARATION To facilitate the installation of your Model 36-BW stove: A) Clear the area around the fireplace of furniture, rugs, etc. B) Place drop clothes or other protective materials on the floor and hearth to protect against damage. -
Page 6: Mounting The Trim Panels
NOTE: Be sure the damper opening of the stove lies such as brick, scrap metal, etc. The 36-BW should behind the lintel to prevent overheating the fireplace sit level in the fireplace to function properly. -
Page 7: Freestanding Installation
Proper preparation and planning of the installation will simplify the The following components are process and help achieve effective operation of the unit. included with the 36-BW A) Select the location for the stove installation. The stove should be freestanding model:... -
Page 8: Mounting The Freestanding Kit
3. MOUNTING THE FREESTANDING KIT Tool needed: Drill A) Remove the wooden blocks from the bottom of the stove. A drill may be used to remove the screws. B) Position the pedestal on the bottom of the stove so that the “turned in”... -
Page 9: Installation Into A Factory Built Chimney
After the stove is positioned, suspend a plumb bob over the center of the damper opening to determine the chimney penetration point. The Model 36-BW stove must be connected ONLY to a UL listed class A all fuel burning heating appliance chimney. CAUTION: SOME CHIMNEYS ARE... -
Page 10: Installing The Brass Trim
V . INSTALLING THE BRASS TRIM 1. STANDARD BRASS (A) Spring Damper Handle - screw the handle onto the damper rod counter-clockwise. B) Draft Knob - screw directly into the hole in the draft slide rod. C) Brass Door Trim - factory installed. FIGURE 10 2. -
Page 11: Catalytic Combustors
A non-functioning combustor will result in a loss of The 36-BW was designed to allow the owner to monitor heating efficiency and an increase in creosote and the catalyst temperatures. A small port is located on the emissions. -
Page 12: Catalyst Troubleshooting
3. CATALYST TROUBLESHOOTING Creosote accumulation may be caused by one or more of Operation of any wood stove can create problems. the following: a poorly insulated chimney; a non- While the use of a catalyst equipped wood stove will functioning combustor; types and amounts of wood substantially lessen some of these problems, such as burned;... -
Page 13: Catalyst Replacement
4. CATALYST REPLACEMENT To replace damaged or non-functioning catalytics follow these steps: A) Loosen the damper tab bolts with 9/16” socket to allow the damper tab to slide back and lower the cast housing as shown. B) Remove the mixing plate, sealing plate and catalyst. Clean the area where the catalyst sits to remove old gasketing. Inside the stove, check the area where the damper was located and clean away old gasketing, if necessary. -
Page 14: Fuel Selection
VII. OPERATION Proper operation of your 36-BW stove will help ensure CAUTION: THE ASH PAN DRAWER MUST BE safe, efficient heating. Review these instructions. CLOSED WHEN THE STOVE IS IN OPERATION. 1. FUEL SELECTION For the best results in maintaining and achieving fewer The 36-BW is designed to burn natural wood only. -
Page 15: Catalyst Light-Off When Refueling
6. ACHIEVING CATALYST LIGHT OFF WHEN REFUELING During the refueling and rekindling of a “charcoal phase” fire, operate the stove at a medium or high firing rate for about 10 minutes to ensure that the catalyst reaches approximately 600 degrees F. It is important to periodically monitor the operation of the catalytic combustor to ensure that it is functioning properly and to determine when it needs to be replaced. -
Page 16: Door Gasket Replacement
6. DOOR GASKET REPLACEMENT Remove all old gasket and clean the gasket channel, if necessary. Put high temperature silicone adhesive in the channel and lay the gasket in so that the ends of the gasket meet in the bottom right corner of the door back. -
Page 17: Limited Warranty
X. LIMITED WARRANTY The Appalachian Stove is warrantied to be free of defects in materials and workmanship for a period of five years from the date of purchase when used in accordance with the recommendations of the manufacturer, with the following exceptions: electrical, limited to the warranties offered by those respective manufacturers (1 yr.);... -
Page 19: Warranty Registration
SERIAL NUMBER: ____________________________________________ DATE OF PURCHASE: _________________________________________ DEALER NAME: ______________________________________________ ______________________________________________________________ CITY: __________________________________STATE:________________ HOW DID YOU HEAR ABOUT APPALACHIAN STOVE? ___________ ______________________________________________________________ TYPE OF HEAT YOU PRESENTLY HAVE? ________________________ APPROXIMATE SQUARE FEET OF HOME: ______________________ NUMBER OF ROOMS: _________________________________________ TYPE OF CONSTRUCTION:...
Need help?
Do you have a question about the 36-BW and is the answer not in the manual?
Questions and answers