Table of Contents
Advertisement
Advertisement
Table of Contents

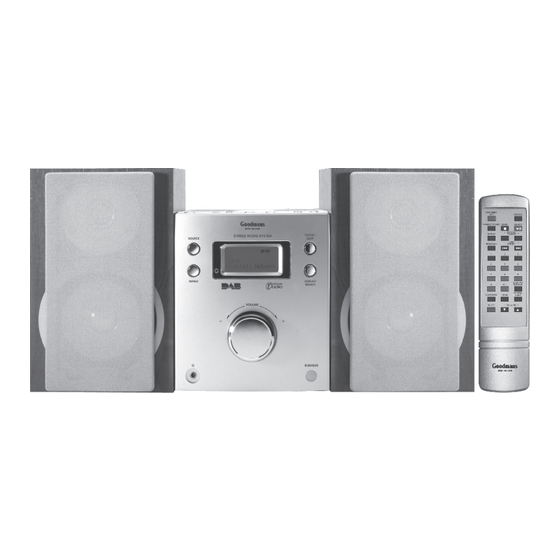
Summary of Contents for Goodmans MICRO1104HDAB
-
Page 2: Table Of Contents
INTRODUCTION This instruction manual is important to you. Please read it. In a short time it shows exactly how to connect, operate, and adjust this unit for best performance. It can save you money. It shows simple things to do and check before you call for help and save the cost of unnecessary service or call out charge. -
Page 3: Important Safeguards
IMPORTANT SAFEGUARDS PRE FITTED MAINS PLUGS For your convenience a mains plug has been fitted to this appliance. For your safety please observe the following information. 1. Should the fuse in the plug fail remove the plug from the wall socket and replace the fuse with a 3 Amp ASTA approved to BS 1362 fuse. -
Page 4: Warnings And Cautions
WARNINGS AND CAUTIONS CAUTION: 1.To reduce the risk of electrical shocks, fire, etc. 2.Do not remove screws, covers or cabinet. 3.Do not expose this appliance to rain or moisture. • Do not block the ventilation opening or holes. (If the ventilation openings or holes are blocked by a newspaper or cloth, etc., the heat may not be able to get out.) •... -
Page 5: Location Of Controls
LOCATION OF CONTROLS 10. SOURCE button Switches unit between DAB, CD or AUX mode. 11. REPEAT button 1. STANDBY / ON Button CD: Cycles Repeat 1 track Repeat all track To toggle the system between Power on and Stand- Repeat off . by status. -
Page 6: Connecting The Unit And Speakers
CONNECTING THE UNIT AND SPEAKERS SPEAKER BOX SPEAKER BOX DAB ANTENNA SOCKET SPEAKER SOCKET 19. AC POWER cord Notes: For optimal sound performance, it is recommended to use 20. AUX in the supplied speakers. 21. DAB antenna socket 22. SPEAKER socket Do not connect more than one speaker to any one pair of +/–... -
Page 7: Remote Control
DAB: Scroll up the items of menu or browse forward REMOTE CONTROL the station. During the unit setting the clock or timer, the key is used to change the setting value. 9. PROGRAM CD: When in stop mode, enter memory registration mode and setting program. -
Page 8: Power Source
• When you press and hold SCROLL/SEARCH DOWN POWER SOURCE or SCROLL/SEARCH UP, the minute indicator AC POWER SUPPLY changes continuously. After all other connections have been made. Connect the • The built-in clock starts work. AC power cord of the system to the wall outlet. The system will be in standby mode. -
Page 9: Using The Cd
When the sound mode is activated, the “EQ” indicator To go to another track lights up on the display. Before or during play, press repeatedly. • : Skips to the beginning of the next tracks. • : Goes back to the beginning of the previous tracks. -
Page 10: Dab - Digital Audio Broadcasts
Full Scan - scans the full range of digital frequencies in DAB - DIGITAL AUDIO BROADCASTS Band III. This may take a minute or more. This section provides information on using your DAB including tuning, selecting a service and altering the 1. - Page 11 If the station has ‘?’ before its name the service is currently Mode: inactive or invalid. If you select a station which has this Displays the mode of the current service Stereo or Mono symbol the DAB tries to tune to that station. If still and the data rate at which the audio signal is being unavailable ‘Service not avail’...
- Page 12 Station Order Manual Tune This option enables you to choose the order in which This option provides a signal quality display which you stations appear as you scroll through the station list. can use to find the best position for your radio and aerial. When you select this option you see the currently selected order on the top row of the display and a scroll list on the bottom.
-
Page 13: Clock/Timer Operation
When you select this option you see the current DRC 1. Press and hold TIMER until “Timer Setting DAB ” value on the top line of the display and a scroll list on the appears on the display. bottom. Press the SCROLL button to scroll through the following options and press the select button to select one: 2. -
Page 14: General Information
How the sleep timer actually works TROUBLE SHOOTING GUIDE The unit automatically turns off after the specified length Check the following guide for problem resolution of time passes. 1. Press and hold CLOCK/SLEEP button on the remote control until “SLEEP OFF” appears on the display. -
Page 15: Specifications
SPECIFICATIONS Power Supply : AC 230V ~ 50HZ Unit Dimensions : 230(L) X 145(W) X167.5(H) mm Speaker Dimensions : 160.5(L) X 134(W) X 208(H) mm : 4.25Kg CD Section Standard : CD CD-R CD-RW Frequency Response : 20Hz-20KHz DAB Section Receiver Band :DAB Band III 174.928 MHZ (5A) 239.200 MHZ(13F) Tuning Range - Local 11A to 12D...


Need help?
Do you have a question about the MICRO1104HDAB and is the answer not in the manual?
Questions and answers