Table of Contents
Advertisement
Quick Links
Advertisement
Table of Contents

Related Manuals for Audiovox AVD400A


Summary of Contents for Audiovox AVD400A
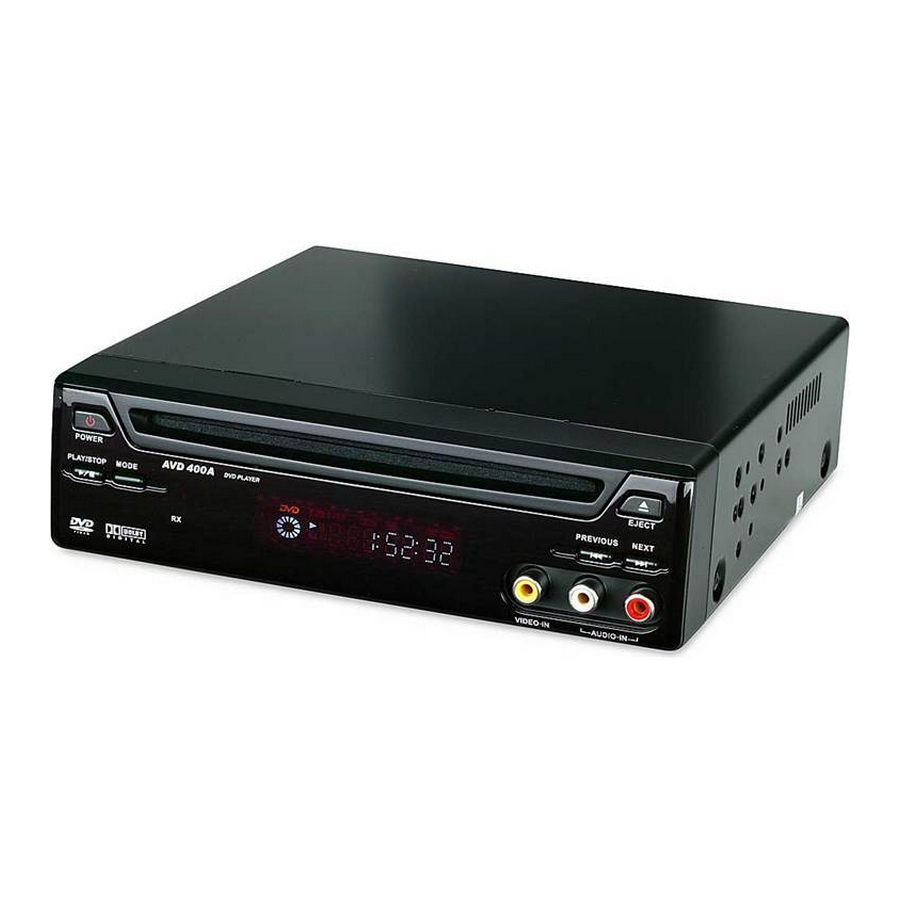
- Page 1 AVD400A SLOT-IN DVD PLAYER AVD400A DVDPLAYER DOLBY Owner’s Manual...
- Page 2 A . Welcome Thank you for choosing the AVD400A DVD Player. The AVD400A is designed to optimize the enjoyment of your favorite DVDs in the mo- bile environment. This DVD Player is constructed to provide years of reliable, trouble-free service. Please read this manual thoroughly prior to operating the player and save it for future reference.
-
Page 3: Safety Precaution
3. CLEANING UNIT When cleaning, make sure the system is unplugged from the power source. Do not use any solvents or cleaning materials. Clean the DVD player using a lightly dampened lint free cloth to wipe the unit. SAFETY PRECAUTION IMPORTANT NOTICE... - Page 4 AVD400A and cause the DVD player to malfunction. If the AVD400A does not operate prop- erly under these conditions leave the AVD400A turned on for at least 30 minutes for the moisture to evaporate.
- Page 5 C. Contents 1 Main Unit 1 Remote control with one Battery 1 12VDC Power Harness 2 Brackets with 4 Screws 1 Remote IR Receiver 1 AV cable (RCA to RCA) 1 Owner's Manual (not shown) AVD400A DVDPLAYER DOLBY AUDIOVOX...
- Page 6 12. Digital Audio Output 13. Audio R Output Jack 14. Audio L Output Jack 15. Video Output Jack 16. S-Video Output Jack 17. External Remote Eye Input 18. DC In 12V Power Supply Connector AVD400A DVDPLAYER DOLBY Figure 1 DOLBY...
- Page 7 E. Remote Control View (Refer to Figure 2) MODE Button POWER Button MENU Button UP/DOWN/ LEFT/RIGHT Button ENTER/PLAY Button VOLUME +/- Buttons NUMERIC KEYPAD 10+ Button TITLE Button AUDIO Button REPEAT Button SUBTITLE Button DISPLAY Button EJECT Button SETUP Button PAUSE Button STOP Button NEXT Button...
- Page 8 Yellow, White (left audio) to White, and Red (right audio) to Red. 4. Connecting an External Video Source ( Refer to Figure 3) To connect a video game or another audio/video source, plug the A/V cable into the A/V input jack on the front of the DVD player. AVD400A DVDPLAYER...
-
Page 9: Basic Operation
G. Playing After connecting power to the unit, press the power button on the main unit momentarily. Insert the disc into the slot on the front of the unit, the unit will load the disc and start playing automatically: If there’s a disc inside the unit, press the POWER button, the unit will start playing automatically. -
Page 10: Display Mode
2. MENU A DVD is divided into sections called titles and chapters. When you play a DVD, a root menu of the disc will appear on the screen of your TV or Monitor. Contents of the menu will vary depending on the disc content. - Page 11 4. ANGLE During playback press ANGLE to change the current angle of discs contain- ing multi-angles. (You can see item 8 in the display change) If the disc has only one angle, you will see ing that no other angles are available. 5.
-
Page 12: Playing Audio Cds
Repeat mode sequence:Repeat Chapter/Repeat Title/Off. 9. PLAYING AUDIO CDS When playing an audio CD the AVD400A will automatically display the disc playback information. The options below show you what information is displayed. Press the ‘DISPLAY’ button to remove the display. -
Page 13: Playing Mp3 Discs
RW discs that have been encoded in MP3 format are compatible with this device. Insert an MP3 Disc, the DVD player will initialize the disc and the directory (folder) will be shown on the monitor. When an MP3 disc is inserted into the unit, the menu screen appears automatically. - Page 14 USING THE REPEAT FEATURE The default mode for the Repeat feature is OFF. Pressing REPEAT consecutively changes the repeat options: • Repeat Single(repeat playback of a song) • Repeat All (repeat playback of all folder) • Off (normal playback) Pressing REPEAT a 3rd time will resume normal playback. As you toggle through the options, the repeat option changes.
- Page 15 12. SETUP Press STOP and then Press ‘SETUP’ to display the Main screen of the SETUP Menu on the screen. Press ‘SETUP’ again to exit the SETUP Menu and the unit will resume it’s last playback mode. Main ‘SETUP’ Menu Screen 1) Select language using the LEFT/RIGHT buttons.
- Page 16 b. Select ‘Subtitle’ using the UP/DOWN buttons, then press ENTER to enter the submenu. Select the ‘Subtitle’ language you desire using the UP/DOWN buttons, then press ENTER to confirm the setting. c. Select “Audio” using the UP/DOWN buttons, then press ENTER to enter the submenu.
- Page 17 2) Select ‘Video’ by using the LEFT/RIGHT buttons, press ENTER to enter the Video set up page. a. Select ‘TV Shape’ using the UP/DOWN buttons, then press ENTER to enter the submenu. Select the aspect ratio you desire using the UP/DOWN buttons, then press ENTER to confirm the setting.
- Page 18 b. Select ‘TV System’ using the UP/DOWN buttons, then press ENTER to enter the submenu. Select the TV System you desire using the UP/ DOWN buttons, then press ENTER to confirm the setting. 3) Select ‘AUDIO’ using the LEFT/RIGHT buttons. a.
- Page 19 b. Select ‘LPCM 48k DS’ using the UP/DOWN buttons, then press ENTER to enter the submenu. Select the LPCM output you desire using the UP/DOWN buttons, then press ENTER to confirm the setting. 4) Select ‘Rating’ by using the LEFT/RIGHT buttons, press ENTER to enter the Rating set up page.
- Page 20 NOTE: For 1st time use the default password is 3308. NOTE: The Default Password is 3308 . This password is always effective even after you have selected your own password and changed it. To avoid the possibility of others using the default password to set the parental level and change the password, you can record this default password in another area and delete it from this manual.
- Page 21 H. Specification Supported media Signal format system DVD Video format Video output Audio output Signal-to-noise ratio Harmonic distortion Dynamic range Wow and flutter Power source Power consumption Operating temperature Storage temperature Operating humidity Dimensions (W x H x D) Weight DVD/CD/MP3/JPEG/CD-R NTSC/PAL Horizontal 720 pixel,...
- Page 22 AUDIOVOX ELECTRONICS CORP. (the Company) warrants to the original retail purchaser of this product that should this product or any part thereof, under normal use and conditions, be proven defective in material or workmanship within 36 months from the date of original purchase, such defect(s) will be repaired or replaced with reconditioned product (at the Company's option) without charge for parts and repair labor.
- Page 23 © 2005 Audiovox Electronics Corp., 150 Marcus Blvd., Hauppauge, N.Y. 11788 128-7393A...
Need help?
Do you have a question about the AVD400A and is the answer not in the manual?
Questions and answers