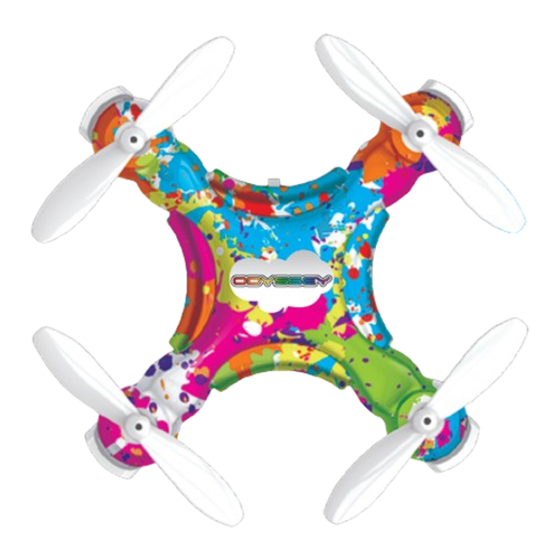
Summary of Contents for Odyssey Micro X-3
- Page 1 Follow us at Extra Parts Available! Visit Odyssey online to order: • Extra Batteries • New rotor blades www.OdysseyToys.com • 4 GB Micro SD Memory Card INSTRUCTION & REFERENCE MANUAL Model no. ODY-5000A...
-
Page 2: Battery Installation
What’s it in the box? Battery Installation 1. Turn the Controller upside-down and open the battery cover by pulling up on the tab above the cover. 2. Install two AAA alkaline batteries (not included), making sure the polarity (“+” and “-”) is correct. WildFX Quadcopter Drone WildFX Controller 3. -
Page 3: Charging The Drone
Charging the Drone CAUTION DO NOT OVERCHARGE THE BATTERY TO AVOID OVERHEATING AND DAMAGE TO THE RECHARGEABLE BATTERY! When charging through the included USB cable: The red LED light illuminates to show the battery is charging. The red LED light goes out to indicate charging is complete. -
Page 4: Getting To Know Your
Getting to know your WildFX Remote Control Auto Take Off Power Indicator Power Indicator • Throttle Stick Auto Take Off • 360º Rotational Yaw • Low-Fast Mode Forward/Reverse Selection Forward/Reverse (Elevator), • Throttle Stick (Elevator), • 360º Rotational Yaw Left/Right (Aileron), Left/Right (Aileron), 3D Flips &... - Page 5 Getting ready for your first flight! Checklist. Check Your Flight Environment • Be sure so secure loose hair and/or clothing. Always fly on a sunny, bright day with as little wind as possible. Flying in extreme • Be sure to have at least 10 feet of clear space in all heat or cold will affect your ability to properly control your drone.
- Page 6 Pairing your drone unit to the remote control. After you’ve fully charged your drone and properly installed the batteries in 2. Turn on the controller. It will beep your controller, you’re ready to use your Wild FX. Before each use, you must once.
- Page 7 How to Start/Stop the Motors How to Start/Stop the Motors 2 sec. 2. To stop the motors (for example, after landing), again push the sticks at the 1. Once your units are paired, you’re ready to arm the motors—to get the propellers same time to the 5 and 7 o’clock positions and hold them there for 2 seconds.
- Page 8 Controlling your WildFX Drone while in flight! Auto Take Off Option 2 – Manual Operation Throttle Stick With the units paired and the motors started and in motion and the propellers spinning, push up on the throttle stick (Diagram shows Left-Handed Mode 2). Depending on weather conditions, have the drone climb to an altitude of about 3-4 feet.
- Page 9 Controlling your WildFX Drone while in flight! Landing Practice maneuvering by using the Directional (right-hand) Stick, going to the Whenever you want to land, press the (A) Auto-Landing button. (This is a handy left and right and forward and backward Reverse button for emergencies—when your Drone gets dangerously close to people or (toward you).
-
Page 10: Mode Settings
Mode Settings Advanced Features You can fly in 3 unique modes: Beginner, Intermediate, or Advanced. Your unit is Fast Rotation (Requires Advanced Mode setting) in Beginner Mode as its default setting. To change flying modes, while the When your Drone is flying at a fixed altitude, push the Throttle Stick to the left to rotate the Drone counter-clockwise, or push the Throttle Stick to the right to rotate the Drone clockwise. -
Page 11: Calibrating The Accelerometer
Trimming the Drone Calibrating the Accelerometer Left Trim Adjustment If your Drone begins to be unstable during flight or drifts quickly to one direction, correct these problems by trimming the unit. 1. Place the Drone on a flat surface. Turn on the Drone and the Push Controller and pair them. - Page 12 How to Fly! How to Fly! TO ASCEND FLIGHT DIRECTION To make your Drone fly To fly forward: Push the direction stick (the right-hand joystick) higher, gradually push the forward. left throttle stick (the To fly backward: Pull the direction left-hand stick) forward stick backward.
-
Page 13: General Care And Maintenance
CAUTIONS & NOTICES General Care & Maintenance Before operating your Pocket Drone for the first time, please read through the • Do not submerge the unit in any liquids. following notices to be aware of proper drone and battery care. •... - Page 14 Use only AAA non-rechargeable battery or AAA rechargeable battery in the controller. Do not mix the two types. 1. Use only the charging USB cord provided by Odyssey Toys for charging. Insert batteries with correct polarity. 2. When charging the battery, if the battery is too hot it means the battery is Do not short circuit the supply terminals.


Need help?
Do you have a question about the Micro X-3 and is the answer not in the manual?
Questions and answers