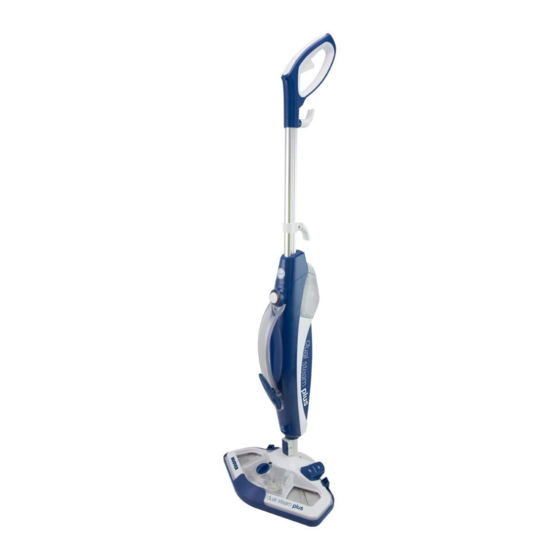
Hoover dual steam plus Manual
2 in 1 steam mop
Hide thumbs
Also See for dual steam plus:
- Owner's manual (12 pages) ,
- Owner's manual (14 pages) ,
- User manual (32 pages)
Advertisement
Table of Contents
- 1 Specifications
- 2 Before You Begin
- 3 Precautionary Measures
- 4 Safety Precautions and Warnings
- 5 Before You Begin Cleaning
- 6 Steam Cleaning Hard Floors
- 7 Refreshing Carpets
- 8 Maintenance
- 9 Empty the Water Tank
- 10 Replacing the Hard Water Filter
- 11 Spare Parts
- 12 Troubleshooting
- 13 Problems and Solutions
- Download this manual
Advertisement
Table of Contents

Subscribe to Our Youtube Channel
Related Manuals for Hoover dual steam plus


Summary of Contents for Hoover dual steam plus
- Page 1 2 IN 1 STEAM MOP...
-
Page 3: Specifications
3631 Dual Steam Plus Congratulations on the purchase of your new HOOVER steam mop. There are many useful features built into your cleaner and we recommend that you carefully read this instruction manual so that you may take best advantage of them. -
Page 4: Before You Begin
Before you Clean, Test First Your Hoover steam mop is designed to clean hard flooring such as ceramic tile, vinyl, laminate, marble, stone and sealed hard wood floors. Use of your steam mop on waxed or some unwaxed floors may result in a diminished gloss. -
Page 5: Safety Precautions And Warnings
Safety Precautions & Warnings Read all instructions before using this stationary position for any period of time. Keep the unit moving while in operation. steam cleaner. Use only as described in this manual. WARNING! To reduce the risk of fire, Use only manufacturer’s recommended electric shock or injury when using an attachments. - Page 6 19. Do not fill the water tank with anything other attachments – use of attachments not than water. Never put additives (such as provided or sold by us may cause fire, electric perfume disinfectant, eucalyptus oil, stain shock or injury. remover or products containing alcohol) in 25.
- Page 7 Assembly Warning: do not plug the steam cleaner into an electrical outlet during assembly. Insert the handle into the machine main body until it locks into position. Assemble the main body of the cleaner to the Floor Head. Important. Please ensure the main body is fully inserted into the mop head until you hear a click sound...
-
Page 8: Before You Begin Cleaning
Instructions for Use (as a steam mop) Before you begin cleaning Remove the clean Water Tank by pressing the Water Tank Release Button. NOTE: The tube which transfers water from the Water Tank to the boiler is weighed down with a brass ball. This is an intentional design to improve efficiency of water usage. -
Page 9: Steam Cleaning Hard Floors
Steam cleaning hard floors NOTE: Always sweep or vacuum the floor prior to use to remove any loose dirt or debris. IMPORTANT: Do not use the cleaner without a Mop Pad attached to the Floor Head. NOTE: Do not use the Carpet Glider when cleaning hard floors. WARNING: Unplug the steamer and let the steamer cool down before you change the accessory. -
Page 10: Refreshing Carpets
Refreshing carpets NOTE: Always sweep or vacuum the carpet prior to use to remove any loose dirt or debris. IMPORTANT: Do not use the cleaner without a Mop Pad and carpet glider attached to the Floor Head. Warning: Unplug the steamer and let the steamer cool down before you change the accessory. Warning: Push the Detergent on/off button OFF before you are going to refresh carpet. - Page 11 Using detergent tank Warning: Unplug the steamer and let the steamer cool down before you change the accessory. Twist Detergent Tank Cap counter-clockwise to open. Add 50ml of recommended detergent (about half of the tank). Fill remaining tank with water. Replace Detergent Tank Cap clockwise and secure.
- Page 12 Instructions for Use (as a handheld steam mop) Warning: Unplug the steamer and let the steamer cool down before you change the accessory. Press the Handle Release Button and remove the steel tube. Remove the Floor Head by pressing the mop head release button. Remove the clean water tank by pressing the Water Tank Release Button.
- Page 13 Pull the cap on the Water Tank to open. Fill the clean Water Tank with cold tap water ONLY. Close the cap and make sure no water leaks before you refit the clean water tank. Ensure the hard water filter is in place before you refill the clean water tank.
- Page 14 Accessories Warning: Unplug the steamer and let the steamer cool down before you change the accessory. Hose Accessory Connector Use on heavily soiled areas such as showers and kitchens. Upholstery / Window Tool & Upholstery Pad Use on windows and mirrors for a smear free clean. Place the upholstery pad on the tool to use on sofas and chair fabrics.
- Page 15 With hose Fit the Hose Connector to steam outlet of the product. Fit the Hose over the Hose Connector on the product. Align the orientation marks with the hole on Hose Connector and rotate clockwise until hose is locked in position and secure. To remove hose, slide Release Button at the base of Hose away from cleaner and rotate counter-clockwise and gently pull away from cleaner.
-
Page 16: Maintenance
Maintenance IMPORTANT: ALWAYS ENSURE THE CLEANER HAS FULLY COOLED DOWN BEFORE PERFORMING ANY MAINTENANCE TASKS. Empty the water tank Unplug the cleaner from the main power and ensure the unit has cooled. Remove the clean Water Tank from the main body of the cleaner. Remove the Water Tank cap. -
Page 17: Replacing The Hard Water Filter
Replacing the hard water filter The cleaner is fitted with a hard water filter. If you live in an area of hard water the filter will discolor over time. Depending on the water hardness and frequency of use, the filter should be changed every 6 months. -
Page 18: Spare Parts
Spare Parts Part Part Number Hard Water Filter 32201371 Brush Set 31155164 Clean Water & Detergent Tank Sets 33155237 Mop Pad 31400231 31400100 Upholstery Pad... -
Page 19: Troubleshooting
- Replace a dry mop pad on the floor - Too much detergent is added to the detergent tank. Please contact Hoover Customer Care: 1300 360 845 (Australia), or (09) 263 7573 (New Zealand) to find your local spare parts provider. - Page 20 2 IN 1 STEAM MOP Conditions of warranty Your Hoover cleaner, in the case of domestic use, has a two years Electrical Home-Aids Pty Ltd is unable to accept responsibility under parts and labour warranty against product defects and failures when...
Need help?
Do you have a question about the dual steam plus and is the answer not in the manual?
Questions and answers
How to purchase new water tank for Hoover Dual plus steam cleaner