Table of Contents
Advertisement
Quick Links
Advertisement
Table of Contents

Related Manuals for Minolta DI1610F


Summary of Contents for Minolta DI1610F
-
Page 1: User Manual
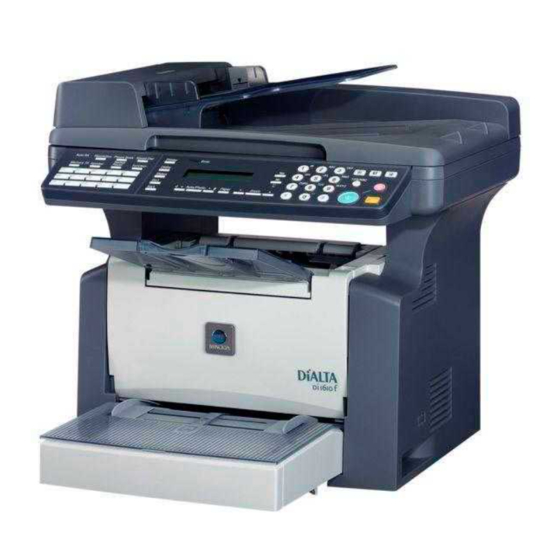
User Manual Di1610f... -
Page 2: Table Of Contents
................1-14 ® What is an ENERGY STAR Product? ........1-14 Explanation of Manual Conventions .........1-15 Explanation of Basic Concepts and Symbols ......1-16 Paper Feeding ................1-16 “Width” and “Length”..............1-17 Paper Orientation ..............1-17 Precaution Installation Precautions..............2-2 Installation Site ................2-2 Power Source ................2-2 Di1610f... - Page 3 Entering Text................3-19 Inputting Example ..............3-20 Copy Paper.................. 3-22 Paper Specifications ..............3-22 Precautions for Loading Paper ..........3-22 Unsuitable Paper ..............3-23 Loading Paper................3-24 Loading Paper into Tray1............3-26 Loading Paper into the Bypass Tray........3-28 Di1610f...
- Page 4 Manually Selecting the Paper Size..........4-4 Specifying the Size and Type of Manually Feed Paper....4-5 Specifying the Zoom Ratio............4-10 Zoom Ratio Settings ..............4-10 Setting the Zoom Ratio.............4-11 Adjusting the Image Density............4-12 Image Density Setting ..............4-12 Setting the Image Density ............4-12 Di1610f...
- Page 5 To fax using batch transmission ..........6-5 Broadcast Transmission ............6-6 To fax using broadcast transmission ......... 6-6 Timer Transmission ..............6-9 To fax using timer transmission ..........6-9 Mailbox Transmission .............. 6-11 To fax using mailbox transmission........... 6-11 Relay Initiation Transmission ........... 6-13 Di1610f...
- Page 6 Selecting the “PAPER SOURCE SETUP” menu......7-15 Specifying the Setting for “TRAY1 PAPER” ......7-16 Specifying the Setting for “TRAY SETTING” ......7-19 Specifying Administrative Settings (“ADMIN. MANAGEMENT” menu)..........7-20 To select the “ADMIN. MANAGEMENT” menu ......7-21 Specifying the Setting for “REMOTE MONITOR”.....7-22 Di1610f...
- Page 7 Specifying the Setting for “RESOLUTION” ......7-58 Specifying the Setting for “DEFAULT TX”........ 7-59 Specifying the Setting for “HEADER”........7-59 Setting Up the Reception............7-60 Selecting the “RX OPERATION” menu........7-61 Specifying the Setting for “MEMORY RX MODE”....7-62 To cancel memory reception............ 7-63 Di1610f...
- Page 8 When the Message “PAPER JAM” Appears......8-13 Clearing a Paper Misfeed in the Machine.........8-13 When the Message “ORIGINAL DOC. JAM” Appears....8-16 Clearing a Paper Misfeed in Auto Document Feeder ....8-16 When the Message “PAPER SIZE ERROR” Appears ....8-19 For Tray1 ..................8-19 Di1610f...
- Page 9 Faxes Cannot Be Sent ............. 8-29 Faxes Cannot Be Received ............. 8-30 Calls Cannot Be Sent............... 8-31 Miscellaneous Specifications ................9-2 Di1610f..................9-2 Auto Document Feeder .............. 9-3 Paper Feed Cassette PF-125 ............ 9-3 Care of the Machine ..............9-4 Cleaning ..................9-4 Housing Cover ................
-
Page 10: Introduction
Introduction... -
Page 11: We Want You To Be A Satisfied Customer
1.1 We Want You to Be a Satisfied Customer We Want You to Be a Satisfied Customer Thank you for choosing the Di1610f. This User Manual describes the functions, operating procedures, precautions, and basic troubleshooting for the Di1610f. Before using this machine, be sure to read the User Manual thoroughly in order to ensure that you use the machine efficiently. -
Page 12: For Canada Users Interference-Causing Equipment Standard (Ices-003 Issue 3)
This device must be used with shielded interface cables. The use of non-shielded cable is likely to result in interference with radio communications and is prohibited under CISPR 22 rules and local rules. Di1610f... -
Page 13: Safety Information
This symbol warns against possible causes of burns. A diagonal line indicates a prohibited course of action. This symbol warns against dismantling the device. A black circle indicates an imperative course of action. This symbol indicates you must unplug the device. Di1610f... -
Page 14: Warning
If you keep on using it as is, a fire or electrical shock could result. Do not throw the toner cartridge or toner into an open flame. The hot toner may scatter and cause burns or other damage. Di1610f... -
Page 15: Caution
Dust that accumulates between the plug terminals may cause a fire. • When unplugging the power cord, be sure to hold onto the plug. Pulling on the power cord could damage the cord, resulting in a fire or electrical shock. Di1610f... -
Page 16: Precautions For Routine Use
• The cooling fan may be activated automatically, but this suggests no problems. • Ni-MH (Nickel Metal Hydride) Batteries are installed inside machine as back up memory batteries. Please dispose according to local, state and federal regulations. Di1610f... -
Page 17: Safety Information
Since radiation emitted by the laser is completely confined within a protective housing, the laser beam cannot escape from the machine during any phase of user operation. This machine is certified as a Class 1 laser product. In other words, the machine does not produce hazardous laser radiation. Di1610f... -
Page 18: Internal Laser Radiation
Therefore, the print head unit should not be opened under any circumstances. Print Head Laser Aperture of the Print Head Unit There is a laser aperture at the location shown above, which must NEVER be viewed directly by the user. Di1610f... -
Page 19: Cdrh Regulation
Usynlig laserstråling ved åbning, når sikkerhedsafbrydere er ude af funktion. Undgå udsættelse for stråling. Klasse 1 laser produkt der opfylder IEC60825 sikkerheds kravene. Dansk: Dette er en halvlederlaser. Laserdiodens højeste styrke er 15 mW og bølgelængden er 770-800 nm. 1-10 Di1610f... -
Page 20: For Finland, Sweden Users
Det här är en halvledarlaser. Den maximala effekten för laserdioden är 15 mW och våglängden är 770-800 nm. VARO! Avattaessa ja suojalukitus ohitettaessa olet alttiina näkymättömälle lasersäteilylle. Älä katso säteeseen. VARNING! Osynlig laserstrålning när denna del är öppnad och spärren är urkopplad. Betrakta ej strålen. Di1610f 1-11... -
Page 21: For Norway Users
1. Dette en halvleder laser. Maksimal effekt till laserdiode er 15 mW og bølgelengde er 770-800 nm. Laser Safety Label A laser safety label is attached to the outside of the machine as shown below. 1-12 Di1610f... -
Page 22: Ozone Release
EN 27779 is equal to or less than 70dB(A). Notice for Ni-MH Batteries Ni-MH (Nickel Metal Hydride) Batteries are installed inside machine as back up memory batteries. Please dispose according to local, state and federal regulations. Di1610f 1-13... -
Page 23: Energy Star
® switch to a “low-power mode” after a period of inactivity. An ENERGY STAR product uses energy more efficiently, saves you money on utility bills and helps protect the environment. 1-14 Di1610f... -
Page 24: Explanation Of Manual Conventions
Text formatted in this style provides additional assistance. ➜ Text formatted in this style describes the action that will ensure the desired results are achieved. [Copy] key The names of keys on the control panel are written as shown above. Di1610f 1-15... -
Page 25: Explanation Of Basic Concepts And Symbols
During printing, paper is supplied from the front side of the machine and fed into the Copy Tray on top with the printed surface of the page facing down. The paper feed direction is shown by the arrows in the diagram below. 1-16 Di1610f... -
Page 26: Width" And "Length
(B), the paper has a vertical or portrait orientation, indicated by either “L” or Crosswise ( If the width (A) of the paper is longer than the length (B), the paper has a horizontal or landscape orientation, indicated by either “C” or Di1610f 1-17... - Page 27 1.6 Explanation of Basic Concepts and Symbols 1-18 Di1610f...
-
Page 28: Precaution
Precaution... -
Page 29: Installation Precautions
A location that is not near any kind of heating devices Power Source The power source requirements are as follows. Voltage Fluctuation: Within ±10% (127V : +6%, -10%) Frequency Fluctuation: Within ±3Hz ❍ Use a power source with as few voltage or frequency fluctuations as possible. Di1610f... -
Page 30: Space Requirements
When lifting the machine, be sure to grab the handles on the left and right sides from the rear of the machine. If the machine is lifted from its front, it may become unbalanced and fall. Di1610f... -
Page 31: Operation Precautions
A negligible amount of ozone is generated during normal operation of this machine. An unpleasant odor may, however, be detected in poorly ventilated rooms during extensive machine operations. ➜ For a comfortable operating environment, it is recommended that the room be well ventilated. Di1610f... -
Page 32: Transporting The Machine
Keep all supplies out of the reach of children. CAUTION Be careful not to spill toner inside the machine or get toner on your clothes or hands. ➜ If your hands become soiled with toner, immediately wash them with soap and water. Di1610f... -
Page 33: Legal Restrictions On Copying
Copyrighted works without permission of the copyright owner In addition, it is prohibited under any circumstances to copy domestic or foreign currencies, or works of art, without permission of the copyright owner. When in doubt about the nature of a document, consult with legal counsel. Di1610f... -
Page 34: Before Making Copies
Before Making Copies... -
Page 35: Available Features
The main copy settings available with this machine are listed below. For details on their operation, refer to the pages indicated. Copies 1-sided copies (p. 4-2) 2in1 copies (p. 4-14) Zoom Ratio Reduced/Full Size/Enlarged (p. 4-10) Finishing Sort (p. 4-15) Di1610f... -
Page 36: Components And Their Functions
3.2 Components and Their Functions Components and Their Functions Main Unit Di1610f Paper Feed Cassette PF-125 (option) Capable of holding up to 500 sheets of paper. 32MB Memory M32-5 (option) Increases the machine’s memory. By increasing the machine’s memory, more pages can be scanned. -
Page 37: Parts Names And Their Functions
Description Auto Document Feeder Automatically feeds one document sheet at a time for scanning. Original Glass Place your original on this glass to allow the machine to scan it. The original is to be placed face down. (p. 3-32) Di1610f... - Page 38 Used for connecting a line to a telephone. (TEL PORT) USB Port For more details, refer to the User Manual for the printer controller. Parallel Port For more details, refer to the User Manual for the printer controller. Fuser Cover Not used Di1610f...
-
Page 39: Auto Document Feeder
Open when clearing an original that has been misfed. (p. 8-16) Cover (Doc. Feed Cover) Document Guide Plate Slide the guide plate to the size of the originals. (p. 3-31) Document Exit Tray Receives originals which have been scanned by the machine. Di1610f... -
Page 40: Inside The Machine
3.3 Parts Names and Their Functions Inside the Machine Part Name Description Imaging Cartridge Generates the print image. The Imaging Cartridge is constructed of both the Drum Cartridge and the Toner Cartridge set into place. Di1610f... -
Page 41: Adjusting The Angle Of The Copy Tray
2. When back curled paper is fed out 3. When clearing a paper misfeed or replacing the Drum Cartridge or Toner Cartridge Note Adjust the Tray Extension and Paper Stopper to fit the size of the paper. For Legal-size paper For A4-size paper For Letter-size paper Di1610f... -
Page 42: Options
Internet Fax & Network By installing the Internet Fax & Network Scan Kit SU-6 together with the Scan Kit Network Interface Card NC-5, the network scanning and Internet faxing functions can be performed. * The internal options are not shown. Di1610f... -
Page 43: Control Panel
• Use to enter the number of copies to be made and any other numeric date. • Used to enter text such as a name. [Copy] key Press to enter Copy mode. The indicator lights up in green to indicate that the machine is in Copy mode. 3-10 Di1610f... - Page 44 • Redials the last number called. • While dialing, used to generate a pause when transferring from an internal to an external line or receiving information services. [Speed Dial] key Used to dial previously programmed fax numbers represented by 3-digit numbers. Di1610f 3-11...
-
Page 45: Display Indications
Displays the currently specified zoom ratio. Number of copies Displays the currently specified number of copy pages and number of copy sets. Image density Displays the currently specified image density. Paper Displays the currently selected paper tray, paper size and paper type. 3-12 Di1610f... -
Page 46: Symbol List
The paper setting for the Manual Bypass Tray is a custom paper size. Dialing A fax number is being dialed. Ringing The machine is being called. Sending The document is being sent. Receiving A document is being received. Di1610f 3-13... - Page 47 A document is queued for polling transmission. transmission In standby for mailbox A document is queued for mailbox reception. reception In standby for memory A document is queued for memory reception or polling reception. reception or polling reception 3-14 Di1610f...
-
Page 48: Turning The Machine On/Off And The Initial Mode
Auto Document Feeder or by placing a document on the Original Glass, and pressing the [Start] key. Pressing the [Start] key at this time will not immediately start the print cycle. You will have to wait for less than 25 seconds (at an ambient temperature of 23°C (73.4°F)). Di1610f 3-15... -
Page 49: Default Settings
Factory default settings Number of copies: 1 Image density: TEXT Auto Zoom ratio: 100% (full size) Paper: Tray1 Finishing: Non-Sort The default settings can be customized from the Utility mode. For more details, refer to “Utility Mode” on page 7-2. 3-16 Di1610f... -
Page 50: Useful Functions
To cancel the Energy Save mode, press any key on the control panel. The length of time before the machine enters the Energy Save mode can be set between 1 min and 240 min. For more details, refer to “Specifying the Setting for “ENERGY SAVE MODE”” on page 7-6. Di1610f 3-17... -
Page 51: Auto Print Start
If the optional Paper Feed Cassette is installed, a maximum of 750 pages can be continuously printed. Tray1 → Tray2 (Paper Feed Cassette) Tray2 (Paper Feed Cassette) → Tray1 Auto tray switching can be disabled. For details, refer to “Setting Up the Paper Sources” on page 7-15. 3-18 Di1610f... -
Page 52: Entering Text
. (period) @_ (underscore) - (hyphen) 1 ABC2abc DEF3def GHI4ghi JKL5jkl MNO6mno PQRS7pqrs TUV8tuv WXYZ9wxyz +&/ =!?( )%[ ]^‘’{ }|˜$ (space) 0 * To switch the input mode of the 10-Key Pad between numbers and letters, press the [123/ABC] key. Di1610f 3-19... -
Page 53: Inputting Example
Press the [6] key 3 times. Press the [3] key 7 times. Ö Press the [ ] key. Press the [3] key 7 times. Press the [4] key 7 times. Press the [2] key 7 times. Press the [3] key 6 times. 3-20 Di1610f... - Page 54 (The character at the cursor’s position is replaced with the new character.) If the same 10-Key Pad is needed to enter two characters in a row, press the [Ö ] key after selecting the first character. (Refer to the above example.) To enter a space, press 10-Key Pad [0]. Di1610f 3-21...
-
Page 55: Copy Paper
Specify the size and type of paper that is loaded. Paper loaded into the Bypass Tray is given priority during feeding. The size of FLS is preset to 330 mm × 210 mm. To change the FLS size, contact a service representative. 3-22 Di1610f... -
Page 56: Unsuitable Paper
Paper of a non-standard shape (not rectangular) Paper that is bound with glue, staples or paper clips Paper with labels attached Paper with ribbons, hooks, buttons, etc. attached Curled or wrinkled paper Art paper, coated paper or inkjet printer paper Di1610f 3-23... -
Page 57: Loading Paper
When loading additional paper, remove any paper remaining in the drawer, place it on top of the new paper, and then align the paper in the stack well before loading it into the drawer. 3-24 Di1610f... - Page 58 <Tray1> Only 1 envelope at a time can be loaded in Tray1 and the Bypass Tray. We recommend replenishing the paper only after all of the paper in the drawer has been used. Di1610f 3-25...
-
Page 59: Loading Paper Into Tray1
Slide the paper guides against the edges of the paper. <When Legal-size paper is installed> ❍ If Legal-size paper is installed, open the door of Tray1. Attach the Bypass Tray in its original position. 3-26 Di1610f... - Page 60 If paper with a different size or type is loaded, various settings must be specified from the “PAPER SOURCE SETUP” menu in the Utility mode. If the settings are not correctly specified, paper size error may occur. For details, refer to “Specifying the Setting for “TRAY SETTING”” on page 7-19. Di1610f 3-27...
-
Page 61: Loading Paper Into The Bypass Tray
When paper is loaded into the Bypass Tray, the paper size and type must be specified, otherwise paper size error may occur. For details, refer to “Specifying the Size and Type of Manually Feed Paper” on page 4-5. 3-28 Di1610f... -
Page 62: Loading Paper Into Tray2 (Optional)
Load the paper into the drawer so that the front side of the paper (the side facing up when the package was unwrapped) faces up. Attach the drawer cover, and then return the drawer for Tray2 to its original position. Di1610f 3-29... -
Page 63: Loading Originals
Coated originals such as carbon-backed paper Up to 25 A4-size document pages can be scanned and stored in the memory at one time. However, if the optional expansion memory is installed, up to 180 scanned pages can be stored. 3-30 Di1610f... -
Page 64: Loading Originals Into The Auto Document Feeder
Slide the front adjustable Document Guide Plate to the size of the originals. Specify the desired copy settings. ❍ “Making Copies” on page 4-1 Press the [Start] key to start feeding and copying the originals from the top page. Di1610f 3-31... -
Page 65: Placing The Original On The Original Glass
While scanning with the Auto Document Feeder or Original Cover open, do not look directly at the bright light that may shine through the Original Glass. Although the light that shines through the Original Glass is bright, it is not a laser beam and, therefore, is not as dangerous. 3-32 Di1610f... -
Page 66: Positioning A Sheet Original
Original Scales. Gently lower the Auto Document Feeder. Specify the desired copy settings. ❍ “Making Copies” on page 4-1 Press the [Start] key to start the print cycle. Di1610f 3-33... -
Page 67: Positioning Highly Transparent Originals
Place a blank sheet of paper of the same size over the original. Gently lower the Auto Document Feeder. Specify the desired copy settings. ❍ “Making Copies” on page 4-1 Press the [Start] key to start the print cycle. 3-34 Di1610f... -
Page 68: Positioning Books
Original Glass. Although the light that shines through the Original Glass is bright, it is not a laser beam and, therefore, is not as dangerous. Specify the desired copy settings. ❍ “Making Copies” on page 4-1 Press the [Start] key to start the print cycle. Di1610f 3-35... -
Page 69: Checking The Machine Status
SPEED DIAL LIST Prints the recipients programmed for the speed dial numbers. KEY SETTING LIST Prints the settings specified for one-touch dial keys. MACHINE STATUS Prints the current machine status. CONFIGRATION PAGE Prints the current machine configuration. 3-36 Di1610f... -
Page 70: Checking The "Total Page" Counts
3.10 Checking the Machine Status Checking the “TOTAL PAGE” Counts Press the [Status] key. Status Press the [Yes] key. Press the [M] and [L] keys to check the “TOTAL COUNT”, “TOTAL SCAN”, “TX PAGES” or “RX PAGES” values. Di1610f 3-37... -
Page 71: Checking The "Tx/Rx Result
If the [No] key is pressed twice while the transmission results are displayed, the main screen appears. ❍ To print the transmission result report, press the [Start] key. After the transmission result report is printed, the main screen appears. 3-38 Di1610f... -
Page 72: To Output A Report/List
The reception/transmission result reports can be checked on screen. For details on viewing the transmission result, refer to “Checking the “TX/RX RESULT”” on page 3-38. The following reports and lists can be printed. Di1610f 3-39... -
Page 73: Tx Result Report
This is a list of documents stored in the memory and waiting to be sent, and documents specified for timer transmission, batch transmission or polling reception. The document number, type of operation being performed, time, recipient/caller name, and number of document pages are printed. 3-40 Di1610f... -
Page 74: Memory Image Print
The group dialing and program dialing settings specified for one-touch dial keys are printed in numerical order of the keys. Machine Status The current machine settings are printed. Configuration Page The list of the printer settings is printed. Di1610f 3-41... -
Page 75: Print Area
For details on using the machine to print from a computer when the printer controller is installed, refer to the User Manual for the printer controller. A: 4 mm (at full size) B: 4 mm (at full size) C: 4 mm (at full size) Paper output direction 3-42 Di1610f... -
Page 76: Making Copies
Making Copies... -
Page 77: Making A Basic Copy
The following procedure describes how to place an original and make a basic copy of it. Position the original. ❍ “Loading Originals” on page 3-30 Select the paper tray. ❍ “Selecting the Paper” on page 4-4 Specify the zoom ratio. ❍ “Specifying the Zoom Ratio” on page 4-10 Di1610f... - Page 78 This will start the print cycle. ❍ To stop the print cycle in mid- operation, press the [Stop] key. ❍ To cancel the print job, press the [C] key or the [Panel Reset] key. ❍ To restart the print cycle, press the [Start] key. Di1610f...
-
Page 79: Selecting The Paper
“Specifying the Zoom Ratio” on page 4-10 ❍ “Adjusting the Image Density” on page 4-12 Using the 10-Key Pad, enter the number of copies to be made, and then press the [Start] key. This will start the print cycle. Di1610f... -
Page 80: Specifying The Size And Type Of Manually Feed Paper
Press the [ ] and [Ö ] keys until the desired paper type is selected. Ö Pressing the [ ] and [ ] keys moves “ ” to select the paper type. To return to the previous message, press the [No] key. Press the [Yes] key. Di1610f... - Page 81 4, the only paper sizes that can be loaded are A4 and Letter. Ö Pressing the [ ] and [ ] keys moves “ ” to select the paper size. To return to the previous message, press the [No] key. Di1610f...
- Page 82 The width can range from 90 mm to 216 mm. When entering the paper size, refer to the diagram on the right side of the screen to check which sides of the paper are the width and the length. Tray 1 Bypass Tray Di1610f...
- Page 83 Using the 10-Key Pad, enter the number of copies to be made, and then press the [Start] key. To change the number of copies to be made, remove the paper from the Bypass Tray and then reload it. Repeat steps 11 and 12. Di1610f...
- Page 84 4.2 Selecting the Paper Note The Bypass Tray can be loaded with a maximum of 1 envelope, 5 OHP transparencies, or 10 sheets of plain paper or cards. Di1610f...
-
Page 85: Specifying The Zoom Ratio
Touching the [M] or [L] key increases or decreases the zoom ratio in × 0.01 increments. and [L] keys The ratio can range from × 0.50 to × 2.00. Full Size This setting makes a copy the same size as the original (× 1.00). 4-10 Di1610f... -
Page 86: Setting The Zoom Ratio
Make the other necessary settings. ❍ “Selecting the Paper” on page 4-4 ❍ “Adjusting the Image Density” on page 4-12 Using the 10-Key Pad, enter the number of copies to be made, and then press the [Start] key. Di1610f 4-11... -
Page 87: Adjusting The Image Density
Select “Photo” when making a copy from an original having large halftone images, such as photos. Setting the Image Density Position the original. ❍ “Loading Originals” on page 3-30 Press the [Auto/Photo] key on the control panel to select the desired mode. 4-12 Di1610f... - Page 88 Make the other necessary settings. ❍ “Selecting the Paper” on page 4-4 ❍ “Specifying the Zoom Ratio” on page 4-10 Using the 10-Key Pad, enter the number of copies to be made, and then press the [Start] key. Di1610f 4-13...
-
Page 89: Making 2In1 Copies
Make the other necessary settings. ❍ “Selecting the Paper” on page 4-4 ❍ “Adjusting the Image Density” on page 4-12 Using the 10-Key Pad, enter the number of copies to be made, and then press the [Start] key. 4-14 Di1610f... -
Page 90: Finishing Copies
Non-Sort: <Copying 1 set> The copies are stacked on top of each other as they are made <Copying 3 sets> Sort: Documents containing multiple <Copying 3 sets> pages can be printed and automatically separated into the individual sets. Di1610f 4-15... -
Page 91: Specifying Sorting
“Selecting the Paper” on page 4-4 ❍ “Specifying the Zoom Ratio” on page 4-10 ❍ “Adjusting the Image Density” on page 4-12 Using the 10-Key Pad, enter the number of print to be made, and then press the [Start] key. 4-16 Di1610f... -
Page 92: Faxing
Faxing... -
Page 93: Dialing
If you wish to change the fax number, press the [No] key, and then enter the correct number. ➜ If the machine is connected to a PBX line and the outside line access number has been specified in the communication settings (p. 7-71), enter “#” to dial the outside line access number automatically. Di1610f... -
Page 94: To Fax Using One-Touch Dialing
Press the [Start] key. The machine automatically starts scanning the document and sending the fax. If the wrong one-touch dial key has been pressed, press the [Stop] key either while dialing or sending the fax to stop the transmission. Di1610f... -
Page 95: To Fax Using Speed Dialing
10-Key Pad to enter the 3-digit speed dial number. Has the wrong speed dial number been entered? ➜ Press the [No] key, and then enter the correct number. Press the [Start] key to begin scanning and sending the fax. Di1610f... -
Page 96: To Fax Using Group Dialing
Press the [Start] key. The machine automatically starts scanning the document and sending the fax. If the wrong one-touch dial key has been pressed, press the [Stop] key either while dialing or sending the fax to stop the transmission. Di1610f... -
Page 97: To Fax Using Program Dialing
If the wrong one-touch dial key has been pressed, press the [Stop] key either while dialing or sending the fax to stop the operation. To cancel a timer transmission, select “CANCEL RESERV.” from the “FUNCTION” menu (p. 6-18). Di1610f... -
Page 98: To Fax Using The Phone Book
Search for the desired recipient by entering part (or all) of the name programmed. For details on performing the search, refer to “To search the phone book” on page 5-8. Press the [Start] key to begin scanning and sending the fax. Di1610f... -
Page 99: To Search The Phone Book
➜ After “(0)” is displayed, the screen allowing you to enter the search text appears. To narrow down the search results even further, press the [Yes] key, and then enter more search text. Press the [Yes] key. Di1610f... -
Page 100: To Redial The Last Recipient Called
Load the document into the Automatic Document Feeder. If necessary, change the “Resolution” setting (p. 5-10). Press the [Redial/Pause] key. The fax number of the last recipient called is displayed. Press the [Start] key to begin scanning and sending the fax. Di1610f... -
Page 101: Transmission Settings
If the Half Tone or Super Fine + Half Tone setting is specified, the fax may be sent with a decreased resolution depending on the quality of the recipient’s fax machine or whether the document size is larger than the paper loaded in the recipient’s fax machine. 5-10 Di1610f... -
Page 102: Basic Faxing
Press the [Start] key to begin scanning and sending the fax. ❍ To stop the transmission, press the [Stop] key. Once transmission is finished, a beep is sounded. If the fax could not be sent, the transmission result report is printed (p. 7-74). Di1610f 5-11... -
Page 103: To Fax Documents Positioned On The Original Glass
Lift open the Automatic Document Feeder, and then position the document to be faxed on the Original Glass. ❍ Position the document face down. ❍ Align the document on the scales above and to the left of the Original Glass. 5-12 Di1610f... -
Page 104: If The Memory Becomes Full While Scanning Fax Documents
If the transmission is cancelled, the data for the scanned pages is deleted. After the other fax transmission or reception is finished, check the amount of memory available, and then try sending the fax again. Di1610f 5-13... -
Page 105: Checking Transmission Results
If the [No] key is pressed twice while the transmission results are displayed, the main screen appears. ❍ To print the transmission result report, press the [Start] key. After the transmission result report is printed, the main screen appears. 5-14 Di1610f... -
Page 106: Fax Transmission/Reception Methods
Fax Transmis- sion/Reception Methods... -
Page 107: Transmission Methods
Load the document face up. If necessary, change the “Resolution” setting (p. 5-10). Using the 10-Key Pad, enter the fax number of the recipient. ❍ The fax number of a previously programmed recipient can also be specified. Refer to “Dialing” on page 5-2. Di1610f... -
Page 108: Manual Transmission
If the fax is to be sent after talking on the telephone, use the Automatic Document Feeder. Manual transmission is possible if a telephone (either purchased or rented) is connected to the TEL port of this machine. Even when pulse dialing is being used, entering “ ” produces signals for tone dialing. Di1610f... -
Page 109: To Send A Fax Manually
Replace the telephone receiver. ❍ To stop the transmission, press the [Stop] key. If the [Speaker] key is pressed instead of picking up the telephone receiver, the speaker can be used for manual transmission in the same way as described above. Di1610f... -
Page 110: Batch Transmission
Press the one-touch dial key programmed with the desired batch transmission settings. The machine automatically starts scanning the document, then automatically sends it at the specified time. To cancel a batch transmission, select “CANCEL RESERV.” from the “FUNCTION” menu (p. 6-18). Di1610f... -
Page 111: Broadcast Transmission
Position the document to be faxed. If necessary, change the “Resolution” setting (p. 5-10). Press the [Function] key. Press the [1] key from the 10-Key Pad. Press the [Function] key once to select “BROADCAST”, and then press the [Yes] key. Di1610f... - Page 112 Press the [No] key to delete the current selection. (This is valid only before the recipient is set by pressing the [Yes] key.) Press the [Start] key. A message appears, allowing you to select whether or not to check the recipients. Di1610f...
- Page 113 Check the recipient, and then press the [Yes] key. ❍ To delete the displayed recipient, press the [No] key. After all recipients have been checked, “Fin.=START” appears in the display. Press the [Start] key to begin scanning and sending the fax. Di1610f...
-
Page 114: Timer Transmission
If necessary, change the “Resolution” setting (p. 5-10). Press the [Function] key. Press the [2] key from the 10-Key Pad. Press the [Function] key twice to select “TIMER TX”, and then press the [Yes] key. A screen appears, allowing you to specify the transmission time. Di1610f... - Page 115 [No] key, and then enter the correct time. Specify the fax number of the recipient. ❍ Refer to “Dialing” on page 5-2. Press the [Start] key. The machine scans the document, then enters transmission standby mode. 6-10 Di1610f...
-
Page 116: Mailbox Transmission
Press the [Function] key 3 times to select “MAILBOX TX”, and then press the [Yes] key. Specify the recipient, and then press the [Yes] key. ❍ Refer to “Dialing” on page 5-2. A screen appears, allowing you to specify the mailbox ID. Di1610f 6-11... - Page 117 ❍ If you wish to correct the password, press the [No] key, and then enter the new number. Press the [Start] key to begin scanning and sending the fax. 6-12 Di1610f...
-
Page 118: Relay Initiation Transmission
Position the document to be faxed. If necessary, change the “Resolution” setting (p. 5-10). Press the [Function] key. Press the [7] key from the 10-Key Pad. Press the [Function] key 7 times to select “RELAY INITIATE”, and then press the [Yes] key. Di1610f 6-13... - Page 119 ❍ If you wish to correct the password, press the [No] key, and then enter the new number. Press the [Start] key to begin scanning and sending the fax. 6-14 Di1610f...
-
Page 120: Polling Transmission
❍ To allow only one polling transmission request, then delete the document from the memory, select “SINGLE”. ❍ To allow multiple polling transmission requests, select “MULTI”. The document is stored in the memory until it has been deleted. Di1610f 6-15... - Page 121 If you do not wish to set a password, continue with step ❍ The password can be set to any number between 0000 and 9999. Press the [Start] key. The machine scans the document, then enters standby mode. 6-16 Di1610f...
-
Page 122: To Delete A Document From The Polling Transmission Setup
[Yes] key. Press the [No] key to delete from the memory the document set for polling transmission. ❍ To keep the polling transmission setting, press the [Yes] key. Press the [No] key twice to return to the main screen. Di1610f 6-17... -
Page 123: Cancelling (Deleting) A Document Queued In The Memory For Transmission
POLL-RX: Polling reception RELAY: Relay initiation transmission FORWARD: Fax forwarding ❍ To check the recipient of the currently displayed transmission job, press the [Ö ] key. After checking, press the [Yes] key to return to the previous screen. 6-18 Di1610f... - Page 124 “CANCEL RESERV.” appears in the display. To delete another queued job, press the [8] key, and then repeat steps 3 and 4. ❍ If you are finished deleting jobs, press the [No] key to return to the main screen. Di1610f 6-19...
-
Page 125: Reception Methods
Memory reception is set using the corresponding Utility mode function. For details on changing the setting, refer to “Specifying the Setting for “MEMORY RX MODE”” on page 7-62. 6-20 Di1610f... -
Page 126: Mailbox Reception
Press the [Function] key 4 times to select “PRINT MAILBOX RX”, and then press the [Yes] key. A screen appears, allowing you to enter the mailbox ID. Using the 10-Key Pad, enter the 4- digit mailbox ID, and then press the [Yes] key. Di1610f 6-21... -
Page 127: Polling Reception
Refer to step 5 of “To fax using broadcast transmission” on page 6-6. To enter the polling ID and password, press the [M] key. ❍ If there is no need to enter a polling ID and password, skip to step 7. 6-22 Di1610f... - Page 128 Check the fax numbers, and then press the [Yes] key. ❍ To delete the displayed fax number, press the [No] key. ❍ After all fax numbers have been checked, “Fin.=START” appears in the display. Press the [Start] key. Di1610f 6-23...
-
Page 129: Using F Codes
Ask your partner, if their machine can process F code transmissions. If one-touch dial keys or speed dial numbers are programmed with F codes (SUB and SID), the appropriate F code can quickly be transmitted to the recipient/caller. 6-24 Di1610f... -
Page 130: Using Mailboxes
Refer to “Specifying the Setting for “MAILBOX”” on page 7-55. If one-touch dial keys or speed dial numbers are programmed with F codes, the appropriate F code can quickly be transmitted. Refer to “Mailbox Transmission” on page 6-11. Di1610f 6-25... -
Page 131: Specifying F Codes
Programming F codes F codes can be specified when programming one-touch dial keys or speed dial numbers. For details on programming F codes, refer to “Setting Up the Fax Registration” on page 7-31 in “7 Using the Utility Mode”. 6-26 Di1610f... -
Page 132: Using The Utility Mode
Using the Utility Mode... -
Page 133: Utility Mode
For details, refer to the User Manual for the Network Interface Card (NC-5). E-MAIL SETTING1 Available only if the Internet Fax & Network Scan Kit SU-6 is installed. For details, refer to the User Manual for the Network Interface Card E-MAIL SETTING2 (SU-6). SCAN SETTING Di1610f... -
Page 134: Specifying The Machine Settings
• The manufacturer’s default setting is “LOW”. INITIAL MODE This function can be used to set the mode (Copy mode or Fax mode) that the machine starts up in or returns to after the Control Panel is reset. • The manufacturer’s default setting is “COPY”. Di1610f... -
Page 135: Selecting The "Machine Setting" Menu
5 PRINT DENSITY 6 LCD CONTRAST 7 LANGUAGE 8 LAMP OFF TIME 9 BUZZER VOLUME 0 INITIAL MODE To quit changing the machine settings, press the [No] key. “STOP SETTING?” appears. Press the [Yes] key to quit changing the settings. Di1610f... -
Page 136: Specifying The Setting For "Auto Panel Reset
If “OFF” was selected, “MACHINE SETTING” appears again. Note If “OFF” was selected, the Auto Panel Reset function is disabled. Press the [ ] and [Ö ] keys to select the desired time period (min). Press the [Yes] key. Di1610f... -
Page 137: Specifying The Setting For "Energy Save Mode
Energy Save mode. The timer can be set between 1 min and 240 min. If an incorrect value is entered, press the [No] key, and then enter the correct value. Press the [Yes] key. Di1610f... -
Page 138: Specifying The Setting For "Density (Adf)
Specifying the Setting for “DENSITY (ADF)” Select the “DENSITY (ADF)”. ❍ Refer to “Selecting the “MACHINE SETTING” menu” on page 7-4. Press the [ ] and [Ö ] keys to select either “Mode 1” or “Mode 2”. Press the [Yes] key. Di1610f... -
Page 139: Specifying The Setting For "Density (Book)
Specifying the Setting for “DENSITY (BOOK)” Select the “DENSITY (BOOK)”. ❍ Refer to “Selecting the “MACHINE SETTING” menu” on page 7-4. Press the [ ] and [Ö ] keys to select either “Mode 1” or “Mode 2”. Press the [Yes] key. Di1610f... -
Page 140: Specifying The Setting For "Print Density
Select the “PRINT DENSITY”. ❍ Refer to “Selecting the “MACHINE SETTING” menu” on page 7-4. Press the [ ] and [Ö ] keys to select one of the seven print density levels between “LIGHT” and “DARK”. Press the [Yes] key. Di1610f... -
Page 141: Specifying The Setting For "Lcd Contrast
Select the “LCD CONTRAST”. ❍ Refer to “Selecting the “MACHINE SETTING” menu” on page 7-4. Press the [ ] and [Ö ] keys to select one of the four display contrast levels between “LIGHT” and “DARK”. Press the [Yes] key. 7-10 Di1610f... -
Page 142: Specifying The Setting For "Language
7.2 Specifying the Machine Settings Specifying the Setting for “LANGUAGE” Select the “LANGUAGE”. ❍ Refer to “Selecting the “MACHINE SETTING” menu” on page 7-4. Press the [M] and [L] keys to select the desired language. Press the [Yes] key. Di1610f 7-11... -
Page 143: Specifying The Setting For "Lamp Off Time
Specifying the Setting for “LAMP OFF TIME” Select the “LAMP OFF TIME”. ❍ Refer to “Selecting the “MACHINE SETTING” menu” on page 7-4. Press the [ ] and [Ö ] keys to select either “Mode 1” or “Mode 2”. Press the [Yes] key. 7-12 Di1610f... -
Page 144: Specifying The Setting For "Buzzer Volume
Specifying the Setting for “BUZZER VOLUME” Select the “BUZZER VOLUME”. ❍ Refer to “Selecting the “MACHINE SETTING” menu” on page 7-4. Press the [ ] and [Ö ] keys to set the buzzer volume to “HIGH”, “LOW” or “OFF”. Press the [Yes] key. Di1610f 7-13... -
Page 145: Specifying The Setting For "Initial Mode
Specifying the Setting for “INITIAL MODE” Select the “INITIAL MODE”. ❍ Refer to “Selecting the “MACHINE SETTING” menu” on page 7-4. Press the [ ] and [Ö ] keys to select either “COPY” or “FAX”. Press the [Yes] key. 7-14 Di1610f... -
Page 146: Setting Up The Paper Sources
❍ The PAPER SOURCE SETUP functions are as follows: 1 TRAY1 PAPER 2 TRAY SETTING To quit setting up the paper sources, press the [No] key. “STOP SETTING?” appears. Press the [Yes] key to quit changing the settings. Di1610f 7-15... -
Page 147: Specifying The Setting For "Tray1 Paper
3, the only paper sizes that can be loaded are A4 L and Letter L. Ö Pressing the [ ] and [ ] keys moves “ ” to select the paper size. To return to the previous message, press the [No] key. 7-16 Di1610f... - Page 148 90 mm to 216 mm. When entering the paper size, refer to the diagram on the right side of the screen to check which sides of the paper are the width and the length. Press the [Yes] key. Di1610f 7-17...
- Page 149 Using the 10-Key Pad, enter the length (Y) of the loaded paper. 140-356 ❍ To clear the entered value, press the [No] key. Note The paper width can range from 140 mm to 356 mm. Press the [Yes] key. 7-18 Di1610f...
-
Page 150: Specifying The Setting For "Tray Setting
A tray can be selected only if the optional Paper Feed Cassette is installed. Press the [Yes] key. Press the [ ] and [Ö ] keys to select either “FIXED” (auto tray switching disabled) or “CONTINUOUS” (auto tray switching enabled). Press the [Yes] key. Di1610f 7-19... -
Page 151: Specifying Administrative Settings ("Admin. Management" Menu)
Note The registering and setup of the administrator access number should be performed by the service representative. For details, contact the service representative. The administrator of this machine should be sure not to lose the administrator access number. 7-20 Di1610f... -
Page 152: To Select The "Admin. Management" Menu
[Yes] key. If, at any time, you wish to quit setting an “ADMIN. MANAGEMENT” function, press the [No] key. When the message “STOP SETTING?” appears, press the [Yes] key to quit. Di1610f 7-21... -
Page 153: Specifying The Setting For "Remote Monitor
7.4 Specifying Administrative Settings (“ADMIN. MANAGEMENT” menu) Specifying the Setting for “REMOTE MONITOR” Press the [ ] and [Ö ] keys to select either “LIMITED” or “FULL” or “OFF”. Press the [Yes] key. 7-22 Di1610f... -
Page 154: Specifying Copy Settings
• The factory default setting is “NON”. RESOLUTION The default resolution when scanning with the Auto Document Feeder × × can be set to “600 dpi 300 dpi” or “600 dpi 600 dpi”. × • The factory default setting is “600 dpi 300 dpi”. Di1610f 7-23... -
Page 155: Selecting The "Copy Setting" Menu
2 DENSITY PRIORITY 3 DENSITY LEVEL (A) 4 DENSITY LEVEL (M) 5 OUTPUT PRIORITY 6 RESOLUTION To quit changing the copy settings, press the [No] key. “STOP SETTING?” appears. Press the [Yes] key to quit changing the settings. 7-24 Di1610f... -
Page 156: Specifying The Setting For "Paper Priority
Specifying the Setting for “PAPER PRIORITY” Select the “COPY SETTING”. ❍ Refer to “Selecting the “COPY SETTING” menu” on page 7-24. Press the [ ] and [Ö ] keys to select either “TRAY1” or “TRAY2”. Press the [Yes] key. Di1610f 7-25... -
Page 157: Specifying The Setting For "Density Priority
Specifying the Setting for “DENSITY PRIORITY” Select the “DENSITY PRIORITY”. ❍ Refer to “Selecting the “COPY SETTING” menu” on page 7-24. Press the [ ] and [Ö ] keys to select either “AUTO”, “MANUAL” or “PHOTO”. Press the [Yes] key. 7-26 Di1610f... -
Page 158: Specifying The Setting For "Density Level (A)
Select the “DENSITY LEVEL (A)”. ❍ Refer to “Selecting the “COPY SETTING” menu” on page 7-24. Press the [ ] and [Ö ] keys to select one of the three print density levels between “LIGHT” and “DARK”. Press the [Yes] key. Di1610f 7-27... -
Page 159: Specifying The Setting For "Density Level (M)
Select the “DENSITY LEVEL (M)”. ❍ Refer to “Selecting the “COPY SETTING” menu” on page 7-24. Press the [ ] and [Ö ] keys to select one of the nine print density levels between “LIGHT” and “DARK”. Press the [Yes] key. 7-28 Di1610f... -
Page 160: Specifying The Setting For "Output Priority
Specifying the Setting for “OUTPUT PRIORITY” Select the “OUTPUT PRIORITY”. ❍ Refer to “Selecting the “COPY SETTING” menu” on page 7-24. Press the [ ] and [Ö ] keys to select either “NON” or “SORT”. Press the [Yes] key. Di1610f 7-29... -
Page 161: Specifying The Setting For "Resolution
Specifying the Setting for “RESOLUTION” Select the “RESOLUTION”. ❍ Refer to “Selecting the “COPY SETTING” menu” on page 7-24. Press the [ ] and [Ö ] keys to select either “600 × 300” or “600 × 600”. Press the [Yes] key. 7-30 Di1610f... -
Page 162: Setting Up The Fax Registration
MAILBOX This function can be used to specify mailbox IDs in order to receive faxes with mailbox reception only if the mailbox ID sent by the caller matches the mailbox ID set on this machine. Di1610f 7-31... -
Page 163: Selecting The "Fax Registration" Menu
4 PROGRAM DIAL 5 BATCH TX 6 MAILBOX If, at any time, you wish to quit programming, changing or deleting a “FAX REGISTRATION” function, press the [No] key. When the message “STOP REGISTRATION?” appears, press the [Yes] key to quit. 7-32 Di1610f... -
Page 164: Setting Up One-Touch Dialing ("One-Touch Dial" Function)
4. ❍ If you wish to change the fax number, press the [No] key, and then enter the correct number. ❍ For details on F codes (SUB and SID), refer to “Using F codes” on page 6-24. Di1610f 7-33... - Page 165 Using the [ ] and [Ö ] keys, select the desired modem speed. Press the [Yes] key. The settings are registered. To program another one-touch dial key, repeat steps 3 through 11. Press the [No] key to finish programming. The “FAX REGISTRATION” menu appears again. 7-34 Di1610f...
-
Page 166: To Change/Delete A Programmed One-Touch Dial Key
If the [Yes] key is pressed, the corresponding settings programmed in group dialing or program dialing are changed. Di1610f 7-35... - Page 167 7-33. When you are finished making changes, press the [Yes] key. To change the settings of another one-touch dial key, repeat steps 3 through 7. Press the [No] key to return to the “FAX REGISTRATION” menu. 7-36 Di1610f...
-
Page 168: Specifying The Setting For "Speed Dial
If a SUB will not be entered, press the [Yes] key after entering the fax number, and then skip to step 8. ❍ If you wish to change the fax number, press the [No] key, and then enter the correct number. Di1610f 7-37... - Page 169 Using the [ ] and [Ö ] keys, select the desired modem speed. Press the [Yes] key. The settings are registered. To program another speed dial number, repeat steps 3 through 11. Press the [No] key to finish programming. The “FAX REGISTRATION” menu appears again. 7-38 Di1610f...
-
Page 170: To Change/Delete A Programmed Speed Dial Number
If the [No] key is pressed, the corresponding settings programmed in group dialing or program dialing are deleted. ❍ If a speed dial number used in group dialing or program dialing is deleted, it is also deleted from the corresponding group dialing or program dialing. Di1610f 7-39... - Page 171 7-33. When you are finished making changes, press the [Yes] key. ❍ To change the settings of another speed dial number, repeat steps 3 through 7. Press the [No] key to return to the “FAX REGISTRATION” menu. 7-40 Di1610f...
-
Page 172: Specifying The Setting For "Group Dial
Press the [No] key, and then specify the correct recipient. Press the [Yes] key, and then specify another recipient. ❍ Repeat steps 5 and 6 until all recipients have been specified. ❍ A maximum of 50 different fax numbers can be specified as one group. Di1610f 7-41... -
Page 173: To Change/Delete A Programmed Group Of Fax Numbers
Press the [No] key. Using the [ ] and [Ö ] keys, select either “EDIT” or “DELETE”, and then press the [Yes] key. ❍ If “EDIT” was selected, the group name is displayed. (Continue with step 6.) 7-42 Di1610f... - Page 174 The next fax number is displayed. When you are finished making changes, press the [Start] key. To change the settings of another group of fax numbers, repeat steps 3 through 8. Press the [No] key to return to the “FAX REGISTRATION” menu. Di1610f 7-43...
-
Page 175: Specifying The Setting For "Program Dial
1 BROADCAST 2 TIMER TX 3 MAILBOX TX 6 POLLING RX 7 RELAY INITIATE Follow the instructions for the selected function. ❍ “To fax using broadcast transmission” on page 6-6 ❍ “To fax using timer transmission” on page 6-9 7-44 Di1610f... -
Page 176: To Change/Delete A Programmed Broadcast Transmission
[Yes] key. ❍ If “EDIT” was selected, the specified recipients are displayed in order. (Continue with step 6.) ❍ If “DELETE” was selected, the program dialing settings are deleted and the “FAX REGISTRATION” menu appears again. Di1610f 7-45... -
Page 177: To Change/Delete A Programmed Timer Transmission
Refer to “Selecting the “FAX REGISTRATION” menu” on page 7-32. Press the [4] key from the 10-Key Pad to select “PROGRAM DIAL”. Press the one-touch dial key ([12] through [15]) programmed with the timer transmission that you wish to change or delete. Press the [No] key. 7-46 Di1610f... -
Page 178: To Change/Delete A Programmed Mailbox Transmission
Other program dialing settings can be changed. Press the [No] key to return to the “FAX REGISTRATION” menu. To change/delete a programmed mailbox transmission Select the “FAX REGISTRATION” menu. ❍ Refer to “Selecting the “FAX REGISTRATION” menu” on page 7-32. Di1610f 7-47... - Page 179 Press the [Yes] key. The mailbox ID is displayed. To change the mailbox ID, press the [No] key, and then use the 10- Key Pad to enter the new ID. Press the [Yes] key. The password is displayed. 7-48 Di1610f...
-
Page 180: To Change/Delete A Programmed Polling Reception
[Yes] key. ❍ If “EDIT” was selected, the specified recipients are displayed in order. (Continue with step 6.) ❍ If “DELETE” was selected, the program dialing settings are deleted and the “SELECT REGIST.KEY” screen appears again. Di1610f 7-49... -
Page 181: To Change/Delete A Programmed Relay Initiation Transmission
Refer to “Selecting the “FAX REGISTRATION” menu” on page 7-32. Press the [4] key from the 10-Key Pad to select “PROGRAM DIAL”. Press the one-touch dial key ([12] through [15]) programmed with the relay initiation transmission that you wish to change or delete. Press the [No] key. 7-50 Di1610f... - Page 182 To change the password, press the [No] key, and then use the 10- Key Pad to enter the new password. Press the [Yes] key. Other program dialing settings can be changed. Press the [No] key to return to the “FAX REGISTRATION” menu. Di1610f 7-51...
-
Page 183: Specifying The Setting For "Batch Tx
A screen appears, allowing you to specify the transmission time. Was the one-touch dial key that was pressed one programmed for group dialing, program dialing, or combination dialing, or not programmed at all? ➜ An error message appears. 7-52 Di1610f... -
Page 184: To Change The Batch Transmission Setting
Press the one-touch dial key programmed with the batch transmission setting that you wish to change. Press the [No] key, and then use the 10-Key Pad to enter the new transmission time. When you are finished making changes, press the [Yes] key. Di1610f 7-53... -
Page 185: To Delete The Batch Transmission Setting
Press the [No] key. A confirmation message appears, asking whether or not to delete the batch transmission setting. Press the [Yes] key. The “SELECT REGIST.KEY” screen appears again. 7-54 Di1610f... -
Page 186: Specifying The Setting For "Mailbox
If you wish to change the password, press the [No] key, and then enter the new password. ❍ If no password is to be specified, press the [Yes] key without entering anything. The “FAX REGISTRATION” menu appears again. Di1610f 7-55... -
Page 187: To Delete A Mailbox
ID, and then press the [Yes] key. ❍ If you wish to change the ID, press the [No] key, and then enter the new number. The specified mailbox is deleted. Press the [Panel Reset] key. The main screen appears again. 7-56 Di1610f... -
Page 188: Setting Up The Transmission
1 SCAN CONTRAST 2 RESOLUTION 3 DEFAULT TX 4 HEADER If, at any time, you wish to quit setting a “TX OPERATION” function, press the [No] key. When the message “STOP SETTING?” appears, press the [Yes] key to quit. Di1610f 7-57... -
Page 189: Specifying The Setting For "Scan Contrast
S/F: Super Fine H/T: Half Tone If “H/T” was selected, a screen appears, allowing you to make a detailed setting. (Continue with step 4.) If any setting other than “H/T” was selected, the “TX OPERATION” menu appears again. 7-58 Di1610f... -
Page 190: Specifying The Setting For "Default Tx
Refer to “Selecting the “TX OPERATION” menu” on page 7-57. Press the [4] key from the 10-Key Pad to select “HEADER”. Using the [ ] and [Ö ] keys, select either “ON” or “OFF”, and then press the [Yes] key. The “TX OPERATION” menu appears again. Di1610f 7-59... -
Page 191: Setting Up The Reception
This function is only available when an optional paper tray is installed. CLOSED NETWORK This function can be used to set whether or not the fax is recieved if the sender’s fax number does not match the fax number programmed in this machine’s one-touch dial keys. 7-60 Di1610f... -
Page 192: Selecting The "Rx Operation" Menu
If, at any time, you wish to quit setting/changing an “RX OPERATION” function, press the [No] key. When the message “STOP SETTING?” appears, press the [Yes] key to quit. To exit the “RX OPERATION” menu, press the [Panel Reset] key. The main screen appears again. Di1610f 7-61... -
Page 193: Specifying The Setting For "Memory Rx Mode
Using the 10-Key Pad, enter the 4- digit password used to cancel memory reception, and then press the [Yes] key. ❍ If no password is to be specified, press the [Yes] key without entering anything. The “RX OPERATION” menu appears again. 7-62 Di1610f... -
Page 194: To Cancel Memory Reception
“RX OPERATION” menu appears again. Using the 10-Key Pad, enter the 4- digit password, and then press the [Yes] key. All received documents stored in the memory are printed, and the “RX OPERATION” menu appears again. Di1610f 7-63... -
Page 195: Specifying The Setting For "No.of Rings
Pad to select “REDUCTION RX”. Using the [ ] and [Ö ] keys, select “ON” (print the document reduced), “OFF” (split the printout) or “CUT” (discard any excess), and then press the [Yes] key. The “RX OPERATION” menu appears again. 7-64 Di1610f... -
Page 196: Specifying The Setting For "Rx Print
Press the [5] key from the 10-Key Pad to select “RX MODE”. Using the [ ] and [Ö ] keys, select either “AUTO RX” or “MANUAL RX”, and then press the [Yes] key. The “RX OPERATION” menu appears again. Di1610f 7-65... -
Page 197: Specifying The Setting For "Forward
An e-mail address can be specified as a forwarding location only when the optional Internet Fax & Network Scan Kit is installed. For details, refer to the User Manual for the Internet Fax & Network Scan Kit (SU-6). 7-66 Di1610f... -
Page 198: Specifying The Setting For "Footer
Using the [L] and [M] keys, select a paper tray, and then press the [Yes] key. Using the [ ] and [Ö ] keys, select either “DISABLE” or “ENABLE”, and then press the [Yes] key. The “RX OPERATION” menu appears again. Di1610f 7-67... -
Page 199: Specifying The Setting For "Closed Network
Refer to “Selecting the “RX OPERATION” menu” on page 7-61. Press the [9] key from the 10-Key Pad to select “CLOSED NETWORK”. Using the [ ] and [Ö ] keys, select either “ON” or “OFF”, and then press the [Yes] key. The “RX OPERATION” menu appears again. 7-68 Di1610f... -
Page 200: Settings Up The Communication
Select the correct setting after checking which type of dialing system is used. To specify the telephone dialing system Press the [Utility] key eight times. The first screen of the Utility mode appears. From the 10-Key Pad, press the [1] key. Di1610f 7-69... -
Page 201: Specifying The Setting For "Line Monitor
From the 10-Key Pad, press the [2] key. A screen appears, allowing you to select the monitoring volume. Using the [ ] and [Ö ] keys, select “HIGH”, “LOW” or “OFF”, and then press the [Yes] key. The “COMM.SETTING” menu appears again. 7-70 Di1610f... -
Page 202: Specifying The Setting For "Pstn/Pbx
[Yes] key. If “PBX” was selected, use the 10- Key Pad to enter the number that should be dialed to access the outside line, and then press the [Yes] key. The “COMM.SETTING” menu appears again. Di1610f 7-71... -
Page 203: Setting Up The Report Output
From the 10-Key Pad, press the key ([1] through [4]) for the “REPORTING” function that you wish to set. ❍ The “REPORTING” functions are as follows: 1 ACTIVITY REPORT 2 RESERV.REPORT 3 TX RESULT REPORT 4 RX RESULT REPORT 7-72 Di1610f... -
Page 204: Specifying The Setting For "Activity Report
Refer to “Selecting the “REPORTING” menu” on page 7-72. Press the [2] key from the 10-Key Pad to select “RESERV.REPORT”. Using the [ ] and [Ö ] keys, select either “ON” or “OFF”, and then press the [Yes] key. The “REPORTING” menu appears again. Di1610f 7-73... -
Page 205: Specifying The Setting For "Tx Result Report
Refer to “Selecting the “REPORTING” menu” on page 7-72. Press the [4] key from the 10-Key Pad to select “RX RESULT REPORT”. Using the [ ] and [Ö ] keys, select either “ON” or “OFF”, and then press the [Yes] key. The “REPORTING” menu appears again. 7-74 Di1610f... -
Page 206: Specifying Initial User Data
The INITIAL USERDATA functions are as follows: 1 INITIAL USERDATA 2 USER FAX No. 3 USER NAME To quit changing initial user data settings, press the [No] key. “STOP SETTING?” appears. Press the [Yes] key to quit changing the settings. Di1610f 7-75... -
Page 207: Specifying The Setting For "Date&Time
Enter the settings in the following order: hours, minutes, year, month, and day. Press the [Yes] key to display the time zone setting. Press the [L] and [M] keys to select the appropriate time zone. Press the [Yes] key. 7-76 Di1610f... -
Page 208: Specifying The Setting For "User Fax No
7.11 Specifying Initial User Data Specifying the Setting for “USER FAX No.” Select the “USER FAX No.”. ❍ Refer to “Selecting the “INITIAL USERDATA” menu” on page 7-75. Using the 10-Key Pad, enter the fax number. Press the [Yes] key. Di1610f 7-77... -
Page 209: Specifying The Setting For "User Name
Using the 10-Key Pad, enter the user name for the machine. ❍ Each press of the [123/ABC] key switches the input mode between numbers and letters. [1]: Numbers can be typed in. [A]: Letters can be typed in. Press the [Yes] key. 7-78 Di1610f... -
Page 210: When A Message Appears
When a Message Appears... -
Page 211: When The Message "Paper Empty" Appears
When the currently selected paper tray runs out of paper, the message shown below appears, and printing cannot continue. Paper tray Paper size Check the paper tray that has run out of paper, and then supply paper according to the following procedures. Indicator Paper Tray Tray1 Tray2 Bypass Tray Di1610f... -
Page 212: Loading Paper Into Tray1
(the side facing up when the package was unwrapped) faces up. Note The Bypass Tray can be loaded with a maximum of 1 envelope, 5 OHP transparencies, or 10 sheets of plain paper or card. Di1610f... -
Page 213: Loading Paper Into Tray2 (Optional)
Load the paper into the drawer so that the front side of the paper (the side facing up when the package was unwrapped) faces up. Attach the drawer cover, and then return the drawer for Tray2 to its original position. Di1610f... -
Page 214: When The Message "Toner Empty" Appears
Never use any other types of toner, as a malfunction could result. For details, contact your service representative. Before replacing the toner cartridge, check that it is of the following type. Toner Cartridge 101C Do not use a toner cartridge of a different type. Di1610f... -
Page 215: Replacing The Toner Cartridge
Since the Imaging Cartridge can easily be damaged by light, exposing the cartridge to light for a long period of time will result in decreased image quality. Move the lever in the direction of the arrow to release the lock. Di1610f... - Page 216 Do not touch the PC drum under the flap of the Drum Cartridge, otherwise decreased image quality may result. Do not touch any metal parts of the Drum Cartridge or Toner Cartridge, otherwise the units may be damaged by static electricity. Di1610f...
- Page 217 8.2 When the Message “TONER EMPTY” Appears Shake the new Toner Cartridge well. Remove the protective cover from the Toner Cartridge. Note Do not touch the developer roller, otherwise decreased image quality may result. Developer roller Di1610f...
- Page 218 Cartridge with the rail in the machine, and then install the cartridge. Note Do not push in the Imaging Cartridge with excessive force if the cartridge is not correctly aligned on the rail, otherwise the units may be damaged. Close the Front Cover. Di1610f...
-
Page 219: When The Message "Paper Misfeed" Appears
Follow the procedure described below to clear the misfed paper. Paper supply section Clearing a Paper Misfeed in the Paper Trays Remove all paper from the Bypass Tray. Remove the Bypass Tray. 8-10 Di1610f... - Page 220 Reload the paper stack in the tray. Attach the tray removed in step 2. Reload the paper removed in step 1. Remove the cover of optional Tray2, and then pull out the drawer. Remove all paper from the drawer. Di1610f 8-11...
- Page 221 8.3 When the Message “PAPER MISFEED” Appears Reload the paper stack into the drawer, and then slide the drawer back into the tray. Open, then close the Front Cover. 8-12 Di1610f...
-
Page 222: When The Message "Paper Jam" Appears
Follow the procedure described below to clear the misfed paper. Fusing section Separating section CAUTION The area around the Fusing Unit is extremely hot. ➜ Touching any part other than the paper may result in burns. Clearing a Paper Misfeed in the Machine Open the Front Cover. Di1610f 8-13... - Page 223 8.4 When the Message “PAPER JAM” Appears Remove the Imaging Cartridge. Grab both sides of the paper, and then pull it out upward. Grab both sides of the paper, and then carefully pull out the sheet of paper. 8-14 Di1610f...
- Page 224 Close the Front Cover. If “PAPER JAM” remains displayed, even after the misfeed-cleaning procedure is performed, refer to “What Does Each Message Mean?” on page 8-23. Di1610f 8-15...
-
Page 225: When The Message "Original Doc. Jam" Appears
Document Feeder and the machine stops operating, a paper misfeed has occurred in the Auto Document Feeder. Follow the procedure described below to clear the misfed paper. Automatic paper supply section Clearing a Paper Misfeed in Auto Document Feeder Open the Document Feeder Cover. 8-16 Di1610f... - Page 226 Raise the Auto Document Feeder. While turning the document feed knob in the direction of the arrow, gently pull out the original. Close the Document Feeder Cover. Load the documents removed in step 2 back into the tray. Di1610f 8-17...
- Page 227 8.5 When the Message “ORIGINAL DOC. JAM” Appears Note Replace the document page that was misfed, according to the page number indicated in the Display. 8-18 Di1610f...
-
Page 228: 8.6 When The Message "Paper Size Error" Appears
Press the [1] key of the 10-Key Pad, and then specify the correct paper size and type. ❍ “Specifying the Setting for “TRAY1 PAPER”” on page 7-16 Remove the Bypass Tray, and then remove all paper from the tray. Di1610f 8-19... - Page 229 8.6 When the Message “PAPER SIZE ERROR” Appears Load the desired paper into the tray. Try performing the print cycle again. 8-20 Di1610f...
-
Page 230: For The Bypass Tray
Load the desired paper into the tray. Select the setting for the size and type of paper that is loaded. ❍ “Specifying the Size and Type of Manually Feed Paper” on page 4-5 Try performing the print cycle again. Di1610f 8-21... -
Page 231: When The Message "Machine Trouble" Appears
When the Message “MACHINE TROUBLE” Appears If the message shown below appears, some machine malfunction has occurred. Contact your service representative. Note When contacting the service representative, be sure to inform them of the machine code (error code: C####) that was indicated. 8-22 Di1610f... -
Page 232: What Does Each Message Mean
Front closed. Cover. INCORRECT T/C TYPE Incorrect type of toner cartridge Install the correct type of toner is installed. cartridge. (p. 8-5) Toner cartridge is not installed. Install the toner cartridge. CHANGE T/C (p. 8-6) Di1610f 8-23... -
Page 233: What Does Each Message Mean
FILE FULL/RX CANCEL While receiving a fax, the Retrieve all received faxes maximum of number of stored in the memory. managed memory file is used. 8-24 Di1610f... -
Page 234: When Incorrect Copies Are Produced
The original is not held tightly Place the original in position so against the Original Glass. that it is held tightly against the Original Glass. The printed output is blurry. The paper is damp. Change the paper. Di1610f 8-25... - Page 235 The printed page is curled. The paper that was used curls Remove the paper from the easily (as with recycled paper). paper tray, turn it over, and then load it again. Change the paper. 8-26 Di1610f...
- Page 236 Otherwise, manually adjusted reduction make a reduced print with a ratio). zoom ratio that matches the paper size. * If the problem is not corrected even after the operations described above are performed, contact your service representative. Di1610f 8-27...
-
Page 237: The Machine Is Not Functioning As Designed
The room’s circuit breaker is Close the room’s circuit open. breaker. * If the problem is not corrected even after the operations described are performed, turn off the machine, unplug its power cord, and then contact the service representative. 8-28 Di1610f... -
Page 238: When Faxing Is Not Performed Correctly
Check the number. telephone calls is being dialed. There is a problem with the Contact the recipient. recipient’s fax machine (it is out of paper, it is not set to receive faxes automatically, it is turned off, etc.). Di1610f 8-29... -
Page 239: Faxes Cannot Be Received
Black streaks appear through There is a problem with the Check that the machine can the print. telephone connection or make clean print. If it can, with the caller’s fax have the caller send the fax machine. again. 8-30 Di1610f... -
Page 240: Calls Cannot Be Sent
(p. 7-70) recipient/caller’s voice. The ringing of the telephone is The ringer volume of the Adjust the ringer volume of too low (loud). connected telephone is set the connected telephone. too low (loud). Di1610f 8-31... - Page 241 8.11 When Faxing Is Not Performed Correctly 8-32 Di1610f...
-
Page 242: Miscellaneous
Miscellaneous... -
Page 243: Specifications
9.1 Specifications Specifications Di1610f Specification Type Desktop Platen Type Fixed platen (unit scanning) Photoconductor Printing System Electrostatic Dry Powdered Image Transfer to Plain Paper Developing System Single component developing system Fusing System Lamp-Heated Roller 600 dpi × 600 dpi Resolution... -
Page 244: Auto Document Feeder
Plain paper, recycled paper (60 g/m to 90 g/m Paper Sizes A4 L, Letter L Capacity 500 sheets (80 g/m Power Consumption Less than 7 W 401 mm (width) × 615 mm (depth) × 138 mm (height) Dimensions Weight 4 kg Di1610f... -
Page 245: Care Of The Machine
Turn off the machine before cleaning it. Housing Cover ➜ Wipe the surface of the housing cover with a soft cloth dampened with a mild household detergent. Original Glass ➜ Wipe the surface of the Original Glass clean with a soft, dry cloth. Di1610f... -
Page 246: Original Pad
Control Panel ➜ Wipe the surface of the Control Panel clean with a soft, dry cloth. Note Incorrectly cleaning the Control Panel keys may damage them. Never use mild household detergent or glass cleaner to clean the Control Panel. Di1610f... -
Page 247: Function Combination Matrix
9.3 Function Combination Matrix Function Combination Matrix Conditions for Combined Functions Code Description The functions can be combined. The functions cannot be combined. Di1610f... -
Page 248: Glossary
A signal used on the telephone line; used when calling on a push-button line or using push-button services. By pressing the [ ] key in the 10-Key Pad, touch-tone signals are used, even if a dial phone line is connected. Di1610f... -
Page 249: Paper Size And Zoom Ratio Tables
8 × 10⁻¹/2 203 mm × 267 mm Government Letter 8 × 10 203 mm × 254 mm Quarto 5-1/2 × 8-1/2 140 mm × 216 mm Statement Invoice 4 × 6 4 × 6 102 mm × 152 mm Di1610f... -
Page 250: Zoom Ratios
× 1.224 × 0.816 257 mm × 364 mm × 0.577 10 × 14-1/4 × 0.707 × 0.500 × 1.154 × 0.816 182 mm × 257 mm × 0.577 7-1/4 × 10 × 0.707 × 1.640 × 1.154 × 1.414 Di1610f... - Page 251 Invoice 215.9 mm × 330.2 mm 11 × 17 × 1.294 11 × 14 × 1.076 × 0.647 Letter Invoice 8-1/2 × 11 11 × 17 × 1.294 215.9 mm × 279.4 mm 11 × 14 × 1.272 9-10 Di1610f...
- Page 252 5-1/2 × 8-1/2 11 × 14 × 1.647 139.7 mm × 215.9 mm × 1.545 Legal × 1.529 Foolscap × 1.294 Letter Zoom ratio = Paper size/Document size 1 inch = 25.4 mm 1 mm = 0.0394 inch Di1610f 9-11...
- Page 253 9.5 Paper Size and Zoom Ratio Tables 9-12 Di1610f...
-
Page 254: Index
Index... - Page 255 Cancelling queued document ............6-18 Care of the machine ................9-4 Communication settings Monitoring volume ............... 7-70 Control panel ..................3-10 Copy paper ..................3-22 Copy settings ..................7-23 Copy tray Angle ..................... 3-8 Default settings ................. 3-16 Dialing ....................5-2 10-2 Di1610f...
- Page 256 Loading original Auto Document Feeder ............3-30 3-31 Precautions ..................3-30 Specific types of originals ............3-30 Loading paper ..................3-24 Bypass tray ................3-28 Precautions ..................3-22 Tray1 ..................3-26 Tray2 ..................3-29 Machine settings ..................7-3 Machine status ..................3-36 Mailbox reception ................6-21 Di1610f 10-3...
- Page 257 Paper sizes ..................9-8 Paper source settings ............... 7-15 Paper width ..................1-17 Phone book ..................5-7 Placing original Original glass ................3-32 Precautions ................. 3-32 Specific types of originals ............3-30 Polling reception ................6-22 Polling transmission ................6-15 10-4 Di1610f...
- Page 258 Printing mode ................7-65 Reception mode ................7-65 Reduced printing ................7-64 Tray selection ................7-67 Relay initiation transmission ..............6-13 Replacing Toner cartridge ................8-6 Resetting Auto panel reset ................3-17 Panel ....................3-17 Sorting ....................4-16 Space requirements ................2-3 Specifications ..................9-2 Speed dialing ..................5-4 Setup ....................7-37 Di1610f 10-5...
- Page 259 Timer transmission ................6-9 Transmission result report ..............7-74 Transmission results ................. 5-14 Transmission settings Default transmission mode ............7-59 Resolution ................... 7-58 Scanning contrast ................ 7-58 Turning Off ....................3-15 On ....................3-15 Utility mode ..................7-2 Zoom ratio ..................4-10 10-6 Di1610f...
- Page 260 Copyright 2003 KONICA MINOLTA BUSINESS TECHNOLOGIES, INC. The information contained in this manual is subject to change without notice to incorporate improvements made on the product or products the manual covers. KONICA MINOLTA BUSINESS TECHNOLOGIES, INC. 2003. 11 Marunouchi Center Building, 1-6-1 Marunouchi, Chiyoda-ku, Tokyo, 100-0005, Japan...
Need help?
Do you have a question about the DI1610F and is the answer not in the manual?
Questions and answers