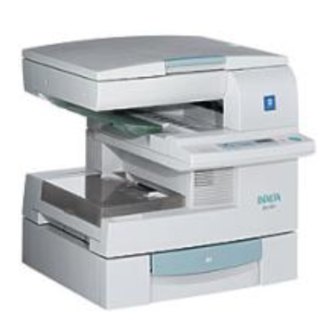
Minolta Di151 Service Manual
Hide thumbs
Also See for Di151:
- Operator's manual (257 pages) ,
- Manual (132 pages) ,
- Service manual (105 pages)
Table of Contents
Advertisement
Quick Links
Advertisement
Chapters
Table of Contents

Related Manuals for Minolta Di151


Summary of Contents for Minolta Di151
- Page 1 Di151 SERVICE MANUAL GENERAL...
- Page 2 INDEX (GENERAL) GENERAL MECHANICAL/ELECTRICAL...
- Page 3 GENERAL 14413...
-
Page 4: Table Of Contents
CONTENTS 1. SAFETY INFORMATION ................. G-1 2. SPECIFICATION .....................G-7 3. PRECAUTIONS FOR INSTALLATION ............G-9 3-1. Installation Site ..................G-9 3-2. Power Source ..................G-9 3-3. Grounding ....................G-9 4. PRECAUTIONS FOR USE ................G-10 4-1. To ensure that the copier is used in an optimum condition ..... G-10 4-2. -
Page 5: Safety Information
CAUTION: The use of controls, adjustments or performance of procedures other than those specified in this manual may result in hazardous radiation exposure. Because of this, Minolta strongly recommends that you operate your copy machine only as described in this documentation. - Page 6 The label shown on page G-3 indicates compliance with the CDRH regulations and must be attached to laser products marketed in the United States. CAUTION: Use of controls, adjustments or performance of procedures other than those specified in this manual may result in hazardous radiation exposure. This is a semiconductor laser.
- Page 7 A laser safety label is attached to the outside of the copy machine as shown below. Laser safety label For Europe CLASS 1 LASER PRODUCT LASER KLASSE 1 PRODUKT For United States 1166O252BA MINOLTA CO., LTD 2, Higashiakatsuchi, Yawata-cho, Toyokawa-shi Aichi-ken 442-8585, Japan C4007O155CB MANUFACTURED: THIS PRODUCT COMPLIES WITH 21 CFR CHAPTER I, SUBCHAPTER J.
- Page 8 Label inside copy machine The following laser safety label will be attached inside the copy machine as shown below. Please read the following for your own protection. Caution Opening the cover indicated by the Caution label may expose you to harmful laser radiation which could cause damage or loss of eyesight.
- Page 9 ALL Areas CAUTION Danger of explosion if battery is incorrectly replaced. Replace only with the same or equivalent type recommended by the manufacturer. Dispose of used batteries according to the manufacturer’s instructions. Germany only VORSICHT! Explosinsgefahr bei unsachgemäßen austausch der batterie.
- Page 10 ALL Areas CAUTION “Replace only with the same or equivalent type recommended by the manufacturer. Dispose of used IC Package according to the manufacturer’s instructions.” Germany only VORSICHT! ⇒”Austausch nur durch denselben oder einen vom Hersteller empfohlenen, gleichwertigen typ. Entsorgung gebrauchter Batterien nach Angaben des Herstellers.
-
Page 11: Specification
SPECIFICATIONS TYPE Desktop ORIGINAL SCANNING SYSTEM CCD Line Sensor PHOTOCONDUCTOR Organic Photoconductor COPYING SYSTEM Electrostatic Dry Powdered Image Transfer to Plain Paper RESOLUTION 600 x 600dpi PAPER FEEDING SYSTEM 2-Way system Paper Tray Manual Bypass Tray CCD Scanning EXPOSURE SYSTEM DEVELOPING SYSTEM Fine Micro-Toning System CHARGING SYSTEM... - Page 12 ZOOM RATIOS Area Metric Inch Mode Full Size 100 % 100 % Fixed 81 % 78 % Reduction 70 % 64 % 115 % 129 % Enlargement 141 % 154 % Variable 50 % to 199 % (in 0.1 % increments) LENS Through Lens EXPOSURE LAMP...
-
Page 13: Precautions For Installation
PRECAUTIONS FOR INSTALLATION 3-1. Installation Site To ensure safety and utmost performance of the copier, the copier should NOT be used in a place: • Where it will be subjected to extremely high or low temperature or humidity. • Where it will be subjected to sudden fluctuations in either temperature or humidity. •... -
Page 14: Precautions For Use
PRECAUTIONS FOR USE 4-1. To ensure that the copier is used in an optimum condition • Never place a heavy object on the copier or subject the copier to shocks. • Insert the power plug all the way into the outlet. •... -
Page 15: Handling Of Consumables
HANDLING OF CONSUMABLES Before using any consumables, always read the label on its container carefully. • Paper can be easily damaged by dampness. To prevent absorption of moisture, store paper, which has been removed from its wrapper but not loaded in the drawer, in a sealed plastic bag in a cool, dark place. -
Page 16: Other Precautions
OTHER PRECAUTIONS Use the following precautions when performing service jobs for a copier that uses a laser. • When a service job needs to be performed in the laser beam path, such as when working around the printerhead or PC Drum, be sure first to unplug the power cord of the copier from the outlet. -
Page 17: System Options
SYSTEM OPTIONS C4007O92CA C4007O91CA 4007M032AA 4007M037AA C4007O093CA C4007O94CA 4007M035AB 1. Automatic Document Feeder AF-8 4. Memory for Copier (16MB/32MB) 2. Original Cover (Except Europe) 5. Paper Feed Unit PF-116 3. Printer Controller Pi1501 6. Fax Unit for Di151 G-13... - Page 18 MECHANICAL/ ELECTRICAL 14413...
- Page 19 CONTENTS 1. CROSS SECTIONAL VIEW ................M-1 2. COPY PROCESS .................... M-2 3. DRIVE SYSTEM ....................M-4 4. SEQUENTIAL EXPLANATION ................ M-5 5. PC DRUM SECTION ..................M-6 5-1. PC Drum Drive Mechanism ..............M-6 5-2. Grounding of the PC Drum ..............M-7 6.
-
Page 20: Cross Sectional View
CROSS SECTIONAL VIEW 4007M001AB 1. IR Section 4. Paper Tray 2. Fusing Unit 5. PH Section 3. I/C... -
Page 21: Copy Process
COPY PROCESS 6.11 4007M002AB 1. PC Drum • Used as the medium on which a visible developed image of the original is formed. 2. Drum Charging • A uniform negative DC charge is deposited across the entire surface of the PC Drum. 3. - Page 22 11. PC Drum Erase • A laser beam strikes the surface of the PC Drum to remove any residual charge from it. 12. Fusing • The developed image is permanently fused to the paper by a combination of heat and pressure applied by the Fusing Roller and Fusing Backup Roller.
-
Page 23: Drive System
DRIVE SYSTEM 4007M003AA 1. Scanner Motor M6 2. Main Motor M1... -
Page 24: Sequential Explanation
SEQUENTIAL EXPLANATION Power Switch ON Start Key ON PH Section Full-speed Half-speed Cooling Fan Motor (M5) rotation rotation Fusing Section Cooling Fan Motor (M3) Fusing Heater Lamp (H1) Scanner Motor (M6) Exposure Lamp OFF upon completion (LA1) of temperature control Polygon Motor (M2) Main Motor... -
Page 25: Pc Drum Section
PC DRUM SECTION The PC Drum consists of layers of semiconductive materials placed on an aluminum alloy base, on which an electrostatic latent image is formed. Charge Holding Layer PC Drum Carrier Generation Layer Aluminum Base 1139M006AA 1139M007AA 5-1. PC Drum Drive Mechanism The PC Drum is rotated by drive from a motor. -
Page 26: Grounding Of The Pc Drum
5-2. Grounding of the PC Drum The potential on the surface of the PC Drum exposed to the light is grounded to the frame. PC Drum Ground Plate 4007M005AC... -
Page 27: Pc Drum Charging Section
PC DRUM CHARGING SECTION • Both the Rotating Charge Brush and Precharge Film are used to negatively charge the surface of the PC Drum. • The Rotating Charge Brush applies charge directly to the PC Drum, which ensures that the PC Drum is charged evenly and stably with a low voltage. It also helps reduce dra- matically the amount of ozone produced in the copier as compared with corona dis- charge systems. -
Page 28: Image Reading Section
IMAGE READING SECTION CCD converts the light reflected off the original to a corresponding electrical signal which is, in turn, applied to the PH image processing section. 4007M006AA 1. ADF Set Switch S3 4. Control Board PWB-I 2. Scanner Interface Board PWB-S 5. -
Page 29: Exposure Components Section
7-1. Exposure Components Section 4007M007AB 1. Reflector 3. Lens 2. Exposure Lamp LA1 4. CCD M-10... -
Page 30: Exposure Lamp Control
7-2. Exposure Lamp Control • The Exposure Lamp is turned ON or OFF by the Exposure Lamp Remote signal output from the Control Board. • It is turned ON or OFF at different timings between when the Power Switch is turned ON and when the Start Key is pressed.Details;... -
Page 31: Image Processing Process
7-3. Image Processing Process 1. CCD Signal 2. Analog to Digital Processing 3. Shading Correction 4. Gamma Correction 5. Magnification Processing 6. Background Detection and Limitation 7. TRC Correction 8. Binary Data 9. Data Buffer PH Section M-12... - Page 32 1. CCD Signal • The Exposure Lamp illuminates the original and the light reflected off the original passes through the mirrors and lens to reach the CCD Sensor which, in turn, converts the optical data to a corresponding analog electrical signal. 2.
-
Page 33: Scanner Movement Mechanism
7-4. Scanner Movement Mechanism • The Scanner is driven by the Scanner Motor. • The Scanner is detected at its home position by the Scanner Home Position Sensor. Scanner Scanner Motor M6 4007M008AB Scanner Home Position Sensor PS5 M-14... -
Page 34: Scanner Motor Drive Control
7-5. Scanner Motor Drive Control • The speed at which the Scanner is moved is controlled by varying the period of the motor drive pulse that is timed with the reference clock. High Speed Low Speed Period • The distance over which the Scanner travels is controlled by the number of motor drive pulses that corresponds to each paper size and zoom ratio. -
Page 35: Ph Section
PH SECTION Image data sent from the IR section is corrected and, based on the corrected data, a laser light is projected onto the surface of the PC Drum to form a corresponding latent image. 4007M009AA 1. Polygon Motor 5. SOS Sensor Board 2. -
Page 36: Laser Exposure Process
8-1. Laser Exposure Process The Start key is pressed. The laser is forced ON. The laser beam is corrected and the laser output is adjusted to an optimum level. When the laser beam strikes the SOS Sensor, an SOS signal is generated. The SOS signal, together with the HSYNC signal (the image start position in the CD direction) and TOD signal (the image start position in the FD direction), determines the laser emission timing. -
Page 37: Laser Emission Area (Hia And Via Signals
8-2. Laser Emission Area (HIA and VIA Signals) • The laser radiation area is controlled in the CD and FD directions, respectively. • The HSYNC signal (IR) determines the image start position in the CD direction. • The Paper Take-Up Sensor and the TOD signal (engine) determine the image start posi- tion in the FD direction. -
Page 38: Developing Unit Section
DEVELOPING UNIT SECTION Toner is applied to the electrostatic latent image formed on the surface of the PC Drum, resulting in a visible, developed toner image. 4007M017AC 1. Reflecting Mirror 5. Charge Neutralizing Sheet 2. Toner Agitating Blade 6. Toner Supply Roller 3. -
Page 39: Developing Unit Drive Mechanism
9-1. Developing Unit Drive Mechanism The rollers and screws are driven through a gear train from the motor. Sleeve Roller Drive Toner Agitating Blade Drive Toner Supply Roller Drive Drive from Main Motor 4007M028AD 9-2. Sleeve Roller • The Sleeve Roller consists of a Developing Sleeve and Flexible Sleeve. •... -
Page 40: Developing Bias
9-3. Developing Bias • A bias voltage is applied to the Developing Sleeve and Toner Regulator Blades to charge the toner. • A bias voltage is also applied to the Bias Seal to prevent toner left on the Sleeve Roller after development from falling down over the areas inside the copier. -
Page 41: Toner Empty Detection
9-4. Toner Empty Detection • An LED and sensor are used to detect a toner-empty condition. 1. Light from the LED strikes the inside of the I/C through the LED Window. 2. The Toner Agitating Blade turns to scrape toner off the surface of the LED Window. 3. -
Page 42: 10. Paper Take-Up/Feeding Section
10. PAPER TAKE-UP/FEEDING SECTION 4007M011AB 1. Paper Take-Up Solenoid SL1 5. Paper Take-Up Sensor PS1 2. Paper Empty Sensor PS4 6. Separator Pad 3. Feed Roll 7. Paper Lifting Plate 4. Paper Take-Up Roll M-23... -
Page 43: 10-1.Paper Empty Detection Mechanism
10-1. Paper Empty Detection Mechanism The Paper Empty Sensor detects a paper-empty condition in the Paper Tray. Paper not Present Paper Present Paper Empty Sensor PS4 4007M012AA Paper CONTROL SIGNAL Blocked Unblocked WIRING DIAGRAM PWB-A PJ10A-3 M-24... -
Page 44: 10-2.Paper Lifting Mechanism
10-2. Paper Lifting Mechanism The paper lifting mechanism raises the paper stack in the tray to press it up against the Paper Take-Up Roll. The Start key is pressed. The Main Motor is energized. The Paper Take-Up Solenoid is energized. The cam turns and the Paper Lifting Lever goes up. -
Page 45: 10-3.Paper Take-Up Mechanism
10-3. Paper Take-Up Mechanism Drive for the paper take-up sequence is transmitted via the Paper Take-Up Clutch and Paper Take-Up Solenoid from a motor. Paper Take-Up Solenoid SL1 4007M013AA 10-4. Paper Take-Up Control S t a r t K e y O N M a i n M o t o r ( M 1 ) O F F... -
Page 46: Paper Take-Up Retry Control
Paper Take-Up Retry Control To minimize the occurrence of a paper misfeed, the paper take-up sequence is temporarily halted if the paper fails to reach the Paper Take-Up Sensor within a given period of time after the sequence has been started. The paper take-up sequence is then performed again. -
Page 47: 11. Pc Drum Cleaning Section
11. PC DRUM CLEANING SECTION • Toner that is left on the surface of the PC Drum after image transfer will be scraped off by the Cleaning Blade and conveyed by the Toner Conveying Screw to the Toner Collecting Box. The Toner Antispill Mylar prevents toner scraped off the surface of the PC Drum from falling over the areas inside the copier. -
Page 48: 12. Image Transfer Section
12. IMAGE TRANSFER SECTION • A positive voltage is applied to the Image Transfer Roller to transfer the toner image on the surface of the PC Drum to the paper. • The voltage applied to the Image Transfer Roller varies according to the copy image (B/W ratio) or paper size. -
Page 49: 13. Fusing Unit Section
13. FUSING UNIT SECTION The Fusing Unit fixes permanently the developed image to the paper by applying heat and pressure to the toner and paper. 4007M023AA 1. Thermoswitch TS1 5. Fusing Roller 2. Paper Separator Finger 6. Fusing Heater Lamp H1 3. -
Page 50: 13-1.Fusing Unit Drive Mechanism
13-1. Fusing Unit Drive Mechanism The Fusing Unit is driven by a motor. Fusing Backup Roller Fusing Roller Main Motor M1 4007M014AC M-31... -
Page 51: 13-2.Fusing Rollers Pressure Mechanism
13-2. Fusing Rollers Pressure Mechanism To ensure that there is a given width of nip between the Fusing Roller and Fusing Backup Roller, pressure springs are installed at the front and rear ends of the Backup Roller. These springs exert a pressure to press the Backup Roller against the Fusing Roller. Fusing Roller Pressure Spring Fusing Backup Roller... -
Page 52: 13-3.Fusing Temperature Control
13-3. Fusing Temperature Control • The Fusing Roller Heater Lamp is turned ON and OFF to keep a set temperature on the surface of the Fusing Roller. • The Fusing Roller surface temperature is detected by using a thermistor that translates the temperature to a corresponding electrical signal. -
Page 53: Fusing Temperature Control During Continuous Small-Size Paper Feeding
Conditions Mode 1 Mode 2 Mode 3 210 °C 210 °C 200 °C Plain Paper 200 °C (90 s) (30 s) Thick Paper 210 °C In standby state 124 °C In Power Save mode 170 °C CONTROL SIGNAL WIRING DIAGRAM PWB-A PJ14A-3 CONTROL SIGNAL WIRING DIAGRAM... -
Page 54: 14. Other Mechanisms
14. OTHER MECHANISMS 14-1. Memory Backup EEPROM (U21) connected to the Control Board PWB-I stores the setting/adjustment val- ues set in the Tech. Rep. modes as well as the counter counts. IMPORTANT It should also be noted that the EEPROM (U21) should not be replaced at the same time when the Control Board is replaced. -
Page 55: 14-2.Cooling Mechanism
14-2. Cooling Mechanism PH Section Cooling Mechanism The PH Section Cooling Fan Motor discharges heat to the outside of the copier to prevent the temperature of the PH Section from rising inordinately. PH Section Cooling Fan Motor M5 4007M025AA CONTROL SIGNAL WIRING DIAGRAM PWB-A PJ13A-1 M-36... -
Page 56: Fusing Section Cooling Mechanism
Fusing Section Cooling Mechanism The Fusing Section Cooling Fan Motor discharges heat generated by the Fusing Unit to the outside of the copier to prevent the temperature of the copier interior from rising inordi- nately. It also functions to draw paper being transported down onto the Suction Deck. Fusing Unit Fusing Section Cooling Fan Motor M3 4007M026AA...
Need help?
Do you have a question about the Di151 and is the answer not in the manual?
Questions and answers