Table of Contents
Advertisement
Advertisement
Table of Contents

Related Manuals for Audiovox VOX 8610


Summary of Contents for Audiovox VOX 8610
- Page 1 USER GUIDE...
-
Page 2: Table Of Contents
WELCOME Thank you for choosing the CDM-8610, our new model, developed by top researchers to support the CDMA2000 1X system through Qualcomm-manufactured MSM6050 chips and CDMA technologies. This product allows for a GUI animation menu. Among its many advanced features, the T9 input mode makes it much easier to enter letters, with proven technologies including: Full graphic display of 9 text input lines and 1 icon line... - Page 3 TABLE OF CONTENTS CHAPTER 4. MENU FUNCTION ...33 VIRGIN MOBILE ACCOUNT...34 CHECKING YOUR ACCOUNT BALANCE...34 TOP-UP YOUR ACCOUNT ...34 VIRGIN ALERTS...35 TO VIEW A STORED VIRGIN ALERT...35 RECENT CALLS ...36 ALL CALLS...36 MISSED CALLS ...37 INCOMING CALLS ...38 OUTGOING CALLS ...39 CONTACTS ...40 FIND BY NAME...40 FIND BY NUMBER...41...
- Page 4 TABLE OF CONTENT CHAPTER 7. VIRGINXTRAS ...85 Chapter 7 START VIRGINXTRAS...86 START VIRGINXTRAS ...86 VIRGINXTRAS ...87 ACCESSING VIRGINXTRAS ...87 CHAPTER 8. SAFETY AND WARRANTY ...89 SAFETY INFORMATION FOR WIRELESS HANDHELD PHONES ...90 EXPOSURE TO RADIO FREQUENCY SIGNALS...90 ANTENNA CARE...90 DRIVING SAFETY ...91 ELECTRONIC DEVICES ...92 PACEMAKERS ...92 OTHER MEDICAL DEVICES ...92...
-
Page 5: Inside The Package
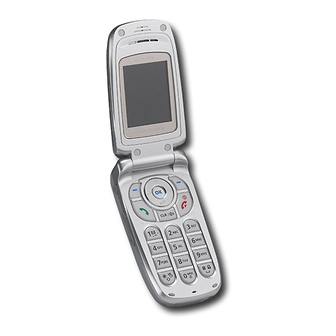
INSIDE THE PACKAGE This package should include all items pictured below. If any are missing or different, immediately contact the retailer where you purchased the phone. Handset Standard Battery This phone is a tri mode CDMA2000 1X digital phone. The CDM-8610 weighs 3.89 oz. -
Page 6: The Function Keys
HANDSET DESCRIPTION Contacts Menu THE FUNCTION KEYS At the main screen - Press and hold UP key to access the Balance Balance and LEFT key for VirginXtras. Press DOWN key to access Recent Calls and RIGHT key for Messaging. VirginXtras Messaging Inside the menu - Within a menu, use to scroll through... -
Page 7: Battery Usage
BATTERY USAGE BATTERY INSTALLATION Place the battery on the back of the handset and slide into place. Push the battery down until it locks into place. BATTERY REMOVAL Pull down the release latch, lift up the battery and remove the battery from the handset. -
Page 8: Battery Handling Information
BATTERY HANDLING INFORMATION Only use the battery and charger approved by the manufacturer. Only use the battery for its original purpose. Try to keep batteries in a temperature between 41ºF (5ºC ) and 95ºF (35ºC). If the battery is stored in temperatures above or below the recommended range, give it time to warm up or cool down before using. -
Page 9: Turning The Phone On / Off
Service, and Accessory Purchases, visit www.virginmobileusa.com or contact Virgin Mobile at (888) 322-1122. For more information about the technical aspects of your phone, visit www.audiovox.com. ACCESSING THE MAIN MENU Your phone can be customized via the menu. Each function can be accessed by scrolling with the Navigation Key or by pressing the number that corresponds with the menu item. -
Page 10: Menu Summary
MENU SUMMARY Level 1 Level 2 Level 3 1. BALANCE 2. TOP-UP 3. MESSAGING 1. Send Text Msg 2. Inbox 3. Virgin Alerts 4. Outbox 5. Voicemail 6. Saved 7. Erase Msgs 1. Inbox 2. Outbox 3. Saved 8. Msg Settings 1. -
Page 11: Basic Functions
MENU SUMMARY Level 1 Level 2 Level 3 3. Change Code 4. Special #’s 5. Erase All 6. Reset to Default Settings 5. Phone Info 1. S/W Version 2. H/W Version MAKING A CALL Level 4 Enter a phone number using the keypad. 1. -
Page 12: Speakerphone
BASIC FUNCTIONS SPEAKERPHONE To activate the speakerphone when the phone is in idle mode, answering mode, and calling mode press and hold The phone returns to normal (speakerphone off) after ending a call or when the phone is turned off and back on. -
Page 13: Adjusting Volume
BASIC FUNCTIONS ADJUSTING VOLUME Adjusts the volume of the ringtone, keypad tone and speaker. Press [MENU] of the following. Ringtones: Controls the ringtone volume. Key Tone: Controls the keypad tone. Voice Call: Controls earpiece volume. Speakerphone: Controls the speakerphone volume. Adjust volume and press Press the volume keys on the side of the phone to adjust volume of microphone during a call. -
Page 14: Making An Emergency Call
MAKING AN EMERGENCY CALL This 911 feature puts your phone in the Emergency Call Mode when you dial the preprogrammed emergency number, 911. It also operates in the lock mode and out of the service area. 911 IN LOCK MODE The 911 call service is available even in the lock mode. -
Page 15: Storing A Phone Number
STORING A PHONE NUMBER The phone book stores up to 300 entries. Enter phone # and press Choose “New Contact” or “Existing Contact”. Press [OK] to select. The Phone # will appear above a list of icons. The name of the icon is displayed below the list. Use the Navigation key to choose the type of # you’re adding, as indicated by the icon. -
Page 16: Standard Input Mode
ENTERING LETTERS, NUMBERS & SYMBOLS STANDARD INPUT MODE Use the digit keys to enter letters, numbers and characters. Enter letters using the keypad as follows: Repetitions Repetitions Keypad Time 2 times 3 times 2ABC 3DEF 4GHI 9WXYZ To change the input mode, press and select the mode. -
Page 17: Numeric Mode
ENTERING LETTERS, NUMBERS & SYMBOLS NUMERIC MODE Allows you to enter numbers. Press [MODE] and select the “123 (Numeric mode)”. To enter a number, press a digit key. SYMBOL MODE Allows you to enter symbols. Press [MODE] and select the “Symbols (Symbol mode)”. -
Page 18: Chapter 4. Menu Function
Chapter 4 MENU FUNCTION This chapter addresses accessing the menu and using its functions and features to customize your phone. VIRGIN MOBILE ACCOUNT VIRGIN ALERTS RECENT CALLS CONTACTS TOOLS SETTINGS... -
Page 19: Virgin Mobile Account
VIRGIN MOBILE ACCOUNT You can manage your Virgin Mobile account from your phone. The basic tasks are summarized below. For more information about your Virgin Mobile account, visit www.virginmobileusa.com. CHECKING YOUR ACCOUNT BALANCE You can check the amount of money remaining in your Virgin Mobile account. -
Page 20: Recent Calls
RECENT CALLS Access the recent call logs by pressing ALL CALLS Displays information about the 60 most recent numbers dialed, missed and received. Places a call to a selected number by simply pressing To see a list of the 60 most recent numbers, press [MENU] If the number is already stored in your phone... -
Page 21: Incoming Calls
RECENT CALLS INCOMING CALLS Displays information of the 20 most recently answered calls. Place a call to a received number by simply pressing To see a list of the 20 most recently answered calls, press [MENU] If the number is already stored in your phone book, only the name appears. -
Page 22: Contacts
CONTACTS Stores up to 300 entries, each of which can be assigned to a group. Entries can be retrieved by name, phone number or group. FIND BY NAME Retrieves an entry by name, and calls the number by simply pressing Press [MENU] When you even press... -
Page 23: Add New
CONTACTS ADD NEW Adds a new entry to the phone book. Please see page 26 for alternate way to add an entry to the phone book. To add a new entry to the phone book, press [MENU] The first field highlighted is Name. Enter the name for the entry, then press Press the Navigation Key down to enter all the other information (group, phone number, etc.). -
Page 24: Speed Dial
CONTACTS SPEED DIAL Calls can be placed to numbers stored in speed dial press & hold the last digit of speed dial # the keypad. Press [MENU] To assign a phone number to a location, select the location and press If a phone number is already assigned to the location, press [ERASE] and the... -
Page 25: My Phone
CONTACTS MY PHONE # To display your phone number and service information. Press [MENU] To return to the previous page, press [OK]. TOOLS ALARM You can set up to 3 alarms. To display alarm entries, press Select one of the entries using the Navigation Key. To set a new alarm, choose item 1, 2 or 3. -
Page 26: Scheduler
TOOLS NOTES SETTING Using the keypad input an alarm message then press [OK]. To save an alarm setting press SCHEDULER Sets an event and reminds you of that event. ADD EVENT Press [SAVE]. Move the Navigation Key left, right, up or down to choose a date in the calendar and press To select alarm options press the Navigation key downwards. -
Page 27: View Event List
TOOLS Press [SAVE] to save it or return to the calendar. The date of the event will be marked on your calendar. VIEW EVENT LIST To view the Event List, press [MENU] Move the Navigation Key to choose an event and press [OK] or [ERASE]. -
Page 28: Stopwatch
TOOLS STOPWATCH Simultaneously times up to six different events. To operate the stopwatch: Press [MENU] To measure a time period. 1. To start the stopwatch, press 2. To pause it, press 3. Press [START] to resume it or to reset counter. To time up to six events at once: 1. -
Page 29: Settings
SETTINGS VOICEMAIL To select a ringtone type for incoming Voicemail: Press [MENU] Select “Tone_1,2,3,4,5” with the Navigation Key. To confirm, press [OK]. To stop playing a ringtone, press [PAUSE]. VOLUME Controls the Ringtones, Key tone, Voice Call and Speakerphone volume and alerts you to incoming calls in a variety of modes. RINGTONES Controls the Ringtones volume and alerts you to incoming calls in the following modes. -
Page 30: Tone Length
SETTINGS TONE LENGTH To adjust tone length: Press [MENU] Select “Normal” or “Long” and press to save it. SILENCER MODE To place the phone in Silencer Mode so all phone sounds are muted: Press [MENU] Select “On” or “Off” and press to save it. -
Page 31: Sub Screen
SETTINGS SUB SCREEN Press [MENU] Select “Digital” or “Analog”. Press [OK] to save it. GREETING MESSAGE To input a personal greeting: Press [MENU] Select “Message”, “Font”, “Bg” or “Enter Message” to personalize your greeting. Press [OK]. Message: On/Off. Font: White, Blue, Dark Blue, Magenta, Gray, Black. Bg: Transparent, White, Blue, Yellow, Gray, Black. -
Page 32: Call Options
SETTINGS CALL OPTIONS CALL ANSWER To select an answer mode: Press [MENU] Select “Any Key” or “Send Key”. Any Key: Press any key to answer an incoming call except , and Send Key: Press only to answer a call. To save, press [OK]. -
Page 33: Location
SETTINGS LOCATION To determine whether or not the network system can detect your position: Press [MENU] Select “Location On” or “911 Only”. Location On: Your location is now available to the network. 911 Only: Your location will be hidden from network &... -
Page 34: Change Code
SETTINGS RECENT CALLS Blocks access to Recent Call List. Press [MENU] and enter “Password”. Press and select “Allow” or “Restrict”. Allow: Allows access to the recent calls menu. Restrict: Restricts access to the recent calls menu. To save, press [OK]. CONTACTS Blocks access to, and protects data in your phone book. -
Page 35: Erase All
SETTINGS ERASE ALL Clears all phone book entries. Press [MENU] and enter “Password”. The default password is the last 4 digits of your phone number. Press Select “Contacts” or “Downloaded Ringtones” and press [OK] to erase all the items in those categories. -
Page 36: Chapter 5. Games
MEMO Chapter 5 GAMES This section explains the features associated with your phone’s Games. You can play games on your phone between phone calls. An incoming call, message, alarm, or alert automatically ends the game. GAMES... -
Page 37: Games
GAMES BLACKJACK You know the rules of the game - whoever gets closest to 21 without going over wins. Think you can beat the dealer? Good luck! Press [MENU] Press any key to start the game. ORGANIZATION OF THE MENU 1) How to manipulate - Betting: 1~4 (4: MAX) - Action: 1-HIT... -
Page 38: Magic Hexa
GAMES MAGIC HEXA The object of this game is to get rid of all the blocks before it's too late. Line-up three blocks in a row - horizontally, vertically, or diagonally - and they'll disappear. Here's a hint: Some blocks have special powers. -
Page 39: When A New Message Arrives
WHEN A NEW MESSAGE ARRIVES The following display appears when a new message arrives. To display the message, press [READ]. VOICEMAIL Displays the number of Voicemails and accesses them by pressing [Call]. To access your Voicemail, press [MENU] SEND TEXT MSG To send a new message: Press [MENU]... -
Page 40: Inbox
INBOX The Inbox manages received text messages. To access: Press [MENU] : New Msg (not read) : Old Msg (already read) Select a message and press The message is displayed. To Reply to the message, press Press [MORE]. 1. ERASE To erase the message, press Press 2. -
Page 41: Virgin Alerts
VIRGIN ALERTS VIRGIN ALERTS Press [MENU] Select a message, then press The Virgin Alert message will be displayed. [OK]. OUTBOX Manages sent text messages or messages waiting to be sent. CHECKING SENT TEXT MESSAGES Press [MENU] Select a message, then press : Auto resend : Fail : Not send... -
Page 42: Save To Contact
OUTBOX 3. SAVE TO CONTACT To save the number to your contacts, press “Save to Contact” Press [OK]. 4. SAVE To save the message, press SAVED Manages saved messages from the Inbox/Outbox. “Save”. SAVED Press [MENU] Select a text message then press [OK]. -
Page 43: Erase Msgs
ERASE MSGS ERASE MESSAGES Press [MENU] 1. To erase all the inbox messages, press Old: Deletes read Message(s). Entire: Deletes all the message(s) in the Inbox. 2. To erase all the outbox messages, press 3. To erase the saved messages, press Select “OK”... -
Page 44: Save To Outbox
MSG SETTINGS SAVE TO OUTBOX Press [MENU] Then press for “Save to Outbox”. Select from “Off”, “On” or “Prompt” with the Navigation key. Press [OK]. AUTO ERASE Automatically erases inbox/outbox messages when new messages arrive. INBOX Press [MENU] Press Select “Disable” or “Enable” with Navigation key. Press [OK]. -
Page 45: Chapter 7. Virginxtras
START VIRGINXTRAS START VIRGINXTRAS VirginXtras - are a fun collection of features which you can access directly from your phone - music, movies, and more. Charges may apply. Visit www.virginmobileusa.com for details. To access VirginXtras, press Scroll down the page using the navigation To select one of the softkeys (options) at the bottom of the display, press To return to the previous page, press... -
Page 46: Chapter 8. Safety And Warranty
MEMO Chapter 8 SAFETY AND WARRANTY This chapter addresses the safety guidelines and precautions to follow when operating your phone. Please be aware of all the following safety info before operating your phone. SAFETY INFORMATION FOR WIRELESS HANDHELD PHONES SAFETY INFORMATION FOR FCC RF EXPOSURE SAR INFORMATION FDA CONSUMER UPDATE PROTECT YOUR WARRANTY... -
Page 47: Safety Information For Wireless Handheld Phones
SAFETY INFORMATION FOR WIRELESS HANDHELD PHONES Read This Information Before Using Your Handheld Portable Cellular Telephone EXPOSURE TO RADIO FREQUENCY SIGNALS Your wireless handheld portable telephone is a low power radio transmitter and receiver. When it is ON, it receives and also sends out radio frequency (RF) signals. -
Page 48: Electronic Devices
SAFETY INFORMATION FOR WIRELESS HANDHELD PHONES ELECTRONIC DEVICES Most modern electronic equipment is shielded from RF energy. However, certain electronic equipment may not be shielded against the RF signals from your wireless phone. PACEMAKERS The Health Industry Manufacturers Association recommends that a minimum separation of six (6”) inches be maintained between a handheld wireless phone and a pacemaker to avoid potential interference with the pacemaker. -
Page 49: Precautions
DO NOT use unauthorized accessories. DO NOT disassemble the phone or its accessories. If service or repair is required, return unit to an authorized Audiovox cellular service center. If unit is disassembled, the risk of electric shock or fire may result. -
Page 50: Sar Information
SAR INFORMATION THIS MODEL PHONE MEETS THE GOVERNMENT’S REQUIREMENTS FOR EXPOSURE TO RADIO WAVES. Your wireless phone is a radio transmitter and receiver. It is designed and manufactured not to exceed the emission limits for exposure to radio frequency (RF) energy set by the Federal Communications Commission of the U.S. -
Page 51: Fda Consumer Update
FDA CONSUMER UPDATE U.S. Food and Drug Administration -Center for Devices and Radiological Health Consumer Update on Wireless Phones 1. Do wireless phones pose a health hazard? The available scientific evidence does not show that any health problems are associated with using wireless phones. There is no proof, however, that wireless phones are absolutely safe. - Page 52 FDA CONSUMER UPDATE The Project has also helped develop a series of public information documents on EMF issues. FDA and the Cellular Telecommunications & Internet Association (CTIA) have a formal Cooperative Research and De-velopment Agreement (CRADA) to do research on wireless phone safety. FDA provides the scientific oversight, obtaining input from experts in government, industry, and academic or- ganizations.
-
Page 53: Protect Your Warranty
Many companies are making look alike accessories and in some cases, promoting that their product is equal to or better than the Audiovox product. Be careful. Some of these products may not be compatible to use with your Audiovox product and may damage the unit or cause it to malfunction. - Page 54 IN USA : AUDIOVOX COMMUNICATIONS CORP. 555 Wireless Blvd. Hauppauge, NY 11788 (800) 229-1235 IN CANADA : AUDIOVOX COMMUNICATIONS CANADA CO. 5155 Spectrum Way, Unit #5 Mississauga, Ontario L4W 5A1 (800) 465-9672...
Need help?
Do you have a question about the VOX 8610 and is the answer not in the manual?
Questions and answers