Table of Contents
Advertisement
Quick Links
Advertisement
Table of Contents

Related Manuals for Audiovox Verizon Wireless CDM8940


Summary of Contents for Audiovox Verizon Wireless CDM8940
-
Page 2: Important Information
Welcome to the world of EVDO!! Developed by top engineers and equipped with Qualcomm MSM6500, CDM8940 supports full EVDO. With CDM8940, you now have the highest speed and the largest bandwidth that supports the most up-to-date data applications and services. Moreover, its intuitive and user friendly GUI brings compli- cated applications such as web browsing, data services, right at your fingertips. -
Page 3: Table Of Contents
ABLE OF CONTENTS ABLE OF CONTENTS CHAPTER 1 BEFORE USING YOUR PHONE ...7 Inside the Package ...8 Handset Description ...9 Function Keys...10 Display Indicators...11 Using the Battery...13 Installing the Battery ...13 Removing the Battery ...13 Charging the Battery...14 Power Connection...14 Battery Standby Times...15 Battery Usage Times...15 Battery Information ...16... - Page 4 ABLE OF CONTENTS ABLE OF CONTENTS Scratchpad ...28 Send My Phone # ...29 My Phone #...29 Voice Privacy...29 Location...30 Phone Info...30 Making an Emergency Call...31 911 in Lock Mode...31 911 Using Any Available System ...31 Using the mini SD Card ...32 Installing the mini SD Card ...32 Removing the mini SD Card ...32 CHAPTER 3 MEMORY FUNCTION ...35...
- Page 5 ABLE OF CONTENTS ABLE OF CONTENTS Camera (Take Flix)...107 Camera (Pix Gallery) ...109 Camera (Flix Gallery)...110 Camera (Help)...111 CHAPTER 6 VOICE MAIL AND TXT, PIX, FLIX MESSAGES ...113 When a New Message Arrives...114 TXT, Pix, Flix Message ...114 Voice Mail...114 New MSG ...115 New TXT Msg ...115 New Pix Msg ...117...
-
Page 6: Chapter 1 Before Using Your Phone
Page 6 Chapter 1 BEFORE USING YOUR PHONE Please read and fully understand this manual before using your phone. This chapter addresses your phone, its keys and display icons, and covers the charging and proper use of the battery. Inside the Package Handset Description Function Keys Display Indicators... -
Page 7: Inside The Package
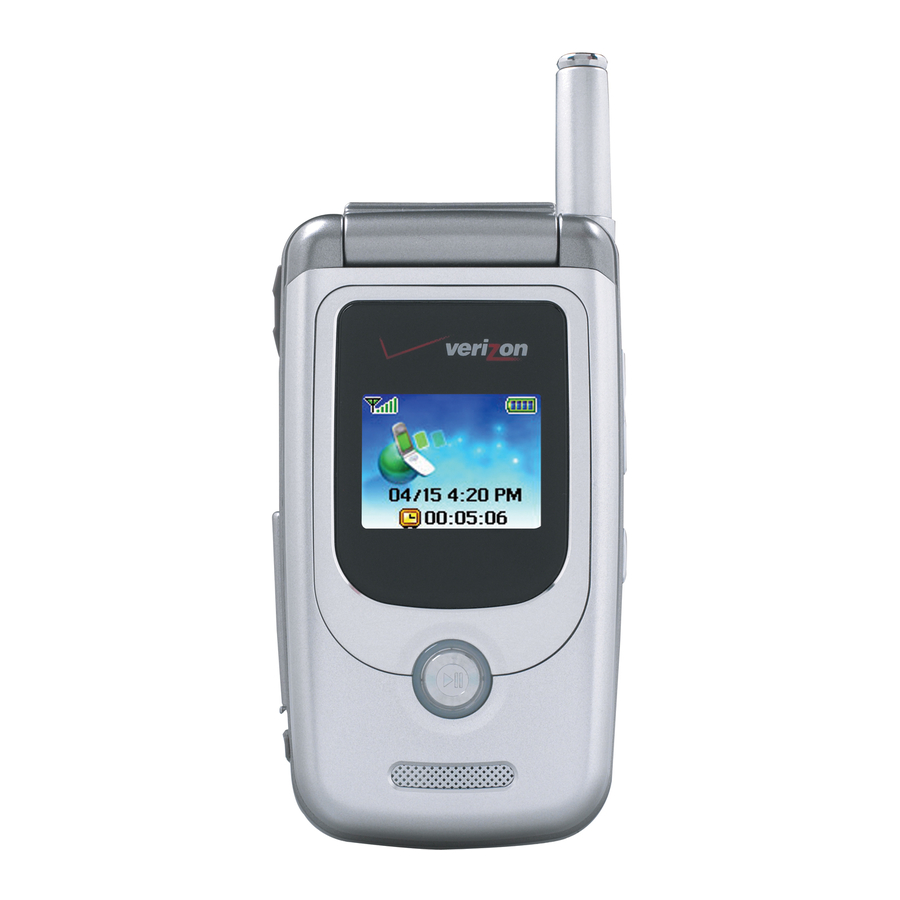
Standard Battery Travel Charger Stereo Headset HANDSET DESCRIPTION HANDSET DESCRIPTION This phone is a tri-mode CDMA2000 1X digital phone with Camera capabilities. The CDM8940 weighs 3.89 oz. and the dimensions are 1.82” x 3.56” x 0.92”. Antenna Camera Lens Camera... -
Page 8: Function Keys
FUNCTION KEYS FUNCTION KEYS SEND KEY: Press to make or receive a call. Press and hold to turn on Voice Recognition mode. END KEY: Press to turn the phone on, to terminate a call or to return to the initial page. -
Page 9: Using The Battery
DISPLA Y INDICA DISPLA Y INDICA Alarm to Schedule Appears when either an plan or an alarm is set. Dormant Indicates the phone is in disconnection condition while on “Server Connection”. Speaker Phone Phone is in speaker phone mode. Data Only Receives an async. -
Page 10: Battery Standby Times
CHARGING THE BA CHARGING THE BA POWER CONNECTION 1. Plug the AC charger into a standard outlet. Charging is in progress NOTE: 1. The times in the following tables are for a new battery. Usage and Standby times may decrease over time. 2. -
Page 11: Battery Information
TTER Y INFORMA TTER Y INFORMA Do’s l Only use the battery and charger approved by the manufacturer. l Only use the battery for its original purpose. l Try to keep batteries in a temperature between F (5 C ) and 95 F (35 l If the battery is stored in temperatures above or below the recommended range, give it time to... -
Page 12: Using The Phone
USING THE PHONE USING THE PHONE TURNING THE PHONE ON 1. Press and hold until your “Power On” logo appears and the melody begins to play. If “Password” appears on the display, enter your 4-digit password to unlock your phone. The default password is the last 4 digits of your phone number. -
Page 13: Chapter 2 - Page 21
MENU SUMMAR MENU SUMMAR 1 : Find PHONE BOOK 2 : Add New 3 : Group 4 : Speed Dial 5 : Msg. Group 6 : My Phone # 1 : All Calls RECENT 2 : Missed Calls CALLS 3 : Received Calls 4 : Dialed Calls 5 : Call Timers 6 : 1x Packet Counter... -
Page 14: Menu Summary
MENU SUMMAR MENU SUMMAR 6 : System 7 : Phone Info 1 : Voice Tools UTILITIES 2 : Schedule 3 : Alarm 4 : Memo Pad 5 : Calculator 6 : World Clock 7 : Stop Watch CAMERA 1 : Take Pix 2 : Take Flix 3 : Pix Gallery 4 : Flix Gallery... -
Page 15: Pause Feature
BASIC FUNCTIONS BASIC FUNCTIONS PAUSE FEATURE You can dial or save a phone number with pauses for use in the automated systems where you need to enter a credit card number, a social security number, or other numbers. This feature will be convenient when you are linked to an ARS (Advanced Record System). -
Page 16: Call Waiting Function
BASIC FUNCTIONS BASIC FUNCTIONS CALL WAITING FUNCTION Notifies you of an incoming call when you’re on a call by sounding a beep and displaying the caller’s phone number on the screen. 1. To answer another call while on the phone press . -
Page 17: Functions During A Call
FUNCTIONS DURING A CALL FUNCTIONS DURING A CALL To display menu options during a call, press These menu items are available while you are on a call. MESSAGING Enables you to send a message (SMS) during a call. 1. Press [MENU] MUTE (UNMUTE) Mutes the microphone while you are on a call so the... -
Page 18: Location
FUNCTIONS DURING A CALL FUNCTIONS DURING A CALL LOCATION Enables the network to locate your current location through Global Positioning System (GPS). 1. Press [MENU] 2. Select “911 Only” or “Location On” and press [OK] to save it. 911 Only: Your location will be hidden from network & applications except 911. -
Page 19: Using The Mini Sd Card
USING THE MINI SD CARD USING THE MINI SD CARD INSTALLING THE MINI SD CARD 1. Open the card hole cover, and insert the mini SD like the arrow indicates. NOTE: Please keep mini-SD slot closed at all times whether mini-SD card is inserted or not to prevent possible damages. -
Page 20: Chapter 3 Memory Function
USING THE MINI SD CARD USING THE MINI SD CARD FLIX Memory Usage Video clips received from other users Video clips downloaded via Get It Now Video clips downloaded via Packet Video (PV) Ex: NBC User generated video Information/files viewable on PC MP3/MUSIC Memory Usage Move MP3 files from PC to the... -
Page 21: Storing Phone Numbers
STORING PHONE NUMBERS STORING PHONE NUMBERS The phone book stores up to 300 entries. 1. Enter phone # then press [SAVE]. 2. Choose “New Contact” or “Existing Contact”. To select, press [OK]. 3. If “New Contact” is selected, the phone number will appear above a list of icons. -
Page 22: Tm Predictive Text Mode
TEXT INPUT METHODS TEXT INPUT METHODS PREDICTIVE TEXT MODE [T9 To choose T9 mode from the Editor screen press [Abc], then choose [T9Word]. This mode predicts the words you are entering using a built-in dictionary. With predictive text input, you press each key only once for each letter. -
Page 23: Numeric Mode [Num]
TEXT INPUT METHODS TEXT INPUT METHODS NUMERIC MODE [NUM] Numeric mode allows you to add a number to your entry/message. To select numeric mode from the Editor screen press [Abc], then select [NUM]. SYMBOL MODE [SYM] Symbol mode allows you to add various symbols to your entry. -
Page 24: Find
PHONE BOOK PHONE BOOK Stores up to 300 entries, each of which can be assigned to a group. Entries can be retrieved by name, phone number or group. FIND Retrieves an entry by name or number, and calls the number by simply pressing you may press [CONTACTS] as well. -
Page 25: Group
PHONE BOOK PHONE BOOK GROUP Allows you to classify phone entries into groups. Existing groups include Personal, Business, Etc. and All. ADD NEW GROUP 1. To add a new group, press A maximum of seven groups is allowed. 2. Press [MENU] then select “Add Group”. -
Page 26: Chapter 3 - Page 47
PHONE BOOK PHONE BOOK CHANGE MSG. GROUP NAME 1. Press [MENU] Select an existing group name. 2. Press [MENU] then select “Rename”. 3. Input a new group name. 4. To save it, press [OK]. SEND TEXT MSG. 1. Press [MENU] Select an existing group name. -
Page 27: Erase Msg. Group
PHONE BOOK PHONE BOOK ERASE MSG. GROUP 1. Press [MENU] Select the group name to be deleted. 2. To delete it, press [ERASE]. “Erase this message group?” will be displayed. 3. Press [OK]. “This message group erased” will be displayed. MY PHONE # To display your phone number and service provider: 1. -
Page 28: Missed Calls
RECENT CALLS RECENT CALLS MISSED CALLS Displays information about the 20 most recently missed calls. Place a call to a missed call number by simply pressing 1. To see a list of the 20 most recently missed calls, press [MENU] . -
Page 29: Dialed Calls
RECENT CALLS RECENT CALLS DIALED CALLS Displays information about the 20 most recently dialed calls. Place a call to a received number by simply pressing 1. To see a list of the 20 most recently dialed calls, press [MENU] . If the number is already stored in your phone book, only the name appears. -
Page 30: Home Calls
RECENT CALLS RECENT CALLS HOME CALLS Displays usage time of all calls made within Home area. 1. Press [MENU] 2. The time of the following items is displayed: Voice Calls, Data Calls 3. To reset the timer, press [RESET]. To return to the previous page, press ROAM CALLS Displays usage time of roaming calls. -
Page 31: 1X Packet Counter
RECENT CALLS RECENT CALLS 1X PACKET COUNTER Checks the log of all kilobyte data transmissions. RECEIVED To show the received kilobyte usage on a user definable interval: 1. Press [MENU] 2. To reset the counter, press [RESET]. To return to the previous page, press TRANSMITTED To show the transmitted kilobyte usage on a user definable interval:... -
Page 32: Chapter 4 Settings
SETTINGS SETTINGS SOUNDS Sets Ringer Type, Volume, Alerts, Roam Ringer, Tone Length and Power On/Off. RINGER TYPE To select a ringer type for incoming calls: RINGER 1. Press [MENU] 2. Select one of the pre-installed 20 music bells and 5 ring tones. 3. -
Page 33: Settings
SETTINGS SETTINGS VOICE CALL To adjust earpiece volume: 1. Press [MENU] 2. Adjust the earpiece volume. Level1-5 (Min- , Max- 3. To save, press [OK]. SPEAKER PHONE To adjust speaker volume: 1. Press [MENU] 2. Adjust the speaker phone volume. Level1-5 (Min- , Max- 3. -
Page 34: Display
SETTINGS SETTINGS ROAM RINGER Sounds a different ringer when you are in a roaming service area. 1. Press [MENU] 2. Select “Distinctive” or “Normal” then press to save it. TONE LENGTH To adjust key tone length: 1. Press [MENU] 2. Select “Normal” or “Long” then press POWER ON/OFF To set sound “ON”... -
Page 35: Chapter 4 - Page 65
SETTINGS SETTINGS DIALED 1. Press [MENU] 2. Select “Default” with the Navigation Key. 3. To save it, press [OK]. SCREEN SAVER Set the time of Screen Saver and select the images, the image will then be displayed on the LCD. 1. -
Page 36: Data Svc
SETTINGS SETTINGS BACKLIGHT Backlights the display and key pad for easy viewing in dark places. 1. Press [MENU] 2. Select “LCD” or “Key Pad” then select one of the following options. LCD: 5 Secs/15 Secs/30 Secs/60 Secs/Always On. Key Pad: 5 Secs/15 Secs/30 Secs/60 Secs/Always On/ Always Off. -
Page 37: Security
SETTINGS SETTINGS SECURITY Prevents others from using the phone without permission and allows access to security features only after inputting a password. PHONE LOCK Prevents others from using your phone without permission. When locked, calls cannot be made and the menu cannot be accessed without entering the password. -
Page 38: Chapter 4 - Page 71
SETTINGS SETTINGS CAMERA Restricts access to camera mode. 1. Press [MENU] then enter “Password”. 2. Press then select “Allow” or “Restrict”. Allow: Allows access to the camera. Restrict: Restricts access to the camera. 3. To save, press [OK]. 900#S Restricts calling 900 dial service numbers. 1. -
Page 39: Reset Phone
SETTINGS SETTINGS ERASE ALL Clears all Phonebook entries, Downloads, Pix Gallery, Flix Gallery and SD Card entries. 1. Press [MENU] then enter “Password”. NOTE: The default password is the last 4 digits of your phone number. 2. Press 3. Select “Phonebook”, “Downloads”, “Pix Gallery”, “Flix Gallery”... -
Page 40: Others
SETTINGS SETTINGS SD CARD FORMAT You can format a mini SD card, if you want to delete all information. 1. Press [MENU] then enter “Password”. 2. Press TRANSFER TO NEW PHONE With the mini SD card, you can move your saved information to a new phone. -
Page 41: Chapter 4 - Page 77
An ideal setting for the hands-free car kit. When Auto Answer is enabled, call is automatically answered even when ear-mic or car kit is not connected to CDM8940. 1. Press [MENU] 2. Select “Handset”, “Headset”, or “Hands Free Kit”, then select one of the following options: Off/5 Secs/10 Secs/18 Secs. -
Page 42: Chapter 4 - Page 79
SETTINGS SETTINGS TTY MODE Your phone is able to operate with a TTY (Teletypewriter) device in both analog and digital modes. This feature is system dependent and may not be available in all areas. 1. Press [MENU] 2. Select one of the following options. TTY Off/TTY+TALK/TTY+HEAR/TTY Full 3. -
Page 43: System
SETTINGS SETTINGS SYSTEM SET MODE Selects the Preferred System. 1. Press [MENU] 2. Select one of the following options: Automatic B, Automatic A, Home only. Automatic B: Scans the radio channels based on the Automatic B setting. Automatic A: Scans the radio channels based on the Automatic A setting. -
Page 44: Phone Info
SETTINGS SETTINGS PHONE INFO To display the version of your phone: S/W VERSION 1. Press [MENU] 2. The software version appears. 3. Press [OK]. H/W VERSION 1. Press [MENU] 2. The hardware version appears. 3. Press [OK]. GET IT NOW VERSION 1. -
Page 45: Music
MEDIA GALLER MEDIA GALLER MUSIC This menu needs to be supported by mini SD Card. It plays the music stored in the mini SD Card. Copy the downloaded music from PC to mini SD Card, and play the music stored in the mini SD Card through your mobile phone. -
Page 46: Chapter 5 Supplementary Functions
MEMO MEMO Page 86 - Chapter 4 Chapter 5 SUPPLEMENTARY FUNCTIONS This chapter addresses supplemental functions including the voice tools, camera, schedule, memo pad, calculator, alarm, world clock and stop watch features. Voice Tools Schedule Alarm Memo Pad Calculator World Clock Stop Watch Camera Chapter 5 - Page 87... -
Page 47: Voice Tools
VOICE TOOLS VOICE TOOLS Voice Recognition (VR) enables you to place calls using your voice and to record voice memos. VOICE DIALING 1. Press and hold until your phone turns to Voice Recognition mode. 2. Say the indicator, such as a person’s name you saved for the number you are calling. -
Page 48: Voice Dial
VOICE TOOLS VOICE TOOLS VOICE DIAL Voice Dial allows you to call a person by simply saying their name. To access Voice Dial: 1. To start Tools menu, p ress 2. To enter a voice dial, press 3. 1.1. To record a voice dial, press The phone book list will be displayed alphabetically. -
Page 49: Voice Setting
VOICE TOOLS VOICE TOOLS WAKE-UP Use to train or untrain the Voice Recognition with the control word, “Wake-Up”. 1. Press [MENU] 2. “Please hold phone to ear and follow instructions” will be displayed and you will hear “Now training control words. -
Page 50: Add New Plan
SCHEDULE SCHEDULE Sets a scheduled plan and reminds you of that plan. ADD NEW PLAN 1. Press [MENU] 2. Move the Navigation Key left, right, up or down to choose a date in the calendar then press 3. To select plan options, press the Navigation Key downwards. -
Page 51: Alarm
ALARM ALARM You can set up to 3 alarms. 1. To display alarm entries, press 2. Select one of the entries using the Navigation Key. To set a new alarm, choose alarm 1, 2 or 3. To edit an existing alarm, select that alarm. Press [OK]. -
Page 52: View Memo
MEMO P MEMO P Your phone includes an internal memo pad that can be used to compose and store reminders and notes. ADD MEMO To compose a memo (there is an 80-letter limit): 1. Press [MENU] 2. Input a new text memo. (Please refer to page 37 for more details on entering letters, numbers and symbols.) 3. -
Page 53: Calculator
CALCULA CALCULA To access the calculator: 1. Press [MENU] 2. Follow the instructions below to calculate 8*6/4-2.5 Input 8. Move the Navigation Key to the right. Input 6 then press the Navigation Key to the left. Input 4 then press the Navigation Key down. Input 2 then press to input dot (.). -
Page 54: Stop Watch
You can activate the Camera Mode and take pictures or take videos. GETTING READY 1. Camera is located on the back of CDM8940 and protected by sliding cover. Please open the cover to expose camera. 2. Camera angle can be adjusted by sliding a button on the side of CDM8940. -
Page 55: Taking A Picture From The Menu
CAMERA (USE CAMERA) CAMERA (USE CAMERA) TAKING A PICTURE FROM THE MENU 1. Press [MENU] or press and hold the right side camera button, then press 2. Press [OK] or the right side camera button to take the picture. 3. To save the picture, press To go back to idle mode without saving the picture, press To send the picture to someone, press... -
Page 56: Camera (Take Flix)
CAMERA (USE CAMERA) CAMERA (USE CAMERA) CAMERA MODE OPTIONS To access the camera mode options, press Self Portrait: Take a picture of yourself by checking the view on the Sub LCD. Flash: To activate the flash function. (Off/Auto Flash/Always On/On This Shot) Self Timer: To activate the camera’s timer function. -
Page 57: Camera (Pix Gallery)
CAMERA ( AKE FLIX) CAMERA ( AKE FLIX) CAMERA MODE OPTIONS To access the camera mode options, press Self Portrait: Take a video of yourself by checking the view on the Sub LCD. Movie Light: To activate the movie flash function. (Off/Always On) Self Timer: To activate the camera’s timer function. -
Page 58: Camera (Help)
CAMERA ( FLIX GALLER CAMERA ( FLIX GALLER 1. Press [MENU] or press and hold the right side camera button then press 2. In “Flix Gallery”, list you can view all the videos you have recorded. 3. Select record video with the Navigation Key then press [OK]. -
Page 59: Chapter 6 Voice Mail And Txt, Pix, Flix Messages
MEMO MEMO Page 112 - Chapter 5 Chapter 6 VOICE MAIL AND TXT, PIX, FLIX MESSAGES This chapter addresses checking voice mail messages, as well as sending and receiving TXT, Pix or Flix messages. When a New Message Arrives New MSG Inbox Sent Web Alerts... -
Page 60: When A New Message Arrives
WHEN A NEW MESSAGE ARRIVES WHEN A NEW MESSAGE ARRIVES TXT, PIX, FLIX MESSAGE 1. The following display appears when a new message arrives. 2. To display the message, press [READ]. VOICE MAIL Displays the number of voice mails. You can access them by pressing 1. -
Page 61: New Pix Msg
NEW MSG NEW MSG 5. Under “Priority”, select “Normal” or “Urgent”. 6. Under “Insert Signature”, select “On” or “Off”. 7. To send the text message, press select the “Send”, then press To save the text message, press select “Save Msg”, then press Page 116 - Chapter 6 NEW PIX MSG To send a new picture message:... -
Page 62: New Flix Msg
NEW MSG NEW MSG 4. Under “Subject”, input a subject text and press [OK]. (Please refer to page 37 for more details on entering letters, numbers and symbols.) 5. To send a message to another person, select “CC” or “BCC”, input the phone numbers, then press [OK]. -
Page 63: Inbox
NEW MSG NEW MSG 4. Under “Subject”, input a subject text and press [OK]. (Please refer to page 37 for more details on entering letters, numbers and symbols.) 5. To send a message to another person, select “CC” or “BCC”, input the phone numbers, then press [OK]. -
Page 64: Chapter 6 - Page 123
INBOX INBOX REPLY WITH COPY 1. To reply to a received message and include the received message into the message. 2. To send the text message, press then select “Send” then press 3. To save the text message, press then select “Save Msg” then press FORWARD 1. -
Page 65: Sent
SENT SENT Manages sent text messages or messages waiting to be sent. 1. P ress [MENU] or press 2.1. Select a message, then press The text message is displayed. 2.2. To Erase Message, press 3. Press [MENU]. RESEND 1. To resend a text message. EDIT MESSAGE 1. -
Page 66: Web Alerts
WEB ALER WEB ALER WEB ALERTS 1. P ress [MENU] or press 2. To select “GoTo”, press To select “Erase Message”, press 3. The text message will be displayed. : Read Message. : Unread Message. : Displays the remaining text. GoTo : Connecting Selected Site. -
Page 67: Quick Text
QUICK TEXT QUICK TEXT QUICK TEXT To view/edit the Quick Text messages: 1. P ress [MENU] or press 2.1. Select a Quick Text message from the list. Press [MENU]. 2.2. To add a new Quick Text message, press [ADD NEW]. To edit the Quick Text message you have selected, press [EDIT]. -
Page 68: Auto Save
SETTINGS SETTINGS Manages messaging settings through various features. AUTO SAVE Select if you want to automatically save a message after sending it. 1. P ress [MENU] or press Press “Auto Save”. 2. Select “Off”, “On”, or “Prompt” with the Navigation Key. 3. -
Page 69: Remind
SETTINGS SETTINGS REMIND When “Remind” is set, CDM8940 periodically alerts the user until all the received messages are checked by the user. 1. P ress [MENU] or press Press “Remind”. 2. Select “On” or “Off” with the Navigation Key. 3. Press [OK]. -
Page 70: Block Or Unblock
SETTINGS SETTINGS BLOCK OR UNBLOCK To block all incoming messages from the phone number or email address of the sender. 1. P ress [MENU] or press Press “Block or Unblock”. 2. Select “Block”, “Unblock”, or “View List of Blocked Addresses” with the Navigation Key. 3. -
Page 71: Get It Now
GET IT NOW GET IT NOW Your phone provides a unique feature -Get It Now- that enables you to download melody ringtones, wallpapers, games and more from your network to your phone. Please contact your service provider for the availability of these services. -
Page 72: Erasing An Application
GET IT NOW GET IT NOW ERASING AN APPLICATION 1. Press [MENU] 2. Select “Settings” with Navigation Key and press 3. Select “Manage Apps” and press 4. Select the application to be erased with Navigation key then press 5. Select “Remove” then press 6. -
Page 73: Chapter 7 - Page 141
GET IT NOW GET IT NOW TO VIEW A STREAMING VIDEO 1. Press [MENU] 2. Select “Video Clips” with Navigation Key and press 3. Read the description of the video clip, and select one you want to view. 4. Select Yes to accept changes. 5. -
Page 74: Starting Internet Browser
TING INTERNET BROWSER LAUNCHING MOBILE WEB 2.0 Now you can access news, sports, weather, and e-mail from your CDM8940. Mobile Web 2.0 keeps you updated by providing access to up-to-date information such as news, sports, weather and stock quotes when you subscribe to Internet service with your service provider. -
Page 75: Chapter 8 Safety Information
BROWSER MENU BROWSER MENU CLEAR MEMORY To clear browser memory, press then press SETTINGS To select “Settings”, press [MENU] then press Downloads Restart Browser Scroll Mode Send Referrer Key Press Timeout Connection Timeout ADVANCED Selecting the advanced item in the browser menu displays the advanced menu items. -
Page 76: Safety Information For Wireless Handheld Phones
SAFETY INFORMA SAFETY INFORMA WIRELESS HANDHELD PHONES WIRELESS HANDHELD PHONES Read This Information Before Using Your Handheld Portable Cellular Telephone EXPOSURE TO RADIO FREQUENCY SIGNALS Your wireless handheld portable telephone is a low power radio transmitter and receiver. When it is ON, it receives and also sends out radio frequency (RF) signals. -
Page 77: Electronic Devices
SAFETY INFORMA SAFETY INFORMA WIRELESS HANDHELD PHONES WIRELESS HANDHELD PHONES ELECTRONIC DEVICES Most modern electronic equipment is shielded from RF energy. However, certain electronic equipment may not be shielded against the RF signals from your wireless phone. Pacemakers The Health Industry Manufacturers Association recommends that a minimum separation of six (6”) inches be maintained between a handheld wireless phone and a pacemaker to avoid potential interference with the pacemaker. -
Page 78: Other Safety Guidelines
DO NOT disassemble the phone or its accessories. If service or repair is required, return the unit to an author- ized Audiovox service center. If unit is disassembled, the risk of electric shock or fire may result. DO NOT short-circuit the battery terminals with metal items etc. -
Page 79: Operating Procedures
SAFETY INFORMA SAFETY INFORMA WIRELESS HANDHELD PHONES WIRELESS HANDHELD PHONES OPERATING PROCEDURES Never violate any of the following Rules and Regulations of the FCC when using your phone. The following offenses are punishable by fine, imprisonment, or both: - Using obscene, indecent, or profane language. - Using the unit to give off false distress calls. -
Page 80: Sar Information
INFORMA INFORMA THIS MODEL PHONE MEETS THE GOVERNMENT’S REQUIREMENTS FOR EXPOSURE TO RADIO WAVES. Your wireless phone is a radio transmitter and receiver. It is designed and manufactured not to exceed the emission limits for exposure to radiofrequency (RF) energy set by the Federal Communications Commission of the U.S. -
Page 81: Chapter 8 - Page 157
U.S. Food and Drug Administration - Center for Devices and Radiological Health Consumer Update on Mobile Phones 1. Do wireless phones pose a health hazard? The available scientific evidence does not show that any health problems are associated with using wireless phones. There is no proof, however, that wireless phones are absolutely safe. -
Page 82: Chapter 8 - Page 159
guidelines that were developed with the advice of FDA and other federal health and safety agencies. When the phone is located at greater distances from the user, the exposure to RF is drastically lower because a person’s RF exposure decreases rapidly with increasing distance from the source. -
Page 83: Chapter 8 - Page 161
The initial research will include both laboratory studies and studies of wireless phone users. The CRADA will also include a broad assessment of additional research needs in the context of the lat- est research developments around the world. 7. How can I find out how much radiofrequency energy exposure I can get by using my wireless phone? All phones sold in the United States must comply with Federal Communications Commission (FCC) guidelines that limit radiofre-... -
Page 84: Chapter 8 - Page 163
increasing the distance between the user and the RF source will reduce RF exposure. Some groups sponsored by other national governments have advised that children be discouraged from using wireless phones at all. For example, the government in the United Kingdom distributed leaflets containing such a recommen- dation in December 2000. -
Page 85: Chapter 9 Warranty
MEMO MEMO Chapter 9 WARRANTY Protect Your Warranty 12 Month Limited Warranty Chapter 9 - Page 165 Page 164 - Chapter 8... -
Page 86: Protect Your Warranty
Many companies are making look alike accessories and in some cases, promoting that their product is equal to or better than the Audiovox product. Be careful. Some of these products may not be compatible to use with your Audiovox product and may damage the unit or cause it to malfunction. -
Page 87: Chapter 9 - Page 169
IN U.S.A.: IN CANADA: ARRANTY ARRANTY UTStarcom/Audiovox Communications 555 Wireless Blvd. Hauppauge, NY 11788 (800) 229-1235 UTStarcom Canada Company 5155 Spectrum Way, Unit #5...
Need help?
Do you have a question about the Verizon Wireless CDM8940 and is the answer not in the manual?
Questions and answers