Audiovox CDM-8910 User Manual
Audiovox cdm-8910: user guide
Hide thumbs
Also See for CDM-8910:
- Owner's manual (71 pages) ,
- User manual (69 pages) ,
- User manual (68 pages)
Table of Contents
Advertisement
Quick Links
Download this manual
See also:
Owner's Manual
Advertisement
Table of Contents

Related Manuals for Audiovox CDM-8910


Summary of Contents for Audiovox CDM-8910
-
Page 2: Table Of Contents
WELCOME Thank you for choosing the up-to-date CDM-8910 our new model developed by top researchers to support the CDMA2000 1X system through Qualcomm-manufactured MSM6050 chips and CDMA technologies. This product allows for high speed communication services, such as data services, and a GUI animation menu. - Page 3 TABLE OF CONTENTS CHANGE MSG. GROUP NAME...41 SEND TEXT MSG. GROUP ...42 SEND PIX MSG. GROUP ...43 ERASE MSG. GROUP...43 MY PHONE # ...44 RECENT CALLS ...45 ALL CALLS...45 MISSED CALLS ...46 RECEIVED CALLS ...47 DIALED CALLS ...48 CALL TIMERS ...49 LAST CALL...49 ALL CALLS...49 HOME CALLS ...49...
- Page 4 4,901,307 U.S.Patent No. 5,056,109 U.S.Patent No. 5,099,204 U.S. Patent No. 5,101,501 U.S. Patent No. 5,103,459 U.S. Patent No. 5,107,225 U.S.Patent No. 5,109,390.” Chapter 1 BEFORE USING YOUR PHONE This chapter provides important information about using the CDM-8910 including: INSIDE THE PACKAGE HANDSET DESCRIPTION BATTERY USAGE BATTERY HANDLING INFORMATION...
-
Page 5: Inside The Package
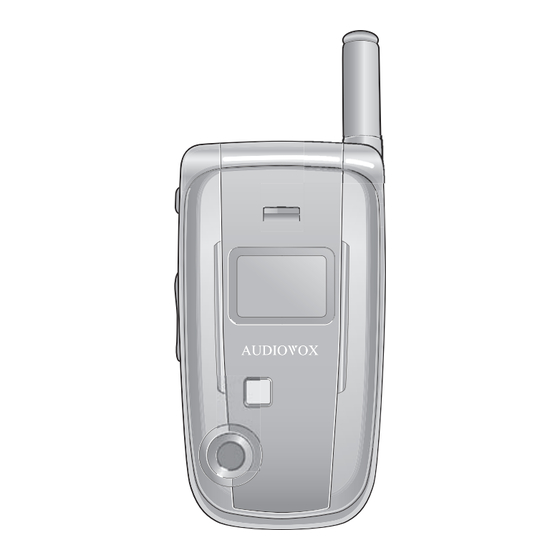
Standard Battery User Manual Handstrap Holster HANDSET DESCRIPTION This phone is a CDMA2000 1X digital (800 MHz CDMA/AMPS, 1900 MHz PCS) phone with camera. The CDM-8910 weighs 3.7oz. The dimensions are 4.5" x 1.8" x .9" Antenna Earjack Earpiece Camera... -
Page 6: Function Keys
HANDSET DESCRIPTION Display Indicators See page 9 for a list of icons. Text & Graphic area Soft Key Indicators Shows the functions currently assigned to each soft key and displays some icons. Menu Contacts Short Press : Camera Menu. Long Press : Camera Mode. -
Page 7: Battery Usage
HANDSET DESCRIPTION Dormant Indicates your phone is in a dormant state during a data call. Your phone goes to Dormant mode when you have not had any activity on a page for some time - your connection is still active and now you can make and receive calls. -
Page 8: Battery Charging
BATTERY USAGE BATTERY CHARGING POWER CONNECTION Plug the AC Charger into a standard outlet. Plug the other end of the AC Charger into the bottom of your phone. The battery must be installed on the phone. • The battery is not charged at the time of purchase. •... -
Page 9: Battery Handling Information
BATTERY HANDLING INFORMATION Only use the battery and charger approved by the manufacturer. Only use the battery for its original purpose. Try to keep batteries in a temperature between 41ºF (5ºC ) and 95ºF (35ºC). If the battery is stored in temperatures above or below the recommended range, give it time to warm up or cool down before using. -
Page 10: Turning The Phone On / Off
TURNING THE PHONE ON / OFF TURNING THE PHONE ON Press and hold , until “Power On” logo appears and the tone sounds. • To select a logo, refer to page 61 for more details. (Settings>Display>Graphics>Power On). • If “Password” appears on the display enter your 4-digit password to unlock your phone. -
Page 11: Menu Summary
MENU SUMMARY 1. Find 1. By Name 2. By Number 2. Add New 3. Group 4. Speed Dial 5. Msg. Group 6. My Phone # 1. All Calls 2. Missed Calls 3. Received Calls 4. Dialed Calls 5. Call Timers 1. -
Page 12: Basic Functions
MENU SUMMARY 1. Voice Memo 1. Record 2. Play 3. Play Speaker 4. Erase All 2. Voice Dial 1. Record 2. Play 3. Play Speaker 4. Erase All 3. Train Words 1. Yes 2. No 3. Wake-Up 4. Undo Train All 4. -
Page 13: Speaker Phone
BASIC FUNCTIONS SPEAKER PHONE The speaker phone feature lets you listen to audio through the speaker and talk without holding the phone. To activate the speaker phone in idle, answering or calling modes, press and hold The phone returns to normal (speaker phone off) after ending a call or when the phone is turned off and back on. -
Page 14: Caller Id Function
BASIC FUNCTIONS CALLER ID FUNCTION Identifies caller by displaying their phone number. If the caller’s name and number are already stored in your phone book, they both will appear. The caller ID is stored in the call history. CALL WAITING FUNCTION Notifies you of an incoming call when you are already on a call by sounding a beep tone and displaying the caller’s phone number. -
Page 15: During A Call
DURING A CALL To display menu options during a call, press [MENU]. MESSAGING Enables you to send a message during a call. Press [MENU] MUTE (UNMUTE) The caller cannot hear you or any sounds from your side but you can still hear them. -
Page 16: Making An Emergency Call
MAKING AN EMERGENCY CALL This 911 feature puts the phone in the Emergency Call Mode when you dial the preprogrammed emergency number, 911. It also operates in the lock mode and out of the service area. 911 IN LOCK MODE The 911 call service is available even in the lock mode. -
Page 17: Storing A Phone Number
STORING A PHONE NUMBER The phone book stores up to 300 entries. Enter phone #, then press [SAVE]. Choose “New Contact” or “Existing Contact”. Press [OK] to select. If New Contact is selected, the phone # will appear above a list of icons. The name of the icon is displayed below the list. -
Page 18: Standard Input Mode
ENTERING LETTERS, NUMBERS & SYMBOLS STANDARD INPUT MODE Use the digit keys to enter letters, numbers and characters. Enter letters using the key pad as follows: Repetitions Repetitions Repetitions Repetitions Key Pad Time 2 times 3 times 4 times 5 times 2ABC 3DEF 4GHI... -
Page 19: Numeric Mode
ENTERING LETTERS, NUMBERS & SYMBOLS NUMERIC MODE Allows you to enter numbers. To enter Numeric Mode, press [Abc] and select “NUM”. To enter a number, press a digit key. SYMBOL MODE Allows you to enter symbols. To enter Symbol Mode, press [Abc] and select “Symbols”. -
Page 20: Phone Book
PHONE BOOK Stores up to 300 entries, each of which can be assigned to a group. Entries can be retrieved by name, phone number or group. FIND Retrieves an entry by name and calls by simply pressing You can review all the entries stored in your phone book list or quickly find an entry by entering a name or phone number. -
Page 21: Add New
PHONE BOOK ADD NEW Adds a new entry. To add a new entry to the phone book, press [MENU] The Contact screen appears. Enter the name of the entry then press . Press the Navigation Key down to enter information for the other phone book fields. -
Page 22: Speed Dial
PHONE BOOK SPEED DIAL In idle mode, calls can be placed to numbers stored in speed dial by pressing & holding the location number on the key pad. For a 2-digit location number, press the first number, then press and hold the second number. -
Page 23: Send Text Msg. Group
PHONE BOOK SEND TEXT MSG. GROUP Press [MENU] Scroll to the group name. Select an existing group name with the Navigation Key. To select “Send Text Msg.”, press [MENU]. Press the Navigation Key down to select the Message field. 5.1. To send the text message, press [MENU], select “Send”, then press [OK]. -
Page 24: My Phone
PHONE BOOK MY PHONE # To display your phone number and service provider: Press [MENU] To return to the previous page, press [OK]. RECENT CALLS In idle mode, you can access recent calls by pressing [MENU] ALL CALLS Displays information about the most recent received, dialed and missed calls. -
Page 25: Missed Calls
RECENT CALLS MISSED CALLS Displays information about the 20 most recently missed calls. Place a call to a missed call number by simply pressing To see a list of the 20 most recently missed calls, press [MENU] . If the number is already stored in your phone book, only the name appears. -
Page 26: Dialed Calls
RECENT CALLS DIALED CALLS Displays information about the 20 most recently dialed numbers. Place a call to a dialed call by simply pressing To see a list of the 20 most recently dialed numbers, press [MENU] If the number is already stored in your phone book, only the name appears. -
Page 27: Roam Calls
RECENT CALLS ROAM CALLS Displays usage time of roaming calls. Press [MENU] View the time of the following items: Voice Call Data Call To reset the timer, press [RESET]. To return to the previous page, press [OK]. CUMULATIVE CALLS Displays usage time of all incoming and outgoing calls, excluding web access calls. -
Page 28: Brew
BREW Your phone provides a unique feature “BREW” that enables you to download melody ringers, wallpapers, games and more from your network to your phone. Please contact your service provider for the availability of these services. START BREW To launch “BREW” from the standby mode, press [MENU] or press... -
Page 29: Media Gallery
MEDIA GALLERY IMAGES GRAPHICS This menu displays the list of downloaded still images. Press [MENU] Press [MENU] to select 1.Erase, 2.Erase All, 3.Change Title. Scroll through the downloaded images to display the picture you want to send, then press To write your picture message, see “New Pix Msg”... -
Page 30: Settings
SETTINGS Customizes your phone and optimizes performance through a variety of settings. SOUNDS Sets Ringer Type, Volume, Alert, Roam Ringer, Tone Length and Etiquette. RINGER TYPE To select a ringer type for incoming calls: RINGER Press [MENU] Select your desired ringer type. Left or Right key : Select “Ring Tones”, “Music Bells”... -
Page 31: Alert
SETTINGS SPEAKER PHONE To adjust speaker phone volume: Press [MENU] Adjusts the speaker phone volume using the Navigation Key. Level 1 - 5 (Min- , Max- To activate, press [OK]. ALERT When selected, this setting alerts you to the following handset changes: MINUTE Sounds an alert every minute during a call. -
Page 32: Etiquette
SETTINGS ETIQUETTE To place the phone in Etiquette Mode so all phone sounds are muted: Press [MENU] Select “On” or “Off” with the Navigation Key, then press [OK] to activate it. Shortcut: To place phone in Etiquette Mode from standby mode, press and hold SETTINGS DISPLAY... -
Page 33: Sub Screen
SETTINGS POWER OFF Press [MENU] Select “Cellular South” with the Navigation Key. To activate it, press [SELECT]. RECEIVED Press [MENU] Select “Default” with the Navigation Key. To activate it, press [SELECT]. DIALED Press [MENU] Select “Default” with the Navigation Key. To activate it, press [SELECT]. -
Page 34: Greeting Message
SETTINGS GREETING MESSAGE To input a personal greeting: Press [MENU] The message field will be highlighted. Press the Navigation Key left or right to choose between On and Off. Press the Navigation Key down to move to the Font field, then left or right to choose a font. -
Page 35: Data Svc
SETTINGS DATA SVC. CONNECTION Choose the connection mode for the usage of your phone. Press [MENU] Select one of the following connection modes with the Navigation Key. Voice Call : To receive a voice call. Data Only : To receive data when connected to PC. To activate, press [OK]. - Page 36 SETTINGS RECENT CALLS Blocks access to Recent Call List. Press [MENU] , then enter your password. Press , then select “Allow” or “Restrict” with the Navigation Key. Allow : Allows a recent call. Restrict : Restricts a recent call. To activate, press [OK].
-
Page 37: Change Code
SETTINGS CHANGE CODE Changes your 4-digit password. Press [MENU] , then enter your password. Press Enter a new password, then press [OK]. Enter the new password again, then press [OK]. SPECIAL #’S Stores 3 phone numbers that can be called even in the lock mode. Press [MENU] , then enter your password. -
Page 38: Others
SETTINGS OTHERS ANSWER OPTIONS CALL ANSWER To select an answer mode: Press [MENU] Select “Any Key” or “Send Key” with the Navigation Key. Any Key : Press any key to answer an incoming call except Send Key : Press only to answer a call. -
Page 39: Language
SETTINGS LANGUAGE Selects the language in which letters are displayed on screen. Press [MENU] Select either “English” or “Spanish” with the Navigation Key. To activate, press [OK]. VOICE PRIVACY Enhances voice privacy to avoid tapping during a call. Press [MENU] Select “Standard”... -
Page 40: System
SETTINGS SYSTEM SET MODE Selects the Preferred System. Press [MENU] Select one of the following options (Automatic B /Automatic A /Home Only) with the Navigation Key, then press [OK]. Automatic B : Scans the radio channels based on the Automatic B setting. Automatic A : Scans the radio channels based on the Automatic A setting. -
Page 41: Phone Info
SETTINGS PHONE INFO Displays the version of your phone: S/W VERSION Press [MENU] The software version appears. Press [OK]. H/W VERSION Press [MENU] The hardware version appears. Press [OK]. BREW VERSION Press [MENU] The “BREW” software version appears. Press [OK]. UTILITIES SCHEDULE Sets a plan and reminds you of that plan. -
Page 42: View Plan
UTILITIES Press [SAVE] to save it or [CLR] to return to the calendar. The date of the plan will be marked on your calendar. VIEW PLAN To view the Event List, press [MENU] Move the Navigation Key to choose an event, then press [OK] or [ERASE]. -
Page 43: Memo Pad
UTILITIES SNOOZE SETTING Use the Navigation Key to select a Snooze setting (Off, 1 time after 5 min, 1 time after 10 min, 3 times by 5 min). RINGER SETTING To set a “Ringer” press [MENU], then select “Default” or “Change” using the Navigation Key. To save it, press [SELECT]. -
Page 44: Calculator
UTILITIES CALCULATOR To access the calculator: Press [MENU] Follow the instructions below to calculate 8*6Ö4-2.5 Press 8. Press the Navigation Key to the right. Press 6. Press the Navigation Key to the left. Press 4. Press the Navigation Key down. Press 2 then press to input (.). -
Page 45: Stop Watch
UTILITIES STOP WATCH Simultaneously times up to six different events. To operate the stop watch: Press [MENU] To measure a time period. 1. To start the stop watch, press [START]. 2. To pause it, press [STOP]. 3. To resume it, press To reset it, press [RESET]. -
Page 46: Camera Mode Options
CAMERA CAMERA MODE OPTIONS When the phone is open and in Camera Mode, several user options are available. GALLERY Press [GALLERY] to enter Review Mode. From there you can view the captured pictures, view a running count of stored pictures and more. RESOLUTION Press the Navigation Key up or down to adjust the picture size from High (640x480 pixels) to Med (320x240 pixels) to Low (160x120 pixels). -
Page 47: Pix Message
CAMERA PIX MESSAGE Once you’ve taken a picture, you can use the messaging capabilities of your phone to instantly share it with family and friends. To send a picture to a recipient’s email address or to their wireless phone: Press [MENU] Press for “New Pix”... -
Page 48: Chapter 5. Voice Service
MEMO Chapter 5 VOICE SERVICE This chapter addresses Voice Service, an advanced feature that allows you to place calls using your voice. With Voice Memo (VM) you can record voice messages and set the Answering Machine. Topics include: VOICE TOOLS MENU VOICE RECOGNITION MODE... -
Page 49: Voice Tools Menu
VOICE TOOLS MENU VOICE MEMO Voice Memo allows you to record a reminder message that can be up to 60 seconds. To record a memo: To start Tools menu, press [MENU] To enter a voice memo, press 1.1. To record a voice memo, press Instructions will be displayed and you will hear “Please record at the tone.”... -
Page 50: Train Words
VOICE TOOLS MENU TRAIN WORDS Train allows you to use Control words to make a call without using the keypad. Use to train or untrain the Voice Recognition with the control word, “Yes”. Press [MENU] “Please listen closely to hear instructions” will be displayed and you will hear “Now training control words. -
Page 51: Voice Setting
VOICE TOOLS MENU VOICE SETTING SET ACTIVE Allows the user to activate or deactivate voice dial service. Press [MENU] Select “Active Flip” or “Send Key” by pressing the Navigation Key left or right. To activate, press [OK]. HFK MODE While using the Hands Free Kit, activates or deactivates the voice recognition function. -
Page 52: Chapter 6. Voice Mail, Text And Pix Message
MEMO Chapter 6 VOICE MAIL, TEXT AND PIX MESSAGE This chapter addresses Voice Mail, Text and Pix Messaging functions including: WHEN A NEW MESSAGE ARRIVES VOICE MAIL NEW TEXT MSG NEW PIX MSG INBOX OUTBOX WEB ALERTS SAVED QUICK TEXT ERASE ALL SETTINGS... -
Page 53: When A New Message Arrives
WHEN A NEW MESSAGE ARRIVES The following display appears when a new message arrives. To display the message, press [READ]. VOICE MAIL Displays the number of voice mails and accesses them by pressing To access your voice mail, press [MENU] FIRST TIME USER Dial *86, then press At the recording, press... -
Page 54: New Pix Msg
NEW PIX MSG To send a new picture message: Press [MENU] Phone goes into camera mode automatically. Take a picture, then press [OK]. (Please refer to page 87 for more details on take a pix.) Under “Send To”, input the phone number, then press [OK]. -
Page 55: Inbox
INBOX The Inbox manages received text messages. To access: Press [MENU] : Urgent New Msg (not read) : Urgent Read Msg : New Msg (not read) : Old Msg (already read) : Lock (already read and locked) Select a message, then press [OK]. -
Page 56: Save To Saved
INBOX SAVE TO SAVED Select Save to Saved to save the message in your phone. SAVE TO QUICK TEXT Select Save to Quick Text to save the received text message to the Quick Text list. *BLOCK SENDER Select Block Sender to block all incoming messages from the sender of the message. -
Page 57: Edit Message
OUTBOX EDIT MESSAGE Select Edit Message to edit the message. Input a text message, then press Input the phone number, then press SAVE TO CONTACT Select Save to Contact to save the number to your contacts list. SAVE TO SAVED Select Save to Saved to save the message in your phone. -
Page 58: Saved
SAVED SAVED Manages saved messages from the Inbox/Outbox. Press [MENU] 2.1. Select a text message then press [OK]. The text message is displayed. 2.2. To erase message, press [ERASE]. Press [MENU]. If the text message is saved from the “Inbox” menu, this screen will be displayed. -
Page 59: Erase All
ERASE ALL ERASE MESSAGES Press [MENU] 1. To erase all the inbox messages, press Old Inbox : To erase all messages already read. (However, the locked Message(s) will not be deleted). Entire Inbox : To erase all messages. 2. To erase all the outbox messages, press 3. -
Page 60: Auto Erase
SETTINGS AUTO ERASE Automatically erases inbox/outbox messages when new messages arrive. INBOX Press [MENU] Press Select “Disable” or “Enable” with Navigation Key. Press [OK]. OUTBOX Press [MENU] Press Select “Disable” or “Enable” with Navigation Key. Press [OK]. SETTINGS DEFAULT CALLBACK Edits a default callback number so that the recipient can callback or reply. -
Page 61: Edit Signature
SETTINGS EDIT SIGNATURE Create a signature that can be automatically inserted at the end of a message. Press [MENU] Press To input “Signature”, put the cursor on Edit Signature, then enter Signature Edit window by using right or left direction keys. To activate Signature function, put the cursor on Insert Signature, then select “On”... -
Page 62: Chapter 7. Web Browsing
MEMO Chapter 7 WEB BROWSING This chapter addresses Internet services and web browsing. For more detailed information contact your service provider. LAUNCHING MOBILE WEB BROWSER MENU... -
Page 63: Launching Mobile Web
LAUNCHING MOBILE WEB ACCESS THE INTERNET To start your Internet browser and access websites through your wireless handset press [MENU] BROWSER MENU The browser menu lists the actions necessary to operate the browser. To access press [MENU] HOME When the home item is selected from the browser menu, the phone displays the home page. -
Page 64: Advanced
BROWSER MENU ADVANCED Selecting the advanced item in the browser menu displays the advanced menu items. To select “Advanced”, press [MENU] , then press EXIT To exit browser, press [MENU] , then press Chapter 8 SAFETY AND WARRANTY This chapter addresses the safety guidelines and precautions to follow when operating your phone. -
Page 65: Safety Information For Wireless Handheld Phones
SAFETY INFORMATION FOR WIRELESS HANDHELD PHONES EXPOSURE TO RADIO FREQUENCY SIGNALS Your wireless handheld portable telephone is a low power radio transmitter and receiver. When it is ON, it receives and also sends out radio frequency (RF) signals. In August 1996, the Federal Communications Commissions (FCC) adopted RF exposure guidelines with safety levels for handheld wireless phones. -
Page 66: Electronic Devices
SAFETY INFORMATION FOR WIRELESS HANDHELD PHONES ELECTRONIC DEVICES Most modern electronic equipment is shielded from RF energy. However, certain electronic equipment may not be shielded against the RF signals from your wireless phone. PACEMAKERS The Health Industry Manufacturers Association recommends that a minimum separation of six (6”) inches be maintained between a handheld wireless phone and a pacemaker to avoid potential interference with the pacemaker. -
Page 67: Handheld Phones
DO NOT use unauthorized accessories. DO NOT disassemble the phone or its accessories. If service or repair is required, return unit to an authorized Audiovox cellular service center. If unit is disassembled, the risk of electric shock or fire may result. -
Page 68: Sar Information
SAR INFORMATION THIS MODEL PHONE MEETS THE GOVERNMENT’S REQUIREMENTS FOR EXPOSURE TO RADIO WAVES. Your wireless phone is a radio transmitter and receiver. It is designed and manufactured not to exceed the emission limits for exposure to radiofrequency (RF) energy set by the Federal Communications Commission of the U.S. -
Page 69: Fda Consumer Update
FDA CONSUMER UPDATE U.S. Food and Drug Administration -Center for Devices and Radiological Health Consumer Update on Wireless Phones 1. Do wireless phones pose a health hazard? The available scientific evidence does not show that any health problems are associated with using wireless phones. There is no proof, however, that wireless phones are absolutely safe. - Page 70 FDA CONSUMER UPDATE The Project has also helped develop a series of public information documents on EMF issues. FDA and the Cellular Telecommunications & Internet Association (CTIA) have a formal Cooperative Research and Development Agreement (CRADA) to do research on wireless phone safety. FDA provides the scientific oversight, obtaining input from experts in government, industry, and academic or- ganizations.
-
Page 71: Protect Your Warranty
Audiovox product. Be careful. Some of these products may not be compatible to use with your Audiovox product and may damage the unit or cause it to malfunction. If service is required on your unit and it is determined that a non-Audiovox accessory has created the problem with your unit, the Warranty will not apply. - Page 72 This Warranty gives you specific legal rights, and you may also have other rights which vary from state to state or province to province. IN USA : UTStarcom/Audiovox Communications 555 Wireless Blvd. Hauppauge, NY 11788 (800) 229-1235...
Need help?
Do you have a question about the CDM-8910 and is the answer not in the manual?
Questions and answers