
Related Manuals for Audiovox CDM-8500


Summary of Contents for Audiovox CDM-8500
- Page 1 Owner’s Manual 555 Wireless Boulevard • Hauppauge, New York 11788 800.229.1235 • www.audiovox.com • LTCLOM253 ©2002 Audiovox Communications Corporation...
- Page 2 With that in mind, Audiovox developed the CDM-8500, a tri mode clamshell style cell phone with dual LCD displays. This 1X digital cell phone enables carriers supporting 1X technology to provide consumers with access to high speed connectivity.
-
Page 3: Table Of Contents
TABLE OF CONTENTS CHAPTER 1 BEFORE USING YOUR PHONE ...7 Package Contents ...8 Cell Phone Description ...9 Function Keys...10 Display Indicators...11 Using the Battery...13 Installing the Battery ...13 Removing the Battery ...13 Charging the Battery...14 Battery Charging Time ...15 Battery Talk and Standby Times ...15 Battery Information ...16... - Page 4 TABLE OF CONTENTS My Profile...29 Voice Privacy ...29 Location ...29 Virgin Mobile Account...30 Checking Your Account Balance ...30 Top-Up Your Account...30 Virgin Alerts ...31 To View a Stored Virgin Alert ...31 CHAPTER 3 MEMORY FUNCTION ...33 Storing Phone Numbers ...34 Text Input Methods ...35 Entering Characters...35 Alpha Mode [ABC] ...35...
- Page 5 TABLE OF CONTENTS CHAPTER 6 VOICEMAIL AND TEXT MESSAGES .97 Two-Way Text Messaging...98 Message Indicators...98 Received Message Notification ...98 Checking Messages ...99 Checking Received Voicemail Messages ...99 Checking Received Text Messages...99 Sending Text Messages...100 Sending New Text Messages ...100 Text Inbox...102 Text Inbox Menu ...102 Net Alerts ...104 Net Alerts ...104...
-
Page 6: Chapter 1 Before Using Your Phone
Once you have read this chapter, you can move on to the basic and advanced features of your phone. Package Contents Cell Phone Description Function Keys Display Indicators Using the Battery... -
Page 7: Package Contents
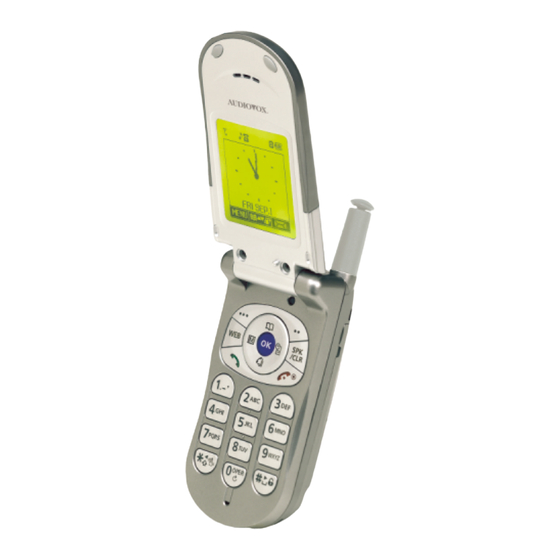
Page 8 - Chapter 1 CELL PHONE DESCRIPTION CELL PHONE DESCRIPTION This phone is a tri mode CDMA2000 1X digital phone with data capabilities. The CDM-8500 weighs at 3.1 oz. and the dimensions are 3.3” x 1.6” x 9”. Standard Battery Travel Charger... -
Page 8: Function Keys
FUNCTION KEYS FUNCTION KEYS END KEY: Press to turn the cell phone on or off. Terminates a call or exits the current menu. SEND KEY: Press to make or receive a call. NAVIGATION KEY: Press the arrow keys to scroll through the menu. Press OK to select an item in the menu. -
Page 9: Using The Battery
Vibrate NOTE: USING THE BA TTER USING THE BA TTER If the battery is not correctly placed in the battery compartment, the cell phone will not turn on and/or the battery may detach during use. Chapter 1 - Page 13... -
Page 10: Charging The Battery
NOTE: TTER TTER 1. It is more efficient to charge the battery with the cell phone off. 2. The battery must be connected to the phone in order to charge it. 3. If the LED flickers while charging. May need cleaning or there may be a problem with the battery. -
Page 11: Chapter 2 Basic Operation
TTER Y INFORMA TTER Y INFORMA Use only manufacturer approved batteries. Never use a damaged or worn out battery. Use the battery only for its intended purpose. Never expose the battery terminals to any other metal object. This can short circuit the battery. Avoid exposure to temperature extremes. -
Page 12: Using The Phone
For More Information For more information about your Virgin Mobile account and Virgin Mobile service, visit www.virginmobileusa.com or contact Virgin Mobile at (888) 322-1122. For more informa- tion on your phone, visit www.audiovox.com. USING THE MENU USING THE MENU USING THE MENU 1. -
Page 13: Menu Summary (Sample)
MENU SUMMAR Y (SAMPLE) MENU SUMMAR Y (SAMPLE) BALANCE 1 : Check Balance 2 : Top-Up 3 : Virgin Alerts TOP-UP 1 : Voicemail MESSAGES 2 : Send New 3 : Text Inbox 4 : Net Alerts 5 : Text Outbox 6 : Filed 7 : Erase Msgs 8 : Msg Settings... -
Page 14: Basic Functions
MENU SUMMAR Y (SAMPLE) MENU SUMMAR Y (SAMPLE) 1 : Calculator TOOLS 2 : World Clock 3 : Stopwatch 4 : Location 1: Voice Memo VOICE SVC. 2: Call Answer 3: Voice Command 4: Voice Dial 5: Voice Alert 6: Voice Setting Page 22 - Chapter 2 MAKING A CALL 1. -
Page 15: Pause Feature
BASIC FUNCTIONS BASIC FUNCTIONS PAUSE FEATURE Pauses are used for automated systems (i.e., voicemail and calling cards). Insert a pause after a phone number, then enter another group of numbers. The second set of numbers is dialed automatically after the pause. This feature is useful for dialing into systems that require a code. -
Page 16: Call Waiting
2. To switch back to the first caller, press ADJUSTING THE VOLUME You can adjust the volume in two ways: by using the volume control keys on the side of the cell phone when it is closed, or by pressing Pressing volume control keys: During a call : Adjusts earpiece volume. -
Page 17: Functions During A Call
FUNCTIONS DURING A CALL FUNCTIONS DURING A CALL These menu items are available while you are on a call. MUTE Mutes the microphone while you are on a call so the other party cannot hear you if you speak. 1. Press “MUTE”. -
Page 18: Virgin Mobile Account
VIRGIN MOBILE ACCOUNT VIRGIN MOBILE ACCOUNT You can manage your Virgin Mobile account from your phone. The basic tasks are summarized below. For more information about your Virgin Mobile account, contact Virgin Mobile. CHECKING YOUR ACCOUNT BALANCE You can check the amount of money remaining in your Virgin Mobile account. -
Page 19: Chapter 3 Memory Function
MEMO MEMO Page 32 - Chapter 2 Chapter 3 MEMORY FUNCTION This chapter addresses numerous functions including saving phone numbers to the internal contacts, entering text and accessing call logs. Storing Phone Numbers Text Input Methods Speed Dialing Call Logs Call Times Using Your Contacts Chapter 3 - Page 33... -
Page 20: Storing Phone Numbers
STORING PHONE NUMBERS STORING PHONE NUMBERS The CDM-8500 can store up to 300 contacts. 1. Enter the phone number, including area code, and press [STO]. 2. Press “Add New Entry”. 3. Select the phone number type by pressing the navigation key... -
Page 21: Tm Predictive Text Mode
TEXT INPUT METHODS TEXT INPUT METHODS PREDICTIVE TEXT MODE [T9 To choose T9 mode, press choose [T9 ABC]. This mode predicts the words you are entering using a built-in dictionary. With T9 dictive text input, you press each key only once for each letter. -
Page 22: Numeric Mode [123]
TEXT INPUT METHODS TEXT INPUT METHODS NUMERIC MODE [123] Numeric mode allows you to add a number to your entry/message. To select numeric mode, press [MODE] then select [123]. SYMBOL MODE [SYM] Selecting symbol mode allows you to add various sym- bols to your entry. -
Page 23: Call Logs
CALL LOGS CALL LOGS The CDM-8500 keeps a log of the 10 most recently missed, answered (incoming) and dialed (outgoing) calls. Log information includes the phone number and the date and time of the call. OUTGOING CALLS 1. To view the 10 most recently dialed numbers, press The 4 most recent calls will be listed first. -
Page 24: Missed Calls
CALL LOGS CALL LOGS MISSED CALLS 1. To view the 10 most recently missed calls, press The 4 most recent calls will be listed first. 2. Use the navigation key to scroll through the list of missed calls, then select the desired number. -
Page 25: Using Your Contacts
USING YOUR CONT USING YOUR CONT RECALLING BY GROUP 1. Press 2. Select one of the options (Family, Friends, Work, Etc, All) with the navigation key 3. All the entries under the group will appear. You can delete the entry by pressing pressing when it is selected. -
Page 26: Edit Group
USING YOUR CONT USING YOUR CONT EDIT EXISTING ENTRY 1. To edit an existing entry, press The 5 entry groups appear – Family, Friends, Work, Etc., All. 2. Use the navigation key to select one of the groups and press 3. -
Page 27: Clear Group
USING YOUR CONT USING YOUR CONT CLEAR GROUP 1. To delete an existing group, press 2. Use the navigation key to select the group to be deleted and press 3. If a phone number already exists in the location, press , then to delete it. - Page 28 MEMO MEMO Page 50 - Chapter 3 Chapter 4 SETTINGS This chapter addresses customizing your phone by adjusting Backlighting, Volume, Ringtones and other user-friendly features. Settings VR Mode VS Menu Chapter 4 - Page 51...
-
Page 29: Chapter 4 Settings
SETTINGS SETTINGS SOUNDS You can choose different Ringtones, Ringtone Mode, Volume, Alert and Tone length. RINGTONES Select Ringtones to set a pre-programmed tone or My Ringtones to set up a downloaded Ringtone. RINGTONES 1. Press 2. Select a Ringtone from the list. 3. -
Page 30: Settings
SETTINGS SETTINGS ALERT Sounds an alert to any change occurring on the phone. MINUTE ALERT Sounds an alert every minute of a phone call. 1. Press 2. Select “OFF” or “ON” with the navigation key then press to save it. CONNECT ALERT Notifies you that a call has been successfully placed. -
Page 31: Display
SETTINGS SETTINGS DISPLAY Customizes and personalizes the display. ANIMATION SETTING Selects your favorite LCD display in the following modes: IDLE DISPLAY 1. Press 2. Select an animation from the Animation List to use in the idle mode by using the navigation key 3. -
Page 32: Chapter 4 - Page 59
SETTINGS SETTINGS LCD SETTING Controls backlight and LCD contrast for better view and more efficient use. BACKLIGHTING Backlights the display and keypad for easy viewing in dark places. 1. Press 2. Select one of the following options: 5 secs, 10 secs, 20 secs, Off. Off: Turns the backlight off 5 secs, 10 secs, 20 secs : Backlight remains on for 5, 10, or 20 seconds after touching... -
Page 33: Security
SETTINGS SETTINGS SUB LCD SETTING Controls backlight and Sub LCD contrast for better view and more efficient use. SUB LCD CLOCK To select an Sub LCD clock display: 1. Press 2. Select one of the following options: Analog Clock, Digital Clock. 3. -
Page 34: Chapter 4 - Page 63
SETTINGS SETTINGS INCOMING CALL Blocks all incoming calls, but allows outgoing calls to be placed. 1. Press then enter “PASSWORD.” 2. Press then select “Allow” or “Restrict” with the navigation key Restrict : Restrict an incoming call. Allow : Allow an incoming call 3. -
Page 35: Long Distance
SETTINGS SETTINGS CONTACTS Blocks access to, and protects data in your contacts. 1. Press then enter “PASSWORD.” 2. Press then select “Allow” or “Restrict” with the navigation key Restrict : Restrict access to the contacts. Allow : Allow access to the contacts. 3. -
Page 36: Chapter 4 - Page 67
SETTINGS SETTINGS SPECIAL #’s Stores 3 phone numbers that are allowed to be dialed even in lock mode. 1. Press then enter “PASSWORD.” 2. Press then select one from three blanks with the navigation key 3. Press and input a phone number 4. -
Page 37: Others
SETTINGS SETTINGS OTHERS ANSWER MODE Selects an Answer mode. 1. Press 2. Select “Any Key” or “Send Key” with the navigation Any Key : Press any key to answer an incoming call except , and Send Key : Press only to answer a call. -
Page 38: Auto Answer
SETTINGS SETTINGS AUTO ANSWER Automatically answers a call after a preset number of rings. An ideal setting for the hands-free car kit. 1. Press 2. Select one from the following items (off, 5, 10, 18 seconds) with the navigation key NOTE: This function will not be activated when you select Vibrate, Silent, or Ringtone after Vibrate... -
Page 39: Name
VR MODE VR MODE Voice Recognition (VR) enables you to place calls and record voice memos using your voice. 1. Press and hold until your phone turns to VR mode. 2. When the phone turns to VR mode, the screen on the right appears. NOTE: Depending on the prompt mode –... -
Page 40: Voice Memo
VR MODE VR MODE VOICE MEMO This feature is the same as on page 76, except you must use the phone to access the menu not your voice. 1. Press and hold until your phone turns to VR mode. 2. Say “Voice Memo”. Instructions will appear and you will hear “Please record it at the tone”. -
Page 41: Voice Memo
VS MENU VS MENU VOICE MEMO RECORD VOICE MEMO 1. To start VS menu, press 2. To enter the voice memo menu, press 3. When you press to record a voice memo, instructions will appear and you will hear “Please record it at the tone”. -
Page 42: Voice Command
VS MENU VS MENU VOICE COMMAND Trains the VR with the following categories of control words: YES/NO 1. Press 2. Press 3. Select one of the following options with the navigation , then press LIST WORDS : Displays the list of control words in the Yes/No set. -
Page 43: Top Level
VS MENU VS MENU TOP LEVEL Use the Top Level to Train or Untrain the VR with your control words. (Dial, Redial, Voice Memo, Phonebook, Cancel). 1. Press 2. Press 3. Select one of the following options with the navigation , then press LIST WORDS : Displays the list of control words in the Top Level set. -
Page 44: Voice Dial
VS MENU VS MENU VOICE DIAL Lists, adds and erases voice tags for a contact entry. LIST 1. Press 2. To list contact entries with attached voice tags, press 3. Select one with the navigation key EDIT : Retrain / Voice Setting / Clear PLAY : Play voice tag. -
Page 45: Voice Alert
VS MENU VS MENU VOICE ALERT Sets the voice alert service. ON/OFF 1. Press 2. Press 3. Select “On” or “Off” with the navigation key then press RECORD 1. Press 2. Press 3. Record voice alert. PLAY 1. Press 2. Press 3. -
Page 46: Digit Mode
VS MENU VS MENU DIGIT MODE Use the digit mode to select one of the following options ; echo, beep, echo+beep. 1. Press 2. Press 3. Select one option with the navigation key press ECHO: Digit echoes back when entered. BEEP: Digit beeps when entered. -
Page 47: Chapter 5 Supplementary Functions
MEMO MEMO Page 88 - Chapter 4 Chapter 5 SUPPLEMENTARY FUNCTIONS This chapter addresses supplemental functions including the schedule, calculator, clock and stopwatch features. Schedule Calculator World Clock Stopwatch Location Chapter 5 - Page 89... -
Page 48: Event
SCHEDULE SCHEDULE Reminds you of a previously scheduled event or anniversary with an alarm. EVENT 1. To display a calendar, press 2. Use the navigation key to choose a date in the calendar, then press Day to Day movement: Press the navigation key left and right. -
Page 49: Calculator
CALCULA CALCULA CALCULATOR Allows you to use the CDM-8500 as a calculator to perform basic mathematic functions (addition, subtraction, multiplication, division). 1. Press then for calculator. 2. Use the keypad to enter the numbers to be calculated. 3. Follow the instructions below to calculate (8*6)/4-2.5... -
Page 50: Stopwatch
STOPW STOPW STOPWATCH Allows you to use your phone as a stopwatch. The stopwatch displays time in hours, minutes, seconds, and 1/100 of a second. 1. Press then for stopwatch. 2. To measure a time period. To start the stopwatch, press To pause it, press To reset it, press Press... -
Page 51: Chapter 6 Voicemail And Text Messages
MEMO MEMO Page 96 - Chapter 5 Chapter 6 VOICEMAIL AND TEXT MESSAGES This chapter addresses checking voicemail messages, as well as sending and receiving text messages. Two-Way Text Messaging Checking Messages Sending Text Messages Text Inbox Net Alerts Text Outbox Filed Erase Messages Message Settings... -
Page 52: Two-Way Text Messaging
TWO-W Y TEXT MESSAGING TWO-W Y TEXT MESSAGING Your CDM-8500 features Two-Way Short Message Service (SMS). This feature sends and receives text messages through your phone. Voicemail notification is also supported. MESSAGE INDICATORS The following symbols indicate the status of a message received by your phone. -
Page 53: Sending Text Messages
SENDING TEXT MESSAGES SENDING TEXT MESSAGES SENDING NEW TEXT MESSAGES 1. Press then press “Send New”. 2. Input phone number, then press 3. Input the text message, then press Send New menu. SEND 1. To send the text message, press NOTE: If the message failed to reach the other party, the display will read “Delivery Failed. -
Page 54: Text Inbox Menu
TEXT INBOX TEXT INBOX TEXT INBOX MENU To enter the Text Inbox menu, follow the procedures for checking received text messages on page 99. REPLY 1. To reply to the text message, press 2. Enter your message, then press ERASE 1. -
Page 55: Net Alerts
NET ALER NET ALER NET ALERTS 1. To enter the Net Alerts menu, press then “Net Alerts”. 2. Select the Go To, then press Select the erase message, then press The text message will be displayed. • [ ] : Read Message. •... -
Page 56: Filed
TEXT OUTBOX TEXT OUTBOX SAVE ADDRESS 1. To save the call back number as a contact, press [OPTS] scroll down, select “Save Address” and press 2. To save the call back number into a memory location, follow the procedures for storing phone numbers on page 34. -
Page 57: Message Settings Menu
ERASE MESSAGES ERASE MESSAGES ERASE MESSAGES 1. Press “Erase Msgs”. 2.1. To erase messages in the Text Inbox, press NOTE: Select “Entire Inbox” or “Old Inbox”. 2.2. To erase messages in the Text Outbox, press 2.3. To erase messages in the Filed, press 2.4. -
Page 58: Chapter 7 Making An Emergency Call
MESSAGE SETTINGS MESSAGE SETTINGS DISPLAY DELIVERY ACKNOWLEDGEMENT 1. Press “Display Deliv. Ack”. 2. Select (No/Yes) using the navigation key then press AUTO ERASE 1. Press “Auto Erase”. AUTO ERASE INBOX 1. Press “Inbox”. 2. Select (Disable/Old Inbox) using the navigation , then press AUTO ERASE OUTBOX 1. -
Page 59: Emergency Calling
When a emergency call ends, the phone is in the Emergency Mode for 5 minutes Page 112 - Chapter 7 Chapter 8 VIRGINXTRAS This chapter address using your cell phone to access VirginXtras. Start VirginXtras Browser Menu VirginXtras Chapter 8 - Page 113... -
Page 60: Start Virginxtras
T VIRGINXTRAS T VIRGINXTRAS START VIRGINXTRAS Your CDM-8500 allows you access VirginXtras directly from your phone. 1. To access VirginXtras, press 2. The Internet browser will launch. 3. Scroll down the page using the navigation key 4. To select the softkey at the bottom of the display, press 5. -
Page 61: Chapter 8 - Page 117
BROWSER MENU BROWSER MENU ADVANCED Displays Advanced Menu options. 1. To select Advanced, press SHOW URL Displays the URL (Uniform Resource Locator) of the current page. 1. To select Show URL, press HOMEPAGE Enables you to change the homepage. 1. To select Homepage, press SET WAP PROXY Enables you to select another WAP PROXY. -
Page 62: Safety Information
VIRGINXTRAS VIRGINXTRAS ACCESSING VIRGINXTRAS You can access a variety of entertainment, music, and information services. 1. To start a VirginXtras session and access these services, press When you select VirginXtras, a session is initiated. You cannot receive incoming calls when a VirginXtras session is in progress. -
Page 63: Safety Information For Wireless Handheld Phones
SAFETY INFORMATION FOR WIRELESS HANDHELD PHONES Read This Information Before Using Your Handheld Portable Cellular Telephone EXPOSURE TO RADIO FREQUENCY SIGNALS Your wireless handheld portable telephone is a low power radio transmitter and receiver. When it is ON, it receives and also sends out radio frequency (RF) signals. -
Page 64: Electronic Devices
SAFETY INFORMATION FOR WIRELESS HANDHELD PHONES ELECTRONIC DEVICES Most modern electronic equipment is shielded from RF energy. However, certain electronic equipment may not be shielded against the RF signals from your wireless phone. Pacemakers The Health Industry Manufacturers Association recommends that a minimum separation of six (6”) inches be maintained between a handheld wireless phone and a pacemaker to avoid potential interference with the pacemaker. -
Page 65: Other Safety Guidelines
5. DO NOT disassemble the phone or its accessories. If service or repair is required, return the unit to an author- ized Audiovox service center. If unit is disassembled, the risk of electric shock or fire may result. 6. DO NOT short-circuit the battery terminals with metal items etc. -
Page 66: Safety Information For Fcc Rf Exposure
SAFETY INFORMATION FOR WIRELESS HANDHELD PHONES OPERATING PROCEDURES Never violate any of the following Rules and Regulations of the FCC when using your phone. The following offenses are punishable by fine, imprisonment, or both: - Using obscene, indecent, or profane language. - Using the unit to give off false distress calls. -
Page 67: Sar Information
SAR INFORMATION THIS MODEL PHONE MEETS THE GOVERNMENT’S REQUIREMENTS FOR EXPOSURE TO RADIO WAVES. Your wireless phone is a radio transmitter and receiver. It is designed and manufactured not to exceed the emission limits for exposure to radiofrequency (RF) energy set by the Federal Communications Commission of the U.S. -
Page 68: Chapter 9 - Page 131
U.S. Food and Drug Administration - Center for Devices and Radiological Health Consumer Update on Mobile Phones 1. Do wireless phones pose a health hazard? The available scientific evidence does not show that any health problems are associated with using wireless phones. There is no proof, however, that wireless phones are absolutely safe. -
Page 69: Chapter 9 - Page 133
guidelines that were developed with the advice of FDA and other federal health and safety agencies. When the phone is located at greater distances from the user, the exposure to RF is drastically lower because a person’s RF exposure decreases rapidly with increasing distance from the source. -
Page 70: Chapter 9 - Page 135
The initial research will include both laboratory studies and studies of wireless phone users. The CRADA will also include a broad assessment of additional research needs in the context of the lat- est research developments around the world. 7. How can I find out how much radiofrequency energy exposure I can get by using my wireless phone? All phones sold in the United States must comply with Federal Communications Commission (FCC) guidelines that limit radiofre-... -
Page 71: Chapter 9 - Page 137
increasing the distance between the user and the RF source will reduce RF exposure. Some groups sponsored by other national governments have advised that children be discouraged from using wireless phones at all. For example, the government in the United Kingdom distributed leaflets containing such a recommen- dation in December 2000. -
Page 72: Warranty
MEMO MEMO Chapter 10 WARRANTY Protect Your Warranty 12 Month Limited Warranty Page 138 - Chapter 9 Chapter 10 - Page 139... -
Page 73: Protect Your Warranty
Many companies are making look alike accessories and in some cases, promoting that their product is equal to or better than the Audiovox product. Be careful. Some of these products may not be compatible to use with your Audiovox product and may damage the unit or cause it to malfunction. -
Page 74: Chapter 10 - Page 143
IN U.S.A.: IN CANADA: ARRANTY ARRANTY Audiovox Communications Corp. 555 Wireless Blvd. Hauppauge, NY 11788 (800) 229-1235 Audiovox Communications Canada Co. 5155 Spectrum Way, Unit #5 Mississauga, Ontario L4W 5A1 (800) 465-9672 Chapter 10 - Page 143...
Need help?
Do you have a question about the CDM-8500 and is the answer not in the manual?
Questions and answers