Table of Contents
Advertisement
Quick Links
Issued 2016-06
S OLID FUE L STOVE
O PER ATIN G M ANUAL
WITH INSTAL L ATIO N I NS T RUC TI O N S
So me i n st a ll ati o n ad v i c e g iven i n thi s i nstructi on
ma n u a l w o u ld, i f f o l l owed , result i n an i ns tal latio n that
ma y no t me e t UK b ui l d i n g re gulati ons. A sup p l ementar y
i nst ru c ti o n ma n u al i s p rovi d ed to g ive co rrect ad v ic e
f o r i ns ta l la t ion s a nd u se w i th i n the UK.
L H S
( R E GA - )
UK
4 0. 4 N
50 .4 N
60 . 4
75 .4 N
90 . 4 N
1 05 . 4 N
Page 1
Advertisement
Table of Contents

Subscribe to Our Youtube Channel
Related Manuals for LOHBERGER 40.4 N


Summary of Contents for LOHBERGER 40.4 N
- Page 1 S OLID FUE L STOVE L H S 4 0. 4 N ( R E GA - ) 50 .4 N 60 . 4 75 .4 N 90 . 4 N 1 05 . 4 N O PER ATIN G M ANUAL WITH INSTAL L ATIO N I NS T RUC TI O N S So me i n st a ll ati o n ad v i c e g iven i n thi s i nstructi on ma n u a l w o u ld, i f f o l l owed , result i n an i ns tal latio n that...
-
Page 2: Table Of Contents
Table of Contents Table of Contents Table of Contents 1. Important standards / guidelines .........3 Air control Primary air control 2. Important instructions prior to installation & start-up .4 Secondary air control Grate riddling 3. Safety instructions ............5 Ash door protection During installation and operation Cooking surface 14. - Page 3 A proper handling and care are essential for a trouble-free operation and a long life. So please read these instructions carefully. We are convinced that this appliance will give pleasure to you. Your LOHBERGER Heiz + Kochgeräte Technologie GmbH Our contribution towards climate protection Our contribution towards climate protection...
-
Page 4: Important Standards / Guidelines
2. 2. 2. Important instructions prior to installation and start-up Important instructions prior to installation and start-up Important instructions prior to installation and start-up CAUTION! CHILDREN PLAYING! Before connecting the appliance to the chimney, Before connecting the appliance to the chimney, Before connecting the appliance to the chimney, inform the local qualifi ed chimney sweep inform the local qualifi ed chimney sweep... -
Page 5: Safety Instructions
Only install genuine spare parts provided by your local specialist dealer or by our company. Wearing parts (e.g. seals), components exposed to high thermal stress (fi reclay, cast-iron parts) or broken stove parts should be replaced or exchanged as soon as possible. -
Page 6: Transport / Unpacking / Inspection
4. 4. 4. Transport / Unpacking / Inspection Transport / Unpacking / Inspection Transport / Unpacking / Inspection The packaging of your appliances provides good protection against damage in Report visible faults to the supplier immediately. Report visible faults to the supplier immediately. Report visible faults to the supplier immediately. -
Page 7: Installing The Appliance
CHANGING THE FLUE CONNECTION TO THE TOP (LHS 90-105) (Figure 8-Figure 11) 1. Remove fl ue connecting piece from the rear panel 2. Remove front cooking plate section (or hot water insert) 3. Remove back cooking plate section 4. Screw off the cover from the cooking plate section 5. -
Page 8: Description Of The Appliance
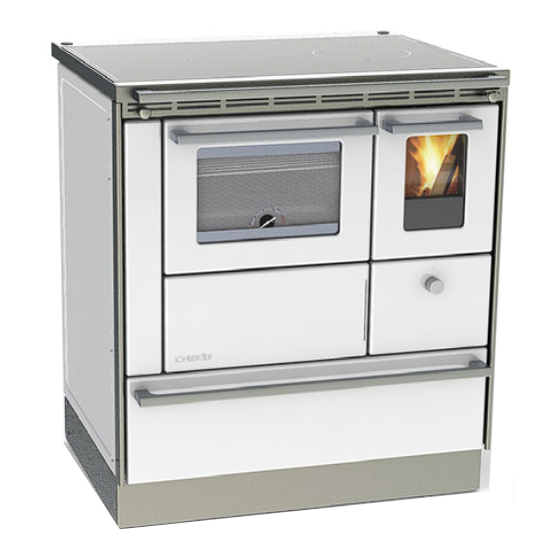
Adjusting rear fl ue connection Auslieferungs- zustand The fl exible rear fl ue can be adjusted from +/- 4.5 cm vertically to +/- 1.25 cm horizontally. With stoves without oven or stoves equipped with a through-wall +4,5 heating, a fl exible fl ue is not possible. -4,5 Verstellblech drehen... - Page 9 Stove frame stainless steel Drawer grip Drawer guide rail Cooking surface (Ceran, extra charge) Cleaning door Cast-iron grate Cooking plate oven (standard) Side panel Ash drawer Stove cover hinge Oven door panel Ball latch Sidewall Oven viewing window Ball latch Button for damper Oven door handle Oven thermometer...
-
Page 10: Installing The Appliance
Base opening for air circulation The LOHBERGER fi re protection units type The LOHBERGER fi re protection units type The LOHBERGER fi re protection units type BSE BSE are only tested in conjunction with LOHBERGER stoves only tested in conjunction with LOHBERGER stoves only tested in conjunction with LOHBERGER stoves of the series LHS. -
Page 11: Chimney Connection
8. 8. 8. Chimney connection Chimney connection Chimney connection Schematic diagram fl ue gas connection (Figure 17) Trouble-free and effi cient operation is assured if the following conditions for an optimum combustion are fulfi lled: Adequate condition of the chimney: good thermal insulation, smooth inner surface, no leakages ... -
Page 12: Combustion Air
9. 9. 9. Combustion air Combustion air Combustion air The appliance is dependent on indoor air (open-fl ued appliance); that means The local qualifi ed chimney sweep or your venti- The local qualifi ed chimney sweep or your venti- The local qualifi ed chimney sweep or your venti- the air required for combustion is drawn from the room where the appliance is lation installer will be happy to provide informati- lation installer will be happy to provide informati-... -
Page 13: Central Heating Insert
11. Central Heating Insert Central Heating Insert Central Heating Insert (optional not available for REGA and LHS 40/50) (optional not available for REGA and LHS 40/50) (optional not available for REGA and LHS 40/50) The stove type LHS-Z is equipped with a central heating element (nominal heat Caution! Caution! Caution! With appliances equipped with hea-... -
Page 14: Automatic Air Bleed
Connection with LOHBERGER installation package (optional equipment) Explanation of symbols: Connection without LOHBERGER installation package Installation package Return fl ow temperature Integrated return fl ow temperature boost boost to be provided by... -
Page 15: Operating The Stove
13. Operating the stove Operating the stove Operating the stove Equipment included closed To ensure a safe operation of the appliance, a protective glove and a multi- open purpose wrench are included in the delivery. Start-up fl ap Start-up fl ap The knob located above the oven door operates the damper. -
Page 16: Combustion
14. Combustion Combustion Combustion Prerequisites for effi cient combustion • Suffi cient amount of combustible material • Oxidising agent, mostly oxygen • Enough heat to reach the ignition temperature or to maintain the minimum temperature required for combustion • The correct proportion of the combustible material to ambient air or to the Fire reactive gas The combustion process... -
Page 17: Fuels
15. Fuels Fuels Fuels Suitable fuels FIREWOOD (LOGS) Billet wood should have a maximum water content of approximately 30 % of the dried weight, be approximately 1/3 m long and be chopped small. In this way the billets are ignited rapidly, producing a better heat output than larger Figure 34 wood billets for the same amount of wood. -
Page 18: Adding Fuel
Adding Fuel After the initial heating phase, add more fuel as per Table (see air settings). • Turn primary air supply to position 1. • Adjust secondary air supply for the required heat output. When adding fuel we recommend: • Short intervals (every 30-50 minutes) •... -
Page 19: Maintenance And Cleaning
Have your fi replace inspected by a specialist Have your fi replace inspected by a specialist tional safety, effi ciency and maintaining the value of the appliance. (LOHBERGER customer service, chimney sweep) (LOHBERGER customer service, chimney sweep) (LOHBERGER customer service, chimney sweep) A thorough cleaning should be performed after each heating period and after at regular intervals. -
Page 20: Oven Door
Oven door The oven door can be completely removed. This is advantageous for a thorough cleaning of the oven. To cool the oven, the door can be set at a 75-degree angle. To do this, open the door, push the metal clips on the door hinges upwards and close the door to the limit stop. -
Page 21: Stoves With Glass Ceramic Cooking Surfaces
Stoves with glass ceramic cooking surfaces WHAT IS CERAN® ? • • • Never use abrasive or harsh cleaning agents Never use abrasive or harsh cleaning agents Never use abrasive or harsh cleaning agents Glass ceramic cooking surfaces by the Mainz-based company SCHOTT (Germa- such as grill and oven sprays, stain and rust re- such as grill and oven sprays, stain and rust re- such as grill and oven sprays, stain and rust re-... -
Page 22: Steel Cooking Plate
Steel Cooking Plate DIRECTIONS FOR THE CARE AND PROTECTION OF THE STEEL COOKING PLATE The bright polished steel cooking plate was oiled before packing for protection from corrosion. First Heating Vor der ersten Inbetriebnahme ist der aufgetragene Korrosionsschutz von der Before heating for the fi rst time, wipe the corrosion protection off the cooking plate. -
Page 23: Troubleshooting
18. Troubleshooting Troubleshooting Troubleshooting A combination of factors is a prerequisite for ensuring a trouble-free operation of the stove: Stove: Correct assembly, connection and start-up. Handling and Care: Regular cleaning of the stove, fl ue pipe and chimney according to the instructions in the operating manual. Chimney: Correct dimensions, fl... -
Page 24: After-Sales Service / How To Order Spare Parts
After-sales service / How to order spare parts Please note AUSTRIA (Centrale) LOHBERGER Heiz u. Kochgeräte Technologie To enable our customer service to deal with repairs and supply spare parts GmbH quickly and to your satisfaction, we require the following information with your Landstraße 19... -
Page 25: 20. Appliance Dimensions
20. Appliance Dimensions Appliance Dimensions Appliance Dimensions LHS 40/50 RA Ø 12 RA Ø 12 68 * 68 * 10 * RA Ø 12 LHS 60-105 RA Ø 12/14,5 RA Ø 12/14,5 68 * 68 * 10 * RA Ø 12/14,5 (Dimensions in cm) LHS 40... -
Page 26: Technical Data
German standards are complied with: Regensburger Norm, Stuttgarter Norm and Münchner Verordnung. The Lohberger Pellet module was successfully tested by the Technical University of Vienna according to the current European Standards. TGM Test report number: VA HL 7462 u. VA HL 7482... -
Page 27: 23. Warranty
These warranty conditions are valid in all European countries where LOHBERGER appliances are sold by local specialist dealers. Warranty claims must always be directed to a local LOHBERGER specialist dealer or the dealer from whom you have bought the appliance. - Page 28 LOHBERGER HEIZ U. KOCHGERÄTE TECHNOLOGIE GMBH Landstraße 19, 5231 Schalchen, Österreich Tel.: +43(0)7742/5211-0 / Fax: +43(0)7742/5211-109 offi ce@lohberger.com www.lohberger.com Page 28 Page 28...
Need help?
Do you have a question about the 40.4 N and is the answer not in the manual?
Questions and answers