Pentair IntelliChlor IC20 Installation And User Manual
Electronic chlorine generator
Hide thumbs
Also See for IntelliChlor IC20:
- Manual (54 pages) ,
- Installation and user manual (16 pages) ,
- Installation and user manual (46 pages)

Related Manuals for Pentair IntelliChlor IC20


Summary of Contents for Pentair IntelliChlor IC20
- Page 1 IntelliChlor ™ Electronic Chlorine Generator (Model IC20, IC40) Installation and User’s Guide Patents pending IMPORTANT SAFETY INSTRUCTIONS READ AND FOLLOW ALL INSTRUCTIONS SAVE THESE INSTRUCTIONS...
- Page 2 Spa, Inc. Other trademarks and trade names may be used in this document to refer to either the entities claiming the marks and names or their products. Pentair Water Pool and Spa Inc. disclaims proprietary interest in marks and names of others.
-
Page 3: Table Of Contents
Contents IntelliChlor Overview ... 1 Features ... 1 IntelliChlor models ... 2 Electrolytic Cell Controller ... 3 IntelliChlor Power Center ... 3 System Diagram ... 3 Loop Plumbing Diagram ... 4 IntelliChlor Plumbing Diagram ... 4 Section 1: IntelliChlor Control Panel ... 5 Salt Level Status LEDs ... -
Page 4: Important Safety Precautions
IMPORTANT SAFETY PRECAUTIONS Important Notice: about the installation, operation and safe use of this product. This information should be given to the owner and/or operator of this equipment. When installing and using this electrical equipment, basic safety precautions should always be followed, including the following: WARNING: IMPORTANT SAFETY INSTRUCTIONS PERTAINING TO A RISK OF FIRE, ELECTRIC SHOCK, OR INJURY TO PERSONS READ. - Page 5 CAUTION - Install the IntelliChlor unit a minimum of two (2) feet from the heater outlet. CAUTION - It is recommended to install a Pentair 2” CHECK VALVE (P/N 263042) between the input side of the IntelliChlor cell and the main heater output pipe.
-
Page 6: Technical Support
Standard EN6100-3-2:2000, EN6100-3-3:1995 +A1:2001 • Standard EN 55014-2: 1997 +A1:2001, EN 55014-1 2000 +A1, +A2 2002 Manufacturer: Pentair Water Pool and Spa, Inc. 1620 Hawkins Ave, Sanford, NC 27330 10951 West Los Angeles Ave, Moorpark, CA 93021 Installation Steps Summary... -
Page 7: Intellichlor Overview
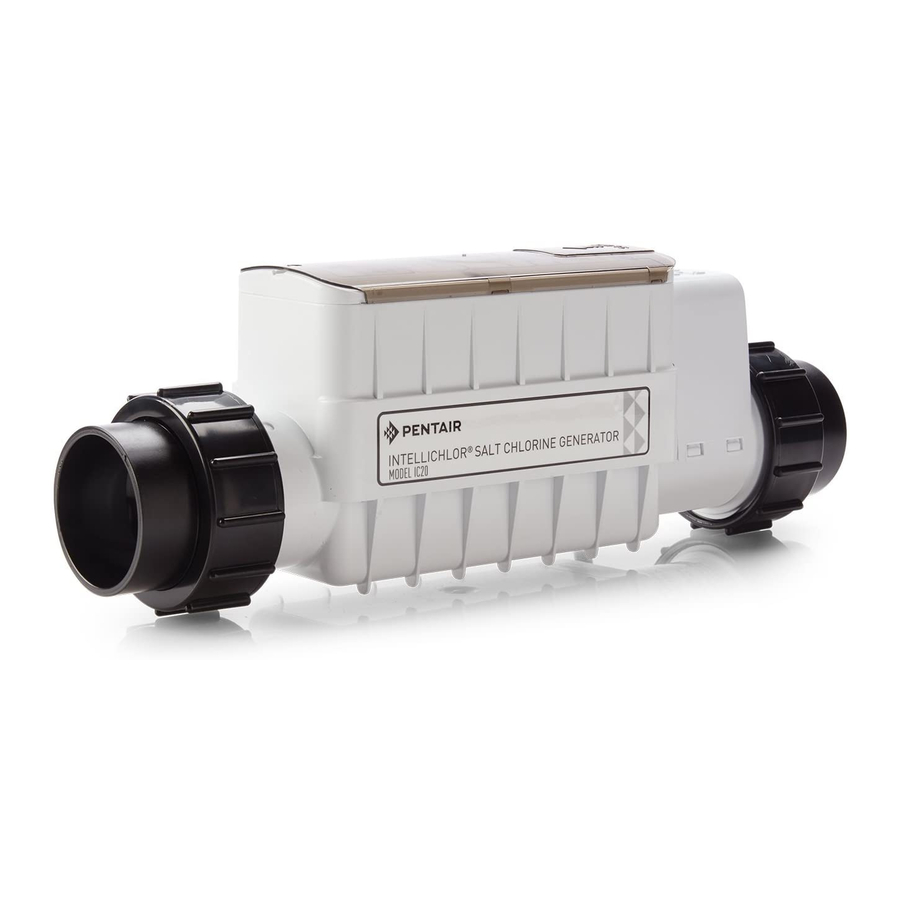
IntelliChlor Overview The IntelliChlor™ salt chlorinator uses a process known as electrolysis to produce Sodium Hypochlorite (liquid chlorine) from a low concentration of salt added to the pool water. Hypochlorite kills bacteria, oxidizes organic material, and kills algae, then reverts back to salt. IntelliChlor then reuses the salt and the process starts over again. - Page 8 Electrolytic Cell Controller The electrolytic cell controller includes a control panel with buttons and LED indicators to fully control and produce chlorine. The cell controller measures the water temperature and salt level to optimally produce chlorine. If the salt level is too low (red on salt display), the cell is turned off until salt is added to the pool. The controller has a self-cleaning cycle which reverses the cell polarity, reducing calcium buildup.
-
Page 9: Electrolytic Cell Controller
IntelliChlor cell and the main heater output pipe. Pool pump and Power Center MUST be wired to switch on and switch off together Power Center (Model PC 100) Power Center Pentair two inch Check Valve (recommended) (P/N 263042) IntelliChlor Installation and User’s Guide... -
Page 10: Loop Plumbing Diagram
Loop Plumbing Diagram The IntelliChlor will operate in water flow rates from 15 gallons per minute up to 110 gallons per minute (the limit of 2” plumbing). For flow rates over 80 gallons per minute, it is recommend that you use a bypass loop (shown below) for best chlorine production. -
Page 11: Section 1: Intellichlor Control Panel
This section describes the IntelliChlor control panel status LEDs and the More, Less and Boost/On/Off control buttons. Salt Level Status LEDs The salt level is checked daily and is displayed on this section of the unit. • Green: Good salt. The water salt level is above 2900 ppm, the cell will produce chlorine. -
Page 12: Sanitizer Output Led Indicators
Operator Control Panel (continued) Sanitizer Output LED Indicators The five LED indicators display as a bar graph to show in 20% increments, the amount of time the chlorine is produced per hour. In BOOST mode, these LEDs scroll in a pattern. Note: If no LEDs are lit, the output is set to 0% and is not producing chlorine. -
Page 13: Section 2: Operating Intellichlor
This section describes the start up procedure and operating instructions for IntelliChlor. Initial Start up Period For the first 30 days of cell operation, the self-cleaning cycle will be set to two hours. After 30 days has elapsed, the unit will automatically set itself to four hour self-cleaning cycle. This feature will clean the cell more often on a new pool installation, then go to a more standard self-cleaning cycle for longer cell life. -
Page 14: Startup Procedure (Super Chlorination)
Startup Procedure (Super Chlorination) Shocking (Super Chlorination) is recommended before pool startup. Start out with clean pool water from the beginning. IntelliChlor will build up a sufficient level of chlorine for sanitation in several hours. However, if pool water has a high demand from the start-up IntelliChlor will not be able to produce enough chlorine to reach break-point chlorination. -
Page 15: Section 3: User Maintenance
This section describes how to maintain the IntelliChlor chlorination system. Daily service. None is needed. Weekly service. 1. Chlorine Test: Test pool water chlorine level with a reliable test kit. Maintain ideal range by adjusting IntelliChlor chlorine production rate. See “More and Less Output Buttons,” on page 6. •... -
Page 16: Cell Usage Hours Meter
Monthly Service (Continued) Test pool water for total alkalinity with a test kit. Adjust according to your pool Total Alkalinity Test: professional’s recommendations. 80-120 PPM APSP Standard. Stabilizer (Cyanuric Acid): having a water sample tested by a pool professional. Maintain ideal range of 50-75 PPM. Follow your pool professional’s recommendations. -
Page 17: Winterizing
Electrolytic Cell Cleaning b. To acid clean the cell: Disconnect the IntelliClor cell communication cable from the cell. Remove the AC power from the Power Center, either by switching off the filter pump or setting the associated circuit breaker to OFF. c. -
Page 18: Optimum Pool Water Conditions
Chemistry You Need to Know 2. Nitrates can cause extremely high chlorine demands and will deplete chlorine from your swimming pool. In some cases Nitrates may even lower your chlorine levels to zero. The local pool professional can test for Nitrates. Make sure Nitrates are not present in your pool. 3. -
Page 19: Chlorine Testing
Chlorine Testing It is recommended that chlorine test samples be taken from two places. Compare the samples. A higher level should be found at the pool return line. The higher level at the pool return line indicates IntelliChlor is producing chlorine. -
Page 20: How To Add Salt To The Pool
How to Add Salt to the Pool Do not operate IntelliChlor with newly poured pool plaster; salt damage can occur. CAUTION: Wait at least 1 MONTH to allow new pool plaster to cure before operating IntelliChlor. 1. Switch on the pump to circulate the pool water. 2. - Page 21 Table 2. Approximate Pounds (kg) of Salt Needed to Maintain 3,000 PPM Table 3. Approximate Amount of Chlorine Stabilizer (Cyanuric Acid) Needed to Obtain 75 PPM NOTE: Add 1.25 lb (0.57 kg) Chlorine Stabilizer to the pool every time 50 lb (22.7 kg) of Salt is added to the pool. The Stabilizer reading should be maintained at 75 PPM.
-
Page 22: Pool Water Preparation
Pool Water Preparation Determining Pool Size (m3 of Water in Your Pool) • Rectangular Pools: Length x width (meters) x average depth x 1000 • Circular Pools: Diameter x diameter x average depth x 785 • Oval Pools: Length x width (meters) x average depth x 893 •... -
Page 23: Section 4: Installation
This section describes how to install the IntelliChlor electrolytic cell assembly into the pool plumbing system. Also, included are connection instructions for IntelliTouch and EasyTouch systems. Before installing, review the IntelliChlor kit contents and required tools. Note: For Power Center installation instructions, see the “IntelliChlor Power Center Installation Guide”... -
Page 24: Installing The Cell Assembly
Installing the Cell Assembly Install the IntelliChlor cell assembly no closer than three (3) feet from the heater outlet, if used. For more information see plumbing diagrams on page 3 and 4. Note: After new pool construction has been completed, in order to prevent debris from entering the IntelliChlor cell assembly, it is recommended that the IntelliChlor pass-through cell (P/N 520588) be installed before installing the IntelliChlor cell. -
Page 25: Connecting Intellichlor To An Intellitouch System
Connecting the Power Center to an IntelliTouch or EasyTouch System To operate IntelliChlor with the IntelliTouch or EasyTouch system, connect a four wire cable from the IntelliChlor Power Center to the IntelliTouch or EasyTouch load center. An alternate connection can be made by splicing anywhere along the four wire connection that connects the IntelliTouch or EasyTouch indoor control panel to the load center. -
Page 26: Connecting Intellichlor To An Intellitouch System
Connecting IntelliChlor to an IntelliTouch System To connect the four wire cable communication from the IntelliChlor Power Center (see page 19) to the Personality board located in the IntelliTouch load center: WARNING Switch OFF main system power to the Load Center before making any connections. 1. -
Page 27: Connecting Intellichlor To An Easytouch System
Connecting IntelliChlor to an EasyTouch System To connect the four wire cable from the IntelliChlor Power Center (see page 19) to the motherboard located in the EasyTouch load center: WARNING Switch OFF main system power to the load center before making any connections. 1. -
Page 28: Section 5: Troubleshooting
Use the following troubleshooting information to resolve possible problems with the IntelliChlor system. Note: Switch power off to unit before to attempting service or repair. Always remove AC power to Power Center when plugging or unplugging the IntelliChlor cell into the Power Center. Table 1: Troubleshooting c i f IntelliChlor Installation and User’s Guide... - Page 29 Table 1: Troubleshooting (Continued) g i l o l l g i l g i l g i l f l l l l e g i l l l e g i l c i f , s i l t l g i l l l e...
-
Page 30: Vac Basic System Wiring
System Specifications - 110 VAC and 220 VAC Wiring Circuit Protection: Two-pole 20 AMP device at the electrical panel. IntelliChlor Model IC20 Input: 90-130 VAC, 50/60 Hz, 220 Watts (2 AMP) or 220-240 VAC, 50/60 Hz, 220 Watts (1 AMP). Output: 22-39 VDC @ 6 AMPS maximum from the Power Center. - Page 31 Pentair Water is not, however, responsible under this warranty for any cost of shipping or transportation of the equipment or parts thereof to or from the Technical Service Department. Also, Pentair Water is not liable for any loss of time, inconvenience, incidental expenses such as telephone calls, labor or material charges incurred in connection with the removal or replacement of the equipment, or any other incidental or consequential damages.
- Page 32 P/N 520589 - Rev D...