Jacobsen PGM 22 InCommand Technical Manual
Walking greens mower
Hide thumbs
Also See for PGM 22 InCommand:
- Parts and maintenance manual (106 pages) ,
- Technical manual (56 pages)
Table of Contents
Advertisement
Available languages
Available languages
Quick Links
Technical Manual
Manual técnico
PGM 22
InCommand
63280 – PGM 22, 11 Blade Reel / Molinete de 11 cuchillas
63286 – PGM 22, 15 Blade Reel / Molinete de 15 cuchillas
WARNING: If incorrectly used this machine can cause severe
injury. Those who use and maintain this machine should be
trained in its proper use, warned of its dangers and should
read the entire manual before attempting to set up, operate,
adjust or service the machine.
ADVERTENCIA: Si se usa de forma incorrecta esta máquina
puede causar graves lesiones. Cualquier persona que use y
mantenga esta máquina deberá estar entrenado en su uso
correcto, instruido sobre sus peligros y deberá leer el manual
completamente antes de tratar de instalar, operar, ajustar o
revisar la máquina.
ES
Spain
™
WARNING
ADVERTENCIA
4131595-ES-Rev B
When Performance Matters.
™
Advertisement
Chapters
Table of Contents

Related Manuals for Jacobsen PGM 22 InCommand


Summary of Contents for Jacobsen PGM 22 InCommand
- Page 1 4131595-ES-Rev B Technical Manual Manual técnico PGM 22 InCommand ™ 63280 – PGM 22, 11 Blade Reel / Molinete de 11 cuchillas 63286 – PGM 22, 15 Blade Reel / Molinete de 15 cuchillas WARNING WARNING: If incorrectly used this machine can cause severe injury.
-
Page 2: Service Parts
Jacobsen Dealer. Suggested Stocking Guide To Keep your Equipment fully operational and productive, Jacobsen suggests you maintain a stock of the more commonly used maintenance items. We have included part numbers for additional support materials and training aids. To order any of the following material: 3. -
Page 3: Table Of Contents
Table of Contents Safety Adjustments Operating Safety ..........4 General .............. 22 Important Safety Notes .........5 Reel-To-Bedknife ..........22 Specifications Bedknife .............23 Product Identification..........6 Brake ..............23 Engine ..............6 Cutting Height ............24 Mower ..............6 Handle ..............24 Traction and Differential ........6 Torque Specification ..........25 Weight ..............7 Maintenance Accessories ............7... -
Page 4: Safety
Only accessories 18. Operate the machine across the face of the slope attachments approved by Jacobsen. (horizontally), not up and down the slope (vertically). 7. Stay alert for holes in the terrain and other hidden Never operate on wet grass. -
Page 5: Important Safety Notes
Adjustments and maintenance should always be performed by a qualified technician. If additional information or service is needed, contact your Authorized Jacobsen who is kept informed of the latest methods to service this equipment and can provide prompt and efficient service. -
Page 6: Specifications
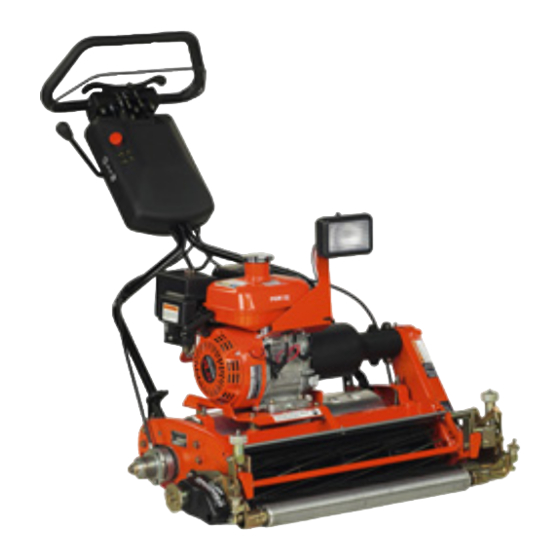
SPECIFICATIONS SPECIFICATIONS PRODUCT IDENTIFICATION_________________________________________________ 63280..22 in., (559 mm) 11 Blade Professional attached to the right side frame. Always provide the serial number of the unit when ordering Greens Mower with InCommand™ control replacement parts or requesting service information. 4.0 H.P. gasoline engine (Honda), system, Operator Presence Control, grass catcher, brakes, and kickstand. -
Page 7: Weight
ACCESSORIES____________________________________________________________ Contact your area Jacobsen Dealer for a complete listing of accessories and attachments. CAUTION Use of other than Jacobsen authorized parts and accessories may cause personal injury or damage to the equipment. Accessories Solid Roller PGM MagKnife Conversion Kit ......4131020 Solid tube Roller with Scraper.........68641... -
Page 8: Declaration Of Conformity
SPECIFICATIONS DECLARATION OF CONFORMITY ____________________________________________ en-8... - Page 9 SPECIFICATIONS en-9...
- Page 10 SPECIFICATIONS United Belgium Bulgaria Switzerland China Cyprus Czech Germany Denmark Estonia Spain Finland France Greece Hungary Iceland Italy Kingdom Republic Japan Korea Liechenstein Lithuania Latvia Malta Netherlands Norway Poland Portugal Romania Russia Sweden Slovenia Slovakia Turkey Ukrain en-10...
-
Page 11: Vibration Level
SPECIFICATIONS VIBRATION LEVEL_________________________________________________________ When the machine was tested for hand/arm vibration levels, the operator was standing in the normal operating position with both hands on the handle. The engine was running and the cutting device was rotating with the machine stationary. -
Page 12: Decals
DECALS DECALS DECALS _________________________________________________________________ Familiarize yourself with the decals, they are critical to the safe operation of the mower. REPLACE DAMAGED DECALS IMMEDIATELY. CAUTION DANGER 1. Read operator’s manual before operating To avoid serious bodily injury stop engine machine. and disengage reels before working on 2. -
Page 13: Initial Inspection
INITIAL INSPECTION INITIAL INSPECTION GENERAL________________________________________________________________ Accessories not included with this product must be The set-up and testing of the unit should always be ordered separately. See instructions provided with performed by a trained technician, familiar with the accessory for installation and parts. operation of the equipment. -
Page 14: Controls
CONTROLS CONTROLS ICONS ___________________________________________________________________ Operator Presence Control Engine Throttle Fast Slow Unlock Engine Off Engine Run Lock Parking Brake Engaged Disengaged Fuel Choke Gasoline WARNING Never attempt to operate the machine unless you have read the Technical Manual, the engine manual, and know how to operate all controls correctly. Familiarize yourself with the icons shown above and what they represent. - Page 15 CONTROLS E. Reel Clutch Lever – To disengage, turn handle (E) to point downwards. Always disengage clutch when mower is being transported. WARNING To prevent bodily injury or property damage, never engage the reel clutch lever while the engine is running or the O.P.C.
-
Page 16: Operation
OPERATION OPERATION DAILY INSPECTION________________________________________________________ 2. Check the fuel supply and crankcase oil level. All fluids must be at the full level mark. CAUTION 3. Make sure the mower is adjusted to the required The daily inspection should be performed only when cutting height. -
Page 17: Operating Procedures
Use care when approaching blind precautions. Only use accessories and attachments corners, shrubs, trees, or other objects that may approved by Jacobsen. obscure vision. 7. Be aware of mower discharge direction and never 14. Never use your hands to clean cutting units. Use a direct discharge of material toward bystanders. -
Page 18: Starting/Stopping Engine
OPERATION STARTING/STOPPING ENGINE ______________________________________________ CAUTION Always start and stop the engine when the mower is on level ground. Keep feet away from blade when starting engine. Starting 1. Check oil level and fuel supply, then open fuel valve lever (G). 2. -
Page 19: Transport Wheels (Optional Kit 62293)
OPERATION TRANSPORT WHEELS (OPTIONAL KIT 62293)__________________________________ 6. When using a vehicle to transport the mower, apply parking brake, stop engine, and close fuel shut-off WARNING valve. Chock or block the wheels. Always stop the engine and disengage the drive 7. Keep tires inflated to 6 to 8 psi (0.41 to 0.55 BAR). levers before installing or removing the transport wheels. -
Page 20: Mowing
OPERATION MOWING_________________________________________________________________ 1. Stop engine. Place mower on kickstand and remove 5. For a more even playing surface and neater the transport wheels if installed. See Section 6.5. appearance, alter the mowing pattern each time a green is mowed. The patterns shown in Figure 6F 2. -
Page 21: Daily Maintenance
OPERATION DAILY MAINTENANCE______________________________________________________ 1. Park the mower on a flat, level surface, engage Handle fuel with care - it is highly flammable. Use an parking brake, and stop the engine. approved container, the spout must fit inside the fuel filler neck. -
Page 22: Adjustments
4. Do not change governor settings or overspeed the performed by a qualified technician. If proper engine. adjustment cannot be made, contact an authorized Jacobsen dealer. REEL-TO-BEDKNIFE _______________________________________________________ (Pre-adjustment Check) 5. The reel must be parallel to the bedknife. An... -
Page 23: Bedknife
ADJUSTMENTS BEDKNIFE _______________________________________________________________ 1. Read Section 7.2 before making the adjustment. b. Adjust the trailing end of the reel in the same manner, then recheck the adjustment at the 2. Start adjustment at the leading end of the reel, leading end. followed by the trailing end. -
Page 24: Cutting Height
ADJUSTMENTS CUTTING HEIGHT _________________________________________________________ Note: Make sure the bedknife is properly adjusted before 6. Repeat Steps 4 and 5 on the opposite end of the setting the cutting height. (Section 7.3). reel then tighten nuts (M). Recheck and readjust the cutting height if necessary. -
Page 25: Torque Specification
All torque values included in these charts are approximate and are for reference only. Use of these torque values is at your sole risk. Jacobsen is not responsible for any loss, claim, or damage arising from the use of these charts. -
Page 26: Maintenance
6. Wash the mower and accessories after each use. Keep the equipment clean. a. Keep the equipment clean. 7. Repair damaged metal surfaces and use Jacobsen b. Keep all moving parts properly adjusted and Orange touch-up paint. lubricated. -
Page 27: Engine Oil
MAINTENANCE ENGINE OIL ______________________________________________________________ Check the engine oil at the start of each day, before starting the engine. If the oil level is low, remove oil filler cap, and add oil as required. Perform initial oil change after the first 20 hours of operation. -
Page 28: Bedknife Shoe Removal
MAINTENANCE BEDKNIFE SHOE REMOVAL ________________________________________________ 1. To remove the shoe (E), loosen nut (A), and turn nuts (B) counterclockwise 1/4 turn or more to bring the bedknife into light contact with the reel blades. 2. Remove mounting hardware (D) from both sides of the shoe. -
Page 29: Wheel Bearing
MAINTENANCE WHEEL BEARING _________________________________________________________ The bearing has the word LOCK and an arrow stamped on the face. When replacing the bearing, make Inside absolutely certain that the bearing is installed in the proper direction of rotation. Outside For the Right wheel, install the bearing with the LOCK arrow to the Outside of the housing. -
Page 30: 8.10 Troubleshooting
MAINTENANCE 8.10 TROUBLESHOOTING ______________________________________________________ Before making any adjustments or performing maintenance, read maintenance section for procedures and warnings. Symptoms Probable Causes Solution Choke in wrong position. See Engine Manual. Engines does not start. Empty fuel tank or dirty fuel. Drain and refill with fresh, clean fuel. Fuel shut-off valve. -
Page 31: 8.11 Lubrication
R - Replace Lubricants - SAE 10W-30 Classified API SF or SG. - Lithium Grease NLGI - Grade 2. III - Lubriplate® grease, Jacobsen Part No. 5001581 IV - SAE EP-140 Oil - Drain and Refill - Apply a light coat en-31... -
Page 32: Notes
NOTES NOTES en-32... -
Page 33: Parts Catalog
Screw, 1/4-20 x 2” Hex Head 10.2 TO ORDER PARTS _________________________________________________________ 1. Write your full name and complete address on the 5. Send or bring the order to an authorized Jacobsen order. Distributor. 2. Explain where and how to make shipment. - Page 34 Jacobsen. Guía de almacenamiento recomendado Para que el equipo esté en todo momento operativo y productivo, Jacobsen recomienda que almacene los repuestos más comúnmente utilizados. Hemos incluido números de piezas para los materiales de apoyo adicionales y ayudas a la formación.
- Page 35 Índice SEGURIDAD AJUSTES Manipulación segura ..........4 General .............. 22 Avisos importantes sobre seguridad ....5 Molinete-a-cuchilla fija ........22 Cuchilla fija ............23 ESPECIFICACIONES Freno ..............23 Identificación del producto........6 Altura de corte ............24 Motor ..............6 Palanca ..............24 Cortacésped ............6 Especificación del par de apriete .......25 Tracción y diferencial ...........6 Peso ..............7 MANTENIMIENTO...
-
Page 36: Seguridad
Utilice accesorios y herramientas aprobados por 18. Maniobre la máquina por las pendientes en sentido Jacobsen. vertical, nunca horizontalmente. No opera nunca en césped mojado. 7. Sea consciente de los posibles agujeros en el terreno y otros peligros ocultos. -
Page 37: Avisos Importantes Sobre Seguridad
Los ajustes y las tareas de mantenimiento deben ser realizadas siempre por un técnico cualificado. Si necesita más información, póngase en contacto con su distribuidor Jacobsen, quien le informará de los métodos de mantenimiento más recientes y le proporcionará un servicio puntual y eficaz. -
Page 38: Especificaciones
ESPECIFICACIONES ESPECIFICACIONES IDENTIFICACION DEL PRODUCTO ___________________________________________ 63280..Cortacésped para greens profesional de Número de serie ...En el marco derecho hay 559 mm con sistema de control colocada una placa de InCommand™, motor Honda de gasolina de identificación, como la que se 2,98 kW (4 CV), control de presencia del muestra, con el número de operario, recogedor de hierba, frenos y... -
Page 39: Peso
ACCESORIOS_____________________________________________________________ Póngase en contacto con su distribuidor Jacobsen local para recibir una lista completa de accesorios y herramientas. PRECAUCIÓN El uso de piezas y accesorios no autorizados por Jacobsen pueden causar lesiones personales o daños al equipo. Accesorios Rodillo sólido Juego de conversión PGM MagKnife ..... -
Page 40: Declaración De Conformidad
ESPECIFICACIONES DECLARACIÓN DE CONFORMIDAD __________________________________________ es-8... - Page 41 ESPECIFICACIONES es-9...
- Page 42 ESPECIFICACIONES United Belgium Bulgaria Switzerland China Cyprus Czech Germany Denmark Estonia Spain Finland France Greece Hungary Iceland Italy Kingdom Republic Japan Korea Liechenstein Lithuania Latvia Malta Netherlands Norway Poland Portugal Romania Russia Sweden Slovenia Slovakia Turkey Ukrain es-10...
-
Page 43: Nivel De Vibración
ESPECIFICACIONES NIVEL DE VIBRACIÓN ______________________________________________________ Cuando se comprobó la máquina para los niveles de vibración en manos/brazos, el operario estaba de pie en la posición normal de trabajo con ambas manos en el manillar. El motor estaba en marcha y la unidad de corte estaba girando con la máquina estacionada. -
Page 44: Etiquetas
ETIQUETAS ETIQUETAS ETIQUETAS ______________________________________________________________ Familiarícese con los adhesivos, ya que son críticos para el buen funcionamiento del cortacésped. LAS ETIQUETAS DAÑADAS DEBEN CAMBIARSE INMEDIATAMENTE. CAUTION DANGER 1. Read operator’s manual before operating To avoid serious bodily injury stop machine. engine and disengage reels before 2. -
Page 45: Inspección Inicial
INSPECCIÓN INICIAL INSPECCIÓN INICIAL GENERALIDADES _________________________________________________________ La configuración y prueba de la unidad debe ser PRECAUCIÓN realizada siempre técnico cualificado familiarizado con el funcionamiento de este equipo. No conduzca la máquina a menos que esté Lea las instrucciones completamente y asegúrese de familiarizado con este tipo de equipo y sepa cómo entenderlas antes de seguir con el montaje. -
Page 46: Controles
CONTROLES CONTROLES ICONOS _________________________________________________________________ Control de presencia del operario Motor Acelerador Rápido Lento Desbloquear Motor en Motor apagado funcionamiento Bloquear Freno de estacionamiento Combustible Gasolina Activado Desactivado Estrangulador ADVERTENCIA No conduzca el equipo a menos que haya leído el manual técnico y del motor y sepa cómo utilizar los controles correctamente. - Page 47 CONTROLES E. Palanca del embrague del molinete – Para desengranar, girar el asa (E) hasta que apunte hacia abajo. Desengranar el embrague siempre que se transporte el cortacésped. ADVERTENCIA Para evitar las lesiones corporales y los daños a la propiedad, nunca engranar la palanca del molinete mientras el motor esté...
-
Page 48: Funcionamiento
FUNCIONAMIENTO FUNCIONAMIENTO INSPECCIÓN DIARIA_______________________________________________________ 2. Revisar el suministro de combustible y el nivel de PRECAUCIÓN aceite del cárter. Todos los líquidos deben estar en la marca de nivel lleno. Las inspecciones diarias deben realizarse sólo 3. Asegúrese de que el cortacésped esté ajustado a la cuando el motor está... -
Page 49: Procedimientos De Funcionamiento
Tenga requerirá ciertos ajustes o precauciones. Utilice cuidado al acercarse a esquinas ciegas, setos, accesorios y herramientas aprobados por Jacobsen. árboles y otros objetos que puedan tapar la visión. 7. Sea consciente de la dirección de descarga del 14. -
Page 50: Encendido/Apagado Del Motor
FUNCIONAMIENTO ENCENDIDO/APAGADO DEL MOTOR _________________________________________ PRECAUCIÓN Encienda y apague siempre el motor cuando el cortacésped esté en una superficie llana. Aleje los pies de la cuchilla cuando encienda el motor. Arranque 1. Compruebe el nivel de aceite y el suministro de combustible y abra la palanca de la válvula de combustible (G). -
Page 51: Ruedas De Transporte (Juego Opcional 62293)
FUNCIONAMIENTO RUEDAS DE TRANSPORTE (JUEGO OPCIONAL 62293) __________________________ 6. Si se transporta el cortacésped sobre un vehículo, ADVERTENCIA aplicar el freno de estacionamiento, apagar el motor y cerrar la válvula de corte de combustible. Bloquear las ruedas. Siempre apagar el motor y desengranar los mandos antes de instalar o de retirar las ruedas de transporte. -
Page 52: Mecanismo De Corte
FUNCIONAMIENTO CORTE __________________________________________________________________ 1. Apague el motor. Coloque el cortacésped sobre un 5. Para conseguir una superficie de juego más regular soporte y quite las ruedas de transporte (si están y más atractiva, cambie el patrón de corte cada vez instaladas). -
Page 53: Mantenimiento Diario
FUNCIONAMIENTO MANTENIMIENTO DIARIO ___________________________________________________ 1. Estacionar el cortacésped en suelo nivelado, aplicar Manipule el combustible con cuidado – es muy el freno de estacionamiento y apagar el motor. inflamable. Utilice un contenedor adecuado de modo que la espita quepa en el cuello del tubo de llenado de 2. -
Page 54: Ajustes
AJUSTES GENERALIDADES _________________________________________________________ puede realizar el ajuste deseado, póngase en ADVERTENCIA contacto con un distribuidor Jacobsen autorizado. 2. Cambie, no ajuste, los componentes desgastados y Para impedir lesiones graves, antes de ajustar, dañados. limpiar o reparar este equipo, desengranar todos los 3. -
Page 55: Cuchilla Fija
AJUSTES CUCHILLA FIJA ___________________________________________________________ 1. Lea la sección 7.2 antes de realizar ningún ajuste. b. Ajuste el extremo posterior del molinete de la misma manera y luego vuelva a comprobar el 2. Comience el ajuste en el extremo anterior de el ajuste del extremo anterior. -
Page 56: Altura De Corte
AJUSTES ALTURA DE CORTE _______________________________________________________ Aviso: Asegúrese de cuchilla fija esté separación entre el rodillo y la barra calibradora. correctamente ajustada antes de establecer la altura de Apretar la tuerca (M). corte. (Sección 7.3). 6. Repetir los pasos 4 y 5 en el extremo opuesto del molinete y luego apretar las tuercas (M). -
Page 57: Especificación Del Par De Apriete
Tenga siempre especial cuidado al utilizar valores de par de apriete. Jacobsen utiliza pernos metalizados Grado 5 de serie, a menos que se cite lo contrario. Al apretar los pernos revestidos, utilice el valor dado a los pernos lubrificados. -
Page 58: Mantenimiento
Mantenga todas las piezas móviles debidamente ajustadas y lubricadas. MOTOR _________________________________________________________________ IMPORTANTE: Con esta máquina se incluye un Durante el período de rodaje, Jacobsen recomienda lo Manual del Motor adicional, preparado por el siguiente: fabricante del motor. Lea este manual detenidamente 1. -
Page 59: Aceite Del Motor
MANTENIMIENTO ACEITE DEL MOTOR _______________________________________________________ Compruebe el aceite del motor al inicio de cada jornada de trabajo y antes de encender el motor. Si el nivel de aceite está bajo, retire el tapón de llenado de aceite y añada el aceite necesario. Realice el cambio inicial de aceite a las primeras 20 horas de operación. -
Page 60: Retirada De La Zapata De La Cuchilla Fija
MANTENIMIENTO RETIRADA DE LA ZAPATA DE LA CUCHILLA FIJA _____________________________ 1. Para quitar la zapata (E), aflojar la tuerca (A) y girar las tuercas (B) 1/4 de giro a la izquierda o más para que la cuchilla fija toque ligeramente las cuchillas del molinete. -
Page 61: Cojinete De Rueda
MANTENIMIENTO COJINETE DE RUEDA ______________________________________________________ El cojinete tiene estampadas la palabra “LOCK y una flecha en su cara. Al sustituir el cojinete, asegurarse que interior el mismo se instala en el sentido de giro correcto. Exterior En la rueda derecha, instalar el cojinete con la flecha LOCK apuntando hacia el exterior de la caja. -
Page 62: 8.10 Resolución De Problemas
MANTENIMIENTO 8.10 RESOLUCIÓN DE PROBLEMAS _____________________________________________ Antes de realizar ningún ajuste o tareas de mantenimiento, lea las sección de mantenimiento para conocer los procedimientos y advertencias. Síntomas Causa probable Solución El motor no se pone en marcha. Estrangulador en posición incorrecta. Consulte el Manual del motor. -
Page 63: 8.11 Lubricación
Lubricantes - SAE 10W-30 Clasificación API SF o SG - Grasa de litio NLGI - Grado 2 III - Grasa Lubriplate®, número de pieza Jacobsen 5001581 IV - Aceite SAE EP-140 -Vaciar y rellenar H - Aplicar una capa fina... -
Page 64: Notas
NOTAS NOTAS es-32... -
Page 65: Catálogo De Piezas
1. Escriba su nombre y dirección completos en el 5. Envíe o lleve el pedido a un distribuidor autorizado pedido. Jacobsen. 2. Indique la dirección y el método de envío: 6. Revise todos los envíos al recibirlos. Si alguna pieza está... - Page 66 Serial No. All 1.1 Decals REEL CLUTCH CONTROL CAUTION CAUTION DISENGAGE ENGAGE BE SURE THE TRACTION CLUTCH ALLOW ENGINE LEVER IS IN NEUTRAL BEFORE TO COOL FOR 2 STARTING THE ENGINE. J-T-3001792 MINUTES BEFORE REFUELING TO ENGAGE TRACTION 1. SLIDE BAIL TO THE LEFT. 2.
- Page 67 Decal, Danger 4131528 Decal, Noise 98 dB 3002753 Decal, Parking Brake 3001792 Decal, Reel Clutch 3001235 Decal, Danger 4182386 Decal, Jacobsen Emblem Plate, Serial 4139678 Decal, Bail Operation 4146636 Decal, Throttle Warning 4147495 Decal, E-Stop > Change from previous revision...
- Page 68 Serial No. All 2.1 Handle and Controls 17 / 18 19 / 20...
- Page 69 Item Part No. Qty. Description Serial Numbers/Notes 366708 Flanged Bearing 400262 Screw, 3/8-16 x 1” Hex Head 400268 Screw, 3/8-16 x 1-3/4” Hex Head 434029 Screw, 1/4-20 x 1” Socket Head 443102 Nut, 1/4-20 Hex 443110 Nut, 3/8-16 Hex 444718 Locknut, 5/16-18 Center 446142 Lockwasher, 3/8 Heavy...
- Page 70 Serial No. All 3.1 Left Chain Cover...
- Page 71 Item Part No. Qty. Description Serial Numbers/Notes 207480 Cover, Chain 472201 Plug, 1/8 Pipe,Square Head 400102 Screw, 1/4-20 x 3/8” Hex Head 446130 Lockwasher, 1/4 Heavy 304756 Retainer 503438 Lever, Shift 339910 • O-Ring 403528 Screw, #8-32 x 3/8” Hex Head 446110 Lockwasher, #8 Medium 304758...
- Page 72 Serial No. All 4.1 Left Side Frame...
- Page 73 Item Part No. Qty. Description Serial Numbers/Notes 2811557 Frame, L.H. 337677 • Seal, Oil 2811124 • Stud, Handle 336962 • Seal, Oil 500534 • Bearing Cup and Cone 2500759 • Bushing 365753 • Seal, Grease 303490 • Bearing 307959 • Washer 446116 •...
- Page 74 Serial No. All 5.1 Right Side Frame...
- Page 75 Item Part No. Qty. Description Serial Numbers/Notes 2811558 Frame, R.H. 337677 • Seal, Oil 336962 • Seal, Oil 500534 • Bearing Cup and Cone 2811124 • Stud, Handle 2500759 • Bushing 307377 Spacer, Shaft 471223 Fitting, Grease 471214 Fitting, Grease 363047 Spring, Tension 453020...
- Page 76 Serial No. All 6.1 Cross Bars, Reel and BedKnife 35 16 31/33 Standard Bedknife Options 503477 22" High Profile 503478 22" Low Profile 503479 22" Tournament 5002887 22" Special Tournament Optional MagKnife Bedknife 4131369 22" High Profile 4131001 22" Low Profile 4131370 22"...
- Page 77 Item Part No. Qty. Description Serial Numbers/Notes 122544 Cross Bar, Front 122545 Cross Bar, Rear 400266 Screw, 3/8-16 x 1-1/2” 446142 Lockwasher, 3/8 Heavy 304740 Tie Rod, Front 443114 Nut, 7/16-14 Hex 446148 Lockwasher, 7/16 363328 Strap, Grass Shield 343732 Bracket, Support 5002605 Reel, 22”...
- Page 78 Serial No. All 7.1 Engine and Clutch Part of Engine Part of Engine Throttle Cable Installation...
- Page 79 Item Part No. Qty. Description Serial Numbers/Notes 303873 Washer 309756 Sprocket, 365658 Spacer, Engine Mounting 400194 Screw, 5/16-18 x 1-3/4” Hex Head 306369 Screw, 5/16-24 x 1” Hex Head 434029 Screw, 1/4-20 x 1” Socket Head 441677 Carriage Bolt, 5/16-18 x 1-1/2” 443106 Nut, 5/16-18 Hex 443820...
- Page 80 Serial No. All 8.1 Traction Rollers...
- Page 81 PGM 22 Item Part No. Qty. Description Serial Numbers/Notes 3004026 Shaft, Roller 163801 Gear, Differential 325656 • Bushing 344745 Washer, Thrust 202947 Pinion 308030 Washer, Pinion Thrust 103862 Housing, Differential 308033 • Bushing 400059 Screw, #10-24 x 5/8” Hex Socket 444782 Locknut, #10-24 Center 338394...
- Page 82 Serial No. All 9.1 Transport Wheels...
- Page 83 Item Part No. Qty. Description Serial Numbers/Notes 1000477 Hub, L.H. Wheel 338766 • Bearing 366705 • Seal 1000476 Hub, R.H. Wheel (Includes 2 and 3) 366697 Bushing 366718 Collar, Latching 445801 Nut, 5/8-18 Hex Jam Lock 361451 Washer 164056 Band, Brake 366742 Pin, Brake Band 415513...
- Page 84 INDEX 0........39 306369 ......45 400184 ......43 441677 ....43 1000476 ......49 306828 ......39 400190 ......47 443102 ....35 1000477 ......49 307360 ......43 400194 ......45 443106 ....43 1001308 ......41 307373 ......43 400218 ......45 443110 ......35 1001309 ......37 307374 ......
- Page 85 INDEX 503448 ......39 503477 ......2 503478 ......2 503479 ......2 503532 ......45 545940 ....39 554847 ......49 62293 ......49...
- Page 88 ISO 9001 e ISO 14001 en todas nuestras plantas de fabricación. Una red mundial de distribuidores y técnicos capacitados en fábrica y respaldados por las piezas originales Jacobsen ofrece asistencia de producto segura y de alta calidad. When Performance Matters.
Need help?
Do you have a question about the PGM 22 InCommand and is the answer not in the manual?
Questions and answers