Table of Contents
Advertisement
Advertisement
Table of Contents

Related Manuals for Leica M-D


Summary of Contents for Leica M-D
- Page 1 LEICA M-D | Instructions...
- Page 5 Leica M-D...
- Page 14 ‒ ‒ ‒ ‒...
- Page 21 ‒ ‒ ‒ ‒...
- Page 22 ‒ ‒ ‒...
- Page 24 16 17 ‒ ‒...
- Page 25 ‒ ‒ ‒ ‒ ‒ ‒ ‒ ‒ ‒ ‒...
- Page 28 1/8000 12500 999-9000 INFO 22:45 22.02.2012 12MP 8234/9999...
- Page 29 1/8000 12500 999-9000 INFO 1/8000 12500 22:45 22.02.2012 12MP 8234/9999 999-9000 1/8000 12500 999-9000 INFO 22:45 22.02.2012 12MP 8234/9999 INFO 22:45 22.02.2012 12MP 8234/9999...
- Page 32 ‒ ‒...
- Page 33 ‒ ‒...
- Page 36 ‒ ‒...
- Page 40 ® ®...
- Page 46 ‒ ‒...
- Page 49 ‒ ‒ ‒ ‒ ‒ ‒ ‒ ‒ ‒ ‒ ‒ ‒ ‒ ‒ ‒...
- Page 51 ‒ ‒ ‒ • ‒ ‒ ‒ ‒ ‒ ‒ ‒ ‒ ‒ ‒ ‒ ‒ ‒ ‒ ‒ ‒...
- Page 59 Leica M-D Instructions...
-
Page 60: Foreword
FOREWORD Dear Customer, Leica would like to thank you for purchasing the Leica M-D and to congratulate you on your choice. With this unique digital view and range finder camera, you have made an excellent choice. We wish you a great deal of pleasure and success using your new camera. - Page 61 Trade Name: LEICA limits for a Class B digital device, pursuant to Part 15 of the FCC Model No.: LEICA M-D (Typ 262) Rules. These limits are designed to provide reasonable protection Responsible party/ Leica Camera Inc. against harmful interfer ence in a residential installation. This equip-...
-
Page 62: Table Of Contents
Exposure metering ..............82 Charging the battery ..............65 Turning the exposure meter on/off .........82 Changing the battery and memory card ........68 Exposure modes ..............83 Leica M lenses ...............71 Aperture priority ..............83 Attaching ................73 Exposure lock ..............84 Removing ................73 Exposure compensation .............84 Manual exposure setting ............84... - Page 63 Using raw data DNG ...............90 Installing firmware updates ............91 Index ..................102 System accessories ..............92 Technical data .................104 Spare parts ................93 Leica service addresses ............108 Precautions and care instructions General precautions ..............94 Care instructions ..............95 Cleaning the sensor ..............97 Storage ...................98...
-
Page 64: Warning Messages
LEGAL INFORMATION The CE identification of our products documents compliance with the fundamental requirements of the applicable EU • Please ensure that you strictly observe copyright laws. The directives. recording and publication of pre-recorded media such as tapes, CDs, or other published or broadcast material may contravene WARNING MESSAGES copyright laws. -
Page 65: Disposal Of Electrical And Electronic Equipment
DISPOSAL OF ELECTRICAL AND The production date of your camera can be found on the stickers in the warranty card and/or on the packaging and that of the ELECTRONIC EQUIPMENT rechargeable batteries on their housing. In the case of the camera, this is written year/month/day and in the case of the rechargeable (Applies within the EU, and for other European countries batteries calendar week/year (WW/YY). -
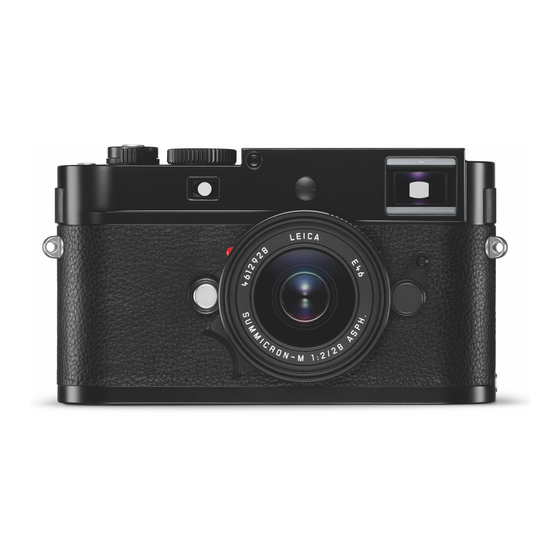
Page 66: Designation Of Parts
⁄ ⁄ Accessory shoe 1 Leica M lenses with viewfinder attachment cover the brightness sensor. Information about functions with these and other lenses can be found under "Displays in the viewfinder", p. 100, and „Leica M lenses ", p. 71. - Page 67 Rear view Viewfinder Thumb wheel ISO setting with a. Scale b. Setting disc c. Index point LED for indicating picture mode/recording data Bottom view (with bottom cover fitted) Locking toggle for bottom cover Tripod thread A ¼, DIN 4503 (¼“) Bottom cover (with bottom cover removed) Memory card slot...
-
Page 68: Quick-Start Guide
QUICK-START GUIDE DETAILED INSTRUCTIONS PREPARATION YOU WILL NEED THE FOLLOWING ITEMS: ATTACHING THE CARRYING STRAP – Camera – Battery – Memory card (not supplied) – Charger and mains cable PREPARATIONS 1. Charge the battery (see p. 65) 2. Insert the battery (see p. 68) 3. -
Page 69: Charging The Battery
CHARGING THE BATTERY Note: LED lights up after around 2 hours due to the charging The camera is powered by a lithium ion battery. characteristics. The charger should be disconnected from the mains when charging is complete. There is therefore no risk of overcharging. •... - Page 70 • Only the charger specified and described in this manual (order no. 14 494) is to be used. The use of other chargers not approved by Leica Camera AG can cause damage to the batter- ies and, in extreme cases, can cause serious or life-threatening...
- Page 71 If the problem persists, please contact your dealer, the camera to be turned on. Leica office in your country or Leica Camera AG. • A new battery only reaches its full capacity after it has been fully charged and – by use in the camera - discharged again 2 or 3 times.
-
Page 72: Changing The Battery And Memory Card
CHANGING THE BATTERY/MEMORY CARD Inserting the battery Turn the camera off (see p. 74). Important: Do not open the bottom cover or remove the memory card or battery while the red LED on the back of the camera is fl ashing, indicating picture recording and/or data saving to the card. - Page 73 Charge level display Inserting the memory card You can display the current battery capacity in the viewfi nder: 1. Turn on the camera Only necessary if the viewfi nder display has switched itself off again even though the camera is switched on: 2.
- Page 74 Notes: Do not touch the memory card contacts. • The range of SD/SDHC/SDXC cards is too large for Leica Camera AG to be able to completely test all available types for compatibility and quality. Although using other card types is not likely to damage the camera or the card, some "no name"...
-
Page 75: Leica M Lenses
1961-1995, Made in Canada) cannot be optimize exposure and image data. fi tted to the camera or will not focus to infi nity. The Leica Even without this additional feature, i.e. when using Leica M lenses Customer Care department can modify these lenses so that without identifi... - Page 76 Notes: Despite the high precision of the range finder on the camera, exact • The Leica Customer Care department can retrofit many Leica M focusing with 135mm lenses with an open aperture cannot be lenses with 6-bit coding. (Address, see p. 108).
-
Page 77: Attaching
Attaching the lens Detaching the lens 1. Turn off the camera 1. Turn off the camera 2. Hold the lens at the fi xed ring 2. Hold the lens at the fi xed ring. 3. Align the red index button on the lens with the release button 3. -
Page 78: Main Switch
OPERATING ELEMENTS - Self-timer Pressing the shutter release starts the set delay time (see p. 90), then the picture is taken. MAIN SWITCH Notes: 16 17 • After turning on, the camera is ready to use after approx. 1s. • If the camera is out of use for an extended period or is stored in a case, always turn it off... -
Page 79: Time Setting Dial
2. Pressing the shutter button all the way down takes a picture. The data is then transferred to the memory card. The Leica M shutter speed dial has no stop, i.e. it can be turned in either direction from any position. It detents at all marked positions Note: and at the intermediate values. -
Page 80: Date And Time
BASIC SETTINGS Accessing the setting mode: 1. Set main switch to 2. Press the function button for a long time (≥12s, during this DATE AND TIME time, no other operation process may be carried out) Actual setting is done only with the function button, the thumb- Setting each of the values: wheel and the viewfi... -
Page 81: Iso Sensitivity
ISO SENSITIVITY PERMANENT CAMERA SETTINGS The ISO setting covers a range of ISO 200 – 6400 in ⁄ ISO incre- This camera saves the picture data in compressed loss-free DNG ments, and thus enables you to adapt the shutter speed/aperture format. -
Page 82: Bright Line View And Range Finder
BRIGHT-LINE VIEW AND RANGE FINDER 1/8000 12500 The camera’s bright-line view and range fi nder is not only a very 999-9000 high-quality, large, brilliant and bright viewfi nder, it is also a highly accurate range fi nder coupled to the lens. It has a magnifi cation factor of 0.68x. -
Page 83: The Image Field Selector
IMAGE FIELD SELECTOR 50mm + 75mm 1/8000 12500 The image fi eld selector extends the possibilities of this built-in universal viewfi nder: at any time, you can view frames that do not 999-9000 belong to the current lens. You can then see immediately if, for image composition reasons, it would be better to photograph the relevant subject using a diff... -
Page 84: Distance Metering
RANGE MEASUREMENT Superimposed image method Due to its large effective metering basis, the range finder on this In a portrait, for example, aim the metering field at the eye and turn camera is very precise. The benefits of this are particularly notice- the distance setting ring on the lens until the contours in the able when using wide-angle lenses with their relatively high depth metering field are brought into line. - Page 85 Split image method When taking photographs of architecture, for example, aim the range finder metering field at the vertical edge or another clearly defined vertical line and turn the distance setting ring on the lens until the contours of the edge or line can be seen at the limits of the metering field with no misalignment.
-
Page 86: Exposure Metering
EXPOSURE METERING Notes: • When the displays have gone out, the camera is in a "stand-by" In this camera, the exposure is metered for the available ambient mode. light though the lens with the working aperture with strong center • In very low ambient light, i.e. at the limits of the exposure meter, weighting. -
Page 87: Exposure Modes
EXPOSURE MODES Notes: • As described in connection with the ISO setting on p. 77, a The camera provides two exposure modes: Aperture priority mode certain amount of noise becomes apparent when using higher and manual mode. Depending on the subject, situation and your sensitivities, and particularly with uniform dark surfaces. -
Page 88: Exposure Lock
EXPOSURE LOCK EXPOSURE COMPENSATION For compositional reasons, the most important part of the subject Exposure meters are calibrated to a gray scale value, which corre- sponds to the brightness of a normal, i.e. average photographic is often not in the center of the picture, and as a result such impor- tant parts of the subject may be excessively light or dark. -
Page 89: The Bsetting
Notes: As well as the direction of rotation of the shutter speed thumb- wheel and aperture setting ring necessary for correct exposure, • Long exposure times can be associated with very heavy picture noise. the three LEDs in the light balance also indicate underexposure, overexposure and correct exposure in the following way: •... -
Page 90: Flash Operation
This is particu- metering: larly important for flash units with additional control and signal • Leica system flash units, such as the models SF 40, SF 64, SF contacts, because if the position in the accessory shoe changes 26, SF 58. - Page 91 FLASH EXPOSURE CONTROL Notes: • Studio flash systems may have a very long burning time. There- Fully automatic flash mode, i.e. controlled by the camera, is avail- fore, when using them it may be useful to select a slower shutter able on the camera with the system-compatible flash units listed in speed than ⁄...
- Page 92 Settings for camera-controlled automatic flash mode Flash exposure displays in the viewfinder with system-com- patible flash units When the flash unit used has been switched on and set to the appropriate mode for TTL flash exposure control (see flash man- A flash-shaped LED appears in the viewfinder as confirmation and to ual), exposure metering must be carried out on the camera: display the various operating conditions.
- Page 93 flash unit being switched on and available with this camera when using correspondingly equipped ready for use: Leica system flash units, with all shutter speeds and in aperture An exposure time shorter than s has been set manually on priority and manual exposure modes.
-
Page 94: Taking Photographs With The Self-Timer
MISCELLANEOUS REVIEW Your photos are played back on your computer. You need one with an integrated or connected card reader. TAKING PHOTOGRAPHS WITH THE SELF-TIMER You can use the self-timer to take a picture with a delay of 12s. In such cases we recommend that the camera is placed on a tripod. -
Page 95: Installing Firmware Updates
INSTALLING FIRMWARE UPDATES Displays Leica is constantly working on developing and optimizing its prod- Viewfinder LED Back LED ucts. As many functions of the camera are entirely controlled by (permanently lit up) software, some of these improvements and extended func-... -
Page 96: System Accessories
Leica UV/IR filters specially developed for use on the Leica M8 central area of the viewfinder image. The 1.25x viewfinder magni- and M8.2 should not be used on the Leica M as they can cause fier gives the 0.68 x viewfinder on this camera a magnification of color shifts at the edges of pictures, particularly when using wide 0.85 x, while the 1.4 x gives 0.95 x magnification. -
Page 97: Spare Parts
FLASH UNITS CASES The Leica M-D can be used with different types of The new M ever-ready case has been specially developed for the new flash unit. Only system-compatible units with the proprietary Leica M. It protects the camera reliably during transport and can Leica interface enable camera-based, fully automatic flash expo-... -
Page 98: General Precautions
SAFETY AND CARE INSTRUCTIONS • Ensure that sand and dust cannot get into the camera, e.g. on the beach. Sand and dust can damage the camera and the memory card. Take particular care when changing lenses and when inserting and removing the card. GENERAL PRECAUTIONS •... -
Page 99: Care Instructions
CARE INSTRUCTIONS FOR THE BATTERY Rechargeable lithium ion batteries generate power through internal As any soiling also represents a growth medium for microorgan- chemical reactions. This reaction is influenced by ambient temper- isms, you should take care to keep the equipment clean. ature and humidity. - Page 100 • Batteries have a limited service life. It is recommended to • Always keep the charger contacts clean, and never short circuit replace it after around four years; this may be necessary sooner them. if used in a cold environment. (You will find the battery manufac- •...
-
Page 101: Cleaning The Sensor
The camera can be an environment that is as dust-free as possible. returned to Leica AG Customer Service (Address: see p. 108) for • As plastic parts can easily pick up a static charge and then attract chargeable cleaning of the sensor;... -
Page 102: Storage
Important: • Store the camera in a dry, adequately ventilated place, where • Leica Camera AG accepts no liability for damage caused by the neither high temperatures nor high humidity will occur. When user when cleaning the sensor. used in humid conditions, the camera should be completely free •... -
Page 103: Malfunctions And Their Resolution
TROUBLESHOOTING THE CAMERA SHUTTER REFUSES TO TRIP. – Picture data is currently being transferred to the memory card and the back-up memory is full. THE CAMERA DOES NOT RESPOND WHEN I TURN IT ON. – The capacity of the memory card is exhausted and the back-up –... -
Page 104: Appendix
APPENDIX VIEWFINDER DISPLAYS... - Page 105 With automatic brightness control adjusted to the ambient brightness. This automatic control is not available for Leica M lenses with viewfinder attachments, since they cover the brightness sensor 5 which supplies the information required for their operation. In such cases the frame...
-
Page 106: Index
KEYWORD INDEX Exposure/exposure control/exposure meter Aperture priority ..............83 Accessories ................92 Exposure compensation ............84 Aperture priority .................83 ISO sensitivity .................77 Battery, inserting and removing ..........68 Manual settings ...............84 Bright-line view and range finder ..........78 Metering field ..............85/104 Care instructions................95 Metering memory lock .............84 Carrying strap ................64 Power Off... - Page 107 Image field selector ..............79 Sensitivity ................. 77/104 Info service, Leica Product Support ..........108 Shutter release, see also shutter and technical data ..74/106 Interchangeable lenses ............71/92 Shutter, see shutter release and technical data ISO sensitivity ..............77/104 Spare parts ................93 Lenses, Leica M .................71...
-
Page 108: Technical Data
TECHNICAL DATA Exposure metering Ambient light: Through the lens (TTL), with working aperture, flash Camera type light: TTL metering with system-compatible, SCA-3000/2-standard Leica M-D (Typ 262), compact digital view and range finder system flash units camera Metering principle/method Lens attachment Metering the light reflected by light blades of the 1st shutter... - Page 109 TTL linear flash mode with HSS-com- line with the relevant distance setting Matching viewfinder and actual image patible Leica system flash units Flash exposure metering At a range setting of 2m, the bright-line frame size corresponds With system-compatible flash units, control with center-weighted...
- Page 110 flash synchronization, HSS linear flash mode 12V DC, 1.3A; Output: Direct current nominal 7.4V,1000mA/max. possible with all shutter speeds faster than s with Leica sys- 8.25V, 1100mA; operating conditions (charging): 10°-30°C; Model tem flash units with appropriate specifications No.: BC-SCL2;...
- Page 111 Camera body Material All-metal magnesium/aluminum body, leather covering, brass top panel and base, black lacquered finish. Tripod thread A ¼ (¼“) DIN stainless steel in bottom Operating conditions 0°-40°C Interfaces ISO accesory shoe Dimensions (Width x Depth x Height) Approx. 138.6 x 42 x 80mm Weight Approx.
-
Page 112: Leica Service Addresses
LEICA PRODUCT SUPPORT LEICA CUSTOMER CARE The Product Support Department at Leica AG can answer any tech- The Leica Camera AG Customer Care department or the repair nical questions relating to Leica products, including support for the service provided by authorized Leica agents in your country are supplied software in writing, on the phone or by email. - Page 113 Leica Camera AG Am Leitz-Park 5 35578 WETZLAR DEUTSCHLAND Telefon +49 (0) 6441-2080-0 Telefax +49 (0) 6441-2080-333 www.leica-camera.com...
Need help?
Do you have a question about the M-D and is the answer not in the manual?
Questions and answers