Table of Contents
Advertisement
Quick Links
Modellbau Lindinger GmbH
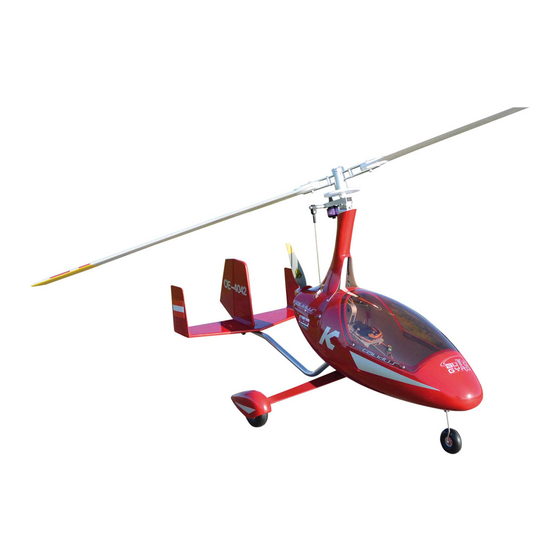
Hacker Autogyro „Calidus 50E"
Montage- und Betriebsanleitung
Vielen Dank für Ihr Interesse an unseren Produkten. Beim Calidus handelt es sich um einen
Tragschrauber mit einem Rotordurchmesser von 1800mm, angetrieben von einem kraftvollen A50
Außenläufer mit einem 4S 5000mA Akkupack. Wir haben viel Zeit und Sorgfalt in dieses ganz
neuartige Flugmodell investiert, um Ihnen ein Höchstmaß an Freude und Spaß beim Fliegen zu
bereiten. Es wurde auf eine hohe Materialqualität und eine praxisgerechte Fertigung geachtet.
Bitte nehmen Sie sich etwas Zeit und studieren aufmerksam die Anleitung. Sie enthält einige Tipps
und Tricks, welche das Fliegen mit einem Modelltragschraubers zu einem tollen Erlebnis werden
lassen.
Thank you for your interest in our products. The Calidus is a RC Autogyro with a rotordiameter of
1800mm driven by a powerful A50 Outrunner with a 4S 5000mAh battery. We have invested much
time and care in this very new flight model, to give you a maximum of pleasure and fun while flying.
We focused on high quality of materials and practical prefabrication. Please take your time and study
the instructions carefully. It contains some tips and tricks which make paragliding a great experience.
Lesen Sie bitte vor der Inbetriebnahme die Anleitung sorgfältig durch.
Please read this instruction manual carefully before starting operation.
Anleitung / Manual Hacker Autogyro „Calidus"
© 2013 Hacker Motor GmbH
Seite / page 1
Modellbau Lindinger GmbH
e-Mail: office@lindinger.at
www.lindinger.at
Advertisement
Table of Contents

Subscribe to Our Youtube Channel
Related Manuals for Hacker Calidus 50E


Summary of Contents for Hacker Calidus 50E
- Page 1 It contains some tips and tricks which make paragliding a great experience. Lesen Sie bitte vor der Inbetriebnahme die Anleitung sorgfältig durch. Please read this instruction manual carefully before starting operation. Anleitung / Manual Hacker Autogyro „Calidus“ © 2013 Hacker Motor GmbH Seite / page 1 Modellbau Lindinger GmbH e-Mail: office@lindinger.at...
- Page 2 Seite 36 Gewährleisung / Guarante: Seite 37 Haftungsausschluss / Disclaimer of liability Seite 37 Kontaktinformationen / Contact information: Seite 37 Anleitung / Manual Hacker Autogyro „Calidus“ © 2013 Hacker Motor GmbH Seite / page 2 Modellbau Lindinger GmbH e-Mail: office@lindinger.at www.lindinger.at...
-
Page 3: Seite
Herkömmliche Batterien dürfen nicht aufgeladen werden. Es besteht Brand- und Explosionsgefahr! Batterien (1,5 V) sind nur für den einmaligen Gebrauch vorgesehen und müssen ordnungsgemäß entsorgt werden, wenn sie leer sind. Anleitung / Manual Hacker Autogyro „Calidus“ © 2013 Hacker Motor GmbH Seite / page 3 Modellbau Lindinger GmbH e-Mail: office@lindinger.at... -
Page 4: Seite
If you join a model club suitable cover will usually be available through the organisation. It is your personal responsibility to ensure that your insurance is adequate. Make it your job to keep your Anleitung / Manual Hacker Autogyro „Calidus“ © 2013 Hacker Motor GmbH... -
Page 5: Seite
If not used for a longer period of time (e.g. for storage), remove the batteries (or rechargeable batteries) inserted in the transmitter to avoid damage from leaking batteries/rechargeable batteries. Anleitung / Manual Hacker Autogyro „Calidus“ © 2013 Hacker Motor GmbH Seite / page 5 Modellbau Lindinger GmbH e-Mail: office@lindinger.at... - Page 6 Servos Rotorkopf /servos rotorhead: 2x min. 10 Ncm Servo Ruder & Rad / servo rudder & wheel: 1x min. 5 Ncm Anleitung / Manual Hacker Autogyro „Calidus“ © 2013 Hacker Motor GmbH Seite / page 6 Modellbau Lindinger GmbH e-Mail: office@lindinger.at...
- Page 7 4pcs washers. The battery frame can be moved to adjust the C.G. When the position have been confirmed, tightening the locking nuts. Anleitung / Manual Hacker Autogyro „Calidus“ © 2013 Hacker Motor GmbH Seite / page 7 Modellbau Lindinger GmbH e-Mail: office@lindinger.at...
-
Page 8: Seite
Don’t add too much thread locker, or else you won’t get the screw loose again. Anleitung / Manual Hacker Autogyro „Calidus“ © 2013 Hacker Motor GmbH Seite / page 8 Modellbau Lindinger GmbH e-Mail: office@lindinger.at... -
Page 9: Seite
Please don’t add more spring washers to the M4*10 screws, or else it will affect the angle of blade hub wave, even loose the M4*10 screw. Anleitung / Manual Hacker Autogyro „Calidus“ © 2013 Hacker Motor GmbH Seite / page 9 Modellbau Lindinger GmbH e-Mail: office@lindinger.at... -
Page 10: Seite
Muttern. Assemble the push-rods to the servos and rotor head system with four M3*12 screws and four M3 locking nuts. Anleitung / Manual Hacker Autogyro „Calidus“ © 2013 Hacker Motor GmbH Seite / page 10 Modellbau Lindinger GmbH e-Mail: office@lindinger.at... - Page 11 C.G hole. Or you can adjust the push-rods to match it. This position is the normal neutral position of elevator. Anleitung / Manual Hacker Autogyro „Calidus“ © 2013 Hacker Motor GmbH Seite / page 11 Modellbau Lindinger GmbH e-Mail: office@lindinger.at...
- Page 12 Next step is checking the range of aileron roll. Match the reverse side of goniometer to the rotor head horns. Please close up the horns throughout. Anleitung / Manual Hacker Autogyro „Calidus“ © 2013 Hacker Motor GmbH Seite / page 12 Modellbau Lindinger GmbH e-Mail: office@lindinger.at...
- Page 13 2-3 degrees. (rotorhead will move right seen in flight direction). Der Rotorkopf ist bei Vollgas leicht nach rechts geneigt. Rotorhead moves slightly rightward at full throttle. Anleitung / Manual Hacker Autogyro „Calidus“ © 2013 Hacker Motor GmbH Seite / page 13 Modellbau Lindinger GmbH e-Mail: office@lindinger.at...
- Page 14 Through the front landing wire with one 3mm chock, Add a drop of thread locker before tightening the the chock.. Insert it from beam bottom and steering gear arm. Anleitung / Manual Hacker Autogyro „Calidus“ © 2013 Hacker Motor GmbH Seite / page 14 Modellbau Lindinger GmbH e-Mail: office@lindinger.at...
-
Page 15: Seite
Add a drop of anaerobic adhesive before tightening the set screws. Cut off the redundant inhaul cable by diagonal pliers. Anleitung / Manual Hacker Autogyro „Calidus“ © 2013 Hacker Motor GmbH Seite / page 15 Modellbau Lindinger GmbH e-Mail: office@lindinger.at... -
Page 16: Seite
Install the tail wheel to the frame with M2.5*16 screw and locking nut.. Leave a little bit gap for wheel free rotation. Anleitung / Manual Hacker Autogyro „Calidus“ © 2013 Hacker Motor GmbH Seite / page 16 Modellbau Lindinger GmbH e-Mail: office@lindinger.at... -
Page 17: Seite
Sie damit das Höhenleitwerk mit dem Heckrohr. Add a drop of CA glue to 4pcs B2.3*20 tapping screws before install the empennage to the tail tube. Anleitung / Manual Hacker Autogyro „Calidus“ © 2013 Hacker Motor GmbH Seite / page 17 Modellbau Lindinger GmbH e-Mail: office@lindinger.at... -
Page 18: Seite
Assemble the goniometer to big try square with 4pcs B2*8 tapping screws. Please don’t use CA glue to fix the goniometer now. Anleitung / Manual Hacker Autogyro „Calidus“ © 2013 Hacker Motor GmbH Seite / page 18 Modellbau Lindinger GmbH e-Mail: office@lindinger.at... - Page 19 Propeller. You can adjust the distance by adding or reducing AL washers. Tip: The marking of the propeller is facing into flight direction. Anleitung / Manual Hacker Autogyro „Calidus“ © 2013 Hacker Motor GmbH Seite / page 19 Modellbau Lindinger GmbH e-Mail: office@lindinger.at...
- Page 20 B position the motor to the flank of middle line. Install the motor to the motor frame A with 4pcs M4*20 screws, washers and locking nuts. Anleitung / Manual Hacker Autogyro „Calidus“ © 2013 Hacker Motor GmbH Seite / page 20 Modellbau Lindinger GmbH e-Mail: office@lindinger.at...
-
Page 21: Seite
Install the motor to the frame B with 2pcs M4*20 screws, washers and locking nuts. You can adjust the side distance by tightening the screws. Anleitung / Manual Hacker Autogyro „Calidus“ © 2013 Hacker Motor GmbH Seite / page 21 Modellbau Lindinger GmbH e-Mail: office@lindinger.at... - Page 22 Insert the skeleton to the fiberglass fuselage slowly, and confirm the assembly holes are superimposed, Fix them with two M3*40 screws, locking nuts and four M3 washers. Anleitung / Manual Hacker Autogyro „Calidus“ © 2013 Hacker Motor GmbH Seite / page 22 Modellbau Lindinger GmbH e-Mail: office@lindinger.at...
- Page 23 Fix the piece with 3pcs M4*40 screws, locking nuts and 6pcs M4 washers. Anleitung / Manual Hacker Autogyro „Calidus“ © 2013 Hacker Motor GmbH Seite / page 23 Modellbau Lindinger GmbH e-Mail: office@lindinger.at...
-
Page 24: Seite
Bohren Sie 1mm Locher um die Position zu fixieren. Match and measure the wheel pants, drill 1mm holes to locate the pants. Anleitung / Manual Hacker Autogyro „Calidus“ © 2013 Hacker Motor GmbH Seite / page 24 Modellbau Lindinger GmbH e-Mail: office@lindinger.at... -
Page 25: Seite
Pylon gesteckt. Through the pre-rotation ESC to the pylon and motor cowling first. And then put the pylon motor cowling into the carling. Anleitung / Manual Hacker Autogyro „Calidus“ © 2013 Hacker Motor GmbH Seite / page 25 Modellbau Lindinger GmbH e-Mail: office@lindinger.at... - Page 26 Schrauben und selbstsichernden Muttern am Rotorkopf und den Servohebel. Install the pushrod to rotor head horns and servo arms with M3*12 screws and locking nuts Anleitung / Manual Hacker Autogyro „Calidus“ © 2013 Hacker Motor GmbH Seite / page 26 Modellbau Lindinger GmbH e-Mail: office@lindinger.at...
-
Page 27: Seite
Hold the position and drill two 1mm holes at the under cowling. Install two B2*8 tapping screws to the under cowling hole Anleitung / Manual Hacker Autogyro „Calidus“ © 2013 Hacker Motor GmbH Seite / page 27 Modellbau Lindinger GmbH e-Mail: office@lindinger.at... -
Page 28: Seite
Match the pylon cowling to the fuselage and drill two 1mm holes at the pylon cowling for installing two B2*8 tapping screws. Anleitung / Manual Hacker Autogyro „Calidus“ © 2013 Hacker Motor GmbH Seite / page 28 Modellbau Lindinger GmbH e-Mail: office@lindinger.at... -
Page 29: Seite
Fix the pre-rotation ESC in the same way as pusher ESC. Put the servo and ESC wires through the bottom of receiver frame. Anleitung / Manual Hacker Autogyro „Calidus“ © 2013 Hacker Motor GmbH Seite / page 29 Modellbau Lindinger GmbH e-Mail: office@lindinger.at... -
Page 30: Seite
3 degrees. The range base on different pusher motor and different size prop, you can adjust the mix range by your taste). Anleitung / Manual Hacker Autogyro „Calidus“ © 2013 Hacker Motor GmbH Seite / page 30 Modellbau Lindinger GmbH e-Mail: office@lindinger.at... -
Page 31: Seite
The diameters respectively are 1780mm,1820mm,1860mm. Small blades diameter means higher rotate speed to more awesome flying. You can adjust it by your taste. Anleitung / Manual Hacker Autogyro „Calidus“ © 2013 Hacker Motor GmbH Seite / page 31 Modellbau Lindinger GmbH e-Mail: office@lindinger.at... -
Page 32: Seite
Schneiden Sie zunächst die Aufkleber wie im Foto zu sehen aus. Snip the silk-screen stickers by surround drawing. Adjust the position. Anleitung / Manual Hacker Autogyro „Calidus“ © 2013 Hacker Motor GmbH Seite / page 32 Modellbau Lindinger GmbH e-Mail: office@lindinger.at... -
Page 33: Seite
Fingernagel herausdrücken. There may be few small bubble under the silk-screen stickers, you can dispel them with your finger nail. Anleitung / Manual Hacker Autogyro „Calidus“ © 2013 Hacker Motor GmbH Seite / page 33 Modellbau Lindinger GmbH e-Mail: office@lindinger.at... -
Page 34: Seite
Schraubenköpfe die Haube auf Position. Posit the four hole to the tapping screws caps and push the canopy back. Now the canopy is installed. Anleitung / Manual Hacker Autogyro „Calidus“ © 2013 Hacker Motor GmbH Seite / page 34 Modellbau Lindinger GmbH e-Mail: office@lindinger.at... - Page 35 Nach einem Reichweiten- und Funktionstest steht dem Erstflug nun nichts mehr im Wege. After a check of range and functions you are now ready for maiden flight. Anleitung / Manual Hacker Autogyro „Calidus“ © 2013 Hacker Motor GmbH Seite / page 35 Modellbau Lindinger GmbH e-Mail: office@lindinger.at...
-
Page 36: Seite
10. Vor der ersten Kunstflugfigur sollten Sie zunächst ausreichend Praxiserfahrung mit dem Modell sammeln um es bei einer missglückten Figur auch wieder abfangen zu können. Anleitung / Manual Hacker Autogyro „Calidus“ © 2013 Hacker Motor GmbH Seite / page 36 Modellbau Lindinger GmbH e-Mail: office@lindinger.at... -
Page 37: Seite
9. please Take off and landing first at a low height, to check the push line and the CG. And then fly higher. 10. If you want to do a aerobatic flying, please practice more and more ,and then try do aerobatic flying! Anleitung / Manual Hacker Autogyro „Calidus“ © 2013 Hacker Motor GmbH Seite / page 37 Modellbau Lindinger GmbH e-Mail: office@lindinger.at... -
Page 38: Seite
Da uns sowohl eine Kontrolle der Handhabung, die Einhaltung der Montage- und Betriebshinweise, sowie der Einsatz des Produktes und dessen Wartung nicht möglich ist, kann von der Fa. Hacker Motor GmbH keinerlei Haftung für Verluste, Schäden oder Kosten gewährt werden.
Need help?
Do you have a question about the Calidus 50E and is the answer not in the manual?
Questions and answers