
Subscribe to Our Youtube Channel
Related Manuals for Sanyo w41sa


Summary of Contents for Sanyo w41sa
- Page 1 Basic Manual Contents/ Before Use Phone Call Inputting Text Address Book/ Pair Function Mail Hello Messenger Camera EZweb EZnavi EZ · FM Troubleshooting/ Remote Auto Lock W41SA Other Features/ by SANYO Index...
- Page 2 Preface Thank you very much for purchasing the W41SA. Before using your W41SA, be sure to read the W41SA “Basic Manual (this PDF manual)” to ensure correct use of your W41SA. After you have finished reading, store this PDF manual and the printed manuals in a safe place so you can retrieve them whenever you need.
-
Page 3: Manners For Using Cellphones
Manners for Using Cellphones A cellphone always generates weak electric waves while its power is ON. Be considerate of others and the environment around you, and have fun using your cellphone safely. In some places, the use of Consider where to use your cellphones is prohibited. -
Page 4: What You Can Do With The W41Sa
Basics of the Cellphone What You Can Do with the W41SA Mail EZweb EZ Channel You can send mails You can automatically You can access the other cellphones or receive information by Internet to check the personal computers. simply registering news or download ... -
Page 5: Manner Mode And Answer Phone
Manner Mode and Answer Phone Manner Mode Answer Phone With Manner Mode, you can set the The caller can leave a message ringer not to sound so as not to when you cannot answer the phone. Press m for more than one second bother the people around you. -
Page 6: Not Using Your W41Sa While Driving
Not Using Your W41SA While Driving Holding a cellphone in your hand to make phone calls and/ or watching the screen to view E-mails, etc., while driving shall be subject to penalties. (The implementation of the revised Road Traffic Law on November 1, 2004) -
Page 7: Beware Of Junk Mails And One-Ring Calls
Prevent side key from misoperation when carrying the W41SA closed in your bag. Press c (MainMenu) for more than one second while the standby screen is displayed. To Release from the Locked Status Open the W41SA and press c (MainMenu) for more than one second while the standby screen is displayed. -
Page 8: Disaster Bulletin Board Service
Disaster Bulletin Board Service When a big scale disaster occurs, you can register your safety information through About Disaster EZweb. The registered safety information can Bulletin Board be referred from anywhere in Japan through EZweb or Internet. When a big scale disaster occurs, from au cellphone, you ◆... - Page 9 <Safety information registration display> 災害用伝言板 <Top display of the ∼登録∼ Disaster Bulletin Board> 被災状況 災害用伝言板 □無事です。 □被害があります。 Register □自宅に居ます。 伝言板トップ □避難所に居ます。 ∼サービス提供中∼ □コメント見て 安否情報の登録・確認が できます。 コメント入力 (全角100文 字まで) 登録 (ご利用可能地域の <Safety information 方のみ登録可能です) reference display> 確認 削除 災害用伝言板 お知らせメール設定 Refer ※登録内容確認画面にて...
-
Page 10: Table Of Contents
Contents Manners for Using Cellphones ..........1 Basics of the What You Can Do with the W41SA ......... 2 Manner Mode and Answer Phone ........... 3 Cellphone Check the Power, Reception and Battery! ....... 3 Not Using Your W41SA While Driving ........4 Beware of Junk Mails and One-Ring Calls! ...... - Page 11 Listening to EZ · FM ..............83 Ending EZ · FM ............... 84 Troubleshooting In Case You Lose Setting the Remote Auto Lock Activation Conditions .... 86 Activating Auto Lock on the W41SA through Remote Operation ... 87 Your W41SA Other Features Index...
-
Page 12: Confirming The Package Contents
Before Use Confirming the Package Contents The W41SA phone and accessories are included in the package. W41SA Phone Battery Pack Desktop Holder (Assembled inside of the phone) USB Cable (Sample) SANYO Flat-type Warranty (Japanese) Stereo Earphones 05 <Conversion Adapter> Precautions in Use (Japanese) <Stereo Earphones>... -
Page 13: Name Of Parts
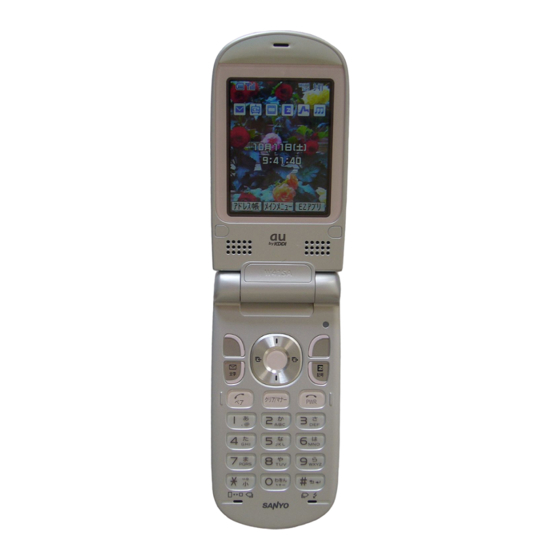
Name of Parts Receiver (Earpiece) Main Display Speakers Flexible Keys Optical Sensor Center Key Cursor Key EZ Key Mail Key Clear/Manner Key Call/Pair Key Power/End Key Dial Keys Stereo Microphone Stereo Microphone (Mouthpiece) Pocket Light/Memo Key Strap Hole Incoming Illuminator Built-in Antenna Camera Key Macro Mode... -
Page 14: Inserting The Minisd™ Memory Card (Commercially Available)
• If you flick the miniSD™ Memory Card inward with your fingernail, the miniSD™ Memory Card may pop out suddenly. Be careful not to direct it toward someone’s face. • The miniSD™ Memory Card is not included with W41SA. Please purchase this item separately. -
Page 15: Charging The Battery Pack
Charging the Battery Pack The battery pack is not fully charged at the time of purchase. When you use the W41SA for the first time, charge the battery pack. How to Charge the Battery Pack Connect the Common AC Adapter 01 to the Desktop Holder. -
Page 16: Turning The Power On
” is displayed, you may not be able to make or receive calls. Turning the Power OFF Press F for more than one second. About the Default Settings When purchased, the W41SA is configured with the following default settings. Lock No. 1234... -
Page 17: Switching Screen Display To English
Switching Screen Display to English Menus, messages and other screen displays can be switched between Japanese and English. Press c ( メインメニュー (Main Menu)) while the standby screen is displayed. The Main Menu (Japanese) appears. ジャンプメニュー 選択 メニュー Use a to select “基本設定 基本設定... - Page 18 Use j to select “Set Set Language M35 日本語 Language” and press English c ( 選択 (Select)). 日本語表示と英語表 示を切り替えます The Set Language settings screen appears. Switches Japanese and English Display Set Use j to select “English” and press c (Set). The screen display is set to English.
-
Page 19: Basic Usage Of The Phone
Basic Usage of the Phone Basic Operation Various functions and settings of the W41SA can be operated by selecting an item with the cursor keys (a) and pressing the center key (c). In this Basic Manual, the usage of the cursor and center keys is indicated as follows. -
Page 20: Using The Main Menu
Press F to return to the standby screen. How to Use the Launcher Menu The W41SA enables you to use each service menu from the launcher menu by pressing u while the standby screen is displayed. You can select and launch functions from the menu using a. -
Page 21: Icons
Icons 〈Main Display〉 Number Displayed Contents When the miniSD™ Memory Card is inserted Communicating/Running EZ · FM ( ) /Running Hello Messenger ( Running EZ apps (BREW Using EZweb Unread mail exists Side Key Operation Invalid EZ Channel registered program (Auto Update Check ON) While Manner Mode is ON While Answer Phone is ON 〈Sub Display〉... -
Page 22: Initializing The E-Mail And Ezweb Settings
Initializing the E-mail and EZweb Settings You must apply to the EZweb service to use the E-mail and EZweb services. Please contact au shops or the au Customer Service Center if you did not apply to the service at the time of purchase. Perform initialization before using the E-mail and EZweb services. -
Page 23: Confirming Your Phone Number And E-Mail Address
Confirming Your Phone Number and E-mail Address Press c (MainMenu) and Profile My # POC Info 0 while the standby screen is displayed. The Profile screen appears, and □□□□@ezweb.ne.jp you can confirm your phone Edit Select Menu number and E-mail address. Information While the standby screen is displayed, your phone number and E-mail address can also be confirmed by selecting c (MainMenu) →... -
Page 24: Changing Your E-Mail Address
Changing Your E-mail Address E-mail address Example: △△△ @ezweb.ne.jp Customizable Part Domain Press X while the standby E−Mail Menu Create New screen is displayed. Inbox Outbox Check New Mail The E-Mail Menu appears. Friendbox Infobox Send−Allbox Variety Mail C−Mail Select Use j to select “E-Mail Setup” E−Mail Setup... - Page 25 Enter your PIN number and use Eメールアト゛レスを変更します。 以下のご注意を確認した 上でアト゛レスの変更を行って j to select “送信 (Send)”, and ください。 then press c (Select). ※入力前の注意※ 1.Eメールアト゛レスを変更した場 合、変更前のアト゛レスを再度 利用する事はできません The PIN number is a 4-digit number you have filled in 。 an application form at the time of purchase. If you enter a wrong PIN number sequentially three times within the same day, you will not be allowed to perform setup operations until the following day.
-
Page 26: Making Calls
Phone Call Making Calls Use the 0 - 9 keys to enter the receiver’s phone number, then press N. Making a call to a regular telephone, enter the phone number starting with the area code. How to Make a Call Your phone number is not displayed on the receiver’s display. -
Page 27: Calling Back (Outgoing Calls/Incoming Calls)
Icon as a Countermeasure for One-Ring Calls With the W41SA, One-Ring Calls (ringer time is 3 seconds or less) are displayed in the Incoming Calls. Be careful if you call back to unfamiliar number. -
Page 28: Changing Ringer Type
Changing Ringer Type Press c (MainMenu) while the standby screen is displayed. The Main Menu appears. Shortcut Select Menu Use a to select “Basic Basic Settings Profile Time/Toll/Sub Settings” and press Sound/Vib/Lamp c (Select). Screen Privacy User Support Communication The Basic Settings screen appears. Guide Function... - Page 29 Use j to select “ ” and Call Ringer Original press c (Select). Data Folder Search from EZweb Random Ringer The Call Ringer selection screen appears. Select Use j to select “Original” Call Ringer RRainbow and press c (Select). Rainbow Black Purple The Call Ringer selection screen appears. Brown...
-
Page 30: Adjusting Ringer Volume
Adjusting Ringer Volume Perform steps 1 to 5 on Call Notice M211 Pattern2 page 26 to display the Level3 standard Call Notice setting screen. OFF( Ptn1 Med) Prior Data Color5 Preview Select Use j to select “ ” and Ringer Volume press c (Select). The Ringer Volume setting screen appears. Level3 STEP↓... -
Page 31: Adjusting The Other Party's Voice Volume
Press d to decrease the volume. Level7 The voice volume can be adjusted in 9 levels during the call. Setting Manner Mode The W41SA notifies you of the incoming call by vibrating. Press C for more than one second while the standby screen is displayed. -
Page 32: Setting Answer Phone
Setting Answer Phone Press m for more than one second while the standby screen is displayed. Answer Phone is turned ON and “ ” Adrs Bk MainMenu EZapps appears on the standby screen. To Turn Answer Phone OFF Press m for more than one second while the standby screen is displayed. Information •... -
Page 33: Playing Back Messages On Answer Phone
Playing Back Messages on Answer Phone When a message is recorded on Answer Phone: A message appears on the standby screen. New Notice Found Missed Calls X Adrs Bk Check EZapps Use s to select “ ” Play A.Ph/Ph Memo 15:15 12/11 and press c (Check). Robin Smith 16:22 12/10 0900001XXXX... -
Page 34: Switching The Input Mode
Inputting Text Switching the Input Mode On the character input screen, press X to display the Switch Character Type input mode selection screen. Use a to select an input mode and press c (OK). Entering Single-byte Alphanumeric Characters You can use the key 1 to 0 to enter characters. The characters appear as shown in the following table each time the indicated key is pressed. - Page 35 Consecutively Entering Characters of the Same Key After entering the first character, press r then the next key. Example: Entering “ab” Body Body Body a a ab Press 2 once. Press r. Press 2 twice. Erasing Characters Press C to erase a character. Press C for more than one second to erase all characters after the cursor ( All characters are erased when the cursor ( ) is at the end of the text.
-
Page 36: Entering E-Mail Addresses
Entering E-mail Addresses Example: To enter “taro@ezweb.ne.jp” using the Phrase Enter “taro”. To(Must) taro t : Press 8 once. a : Press 2 once. r : Press 7 3 times. o : Press 6 3 times. XX/XX OK Menu Press Z (Menu). Menu 1/2... -
Page 37: Entering Pictographs
Entering Pictographs Press X at the character Body wow input screen. Switch Character Type The input mode selection screen appears. XXXXX/XXXXX OK Use a to select “ ” Body wow and press c (OK). Pictograph Face The pictograph list screen appears. Press Z (Category) or +/ $ to XXXXX/XXXXX... -
Page 38: Registering Data In The Address Book
Address Book Registering Data in the Address Book Press Y (Adrs Bk) for Edit Address Book Ph. Bk Items Option more than one second 000 [Name] while the standby screen is displayed. ク゛ルーフ゜0 OFF The Edit Address Book screen appears. Select Reg Use j to select “ ”... - Page 39 Enter a phone number Edit Address Book Ph. Bk Items Option and press c (OK). 000 Cathy Johnes CathyJohnes Use j to select a type of 0900001XXXX 0900001XXXX phone number and press ク゛ルーフ゜0 c (Select). Select Reg Enter the area code when registering a regular telephone number. If you do not want to enter E-mail addresses, go to step 8.
-
Page 40: Making A Call From The Address Book
Making a Call from the Address Book Press Y (Adrs Bk) while Ph. Book Search ア カ サ タ ナ ハ マ the standby screen is 愛川めぐみ displayed. 秋山昇 伊藤次郎 The address book list screen appears. Use a to select the Ph. Book Search AB... -
Page 41: Editing Address Book Data
Editing Address Book Data Example : To change a phone number Press Y (Adrs Bk) while Ph. Book Search AB ナ ハ マ ヤ ラ ワ the standby screen is Cathy Johnes displayed, and use a to Margaret Watson select the data to edit. Robin Smith... -
Page 42: Registering Data From Outgoing/Incoming Calls
Registering Data from Outgoing/Incoming Calls Press r while the standby Outgoing Calls I.C 0113:32 12/11 screen is displayed. 0900001XXXX 0213:00 12/11 Robin Smith The Outgoing Calls appears. 0320:15 12/10 Cathy Johnes If l is pressed while the standby screen is 0420:00 12/10 0900002XXXX displayed, the Incoming Calls appears. Mail Rec... -
Page 43: Registering Data As A Popular Contact
Pair Function You can register the frequent contacts (up to 5 entries) as Popular Contacts to make calls, send mails or use Hello Messenger easily. Registering Data as a Popular Contact Press N while the Popular Menu 1 2 3 4 5... -
Page 44: Making A Call To The Popular Contact
Making a Call to the Popular Contact Press N while the Popular Menu 1 2 3 4 5 standby screen is displayed. Use s to Robin Smith select the person to call. 0900004XXXX △△△@ezweb.ne .jp Reset Select Use j to select “Dial” Robin Smith... -
Page 45: E-Mail
Mail You must apply to the EZweb service to use the E-mail. Please contact au shops or the au Customer Service Center if you did not apply to the service at the time of purchase. Be sure to perform initialization before using the E-mail and EZweb services. If you have not performed initialization yet, see page 20. -
Page 46: Creating And Sending E-Mail
Creating and Sending E-mail Press X while the standby E−Mail Menu Create New screen is displayed. Inbox Outbox Check New Mail The E-Mail Menu appears. Friendbox Infobox Send−Allbox Variety Mail C−Mail Select Use j to select “Create Create Mail [Address] New” and press c (Select). The Create Mail screen appears. Send... - Page 47 Search the address book Address Book 005 Ph. Bk Items Option with a and press Margaret Wat son c (Detail). 0900002XXXX △△△@□□□.ne.jp The address book detail screen appears. ク゛ルーフ゜0 Select Use j to select a desired Create Mail Margaret Watson [Subject] E-mail address and press c (Select). The Create Mail screen returns.
- Page 48 Use j to select “ ” Body (Body) and press c (Select). The Body input screen appears. :Decor Menu :Palette XXXXX/XXXXX OK Menu Enter the body and press Create Mail Margaret Watson c (OK). Notice about schedule I would like to inform y ou that the meeting was The Create Mail screen returns. scheduled at 17:00. Send...
-
Page 49: Reading Received E-Mail
Reading Received E-mail When you receive E-mail: A message “New Notice Found” appears on the standby screen. New Notice Found New E−Mail X Adrs Bk Check EZapps Use s to select “ ” Inbox Unread X/ X and press c (Check). メインフォルタ゛ フォルタ゛1 フォルタ゛2 The Inbox appears. フォルタ゛3... -
Page 50: Received Mail
■ Viewing Received Photos or Movies Example: To view a photo attached to a received E-mail Perform steps 1 to 3 on Received Mail 0001 19:30 Sun Dec24 page 47 to display the Robin Smith (80k)061212_1030 ∼ 01.jp Attached data g received mail. Happy Birthday I am looking forward to... -
Page 51: Reading E-Mail From The Inbox
Reading E-mail from the Inbox Press X while the standby E−Mail Menu Create New screen is displayed. Inbox X Outbox Check New Mail The E-Mail Menu appears. Friendbox Infobox Send−Allbox Variety Mail C−Mail Select Use j to select “Inbox” Inbox Unread X/ X and press c (Select). メインフォルタ゛ フォルタ゛1... -
Page 52: Replying To Received E-Mail
Replying to Received E-mail Press X while the standby E−Mail Menu Create New screen is displayed. Inbox X Outbox Check New Mail The E-Mail Menu appears. Friendbox Infobox Send−Allbox Variety Mail C−Mail Select Use j to select “Inbox” Inbox Unread X/ X and press c (Select). メインフォルタ゛ フォルタ゛1 フォルタ゛2... - Page 53 Use j to select “ ” Body (Body) and press c (Select). >I am looking forwar d to having a dinner with you. By the wa The Body input screen appears. y, I am wondering if it’ll be fine tomor :Decor Menu :Palette XXXXX/XXXXX Highlight OK Menu Enter the body and press Create Mail Robin Smith c (OK). Re:Happy Birthday Me too! Tell me if you h ave something to go eat. The Create Mail screen returns.
-
Page 54: Blocking Junk Mails
Blocking Junk Mails To block junk mails, it is recommended to set up the メールフ ィ ルター (Mail Filter). KDDI Corporation provides the “ サポート設定 (Support Setup)” function to guide which メールフ ィ ルター (Mail Filter) is suit for the customer. You can set up the メールフ... -
Page 55: Mail C-Mail
C-mail C-mail is a service for sending/receiving mails to/from “C-mail” compatible au cellphones. Phone numbers can be used for sending/receiving C-mail. Example : 090-○○○○-XXXX Via au C-mail can be sent to All you have to do is to au cellphones. enter a message and select the receiver’s phone number. -
Page 56: Creating And Sending C-Mail
Creating and Sending C-mail Press X for more than C−Mail Menu Create New one second while the Inbox Outbox standby screen is C−Mail Setup displayed. The C-Mail Menu appears. E−Mail Select Use j to select “Create Body New” and press c (Select). The Body input screen appears. Enter the body and press Create Mail... - Page 57 Use j to select “Use Ph.Book Search ア カ サ タ ナ ハ マ Address Book” and press 愛川めぐみ c (OK). 秋山昇 伊藤次郎 The address book list screen appears. You can also select the phone number from "Use Records", or enter the phone number directly from "Phone No.
-
Page 58: Reading Received C-Mail
Reading Received C-mail When you receive C-mail: A message “New Notice Found” appears on the standby screen. New Notice Found New C−Mail X Adrs Bk Check EZapps Use s to select “ ” Inbox Unread X/ X and press c (Check). メインフォルタ゛ フォルタ゛1 フォルタ゛2 The Inbox appears. フォルタ゛3... -
Page 59: Reading C-Mail From The Inbox
Reading C-mail from the Inbox Press X for more than C−Mail Menu Create New one second while the Inbox X Outbox standby screen is C−Mail Setup displayed. The C-Mail Menu appears. EーMail Select Use j to select “Inbox” Inbox Unread X/ X and press c (Select). メインフォルタ゛... -
Page 60: Hello Messenger
Send text messages. Information • Note that time available to use W41SA may shorten depending on the usage or the electric wave reception in your location for the frequent use of Hello Messenger. • The service is available for members between two (minimum) and five (maximum). -
Page 61: Displaying Hello Messenger Menu
Displaying Hello Messenger Menu Press c (MainMenu) while the standby screen is displayed. Use a to select “Hello Messenger” and press c (Select). The Hello Messenger menu appears. When you activate Hello Messenger for the first time, press c (OK), select your character and press c (設定(Set)). -
Page 62: Inviting Member To The Meeting
Inviting Member to the Meeting You can select members to invite to the meeting from the address book, グループ (Group) or ハローランキング (Hello Ranking; the ranking of members that you had invited to the meeting or received the invitation), and start the meeting. Use j to select “... -
Page 63: When Receiving The Meeting Invitation
When Receiving the Meeting Invitation When you receive the meeting invitation, Ringer or Vibrator is activated and the invitation screen appears. However, if you set the ringer mode to “ 自動応答モー ド (Auto Answer)”, the invitation is automatically received without any ringer. When you receive the meeting invitation: The invitation screen appears. -
Page 64: What You Can Do With The Camera
• Save the photos you shot in miniSD Memory Card (commercially available). You can print the photos at photo service shops same as the film developing. • W41SA provides direct printing of images or shoot items to printers without PC. - Page 65 Open your feet to the breadth of your shoulders and maintain your back and sides firm. To Prevent from Jiggling • Do not move the W41SA after pressing the shutter key until you hear the shutter sound. • It is possible to shoot a photo using the Self-Timer. By using the Self-Timer, you do not need to press the shutter key at the moment to shoot the photo, so you can prevent from jiggling.
-
Page 66: Camera
Camera Shooting Photos Press R for more than one second while the standby screen is displayed. The view seen through the lens appears on the main display. Shoot Menu Pressing $ toggles between the light and flash. Aim at the object on the main display, and press c (Shoot). -
Page 67: Recording Movies
Recording Movies Press R for more than one second while the standby screen is displayed and then press Y ( 00:00:15 The view seen through the lens Record Menu appears on the main display. Pressing $ turns the light ON/OFF. Aim at the object on the main display, and press c (Record). - Page 68 The Photo Size is set to “Wallpaper Size” at the time of purchase. Photo Size Title of a Photo Where to Save shooting date_shooting time˜serial Mobile/Wallpaper Size “Photo Folder” of the W41SA number “DSC Folder” on the miniSD™ VGA/SXGA Size SA36 + serial number Memory Card Example : For the first photo shot at 19:30 on December 24, 2006 Mobile/Wallpaper Size: 061224_1930˜01...
-
Page 69: Viewing Photos Or Movies
Viewing Photos or Movies Press c (MainMenu) while the standby screen is displayed. The Main Menu appears. Shortcut Select Menu Use a to select “Data Data Folder All Data XXXX Folder” and press User Folder Movie Folder c (Select). Photo Folder The Data Folder list screen appears. miniSD... -
Page 70: Attaching A Photo Or A Movie To An E-Mail Message
Attaching a Photo or a Movie to an E-mail Message Perform steps 1 and 2 on page 64 or 65 to shoot a photo or record a movie. EーMail Save Menu Press Y (E-Mail) and use Create Mail [Address] j to select “YES” and (80k)061212_1030... -
Page 71: Ezweb
Be sure to perform initialization before using the E-mail and EZweb services. If you have not performed initialization yet, see page 20. EZweb EZweb is a data service to enjoy the Internet via your W41SA. Chaku-Uta ® and the latest news can be obtained from information sites. -
Page 72: Displaying The Ez Top Menu
Displaying the EZ Top Menu Press W while the standby screen is displayed. Use j to select “Top Menu” and press c (Select). The EZ トップメニュー (EZ Top Menu) appears. It may take some time to display the screen. カテゴリで探す (Search by category) Searches for a site by category. -
Page 73: Bookmarking Frequently-Accessed Sites
Bookmarking Frequently-Accessed Sites New bookmark Display the site to Save Items Take snapshot bookmark and press Reload Bookmark(s) Z(Browser Menu). View snapshots Go To URL Current Certificate The Browser Menu appears. Use j to select “New Favorite Title: bookmark” and press c スホ゜ーツニュース URL: http://△△□□□.jp/ (Select). Folder: No... -
Page 74: Accessing Bookmarked Sites
Accessing Bookmarked Sites Press W while the standby EZ Menu Top Menu screen is displayed. Favorite Site Screen Memo EZ Service Menu The EZ Menu appears. URL Input Clear Browser Rec EZ Setup Previous Display Select SANYO Use j to select “Favorite Favorite Site 01芸能ニュース Site” and press c (Select). 02フ゜ロ野球速報 The Favorite Site screen appears. Detail... -
Page 75: Viewing Charges
Viewing Charges Approximate charges for calls and transmission can be viewed on EZweb. Press c (MainMenu) Inquire Toll M11 Execute Cancel while the standby screen is displayed and press 1 twice. Connects to EZweb to Inquire Toll The Inquire Toll selection screen Select appears. Use j to select ■料金照会■... -
Page 76: Downloading Chaku-Uta
Downloading Chaku-Uta Example: To download the latest Chaku-Uta and set it for the ringer Press W while the standby EZ Menu Top Menu screen is displayed. Favorite Site Screen Memo EZ Service Menu The EZ Menu appears. URL Input Clear Browser Rec EZ Setup Previous Display Select SANYO Use j to select “Top Menu” and press c (Select). - Page 77 Use j to select and △△△(XXXk) Saved to Data Folder download a Chaku-Uta Download the Chaku-Uta prompted by on-screen instructions. When the additional information cost is charged to use the site, you must input your EZ Password or Premium EZ Password. EZ Password : 4-digit number to be set when you apply to the paid contents for the first time.
-
Page 78: Downloading Chaku-Uta-Full
Select Use j to select “Jump to EZ Music!” from the au Music Menu and press c (Select). Your W41SA connects to the EZ Music! Browser OK Menu Follow the on-screen instructions after connection. When the additional information cost is charged to use the site, you must input your Premium EZ Password. -
Page 79: Ez Channel
• The program starts being downloaded automatically when the broadcasting start time arrives. Turn fully charged W41SA ON in a location where signals can be picked up. • The layout and contents of the screens shown here are only an example and are... -
Page 80: What You Can Do With Eznavi
Select You can locate an au cellphone that supports Position Search <EZnavi screen> from your W41SA. The “位置確認メール(Position Search Mail)” (free service) and “いつでも位置確認(Auto Position Search )” (pay service) services are available. “Area Message(安心ナビエリア通知)” to be informed in a specific time zone and area Transmission of information is ○○駅... - Page 81 Send Select Save continuous positioning. Your W41SA can display the map of your When you meet someone, it is possible present location in real-time, by simply to inform the other party of where you selecting “現在地マップ(View My Map)”.
-
Page 82: What You Can Do With Security Navi
EZweb subscription required What You Can Do with Security Navi What You Can Do with Position Search When your kids are coming home late or getting lost, you can check the current location of your kids with easy operation. The Position Search provides two services of “... -
Page 83: What You Can Do With Area Message
What You Can Do with Area Message Transmission of information is notified by alarm when getting to (getting out of) the pre-specified area in the pre-specified period of time, and a message is automatically sent from the kid's au cellphone to the mother's. エリア通知... -
Page 84: Ez · Fm
EZweb subscription required EZ · FM You can listen to the FM radio on the W41SA. The audio broadcasted over the FM radio can be recorded. Antenna Available for W41SA To listen to EZ · FM, use antennas for optimal reception of airwaves. -
Page 85: Listening To Ez · Fm
Listening to EZ · FM Press c (MainMenu). EZ・FM 注意事項 注意事項をよくお読みの 上、EZ・FMアプリをご利用く ださい。 Use a to select “EZ · FM” 承諾する and press c (Select). 承諾(次回から非表示) ・ラシ゛オを聞くだけでは通 話料はかかりません。 ・本アフ゜リはネットワーク通信を 注意事項(Precautions) screen appears. 行う場合があります。ま た、定期的に通信を行う 場合があります。最大 Use j to confirm the precautions. -
Page 86: Ending Ez·fm
■ Viewing and Operating the EZ · FM Screen <EZ · FM Screen> Icons appear if downloadable information is provided. Radio frequency Switching Speaker/Earphone Radio station/Song Banner Main Operations: Switches radio stations. ・ Press 1 to 9 to switch to a radio station which is set to each key. Tunes in on the station in 0.1MHz. -
Page 87: Troubleshooting
For detailed information, visit the company homepage of SANYO Electric Co.,Ltd. • From W41SA → Press W for more than one second. (SANYO Keitai Planet) • From PC → http://www.sanyo-keitai.com (SANYO Keitai Arena) -
Page 88: In Case You Lose Your W41Sa
In Case You Lose Your W41SA The Remote Auto Lock function enables you to lock your W41SA through remote operation so that no one else can use your W41SA. Setting the Remote Auto Lock Activation Conditions Making several incoming calls to the W41SA from the registered phone number within the specified time activates Auto Lock. -
Page 89: Activating Auto Lock On The W41Sa Through Remote Operation
Information • Remote Auto Lock cannot be activated if the W41SA is not powered on or is under area with bad reception. • When activating Remote Auto Lock, you can choose the setting whether to delete the... -
Page 90: Other Features
Other Features The W41SA is provided with other useful features. ® au Music Player EZ apps (BREW You can play music data downloaded You can enjoy various applications, ® from Chaku-Uta-Full , CD, and including high-volume games rich in SD-Audio applicable music data. -
Page 91: Index
Index Accessories ........... 10 Electric Waves Reception ....3, 14 Address Book ........36 E-mail ............. 43 Edit ............ 39 Attach a Photo or a Movie ....68 Make a Call ........38 Create and Send ....... 44 Register ..........36 Initialization ........ - Page 92 Launcher Menu ........18 Adjust Ringer Volume ....... 28 Lock No..........14 Change Ringer Type ......26 Mail SANYO Flat-type Stereo C-mail ..........53 Earphones 05 ....... 10, 82 E-mail ..........43 Set Language ........15 Mail Filter ........... 5, 52 Site Main Menu ..........
- Page 93 Pressing "zero" will connect you to an operator, after calling "157" on your au cellphone. Sales : KDDI CORPORATION • OKINAWA CELLULAR TELEPHONE COMPANY SANYO Electric Co., Ltd. Manufactured by : February 2006 Edition Access the au online manual from here.
Need help?
Do you have a question about the w41sa and is the answer not in the manual?
Questions and answers