Table of Contents
Advertisement
Quick Links
X
4-CHANNEL PRESSURE HOVERING HEIGHT-ADJUSTMENT
USER MANUAL
1
OPERATING STANDARDS: GB/T26701-2011
MAIN FEATURES
● Utilises the 4-axis structure, enabling the aircraft to be even more
flexible, speedy,and possessing a relatively stronger wind-withstanding
capability. Also it can conduct flights in interior as well as exterior
environment.
● A 6-axis gyro direction stabiliser is built-in, ensuring precise positioning
in the air.
● The structure uses modular designs, making installation simple and
repair and maintenance easier.
● Capable of 360° 3D overturning function.
● Headless function is enabling the aircraft to be summoned back with ease.
● Brand new pressure hovering height-adjustment function.
● New functions increased are one key take off/landing .
● HD wifi real-time transmission aerial.
GYRO REMOTE CONTROL SERIES
14W
REMOTE CONTROL 6-AXIS FLYCOPTER
14+
(720P)
Advertisement
Table of Contents

Subscribe to Our Youtube Channel
Related Manuals for SYMA X14W


Summary of Contents for SYMA X14W
- Page 1 GYRO REMOTE CONTROL SERIES (720P) 4-CHANNEL PRESSURE HOVERING HEIGHT-ADJUSTMENT REMOTE CONTROL 6-AXIS FLYCOPTER USER MANUAL OPERATING STANDARDS: GB/T26701-2011 MAIN FEATURES ● Utilises the 4-axis structure, enabling the aircraft to be even more flexible, speedy,and possessing a relatively stronger wind-withstanding capability. Also it can conduct flights in interior as well as exterior environment.
-
Page 2: Safety Guide
For any updates or errors, please abide by the SYMA MODEL AIRCRAFT’s website as accurate. Safety guide 1. Please store the smaller-sized aircraft accessories in places that are out of reach of children, in order to avoid the occurrence of accidents. -
Page 3: Repair And Maintenance
Repair and maintenance 1. Always use dry and soft cloth to clean this product. 2. Avoid this product to be exposed to sunlight or heat. 3. Avoid immersing these toys into water, otherwise ,the electronic parts may be damaged. 4. Regularly Check and inspect the plug and other accessories. If any damages are discovered, please immediately stop using it, until it is completely repaired in good working condition. - Page 4 Battery changing and charging methods for aircraft Battery changing step 1. Shut down model 2. Open aircraft’s 3. Connect battery on the power switch. battery cover disconnect with the pushed back. dash receiver. 4. After battery replacement,fasten the battery cover again. Charging methods for aircraft 1.
- Page 5 Understanding your remote control Remote control’s button function description: Phone attaching clamp Power ON/OFF Right function lever (PressStart headless mode / Short Press Left function lever the high-low speed (press and hold to switching) fine-tune the adjustment, release the complete exit / + hold the power key, trimming cleared) 3D Eversion...
-
Page 6: Product Features
1. Battery Installation Method: Open up the battery cover at the back of the remote control. Correctly place 4 x AA alkaline batteries in the battery box in strict adherence to the polarity instructions (the batteries are optional). 1. During the battery installation, it must be ensured that the polarities of the batteries are matched with that of the battery box. - Page 7 4.Fast/slow gear function: Slow gear by default on power-on. Possible to switch the function mode of fast/slow gear by pressing on the operating arm on the right side for a short time. It is switched into fast gear mode when two “didi” sound come from the remote control, pressing on the operating arm on the right side for a short time under fast gear mode and then one “di”...
- Page 8 2. After connecting the aircraft to the power supply, Front push the switch to “ON” location, and adjust the specified direction of the aircraft’s head under the Left Right headless mode as the new forward direction. Back 3. Push the accelerator joystick of the remote control to the highest level and then, pull back into the lowest level.
- Page 9 SYMA FPV installation software. For Apple mobile phones, please kindly proceed to APP STORE to download the SYMA FPV installation software or scan the QR code to download the SYMA FPV installation software. Warm remided: Two-dimension code is provided in color box packing and back cover of specification to scan.Please...
- Page 10 4. Real-time transmission aerial photo-taking Photo-Taking and Video Recording: When the WIFI camera is operating in normal conditions, please click on the photo or video icon on the real-time transmission GUI, and immediately you can conduct photo-taking or video recording. (The completed files for photo-taking or video recording can be found in the “Checking of Photos and Videos”...
- Page 11 Step 3. Enclose battery into the fuselage, after closing battery cover,turn on the switch on the bottom of aircraft. Step 4.Pressing on the power switch on the top of the aerobat to make sure the aerobat in the state of “OFF”. Step 5: Push the left lever (accelerator) to the highest point and then reset to the lowest point.
- Page 12 3. Switching off the aircraft Method 1: Push the left joystick (Accelerator) to the lowest level and stay there for 2 to 3 seconds, the aircraft can then be switched off. Method 2: Move the left and right joysticks inwards in an internal loop of “8” for 1 second, and the aircraft can be switched off.
- Page 13 Left turning and right turning control Left side flying and right side flying control When the left joystick (Accelerator) is When the right joystick (Turning Rudder) pushed towards the left or right, the is pushed towards the left or right, the aircraft will turn left or right aircraft will fly sideward on the left or correspondingly.
-
Page 14: Accessories (Optional)
Memory card installation / removal Memory card installation Memory card removal 1. According to the figure 1. According to the figure memory card into the slot from the memory card in front of the aircraft. out of the slot on the front of the aircraft. -
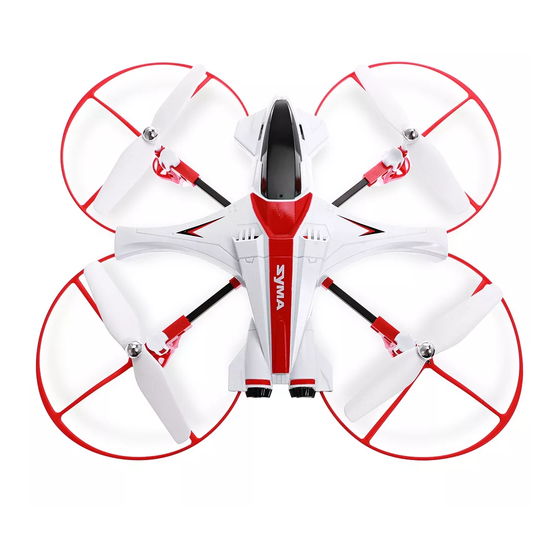
Page 15: Product Descriptions
Square Fiber Tube 720P WIFI the Battery Cover Motor Seat Fitting Camera Board Battery Box Receiver Board Light Strip Battery Card Reader Mobile Phone Remote Control Fixed Mounting Product descriptions -14-... -
Page 16: Main Specifications
Product Name Qty. Product Name Qty. Receiver Board Top Main Body Motor Cover Bottom Main Body Square Fiber Tube Main Blade(Clockwise Direction) Battery Cover Main Blade(Anti-clockwise Direction) Battery Box Protective Gear Camera Board Seat Battery 720P WIFI the Camera Board Main Motor(Clockwise Direction) Camera Board force down Object Main Motor(Anti-clockwise Direction) - Page 17 Two-dimension code Two-dimension code of Android system of iphone IOS system The company has the right of final interpretation of this instruction manual statement.
Need help?
Do you have a question about the X14W and is the answer not in the manual?
Questions and answers