Table of Contents
Advertisement
Available languages
Available languages
Quick Links
Advertisement
Chapters
Table of Contents

Related Manuals for SYMA X110W


Summary of Contents for SYMA X110W
- Page 1 X110W FOLDABLE DRONE User manual...
- Page 3 Contents 1-21 ENGLISH INTRODUCE 23-41 DEUTSCH EINFÜHRUNG...
-
Page 4: Table Of Contents
Contents 1.0 Important safety information 2.0 About this product 2.1 Specifications 2.2 Install the SYMA FLY app 2.3 Drone diagram 2.4 Remote control diagram 3.0 Assembling the product 3.1 Removing the Drone 3.2 Fixing the propeller 3.3 Installing the propeller protectors 3.4 Attaching the phone holder... -
Page 5: Important Safety Information
1.0 Important safety information Thank you for purchasing this SYMA product. To ensure that you operate the aircraft correctly and conveniently, please read these instructions carefully before first use and store them in a safe place for future reference. Safety Guide 1. -
Page 6: About This Product
Propeller protector Screwdriver Phone holder User manual 2.2 Install the SYMA Fly app 1. Scan the QR code with your mobile device or download the app from your app store. Android Note: *For best results, use a device with iOS 8.0/Android 5.0 or later. -
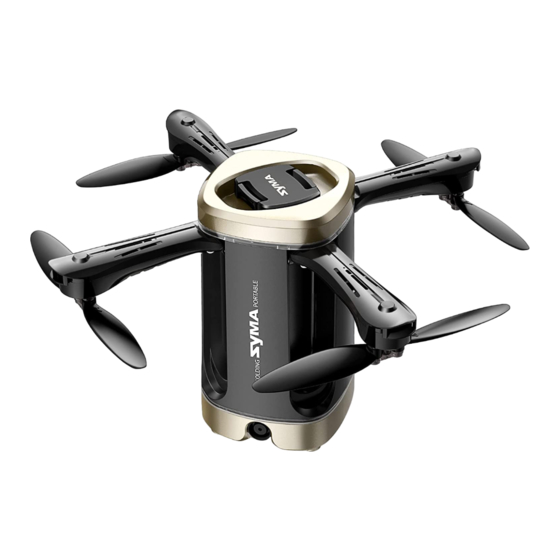
Page 7: Drone Diagram
③ Wait a few seconds until your smartphone connects to the drone's WiFi network. ④ Open the Syma fly application, select the corresponding model, and then click Start, the camera image will be displayed on the screen, indicating that the connection is successful. -
Page 8: Assembling The Product
3.0 Assembling the product 3.1 Removing the Drone Remove the plastic transparent cover (lift it up), then the battery and the battery locating ring. After, remove the drone from the charging cradle. Tips:Base and top cover with accessories 1. Propeller protector 2. -
Page 9: Attaching The Phone Holder
3.4 Mobile phone clip installation Insert the phone holder Press the spring to into the opening on the adjust the size of remote control. the phone holder. Attaching the phone holder 3.5 Charging the drone battery 1. To remove the battery, press on the release buttons and at the same time pull out the battery. 2. -
Page 10: Instruction Of Remote Control
3.6 Instruction of remote control To insert the controller batteries, open the battery cover on the back of the remote control and insert 4x AA alkaline batteries, ensuring that you observe the polarity markings (batteries are not included and must be purchased separately). Battery cover 4x AA batteries Note:... - Page 11 Turning the drone on Method one Method two Method three Push to the highest point and Pull the joysticks in a V shape Press the ascend/descend button return to the center. Note: 1. If the drone is flown out of range from the remote control, the drone indicator light will start to flash and the drone will land slowly.
-
Page 12: Using The Remote Controller
4.2 Using the remote controller Ascend Descend Move Backwards Move forwards Front Rotate left Rotate right Rear Front Tilt left Tilt right Rear... -
Page 13: Trimming
Trimming Trimming forwards and backwards When the drone is hovering in the air, when it flies forward / backward automatically, you can press and hold the left fine-tuning button and push the right joystick in the backward / forward direction to adjust it until the drone is stable and then release it. -
Page 14: Stunt Functions
4.3 Function introduction Undervoltage protection When the two indicators on the nose of the drone begin to flash, it means that the power of the drone is low. At this time, please control the drone to return. Overcurrent protection If the drone's blades collide with another object or become stuck, the drone's circuit will engage the overcurrent protection mechanism. - Page 15 High/low speed mode Short press the fast and slow button to switch the fast/slow mode. 1.The default is slow mode when power on. 2. The remote control emits two beeps for fast mode and one beep for slow mode. One-touch take-off/landing 1.
- Page 16 Altitude hold When you release the left joystick (throttle) after ascending/descending, the drone will continue to hover at the current height. Headless mode In headless mode, push the right joystick of the remote control to fly forward, the drone will always fly in the direction indicated by the nose when it takes off, even if the direction of the nose is changed during the flight.
- Page 17 1. Define the front When you turn on the power for the first time and start the drone, the direction of the nose of the drone is straight ahead. 2. Enter and Exit of Headless Mode ① After the pairing is completed, short press the "Headless Mode" button, the remote control will emit a "Di Di Di..."...
-
Page 18: Contact Us
6.0 Contact Us Please do not hesitate to contact us if you need more further support. warranty@symatoys.com.cn +1 718-312-0558(US) +44 (0)7723708421(UK) +4933545519201(DE) For online support, please scan this code with Facebook Messenger... -
Page 19: Accessories/Parts (Optional)
7.0 Accessories (available separately) The following section contains a list of optional accessories that are available to purchase. Accessories can be purchased from your local retailer. Please indicate your preferred colour when making your purchase. Main Body Main Body Top Shield Main Body Bottom Shield Transparent Cover... - Page 21 Transmitter power: <3.55dBm Product name: DRONE Hereby, [GUANGDONG SYMA MODEL AIRCRAFT INDUSTRIAL CO., LTD], declares that this [DRONE ] is in compliance with Directive 2014/53/EU.The full test of the EU declaration of conformity is available at the following internet address:...
- Page 22 2 YEAR WARRANTY: LIMITED 2-YEAR WARRANTY AND FREE LIMITED REPLACEMENT PARTS FOR 2-YEARS Symatoys.com.cn warrants to the original buyer only that its products will be free from defects in material and workmanship for 2 years from the date upon which the product is shipped, either directly from symatoys.com.cn or from an Authorized Re-seller’s location, to the buyer.
- Page 23 LIMITED REMEDY: Symatoys.com.cn's sole liability, and buyer's sole remedy for any breach of the foregoing warranty shall be at Symatoys.com.cn's option to exchange the product with a new product or a refurbished product that is functionally equivalent to the original product, or issue a credit or refund to the purchase price the product.
- Page 24 +49 335-4551-9201(DE) usa@symatoys.com(US) eu@symatoys.com(EU) http://www.symatoys.com SYMA is a trademark of Guangdong Syma Model Aircraft Industrial Co., Ltd. registered in the United States and/or other countries. Made in China The company has the right of final interpretation of this user manual.
- Page 25 Inhalt 1.0 Wichtige Sicherheitshinweise 2.0 Über dieses Produkt 2.1 Spezifikationen 2.2 Installation der SYMA FLY App 2.3 Drohne-Diagramm 2.4 Fernbedienung 3.0 Zusammenbau des Produkts 3.1 Entfernen der Drohne 3.2 Befestigung des Propellers 3.3 Installieren der Propeller Schutzvorrichtungen 3.4 Installation des Handyclips 3.5 Aufladen des Drohnenakkus...
-
Page 26: Wichtige Sicherheitshinweise
1.0 Wichtige Sicherheitshinweise Vielen Dank für den Kauf dieses SYMA-Produkts. Um sicherzustellen, dass Sie die Drohne richtig und bequem bedienen, lesen Sie bitte dieses Handbuch vor dem Betrieb sorgfältig durch und bewahren Sie dieses Handbuch zum späteren Nachschlagen ordnungsgemäß auf. -
Page 27: Über Dieses Produkt
2 (A/B) Propellerschutz Schraubendreher Telefonhalter Benutzerhandbuch 2.2 Installation der SYMA Fly App Scannen Sie den QR-Code mit Ihrem Mobilgerät oder laden Sie die App aus Ihrem App Store herunter. Android Achtung: *Verwenden Sie für beste Ergebnisse ein Gerät mit iOS 8.0/Android 5.0 oder höher... -
Page 28: Drohne-Diagramm
③ Warten Sie einige Sekunden, bis sich Ihr Smartphone mit dem WLAN-Netzwerk der Drohne verbindet. ④ Öffnen Sie die Syma Fly-Anwendung, wählen Sie das entsprechende Modell aus und klicken Sie dann auf Start. Das Kamerabild wird auf dem Bildschirm angezeigt und zeigt an, dass die Verbindung erfolgreich ist. -
Page 29: Zusammenbau Des Produkts
3.0 Zusammenbau des Produkts 3.1 Entfernen der Drohne Entfernen Sie die transparente Kunststoffabdeckung (heben Sie sie an), dann die Batterie und den Batteriepositionierungsring. Entfernen Sie danach die Drohne aus der Ladestation. Tipps: Basis und obere Abdeckung mit Zubehör 1. Propellerschutz 2. -
Page 30: Installation Des Handyclips
3.4 Installation des Handyclips Setzen Sie den Telefonhalter Drücken Sie auf die in die Öffnung an der Feder, um die Größe Fernbedienung ein. des Telefonhalters anzupassen. Attaching the phone holder 3.5 Aufladen des Drohnenakkus 1. Um den Akku zu entfernen, drücken Sie auf die Entriegelungstasten und ziehen Sie gleichzeitig den Akku heraus. -
Page 31: Anleitung Der Fernbedienung
3.6 Anleitung der Fernbedienung Öffnen Sie zum Einlegen der Controller-Batterien die Batterieabdeckung auf der Rückseite der Fernbedienung und legen Sie 4x AA-Alkalibatterien ein, achten Sie dabei auf die Polaritätsmarkierungen (Batterien sind nicht im Lieferumfang enthalten und müssen separat erworben werden). Batterieabdeckung 4x AA-Batterien Achtung:... - Page 32 Einschalten des Quadcopters Methode eins Methode zwei Methode drei Drücken Sie zum höchsten Punkt Ziehen Sie die Joysticks in einer V-Form. Drücken Sie die Auf-/Abstiegstaste. und kehren Sie zur Mitte zurück. Achtung: 1. Wenn die Drohne außerhalb der Reichweite der Fernbedienung geflogen wird, beginnt die Drohnenanzeige zu blinken und die Drohne landet langsam.
-
Page 33: Verwenden Der Fernbedienung
4.2 Verwenden der Fernbedienung Aufsteigen Absteigen Rückwärts Vorwärts Vorderseite Nach links Nach rechts drehen drehen Rückseite Vorderseite Nach links Nach rechts neigen neigen Rückseite... - Page 34 Trimmen Trimmen vorwärts und rückwärts Wenn die Drohne in der Luft schwebt, wenn sie automatisch vorwärts / rückwärts fliegt, können Sie die linke Feinabstimmungstaste gedrückt halten und den rechten Joystick in die Rückwärts- / Vorwärtsrichtung drücken, um sie einzustellen, bis die Drohne stabil ist, und dann loslassen es. Trimmen links und rechts Wenn die Drohne im Schwebeflug nach links oder rechts driftet, halten Sie den linken Joystick gedrückt und drücken Sie den rechten Joystick nach rechts/links, bis die Drohne nicht mehr driftet.
-
Page 35: Funktionen Einführung
4.3 Funktionen Einführung Unterspannungsschutz Wenn die beiden Anzeigen an der Nase der Drohne zu blinken beginnen, bedeutet dies, dass die Leistung der Drohne niedrig ist. Steuern Sie zu diesem Zeitpunkt bitte die Drohne, um zurückzukehren. Überstromschutz Wenn die Rotorblätter der Drohne mit einem anderen Objekt kollidieren oder stecken bleiben, aktiviert der Schaltkreis der Drohne den Überstromschutz- mechanismus. - Page 36 High/Low-Speed-Modus Drücken Sie kurz die Schnell- und Langsam-Taste, um den Schnell-/Langsam-Modus umzuschalten. 1. Die Standardeinstellung ist der langsame Modus beim Einschalten. 2. Die Fernbedienung gibt zwei Pieptöne für den schnellen Modus und einen Piepton für den langsamen Modus aus. One-Touch-Start/Landung 1.
- Page 37 Höhe halten Wenn Sie den linken Joystick (Gas) nach dem Auf-/Abstieg loslassen, schwebt die Drohne weiterhin auf der aktuellen Höhe. Headless-Modus Drücken Sie im Headless-Modus den rechten Joystick der Fernbedienung, um vorwärts zu fliegen. Die Drohne fliegt beim Abheben immer in die von der Nase angezeigte Richtung, auch wenn die Richtung der Nase während des Flugs geändert wird.
-
Page 38: Drohnenstatus Und Wartung
1. Definiere die Front Wenn Sie das Gerät zum ersten Mal einschalten und die Drohne starten, ist die Richtung der Nase der Drohne geradeaus. 2. Ein- und Ausstieg aus dem Headless-Modus ① Nachdem die Kopplung abgeschlossen ist, drücken Sie kurz die Taste „Headless Mode“, die Fernbedienung gibt einen „Di Di Di...“-Ton aus und die Kontrollleuchte am Flugzeug blinkt langsam, um anzuzeigen, dass es in den Headless-Modus eingetreten ist Zustand;... -
Page 39: Uns Kontaktieren
6.0 Uns kontaktieren Bitte zögern Sie nicht, uns zu kontaktieren, wenn Sie weitere Unterstützung benötigen warranty@symatoys.com.cn +1 718-312-0558(US) +44 (0)7723708421(UK) +4933545519201(DE) Für Online-Support scannen Sie bitte diesen Code mit Facebook Messenger... -
Page 40: Zubehör/Teile (Optional)
7.0 Zubehör/Teile (optional) Der folgende Abschnitt enthält eine Liste mit optionalem Zubehör, das zum Kauf erhältlich ist. Zubehör kann bei Ihrem Händler vor Ort erworben werden. Bitte geben Sie beim Kauf Ihre bevorzugte Farbe an. Drohnenkörper Oberer Schutzschild Unterer Schutzschild Transparente Arm A Arm B... - Page 42 Antennen oder Sendern aufgestellt oder betrieben werden.“ HF-Frequenzband: 2445.0-2475.0MHz Sendeleistung: <3.55dBm Produktname: (DROHNE) Konformitätsauszeichnungsbeilagen: GuangDong SYMA Model Aircraft Industrial Co., Ltd. erklärt hiermit, dass das Funkgerätetyp Helikopter der Richtlinie 2014/53/EU entspricht Der vollständige Text der EUKonformitätserklärung ist im folgenden Internet verfügbar Adresse:...
- Page 43 2-jährige Garantie BEFRISTETE GARANTIE VON 2 Jährige UND KOSTENLOSE BEGRENZTE ERSATZTEILE FÜR 2 Jahre Symatoys.com.cn garantiert dem ursprünglichen Käufer, wenn Produkte neunzig 2 Jahr ab dem Datum des Versands an den Käufer Material- und Verarbeitungsfehlern haben, kann der Käufer einen kostenfreien Ersatz erhalten, entweder direkt von symatoys.com.cn oder von einem autorisierten Wiederverkäufer Standort.
- Page 44 BEGRENZTE ABHILFE: Die alleinige Haftung von Symatoys.com.cn und das alleinige Rechtsmittel des Käufers bei Verstößen gegen die vorstehende Garantie liegt in der Option von Symatoys.com.cn, das Produkt gegen ein neues Produkt oder ein generalüberholtes Produkt auszutauschen, und funktional dem Originalprodukt entspricht, oder eine Gutschrift oder Rückerstattung auf den Kaufpreis des Produkts auszustellen.
- Page 47 CET PRODUCT SERVICE LTD. Osterholzallee 144 71636 Ludwigsburg Germany Email:info.cetservice@gmail.com Tel:+4971416432236 Hersteller: GUANGDONG SYMA MODEL AIRCRAFT INDUSTRIAL CO.,LTD Adresse: NO.2 WEST XINGYE ROAD LAIMEI INDUSTRIAL AREA CHENG HAI , Shantou, China Postleitzahl: 515800 +1 718-312-0558 (US) +44(0)7723708421 (UK) +49 335-4551-9201(DE) usa@symatoys.com(US)
- Page 48 One-key Flashing 2.4Ghz Hover Indoor Flight take off/landing LED Lights Frequency Function...
Need help?
Do you have a question about the X110W and is the answer not in the manual?
Questions and answers