Table of Contents
Advertisement
Available languages
Available languages
Advertisement
Table of Contents

Related Manuals for Grillo FX 27


Summary of Contents for Grillo FX 27
- Page 1 FX 27 Zero turning Käyttöohje Operator’s Manual 02405–13...
-
Page 2: Table Of Contents
SISÄLLYSLUETTELO Turvamerkinnät Ohjeet: Varoitukset Laitteen tiedot ja huolto Tekniset tiedot Ennen ensimmäistä käyttökertaa Käyttöohjeet Kunnossapito ja voitelu Voitelutaulukko Taulukko kunnossapitotoimista Kuvat CE-merkinnän hyväksyntä (eng) INDEX Safety symbols Instructions: Warnings Identification and servicing Technical specifications Putting the machine into service Instructions for use Maintenance and lubrication Lubrication chart Routine maintenance guide... -
Page 3: Turvamerkinnät
TURVAMERKINNÄT – SAFETY SYMBOLS YLEISOHJEKIRJA – Lue käyttöohje huolellisesti. OPEN MANUAL- means that you must read the operator's manual very carefully. VAROITUS! – Toimenpide vaatii erityistä tarkkaavaisuutta varsinkin, jos mukana on tämä VAARA-merkintä. CAUTION! - means that you have to pay particular attention to the operation you have to carry out, in particular if there is the indication “DANGER”. - Page 4 Varo erityisen huolellisesti moottorin kuumiin osiin koskemista. Take special care not to touch hot parts of the engine. Moottorin pakokaasut voivat aiheuttaa sairastumisen tai kuoleman. Jos moottori on pidettävä käynnissä suljetussa tilassa, ohjaa kaasut ulos pakoputken jatkeella. Pyri aina työskentelemään paikassa, jossa ilma vaihtuu. Engine exhaust fumes can cause sickness or death.
- Page 5 Pyörivät terät ovat vaarallisia. Pidä erityisesti lapset kaukana niistä onnettomuuksien välttämiseksi. Rotating blades are dangerous. Protect children and prevent accidents. Akun rikkihappo on myrkyllistä ja niin vahvaa, että se voi polttaa ihoa, syövyttää vaatteisiin reikiä ja aiheuttaa silmään joutuessaan sokeutta. Sulphuric acid in battery electrolyte is poisonous.
-
Page 6: Varoitukset
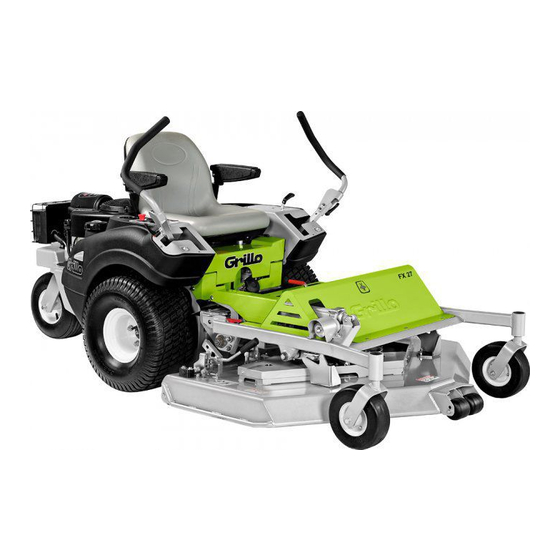
FX 27 Zero Turning HYDROSTAATTINEN RUOHONLEIKKURI Hyvä asiakas, Kiitos, että valitsit Grillon FX 27 -ruohonleikkurin. Olemme varmoja siitä, että laite täyttää kaikki sille asettamasi odotukset. Jotta voisit käyttää ja huoltaa ruohonleikkuriasi parhaalla mahdollisella tavalla, kehotamme sinua lukemaan ja huomioimaan tässä opaskirjasessa annetut ohjeet huolellisesti –... - Page 7 15) Vääntyneet tai vahingoittuneet terät on aina vaihdettava, pelkkä korjaaminen ei riitä. 16) Käytä aina Grillon valmistamia varaosia ja lisävarusteita. 17) Työskentele aina auringonvalossa tai tehokkaan keinovalon alla. 18) Säilytä polttoainetta sille soveltuvassa ja sen säilytykseen suunnitellussa astiassa. 19) Noudata erityistä varovaisuutta työskennellessäsi tien läheisyydessä. 20) Käännä...
-
Page 8: Laitteen Tiedot Ja Huolto
LAITTEEN TIEDOT JA HUOLTO LAITTEEN TIEDOT Grillo FX 27 on varustettu korin kylkeen kiinnitetyllä tietokilvellä, josta käy ilmi ostamasi koneen valmistenumero. HUOLTO Tämä opas sisältää ruohonleikkurin käyttöohjeet. Ota yhteyttä jälleenmyyjääsi, kun haluat perushuollattaa koneesi. VARAOSAT Varaosien tulee aina olla Grillon valmistamia, jotta niiden turvallisuus ja yhteensopivuus voidaan taata. -
Page 9: Ennen Ensimmäistä Käyttökertaa
LISÄOSAT: 1 320 mm:n leikkuulaite, jonka leikkuualan leveys 1 250 mm ja paino 125 kg (koko leikkuulaite, mukaan lukien jalkataso). OHJAAJAN ISTUIMELTA VOIDAAN VALITA LEIKKUULAITTEEN TAAKSEPURKAVA- TAI BIOLEIKKUUTAPA. /h (suuntaa-antava). LEIKKUUTEHO: 15 000 m KOKO (leikkuulaitteella): pituus 2 580 mm, leveys 1 320 mm, korkeus 1 100 mm. MAAVARA: 95 mm AKSELIVÄLI: 1 022 mm. - Page 10 Täytä polttoainesäiliöt (kuva 7:C) polttoaineella (bensiinillä) käyttäen erittäin hienolla verkkosuotimella varustettua suppiloa. MOOTTORIN KÄYNNISTÄMINEN Työnnä avain virtalukkoon (kuva 1:3). Käännä avainta, kunnes moottoriöljyn määrän hälytysvalo syttyy. Työnnä kaasuvipu ääriasentoon, jolloin STARTTIMOOTTORI (kuva 1:6) käynnistyy automaattisesti. Käännä virta-avainta, kunnes moottori käynnistyy, ja säädä sitten moottori käymään maksimikierroksilla kaasuvivusta.
- Page 11 9) Tarkista leikkuulaitteeseen voiman siirtävä hihnasto ja säädä säätömutterista (kuva 19:A) tarpeen vaatiessa. 10) Tarkista, että terät eivät ole kuluneet tai vioittuneet. 11) Tarkista moottorin kierrokset (max. 3 350). 12) Pidä moottori aina maksimikierroksilla leikatessasi ruohoa. Jos kierrosluku laskee, hiljennä ajonopeutta hetkeksi. 13) Tarkista, että...
-
Page 12: Kunnossapito Ja Voitelu
kuljettaja ei istu istuimella (moottorin voi käynnistää ilman istuimella istuvaa kuljettajaa, jos seisontajarru on päällä ja jos voiman ulosotto teriin ei ole päällä) tai ohjaussauvat eivät ole STOP-asennossa. Huomio! Kun seisontajarru on kytketty päälle, kuljettaja voi poistua istuimelta ilman, että moottori sammuu. - Page 13 VAKAUSLAITE FX 27 -leikkurissa on laite, joka parantaa koneen ohjailtavuutta rinteillä. Kun koneen takarengas nousee hieman maasta, korin alasyrjässä sijaitseva hydraulinen sylinteri (kuva 11) pysäyttää renkaan nousemisen. Sylinteriä ohjaa heiluri (kuva 6:B), joka havaitsee, milloin ajetaan rinteessä.
- Page 14 maan kanssa, laske jalkakorokkeen kansi (kuva 13:B) ja kiinnitä leikkuulaite asianmukaisilla kiinnitysvivuilla (kuva 14:A). Huomaa: Jos punaiset kiinnitysvivut eivät lukkiudu asentoonsa: Tarkista, että istuimen takana sijaitseva kytkinpainikkeen punainen merkkivalo (kuva 17:D) ei pala. Jos valo palaa, napsauta valo sammuksiin kytkimestä. ...
- Page 15 Jotta pääset säätämään kireyttä, käännä 13 mm:n kiintoavaimella jousen säätömutteria (kuva 19:B). Jousen on oltava säädetty 85 mm:n pituiseksi. - 14 -...
- Page 16 RATKAISUJA ONGELMATILANTEISIIN ONGELMA KORJAUSTOIMENPIDE Tarkista akkukaapelit. Avain on ON-asennossa, Lataa akku. mutta hallintayksikköön ei Akusta ei saada virtaa. Vaihda sulake. syty valoja. Akusta ei saada tarpeeksi Lataa akku. virtaa. Hallintayksikköön syttyvät Tarkista, että valot, mutta starttimoottori ei käynnisty, vaikka avain Turvalaite estää...
- Page 17 Säädä voiman ulosottohihnan kireyttä. Ajonopeus on liian suuri Hiljennä ajonopeutta. nurmikon korkeuteen ja kuntoon nähden. Tasapainota terät tai Terät eivät ole vaihda vaurioituneet tasapainossa. uusiin. Kone tärisee, kun Tarkista terien kiinnitys ja leikkuulaite on päällä. kiinnikkeiden kunto. Kiinnikkeet löysällä.
- Page 18 PÄÄSÄHKÖJÄRJESTELMÄN TOIMINTA Mikrokytkin tarkkailee sitä, onko jalkakorokkeen kansi työskentelyasennossa (kuva 20:B). Jos kansi ei ole kiinni, leikkuulaite ei toimi. Ohjaussauvoissa on kaksi mikrokytkintä, jotka tarkkailevat ohjaussauvojen asentoa ja sitä, onko seisontajarru kytketty. Kuljettajan istuimen alla on mikrokytkin, joka tarkkailee sitä, istuuko kuljettaja istuimella. ...
-
Page 19: Voitelutaulukko
KONEEN KULJETTAMISEEN LIITTYVIÄ VAROITUKSIA Jos konetta täytyy nostaa, tarkista koneen paino tunnistelaatasta ja käytä vain nostoon soveltuvia välineitä (rampit, nosturit jne.). Jos konetta kuljetetaan esimerkiksi pakettiautossa tai kuljetustrailerissa, säädä leikkuulaite alimpaan mahdolliseen asentoon, kytke seisontajarru päälle ja kiinnitä kone tukevasti paikoilleen köysillä, vaijereilla tai ketjuilla. -
Page 20: Taulukko Kunnossapitotoimista
TAULUKKO FX27:n KUNNOSSAPITOTOIMISTA Alla oleva taulukko auttaa sinua huolehtimaan koneestasi niin, että se pysyy tehokkaana ja turvallisena. Siinä on lueteltu tärkeimmät kunnossapitotoimet (mm. voitelu) ja aikavälit, jolloin ne pitää tehdä. Kunkin toimen kohdalla on tyhjiä sarakkeita, joihin voit merkitä, minä päivänä... -
Page 21: Kuvat
KUVA 1 – OHJAUSLAITTEET / FIG. 1 COMMANDS - 20 -... - Page 22 KUVA 1 – OHJAUSLAITTEET / FIG. 1 COMMANDS SUOMI ENGLISH 1. Ohjaussauvat (ajo, peruutus ja 1. Steering levers (forward, reverse pysähtyminen). gear and stop) 2. Terien päälle- ja poiskytkentänuppi. 2. Blades engagement knob 3. Virtalukko. 3. Engine start and stop key 4.
- Page 23 KUVA 2 – TIETO- JA VAROITUSKILVET / FIG. 2 INFORMATION AND WARNINGS - 22 -...
- Page 24 KUVA 2 – TIETO- JA VAROITUSKILVET / FIG. 2 INFORMATION AND WARNINGS SUOMI ENGLISH 1. Seisontajarru. 1. Parking brake 2. Kaasuvivun min./max. 2. Accelerator min/max. 3. Kaavio voideltavista osista. 3. Lubrication points 4. Huom., VAARA! Lue käyttöohje. Ota 4. ATTENTION, DANGER! Read the avain virtalukosta ja lue ohjeet ennen instruction manual.
- Page 25 KUVA 3 – HALLINTAYKSIKKÖ / FIG. 3 CONTROL UNIT KUVA 3 – HALLINTAYKSIKKÖ / FIG. 3 CONTROL UNIT SUOMI ENGLISH A) Ajovalon merkkivalo (valinnainen). A) Working lights indicator light B) Seisontajarrun merkkivalo. (optional) C) Moottoriöljyn merkkivalo. B) Parking lights indicator light D) Voiman ulosoton merkkivalo.
- Page 26 - 25 -...
- Page 27 - 26 -...
- Page 28 - 27 -...
-
Page 29: Warnings
FX 27 Zero Turning Dear Customer, thank you for having purchased our Grillo FX27. We are confident that this machine will fully satisfy all your requirements. To use and maintain the mower at its best, we urge you to read and observe carefully the directions given in this handbook; this will ensure the best possible results and will also safeguard your investment. - Page 30 17) Only work in sunlight or under effective artificial lighting. 18) Only store fuel in suitable containers designed for the purpose. 19) Be very careful when working close to a road. 20) Tilt and clean the cutting deck only when the machine stands motionless and on a flat ground.
-
Page 31: Identification And Servicing
WARRANTY The warranty is given in compliance with the current law. The dealer will have to give the client a copy of the registration card of the machine, which they will print up from the Grillo website. For the engine the guarantee of the relative manufacturers apply. -
Page 32: Putting The Machine Into Service
STEERING SYSTEM: with levers. CLUTCH: for electromagnetic PTO, with magnetic blade brake. SPEED: 0-12 km/h: continuous variation. WHEELS: front 20×10-8; rear 15×6-6. BRAKE: mechanical parking brake. ELECTRICAL DECK TILTING FOR INSPECTION AND MAINTENANCE. SEAT: comfort adjustable and sprung seat with armrests. STEERING LEVERS: adjustable in height and longitudinally. -
Page 33: Instructions For Use
- the engine cooling intake grilles are clean (fig. 7, ref A); - the engine oil is up to the level (fig. 4, ref.A); - the hydraulic oil is up to the level (fig. 5, ref.A); - the feed levers (fig. 1, n°1) are in the stop position; - the PTO engagement push button is in the neutral position (fig. -
Page 34: Cutting Deck
2) Check the terrain before mowing, make sure there are no stones, sticks of foreign objects. 3) While mowing keep the engine at maximum revs., adjust the speed to suit the height of the grass. Be careful when coming across tall thick clumps of grass, slow down. 4) Sharpen the lawnmower blades regularly;... -
Page 35: Maintenance And Lubrication
This operation is best done with dry grass as the turbulence inside the deck mulches it better. It is advisable not to stop the machine after cutting but to continue over the mown lawn for a few minutes to discharge the grass from the inside of the deck. Inspect the blades regularly and sharpen or replace them if necessary. - Page 36 open the lid on the left side of the engine (fig. 4, ref. A). Pour in the oil through the lid (fig. 4, ref. A). The first precaution to be taken is that the engine is maintained correctly with a clean air filter and the engine oil up to the level.
- Page 37 2) Unhook the two red cutting deck blocking levers (fig. 12, ref. A); 3) Tilt the foot rest platform until it is stuck in the corresponding rubber buffers (fig. 13, ref. 4) Keep the deck lifting switch pressed (fig. 1, no. 4) until the complete tilting of the cutting deck (fig.
- Page 38 1) Press the switch (fig. 17, ref. D) until the warning light lights up. 2) Loosen the PTO belt stretcher by turning the corresponding lever (fig. 17, ref. A) and remove the belt from the cutting deck pulley. 3) Carry out points 1-2-3 listed in the paragraph "CUTTING DECK TILTING". 4) When the cutting deck frame wheels lift from the ground, stop the tilting and put the cutting height indicator in position "2"...
-
Page 39: Troubleshooting Guide
TROUBLESHOOTING GUIDE PROBLEM CAUSE REMEDY Check connecting With the key in the «AVV.» The battery is not providing cables [ON] position the instrument Recharge the battery any current panel remains off Replace the fuse The battery is not providing ... -
Page 40: Electrical System
Balance blades or replace Blades not balanced them if damaged Check and tighten the Vibrations while working screws fastening Loose screws blades, the engine and the chassis Check engine oil level and Engine oil light comes on Insufficient pressure top up if necessary ... -
Page 41: Air Filter
- Under the driving seat there is a micro switch that senses the driver's presence on the machine. - The electrovalve that controls the machine's stabilizing mechanism on slopes (fig. 6, ref. C) is situated behind the right hydrostatic transmission. Under normal working conditions the electrovalve is illuminated by a red LED. -
Page 42: Lubrication Chart
Check regularly that the battery voltage has not dropped below 12.5 Volts and if necessary, recharge it. WARNINGS FOR TRANSPORT In case it should be necessary to lift the machine, check the machine’s weight on the identification plate and use only suitable equipment (ramps, cranes, etc.). If the machine is carried with a lorry or with a towed trailer, set the cutting deck at a low position, apply the parking brake and tie the machine up to the means of transport using ropes, cables, or chains. -
Page 43: Routine Maintenance Guide
FX27 ROUTINE MAINTENANCE GUIDE This table is intended to help you to keep your machine in good, safe working order. It lists the main maintenance and lubrication procedures with the frequencies at which they are required; alongside each one, you will find a series of boxes where you can note the date or the number of operating hours when the procedure was carried out.
Need help?
Do you have a question about the FX 27 and is the answer not in the manual?
Questions and answers