Grillo FD450 Operator's Manual
Hide thumbs
Also See for FD450:
- Operator's manual (48 pages) ,
- Operator's manual (120 pages) ,
- Operator's manual (36 pages)

Subscribe to Our Youtube Channel
Related Manuals for Grillo FD450


Summary of Contents for Grillo FD450
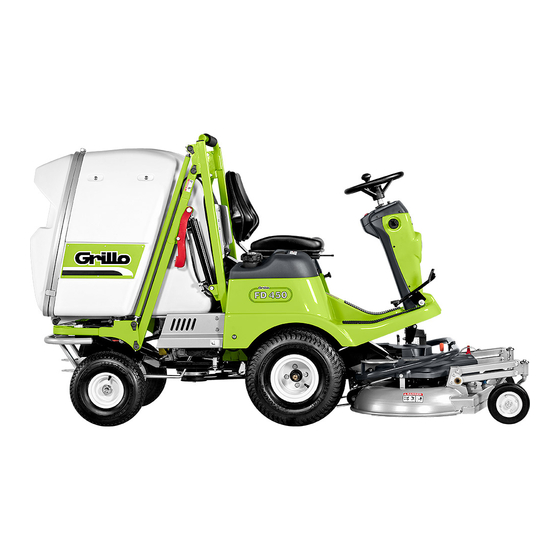
- Page 1 FD450 OPERATOR'S MANUAL MANUALE DELL'OPERATORE MANUEL D'UTILISATION BEDIENUNGSANLEITUNG MANUAL DE INSTRUCCIONES EERST DE HANDLEIDING...
-
Page 3: Table Of Contents
SUMMARY Safety rules Instructions: Warnings Identification and servicing Technical specifications Putting the machine into service Instructions for use Maintenance and lubrication Pictures’ list EC Declaration of Conformity - INDICE Norme antinfortunistiche Istruzioni : Avvertenze Identificazione e assistenza Caratteristiche tecniche Messa in opera della macchina Istruzioni d’uso Manutenzione e lubrificazione Elenco figure... - Page 4 SAFETY SYMBOLS - SIMBOLOGIA PER LA SICUREZZA - SYMBOLOGIE POUR LA SECURITE – SICHERHEITSSYMBOLE- SIMBOLOGÍA DE SEGURIDAD OPEN MANUAL- means that you must read the operator's manual very carefully. MANUALE APERTO - significa che dovete leggere attentamente il manuale di uso e manutenzione. MANUEL OUVERT –...
- Page 5 Take special care not to touch hot parts of the engine. Prestate particolare attenzione a non entrare in contatto con parti surriscaldate del motore. Veiller tout particulièrement à ne pas toucher des éléments surchauffés du moteur. Achtung – keine heißen Motorteile berühren! No tocar partes recalentadas del motor.
- Page 6 WARNING! SHARP PARTS. Keep hands and feet away. Do not operate the mower over gravel or foreign bodies which may be sucked up and ejected by the blades, generating a danger. Keep people away. Remove the key and read the instruction manual before attempting to carry out any maintenance or repairs to the machine.
-
Page 7: Warnings
OUTFRONT MOWER WITH COLLECTION Dear Customer, Thank you for purchasing our Grillo FD450. We are confident that this machine will fully satisfy all your requirements. To use and maintain the mower at its best, we urge you to read and observe carefully the instructions given in this handbook;... -
Page 8: Identification And Servicing
The guarantee is given in compliance with the current law. The dealer will have to give the client a copy of the registration card of the machine, which they will print up from the Grillo website. For the engine the guarantee of the relative manufacturers apply. -
Page 9: Technical Specifications
HOW TO ORDER SPARE PARTS Always state the machine's serial number and the code number of the spare part required. Contact your local Grillo service centre. For further information, our address is: GRILLO S.p.A. Via Cervese 1701 - 47521 CESENA (FC) Tel. -
Page 10: Putting The Machine Into Service
FD450/ Translation of the original instructions PUTTING THE MACHINE INTO SERVICE 1) Check that the machine is complete and has not been damaged in transit. 2) Check the engine oil level (SAE30). 3) Check the tyre pressure: Front wheels 20×10.0 – 8 (1 BAR) Rear wheels 15×6.0 –... - Page 11 FD450/ Translation of the original instructions CAUTION: Do not insert the cutting blades with the engine running at maximum revs. The engine has to run at half speed. Insert the cutting blades at half speed and at some distance from the grass to be cut.
-
Page 12: Maintenance And Lubrication
FD450/ Translation of the original instructions BLADE ROTATION The rotation of the blades is started and stopped using the switch (fig. 1, no. 1). When rotation is engaged the engine must be running at medium rpm and the machine must not be in the area to be cut. - Page 13 FD450/ Translation of the original instructions ENGINE For the lubrication intervals, follow the instructions provided in the engine handbook. For the INTEK 7220 professional series engine use SAE 30 oil (quantity 2,2 litres). Oil drain plug (fig. 11, A): Use a lock wrench in the fixed part. Oil filter (fig. 13, C); oil level (fig. 13, B). Before draining the oil insert a pipe and drain the oil into a tank.
- Page 14 FD450/ Translation of the original instructions CAUTION! In order to reassemble the cutting deck, you have to fit together the cutting deck lead (fig.23, A) with the one which is located on the machine, between the wheels, in the centre.
- Page 15 FD450/ Translation of the original instructions MAINTENANCE SUMMARY TABLE PROCEDURE EVERY 8 AFTER EVERY EVERY ONCE A HOURS YEAR OR HOURS HOURS HOURS EVERY HOURS check the level ● Engine oil change ● ● check ● Air filter replace ٭...
- Page 16 FD450/ Translation of the original instructions – Sediment or dirt in the fuel – Empty the tank and use fresh petrol – Check the fuel filter and replace if necessary The starter motor turns but the engine will not start –...
- Page 17 FD450/ Translation of the original instructions COLLISION WITH A STONE OR OTHER OBSTACLE – Stop the machine. – Switch off the engine, unhook the lawnmower and check that the blade has not been damaged. If so, replace it (fig. 26).
- Page 18 FD450/ Translation of the original instructions - On the electromagnetic clutch (fig. 12, B) there is a diode that prevents back current. - A sensor is located in the grass-catcher that disengages the blades when the grass-catcher is full (fig. 38, A).
- Page 19 FD450/ Translation of the original instructions LONG PERIODS OF STORAGE The machine should be stored in a dry place protected from the weather; cover it with a sheet of canvas if possible. If it is to be out of use for more than 1 month, disconnect the negative battery lead and follow the instructions in the engine handbook;...
-
Page 20: Avvertenze
DESCRIZIONE GENERALE E USO PREVISTO La macchina Grillo FD 450 è un tosaerba con operatore a bordo, progettato per il taglio e la raccolta dell'erba e per la raccolta di fogliame. ATTENZIONE! Leggere attentamente prima di avviare il motore. -
Page 21: Identificazione E Assistenza
FD450/Original instructions – Istruzioni originali – Instructions originales – Original-Anleitungen - Instrucciones originales 25) Non utilizzare la macchina quando si è affaticati e non bere alcolici. 26) Non operare col rasaerba vicino a fossati o banchine che si possono rompere sotto il peso della macchina, specialmente quando la superficie è... -
Page 22: Caratteristiche Tecniche
La garanzia è fornita nei modi e nei limiti indicati dalla legge vigente. Il rivenditore dovrà obbligatoriamente consegnare il certificato di garanzia della macchina al cliente finale, stampando una copia della registrazione dal sito Grillo. Per quanto riguarda il motore, valgono le condizioni previste dai rispettivi Produttori. -
Page 23: Messa In Opera Della Macchina
FD450/Original instructions – Istruzioni originali – Instructions originales – Original-Anleitungen - Instrucciones originales MESSA IN OPERA DELLA MACCHINA Controllare l'integrità della macchina e accertare che non abbia subito danni durante il trasporto. Verificare il livello olio motore. (SAE30) Verificare la pressione degli pneumatici: Ruote anteriori 20 x10.0-8 (1 BAR) - Page 24 FD450/Original instructions – Istruzioni originali – Instructions originales – Original-Anleitungen - Instrucciones originales IMPORTANTE Regolare la velocità di avanzamento, in modo da non caricare eccessivamente il piatto durante il lavoro e tagliare con il motore a massimo regime. Tagliare sempre con lame affilate.
-
Page 25: Manutenzione E Lubrificazione
FD450/Original instructions – Istruzioni originali – Instructions originales – Original-Anleitungen - Instrucciones originales TERRENI IN PENDENZA I terreni ripidi devono essere percorsi possibilmente nel senso salita/discesa, facendo molta attenzione nei cambi di direzione, che le ruote a monte non incontrino ostacoli (sassi, rami, radici, ecc.) che potrebbero causare la perdita di controllo della macchina. - Page 26 FD450/Original instructions – Istruzioni originali – Instructions originales – Original-Anleitungen - Instrucciones originales ASSALE IDROSTATICO Controllare il livello a motore freddo tramite l’asta del tappo (fig.14, rif.A). Pulire frequentemente le alette di raffreddamento del motore idraulico e la ventola (fig.17) in estate, in presenza di molta polvere, ogni 4 ore di lavoro.
- Page 27 FD450/Original instructions – Istruzioni originali – Instructions originales – Original-Anleitungen - Instrucciones originales REGOLAZIONE PIATTO DI TAGLIO Una buona planarità del piatto è essenziale per ottenere un prato uniformemente rasato. Posto il rasaerba su una superficie piana, verificare la corretta pressione degli pneumatici, controllare la tensione delle molle di galleggiamento (fig.
- Page 28 FD450/Original instructions – Istruzioni originali – Instructions originales – Original-Anleitungen - Instrucciones originales TABELLA RIASSUNTIVA MANUTENZIONE OPERAZIONE OGNI 8 PRIME 20 OGNI 50 OGNI 100 OGNI ANNO O 200 ORE Olio motore Controllare il livello ● Cambiare ● ● Filtro aria Controllare ●...
- Page 29 FD450/Original instructions – Istruzioni originali – Instructions originales – Original-Anleitungen - Instrucciones originales Il motorino gira ma il motore non si avvia – Mancanza del flusso di benzina – Controllare che lo starter sia azionato (se il motore è freddo) –...
- Page 30 FD450/Original instructions – Istruzioni originali – Instructions originales – Original-Anleitungen - Instrucciones originales FRENO DI STAZIONAMENTO MECCANICO Per questo dispositivo occorre mantenere registrato il cavo (fig. 28, rif. B) nella posizione disinserito: la levetta deve essere a zero, "libera" leva nella posizione n° 7 (fig.3) nella posizione "P" è inserita. Quando il freno di stazionamento è...
- Page 31 FD450/Original instructions – Istruzioni originali – Instructions originales – Original-Anleitungen - Instrucciones originales PULIZIA Lavaggio interno del piatto: questa operazione deve essere eseguita su un pavimento solido. Si effettua collegando un tubo per l’acqua all’apposito raccordo (fig.31, rif.A) e facendo affluire dell’acqua per alcuni minuti, con: l’operatore seduto al posto guida;...
- Page 32 FD450/Original instructions – Istruzioni originali – Instructions originales – Original-Anleitungen - Instrucciones originales RIMESSAGGIO E INATTIVITÀ PROLUNGATA Riporre la macchina in un ambiente asciutto, al riparo dalle intemperie e, possibilmente, ricoprirla con un telo. Se si prevede un prolungato periodo di inattività (superiore ad 1 mese), provvedere a scollegare il cavo negativo della batteria e seguire le indicazioni contenute nel libretto di istruzioni del motore;...
-
Page 33: Mises En Garde
DESCRIPTION GENERALE ET USAGE PREVU La machine Grillo FD450 est une tondeuse auto-portée conçue pour la coupe et le ramassage de l'herbe et pour le ramassage du feuillage. ATTENTION! Lire attentivement les instructions avant de démarrer le moteur. - Page 34 16) Les couteaux déformés ou endommagés doivent être toujours remplacés et jamais réparés. 17) Utiliser toujours des pièces détachées et des accessoires d'origine GRILLO. 18) Travailler uniquement avec la lumière du soleil ou avec une bonne lumière artificielle. 19) Conserver le carburant dans des jerrycans spécifiquement construits à cet effet.
-
Page 35: Identification Et Assistance
GRILLO si nécessaire. IDENTIFICATION ET ASSISTANCE IDENTIFICATION La tondeuse Grillo FD450 est munie d’une plaquette d’identification placée sous le siège indiquant le numéro de série de la machine. Le numéro de matricule doit toujours être cité... -
Page 36: Caractéristiques Techniques
COMMENT COMMANDER LES PIECES DETACHEES Indiquer toujours le numéro de série de la tondeuse et la référence de la pièce à remplacer. S’adresser au Centre Grillo, les plus proche. Pour plus d'informations, voici notre adresse: GRILLO S.p.A. Via Cervese 1701 - 47023 CESENA (FC) Tél. - Page 37 FD450-Traduction des instructions originales SYSTEME DE CONDUITE: par volant et avec avancement et marche arrière par pédale. SIEGE: avec suspension réglable. BAC DE RAMASSAGE: 450 litres avec fermeture automatique et capteur bac plein motorisé. EJECTION DU BAC ET RELEVAGE DU PLATEAU DE COUPE HYDRAULIQUES ACTIVABLES PAR BOUTONS ELECTRIQUES.
-
Page 38: Mode D'emploi
FD450-Traduction des instructions originales MODE D'EMPLOI Avant de démarrer le moteur, contrôler toujours que: – les ailettes de refroidissement de la transmission hydrostatique soient bien propres (fig. 18) – les grilles d’aspiration pour le refroidissement du moteur soient bien propres (fig.13, A) –... - Page 39 FD450-Traduction des instructions originales avance et en la poussant sur (B) la machine recule. En relâchant la pédale la machine s’arrête. Le levier (fig.3, n° 7) est le frein de stationnement: dans la position (P) il est enclenché. Quand le bac de ramassage est plein les lames se déclenchent automatiquement. Le bac de ramassage est équipé...
- Page 40 FD450-Traduction des instructions originales POSITIONS DE COUPE Pour régler la hauteur de coupe, agir sur le bouton (fig. 2, réf. 4). En présence d’un terrain accidenté, de cassis ou de dos-d’âne, on conseille d'utiliser le plateau dans la position de coupe la plus haute pour éviter les chocs des lames.
- Page 41 FD450-Traduction des instructions originales le courroies de l'huile. Première précaution à prendre: le moteur doit être correctement entretenu avec un filtre à air, des ailettes de refroidissement, une tête propre et l’huile moteur au niveau voulu. Contrôler le filtre à air toutes les 4 heures ou même plus fréquemment si l’environnement est très poussiéreux (fig.
- Page 42 FD450-Traduction des instructions originales réf.B). 5) Enlever la courroie de la prise de force (fig. 25, réf.C). 6) Décrocher la fourche (fig. 31, réf.B), tirer le plateau vers l'avant et le mettre en position verticale (fig. 26). On conseille d’ouvrir préalablement le bac et d'enlever la conduite de chargement (fig. 32).
- Page 43 8) Décrocher le ressort (fig.34, réf. A) 9) Enlever et puis replacer la courroie (fig. 34, réf.B) N’UTILISER QUE DES COURROIES D’ORIGINE GRILLO! COURROIE POMPE HYDRAULIQUE La courroie qui actionne la pompe hydraulique n'a pas besoin d’être réglée (fig.21). Pour la remplacer il faut décrocher le ressort (fig.21, réf.
- Page 44 FD450-Traduction des instructions originales TABLEAU RECAPITULATIF DE MAINTENANCE OPERATION TOUTES APRES LES TOUTES TOUTES UNE FOIS PAR LES 8 PREMIERES LES 50 LES 100 AN OU TOUTES HEURES 20 HEURES HEURES HEURES LES 200 HEURES Huile moteur contrôler le ●...
- Page 45 FD450-Traduction des instructions originales PROCEDURE POUR L’IDENTIFICATION DES INCONVENIENTS INCONVENIENT CAUSE SOLUTION Clé de démarrage sur AVV. (DEMARRAGE). Le tableau de bord est éteint – La batterie ne distribue pas de courant – Contrôler les câbles de connexion – Recharger la batterie –...
- Page 46 FD450-Traduction des instructions originales Baisse de rendement du moteur pendant la coupe - Vitesse d’avancement élevée par rapport - Réduire la vitesse à la hauteur de coupe - Positionner le plateau de coupe dans la position de coupe plus haute Le moteur s’éteint lorsqu’on embraye les lames...
- Page 47 Exécuter cette opération avec le moteur froid. En augmentant la course du levier de la transmission hydrostatique à travers le levier connecté au pédale, on augment aussi la puissance des roues. Il faut effectuer ces opérations dans un centre autorisé Grillo. BAC DE RAMASSAGE Les cylindres hydrauliques qui soulèvent et basculent le bac de ramassage peuvent être réglés.
- Page 48 FD450-Traduction des instructions originales FONCTIONNEMENT COMPOSANTS PRINCIPALES L'INSTALLATION ELECTRIQUE - un capteur de sécurité relève si le bac est en position de travail (fig.13, réf.F). Autrement les lames ne s'enclenchent pas. - sur la pédale d'avancement se trouve un micro-interrupteur qui relève la position de STOP pour le démarrage de la machine (fig.30).
- Page 49 FD450-Traduction des instructions originales KIT MULCHING Instructions de montage - Enlever et garder à part les deux couteaux dont le plateau est équipé. Attention: la vis de la lame droite a le filet gauche. - Fixer les deux couteaux mulching A et B (fig. 43) avec les fixations des couteaux enlevés et les entretoises C fournis dans le kit (fig.
- Page 50 FD450-Traduction des instructions originales MISE EN GARDE POUR LE TRANSPORT Si la machine doit être transportée avec un camion ou remorque, activer le frein de stationnement et fixer au véhicule avec des câbles ou cordes. Pour soulever la machine lier les câbles ou les cordes dans le points indiqués (fig.
-
Page 51: Sicherheitsrelevante Hinweise
Maschinenausstattung. ALLGEMEINE BESCHREIBUNG UND VORGESEHENER GEBRAUCH Die Grillo Maschine FD 450 ist ein Aufsitz-Rasenmäher, welche für das Mähen und Sammeln von Gras und für die Laubsammlung entwickelt worden ist. VORSICHT! Lesen Sie vor dem Anlassen des Motors die folgenden Hinweise zum Schutz Ihrer persönlichen Sicherheit aufmerksam durch! - Page 52 FD450-Übersetzung der Original-Anleitungen 19) Den Treibstoff in speziell zu diesem Zweck hergestellten Behältern aufbewahren. 20) Beim Arbeiten in der Nähe einer Straße ist immer größte Vorsicht geboten. 21) Heben und leeren Sie den Grasbehälter nur bei stehender Maschine und auf ebenem Untergrund.
-
Page 53: Identifikation Der Maschine Und Kundendienst
1 Gaszug ERSATZTEILEBESTELLUNG Bei der Ersatzteilebestellung immer die Seriennummer des Mähers und die Artikelnr. des auszuwechselnden Teils angeben. Wenden Sie sich bitte an ein Grillo-Center oder an eine Grillo autorisierte Werkstatt. Für nähere Informationen wenden Sie sich bitte an: GRILLO S.p.A. -
Page 54: Technische Daten
FD450-Übersetzung der Original-Anleitungen TECHNISCHE DATEN MOTOR: Briggs & Stratton 22 PS Professional (16,1 kW mit 3300 U.p.M.), 656cm³, 2-Zylinder OHV, 4- Takt Benzinmotor mit Ölpumpe. ANLASSER: Elektrostart mit 12V-Batterie GETRIEBE: hydrostatisches Getriebe mit Differential. GESCHWINDIGKEIT: 0 – 11km/h stufenlos einstellbar 0 –... -
Page 55: Inbetriebnahme Der Maschine
FD450-Übersetzung der Original-Anleitungen INBETRIEBNAHME DER MASCHINE 1) Die Maschine auf Transportschäden untersuchen. 2) Den Motorölstand kontrollieren (SAE 30). 3) Den Reifendruck kontrollieren: Vorderreifen 20 x 10.0 - 8 (1 Bar) Hinterreifen 15 x 6.0 - 6 (1,2 Bar) 4) Batterie kontrollieren; die Spannung darf nicht weniger als 12 V betragen; ggf. Batterie nachladen. - Page 56 FD450-Übersetzung der Original-Anleitungen VORDERLICHT Um das Vorderlicht anzuzünden, den Schlüssel in die zweite Position stellen (Abb. 4, A). WICHTIG: Das Vorderlicht nur mit eingeschaltetem Motor anzünden, um zu vermeiden, dass die Batterie sich entlädt. BEGINN DER ARBEIT Den Motor aufdrehen, die Zapfwelle durch den Druckknopf einschalten (Abb. 2, Pos. 3). Mit dem Druckknopf (Abb.
-
Page 57: Wartung Und Schmierung
FD450-Übersetzung der Original-Anleitungen verstopft ist. Bei sehr hohem Gras empfiehlt es sich, zuerst mit maximaler Schnitthöhe zu mähen und dann mit der gewünschten Schnitthöhe nachzuschneiden. Beim Mähen um Sträucher und in der Nähe niedriger Einfassungen ist besondere Vorsicht geboten, damit der Rand des Mähdecks und die Messer nicht beschädigt werden. - Page 58 (Abb. 19, Pos. A). 8) Den Motor anlassen, einige Minuten warten, und den Ölstand durch das Sichtfenster prüfen (Abb. 14, Pos. A). Man empfiehlt, den Ölwechsel im Hydrostat Getriebe von einer Grillo Fachwerkstatt vornehmen zu lassen. ACHSE DER HINTERRÄDER Alle 20 Stunden die hinteren Radgelenkzapfen fetten (Abb.
- Page 59 FD450-Übersetzung der Original-Anleitungen bis das Messer in horizontaler Position verharrt. Zum Ausbauen das Messer mit Schutzhandschuhen festhalten zentrale Befestigungsschraube herausdrehen. Achtung: zentrale Befestigungsschraube des rechten Messers ist linksgängig. (Linksgewinde) ACHTUNG! Beschädigte oder verformte Messer nicht reparieren, sondern immer ersetzen! AUSSCHLIESSLICH GRILLO-ORIGINAL-ERSATZTEILE VERWENDEN! ACHTUNG! Um das Mähdeck wieder zu montieren, muss die Mähdecksführung (Abb.
- Page 60 8) Die Feder (Abb. 34, Pos. A) aushängen. 9) Entfernen Sie den alten Riemen (Abb. 34, Pos. B) und bauen Sie den neuen wie abgebildet ein (Abb. 34, Pos. A). BITTE BENUTZEN SIE AUSSCHLIESSLICH GRILLO-ORIGINAL-RIEMEN! RIEMEN DER HYDRAULIKPUMPE Der Riemen, der die Hydraulikpumpe betreibt, ist selbstregulierend (Abb. 21). Für die eventuelle Auswechslung die Feder (Abb.
- Page 61 FD450-Übersetzung der Original-Anleitungen LISTE DER HÄUFIGSTEN STÖRUNGEN UND DEREN BEHEBUNG STÖRUNG URSACHE ABHILFE Der Zündschlüssel steht auf Position „Start“, aber die Armaturenbrettbeleuchtung schaltet sich nicht ein - Die Batterie liefert keinen Strom - Verbindungskabel kontrollieren - Batterie aufladen - Sicherung auswechseln Die Armaturenbrettbeleuchtung schaltet sich ein, aber obwohl der Zündschlüssel in Position „Start“...
- Page 62 Vorgang darf nur bei kaltem Motor durchgeführt werden. Erhöht man den Lauf des Hebels auf der Hydrostatischen Achse durch die entsprechend an die Pedale verbundene Spannung, wird auch die Leistung auf die Räder erhöht. (Diese Arbeiten müssen jedoch von einer Grillo-Fachwerkstatt ausgeführt werden).
- Page 63 (Abb.29). Den Defekt suchen und beheben, und die durchgebrannte Sicherung durch eine neue, identische Sicherung ersetzen. Niemals Sicherungen mit anderer Leistung einsetzen. Funktioniert der Mäher danach noch immer nicht, setzen Sie sich bitte mit Ihrem Grillo-Kundendienst in Verbindung. Versuchen Sie niemals, aufwändige Reparaturen selber durchzuführen, wenn Sie nicht über die dafür erforderlichen technischen Kenntnisse und Ausrüstungen verfügen.
- Page 64 FD450-Übersetzung der Original-Anleitungen REINIGUNG Das Mähdeck waschen: Sie müssen diese Arbeit auf festem Boden vornehmen. Verbinden Sie einen Wasserschlauch mit dem Adapter (Abb. 31, Pos. A) und lassen Sie das Wasser für einige Minuten zufließen. Folgende Punkte sind zu beachten: den Fahrer muss sich auf den Fahrsitz befinden;...
- Page 65 FD450-Übersetzung der Original-Anleitungen ARBEITEN WENN DER MÄHER LÄNGERE ZEIT UNBENUTZT BLEIBT Den Mäher an einen trockenen, vor Witterungseinflüssen geschützten Ort bringen und abdecken. Wird er voraussichtlich für mehr als einen Monat nicht gebraucht, das rote Kabel der Batterie abnehmen, die im Handbuch des Motors angeführten Hinweise beachten, und alle Gelenke schmieren.
-
Page 66: Advertencias
Le rogamos también que guarde este manual, el cual deberá acompañar siempre a la máquina. DESCRIPCION GENERAL Y USO PREVISTO La máquina Grillo FD 450 es un cortacésped con asiento, construido para cortar y recoger el césped y para la recogida del follaje. - Page 67 GRILLO.
-
Page 68: Identificación Y Asistencia
Traducción des instrucciones originales IDENTIFICACIÓN Y ASISTENCIA IDENTIFICACIÓN La máquina Grillo FD 450 está dotada de una placa con su número de bastidor colocada debajo del asiento. SERVICIO DE ASISTENCIA Este manual suministra las indicaciones para el uso del cortacésped. Para un correcto mantenimiento, diríjase al Revendedor de su zona. -
Page 69: Puesta En Servicio De La Máquina
Traducción des instrucciones originales EMBRAGUE: por P.T.O electromagnética con freno magnético de las cuchillas. SISTEMA DE CONDUCCIÓN: mediante volante con avance y marcha atrás mediante mando de pedal. ASIENTO: con palanca de regulación y amortiguado. SISTEMA DE CORTE: 3 cuchillas rotativas. CESTO DE RECOGIDA: 450 litros con cierre magnético y descarga con activación eléctrica. -
Page 70: Instrucciones De Uso
Traducción des instrucciones originales INSTRUCCIONES PARA EL USO Antes de poner en marcha el motor controlar siempre que: las aletas de refrigeración de la transmisión hidrostática estén bien limpias (fig. 18); las rejillas de aspiración para la refrigeración del motor estén bien limpias (fig. 13 ref. A); el aceite del motor esté... - Page 71 Traducción des instrucciones originales CIERRE DEL CESTO Es posible inspeccionar el cesto abriendo la tapa por medio del gancho (fig. 8 ref. A): la cerradura es ajustable (fig. 8, ref. B). La abertura es automática gracias a un pulsador colocado al lado del puesto de conducción.
-
Page 72: Mantenimiento Y Lubricación
Traducción des instrucciones originales CONTADOR HORARIO La máquina está equipada con un nuevo contador horario. Este dispositivo ofrece 3 funciones: 1) Muestra el número de las horas trabajadas (siempre visible, incluso si la llave no está insertada). 2) Muestra las horas que faltan al cambio del aceite motor (OIL CHANGE IN ...HS). Es indispensable sustituir el aceite tras las primeras 20 horas de trabajo y sucesivamente cada 100 horas de trabajo. - Page 73 8) Arrancar el motor, esperar unos minutos y comprobar el nivel del aceite a través de la ventanilla (fig. 14 ref. A). Sugerimos dirigirse a un taller autorizado Grillo para efectuar el cambio del aceite en el eje hidrostático. EJE RUEDAS TRASERAS Engrasar cada 20 horas los pernos de articulación de las ruedas traseras (fig.
- Page 74 Traducción des instrucciones originales PUNTOS DE LUBRIFICACIÓN CON GRASA Consultar los puntos de lubrificación siguiendo los esquemas (fig. 41A y 41B). Lubrificar con grasa cada 40 horas las articulaciones del eje trasero, los pedales, los brazos de alzamiento del cesto etc. REGULACIÓN PLATO DE CORTE Una buena horizontalidad del plato es esencial para obtener un césped uniformemente cortado.
- Page 75 Traducción des instrucciones originales TABLA RECAPITULATIVA DE MANTENIMIENTO INTERVENTOS CADA 8 PRIMERAS CADA CADA 100 CADA AÑO O HORAS 20 HORAS HORAS CADA 200 HORAS HORAS Aceite motor Controlar el nivel ● Sustituir ● ● Filtro aire Controlar ● Sustituir ٭...
- Page 76 Traducción des instrucciones originales – Depósitos o impurezas en el combustible - Vaciar el depósito y emplear gasolina fresca - Controlar y, de ser necesario, cambiar el filtro de gasolina El motor de arranque gira pero el motor no se pone en marcha –...
- Page 77 Aumentando el recorrido de la palanca de la transmisión hidrostática por la varilla conectada al pedal se aumenta la potencia de las ruedas. (Estas operaciones tienen que ser efectuadas por un taller autorizado Grillo). CESTO DE RECOGIDA DE LA HIERBA Los cilindros hidráulicos que levantan y basculan el cesto son regulables, hay que prestar atención que...
- Page 78 Traducción des instrucciones originales todas funciones eléctricas como la toma de fuerza, las seguridades, al asenso al arranque y un relé que comanda la activación de los pulsadores eléctricos (fig. 35). FIN DEL TRABAJO Una vez terminado el corte, desembragar las cuchillas. Para detenerse quitar el pie del pedal (fig. 1 ref. 1), llevar la palanca del acelerador al mínimo, apagar el motor girando la llave (fig.
- Page 79 Traducción des instrucciones originales ESTACIONAMIENTO E INACTIVIDAD PROLONGADA Guardar la máquina en un medio ambiente seco, al reparo de la intemperie y, posiblemente, cubriéndola con una lona. Si se prevé un tiempo de inactividad prolongado (superior a 1 mes), proceder con la desconexión del cable negativo de la batería y seguir las indicaciones detalladas en el manual de instrucciones del motor;...
-
Page 80: Waarschuwingen
FRONTALE GRASMAAIER MET OPVANGBAK Geachte klant, wij dank u voor uw vertrouwen en de keuze voor onze Grillo FD 450. Wij zijn ervan overtuigd dat het gebruik van uw nieuwe machine volledig aan uw verwachtingen zal voldoen. Wij verzoeken u om de aanwijzingen in deze handleiding aandachtig te lezen en op te volgen voor een optimaal gebruik na verloop van tijd en voor het onderhoud. - Page 81 FD450/Original instructions – Oorspronkelijke instructies – Instructions originales – Original-Anleitungen - Instrucciones originales 21) De bak alleen optillen en leegmaken wanneer de machine stilstaat en op een vlakke ondergrond staat. 22) Laat de motor eerst afkoelen vooraleer de machine in gesloten lokalen te stallen.
-
Page 82: Identificatie En Assistentie
FD450/Original instructions – Oorspronkelijke instructies – Instructions originales – Original-Anleitungen - Instrucciones originales IDENTIFICATIE EN ASSISTENTIE IDENTIFICATIE De machine is uitgerust met een label met het serienummer, aangebracht op het frame. Dit nummer is noodzakelijk voor iedere aanvraag voor technische interventie en voor het bestellen van reserveonderdelen. -
Page 83: Technische Kenmerken
FD450/Original instructions – Oorspronkelijke instructies – Instructions originales – Original-Anleitungen - Instrucciones originales TECHNISCHE KENMERKEN MOTOR: BRIGGS & STRATTON 22 HP Professional (16,1 kW met 3300 toeren/min.) OHV 656 cc twee cilinders, 4-takt met benzine, oliepomp. STARTEN: elektrisch met accu 12 V. -
Page 84: De Machine In Werking Stellen
FD450/Original instructions – Oorspronkelijke instructies – Instructions originales – Original-Anleitungen - Instrucciones originales DE MACHINE IN WERKING STELLEN Controleer de integriteit van de machine, inspecteer of de machine tijdens het transport geen schade heeft opgelopen. Controleer het peil van de motorolie. (SAE30) Controleer de bandenspanning: Voorwielen 20 x10.0-8 (1 BAR) - Page 85 FD450/Original instructions – Oorspronkelijke instructies – Instructions originales – Original-Anleitungen - Instrucciones originales INSCHAKELING VAN DE VERLICHTING Om de verlichting in te schakelen, zet u de contactsleutel in de tweede positie (fig.4, ref. B). BELANGRIJK: het is noodzakelijk om de verlichting alleen te gebruiken wanneer de motor gestart is, om te vermijden dat de accu leeg raakt.
- Page 86 FD450/Original instructions – Oorspronkelijke instructies – Instructions originales – Original-Anleitungen - Instrucciones originales MAAIPOSITIES Bedien de knop (fig.2 ref.4) om de maaihoogte in te stellen. Wanneer het terrein oneffen is en kuiltjes of hobbels vertoond, doet u er goed aan te werken met het maaidek in de hoogste maaistand om stoten van het maaimes te vermijden.
-
Page 87: Onderhoud En Smering
FD450/Original instructions – Oorspronkelijke instructies – Instructions originales – Original-Anleitungen - Instrucciones originales ONDERHOUD EN SMERING AANDACHT! Koppel de bougies los vooraleer interventies voor schoonmaak, onderhoud of reparatie uit te voeren. Draag geschikte kledij en werkhandschoenen. - Wanneer u de machine of een deel ervan optilt, moet u altijd geschikte werktuigen gebruiken, zoals steunen of veiligheidsstops. - Page 88 FD450/Original instructions – Oorspronkelijke instructies – Instructions originales – Original-Anleitungen - Instrucciones originales DE MAAIMESSEN SLIJPEN Een bot mes rukt het gras los, waardoor het grasveld er lelijk uitziet. Het slijpen dient altijd gebeuren op de snijdende kant van het maaimes. Als die versleten is, moet u het maaimes vervangen.
- Page 89 FD450/Original instructions – Oorspronkelijke instructies – Instructions originales – Original-Anleitungen - Instrucciones originales PLATTE RIEM Dit is een speciale riem met dubbel A-A profiel zodat de maaimessen in omgekeerde zin kunnen roteren. De spanning van de riem wordt automatisch geregeld door de veer (fig.34, ref.A). De veer moet 130 mm lang zijn (lengte van de spiralen).
- Page 90 FD450/Original instructions – Oorspronkelijke instructies – Instructions originales – Original-Anleitungen - Instrucciones originales LEIDRAAD OM PROBLEMEN OP TE LOSSEN PROBLEEM OORZAAK OPLOSSING Wanneer de sleutel op START staat, blijft het instrumentenbord uit – De accu geeft geen stroom af – Controleer de aansluitingskabels –...
- Page 91 FD450/Original instructions – Oorspronkelijke instructies – Instructions originales – Original-Anleitungen - Instrucciones originales – Gebrekkige werking van de maaimessen – Controleer of de maaimessen correct gemonteerd zijn – De maaimessen slijpen of vervangen – Hoge rijsnelheid in verhouding – Maai het gras wanneer het grasveld indien...
- Page 92 FD450/Original instructions – Oorspronkelijke instructies – Instructions originales – Original-Anleitungen - Instrucciones originales ELEKTRISCHE INSTALLATIE De elektrische installatie is door twee zekeringen beveiligd: één van 16A op het instrumentenbord (fig. 2, ref. 6), die alle functies beveiligt. Wanneer deze zekering doorslaat, kan alleen de motor worden gestart.
- Page 93 FD450/Original instructions – Oorspronkelijke instructies – Instructions originales – Original-Anleitungen - Instrucciones originales TREKHAAK Dient om een kleine aanhanger of een aandrukrol voor sportvelden aan te sluiten (fig.33, ref.B). Trekvermogen max. 130 kg op een vlak terrein. Gebruik de machine op een lage snelheid en wees altijd uiterst aandachtig.
- Page 95 LEGEND – LEGENDA – LEGENDE – ZEICHNUNGERKLÄRUNG – LEYENDA 1- Cutting deck lifting button – grass- 1- Pulsante sollevamento piatto – pulsante 1- Bouton relevage plateau de coupe – catcher lifting button – grass-catcher sollevamento cesto – pulsante ribaltamento bouton relevage du bac - tilting button cesto.
- Page 96 DESCRIZIONE COMANDI – DESCRIPTION OF CONTROLS – DESCRIPTION COMMANDES – BEDIENUNGSBESCHREIBUNG – DESCRIPCIÓN MANDOS FIG. 1 -2 -3- 4- 5 1- Pedale avanzamento e retromarcia 1- Forward and reverse pedal 2- Pedale bloccaggio differenziale 2- Differential lock pedal 3- Pulsante inserimento PTO 3- P.T.O.
- Page 97 Fig. 1 Fig. 2...
- Page 98 Fig. 3 Fig. 5 Fig. 4 Fig. 6 Fig. 7...
- Page 99 Fig. 8 Fig. 7A Fig. 10 Fig. 9 Fig. 11 Fig. 12...
- Page 100 Fig. 13 Fig. 14 Fig. 15 Fig. 17 Fig. 16...
- Page 101 Fig. 18 Fig. 20 Fig. 19 Fig. 22 Fig. 21...
- Page 102 Fig. 23 Fig. 24 Fig. 25 Fig. 26 Fig. 28A Fig. 27...
- Page 103 Fig. 28 B Fig. 29 Fig. 31 Fig. 30 Fig. 32 Fig. 33...
- Page 104 Fig. 34 Fig. 35 Fig. 36 Fig. 38 Fig. 37...
- Page 105 Fig. 39 Fig. 40 Fig. 41A Fig. 41B...
- Page 106 Fig. 42 Fig. 43 Fig. 44 Fig. 45...
- Page 107 Grillo Spa Via Cervese, 1701 – 47521 CESENA (FC) – ITALY Cortadora de relva Machine model / Maccina tipo / Machine type / Maschine Typ / Máquina tipo : FD450 Serial n° / Numero / Numéro / Nummer / Número : Engine / Motore / Moteur / Motor / Motor :BRIGG&STRATTON INTEK 7220 PROFESSIONAL...
- Page 108 47521 CESENA (ITALY) – Via Cervese 1701 Tel: +39 0547 633111 Fax: +39 0547 632011 Website: www.grillospa.it E-mail: grillo@grillospa.it GRILLO DEUTSCHLAND GmbH Pilsener Strasse, 9 - D-86199 Augsburg Tel: + 49 082126879910 Faxnr.: + 49 01733132860 Webseite: www.grillodeutschland.de E-Mail: grillo@grillodeutschland.de...
Need help?
Do you have a question about the FD450 and is the answer not in the manual?
Questions and answers
Grilling sd 450 will not start battery is ok
If the Grillo FD450 won't start even though the battery is okay, possible reasons include:
- Starter motor not turning:
- The start consent is missing (e.g., the forward pedal is in the STOP position).
- The blades are engaged.
- The operator is not seated.
- Starter motor turns but engine does not start:
- Lack of fuel flow.
- Choke not engaged (if the engine is cold).
- Low fuel level.
- Clogged or faulty fuel filter.
- Blocked fuel tank vent.
Checking these conditions and taking the necessary corrective actions can help resolve the issue.
This answer is automatically generated