Table of Contents
Advertisement
Quick Links
Advertisement
Table of Contents

Related Manuals for Grillo FD 220E


Summary of Contents for Grillo FD 220E
- Page 1 FD 220E Electric Lawnmower OPERATOR’S MANUAL 02620.2024.04...
-
Page 2: Table Of Contents
FD 220E Electric Lawnmower / Translation of the original instructions TABLE OF CONTENTS Introduction ................3 15. Troubleshooting guide ............19 Description and intended use ..........3 16. Maintenance schedule ............20 17. Storage and prolonged inactivity ........21 Safety decals ................4 General safety rules ............... -
Page 3: Introduction
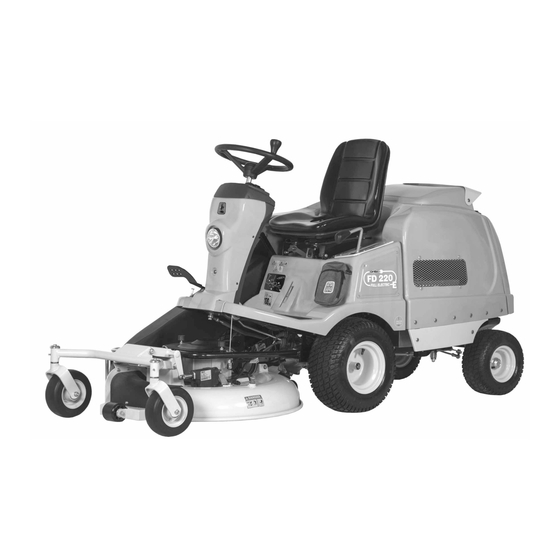
INTRODUCTION Dear Customer, we thank you for the trust and preference you have placed in our Grillo FD 220E and we are confi dent that the use of your new machine will fully meet your requirements. For optimal use and maintenance over time, please carefully read and follow the instructions in this booklet; this will enable you to obtain the best results and safeguard your purchase. -
Page 4: Safety Decals
SAFETY DECALS Dangers and warnings Danger Danger consult the manual of bursting Danger of overturning Danger of sharp blades and danger of objects thrown by the rotation of the blades Sound power level... -
Page 5: General Safety Rules
GENERAL SAFETY RULES ersonal protection eQuipment ccident preVention rules On the machine and in this manual there are warnings and indications accompanied by this symbol: Before using the machine the appropriate personal protection equipment it indicates the presence of a potential hazard for which particular caution must be worn: body protection, protective gloves, safety footwear, hearing should be taken for your own safety and for the safety of others who may protection, goggles. -
Page 6: General Warnings To Keep In Mind
• If the machine begins to vibrate abnormally after a knock, immediately carry out a general check to identify the reason for the anomaly. If necessary, request the assistance of an authorised Grillo workshop; WARNING: Read carefully before operating the machine. • Rotation of the mower blade is very dangerous, never put your hands or feet under the cutting deck;... -
Page 7: Identification Of Use Decals
IDENTIFICATION OF USE DECALS Cutting height Machine grease points Ground pressure of the front wheels Battery disconnect Battery charging socket Lifting/fl oating of the cutting deck Parking brake deactivation Grass catcher manual release... -
Page 8: Identification Of Machine Controls And Functions
IDENTIFICATION OF MACHINE CONTROLS AND FUNCTIONS 1. CUTTING DECK LIFTING/FLOATATION LEVER 7. PTO BUTTON 2. STEERING WHEEL 8. STARTING KEY 3. ECO/TOP BUTTON 9. FORWARD/REVERSE TRAVEL PEDAL 4. WORKLIGHT BUTTON 10. DISPLAY 5. CUTTING HEIGHT ADJUSTMENT BUTTON 11. HORN BUTTON 6. - Page 9 13. BATTERY CONNECTION TO MACHINE ELECTRICAL SYSTEM 19. FULL GRASS CATCHER PLATE 14. FRONT WHEEL GROUND PRESSURE ADJUSTMENT KNOB 20. GRASS CATCHER ACTUATOR RELEASE LEVER 15. SEAT SUPPORT ROD 21. LIFTING POINTS 16. SEAT ADJUSTMENT LEVER 22. TOWING HITCH 17. WASHING HOSE CONNECTION NOZZLE 23.
-
Page 10: Technical Specifications
USING THE BATTERY CHARGER ATTACHMENTS: mulching kit; side discharge kit. The battery charger for the FD 220E is external to the machine and SIZE (fi g. 1): is available in two types, both of which can be connected to the 220V - Length (A): 234.5 cm... -
Page 11: Forward And Reverse Travel Pedal
TOP/ECO CUTTING MODES Fig. 3 Two cutting modes can be selected using the TOP/ECO button (fi g. 7/A): • TOP mode allows maximum performance for tough grass conditions. • ECO mode, highlighted on the display with the letter E (fi g. 2/E), is optimal for collecting foliage and can be used for lighter grass. This saves energy and extends the charge duration. CHECKS TO BE CARRIED OUT BEFORE STARTING THE MACHINE Check that: •... -
Page 12: Work Conclusion
When fi nished, clean the grass catcher grid as well. Fig. 5 Fig. 6 After using water, run the cutting deck blade for a few minutes to ensure that all components have dried. Fig. 8 Fig. 7 9.10 USEFUL RULES FOR CORRECT USE The machine can work even under severe conditions without clogging problems. -
Page 13: Safety Devices
SAFETY DEVICES 10.2 PARKING BRAKE The FD 220E is equipped with a electromechanical drive system, therefore in order to brake it is suffi cient to release the travel pedal. The 10.1 ELECTRONIC SAFETY parking brake is automatically engaged whenever the pedal is released in neutral. The ECUs of the machine carry out safety checks and control-related If the parking brake is deactivated via the lever on the electromechanical alarms appear on the display. -
Page 14: Adjusting The Ground Pressure Of The Front Wheels
The cutting deck is suspended at one end by an adjustable spring technical skills and expertise. anchored to the machine frame. By turning the knob under the seat (fig. It is advisable to contact an authorised Grillo centre to undertake 16) it is possible to increase (by turning the knob clockwise) or decrease these procedures. (by turning the knob anti-clockwise) the weight of the cutting deck transferred to the front wheels. -
Page 15: Adjusting The Grass Catcher Alignment
12.2 ADJUSTING THE GRASS CATCHER ALIGNMENT Fig. 23 For good operation, it is very important to ensure a perfect coupling between the grass catcher and the loading chute in the closed position. To do this, proceed as follows: 1. Bring the grass catcher into the fully closed position and check the coupling with the chute;... -
Page 16: Ordinary Maintenance And Lubrication
IMPORTANT: lubricate with grease every 40 hours all points shown in the diagram. EXTRAORDINARY MAINTENANCE Fig. 26 CAUTION: the operations contained in this chapter require technical skills and special equipment. It is advisable to contact an authorised Grillo centre. CAUTION: carry out maintenance operations with the machine switched off and the battery disconnected using the battery disconnect handle. 14.1 CUTTING DECK MAINTENANCE AND COMPLETE DISASSEMBLY Proceed as follows to remove the cutting deck: 1. -
Page 17: Electrical System Maintenance
14.2 ELECTRICAL SYSTEM MAINTENANCE CAUTION: when reassembling the cutting deck, check that the loading chute is correctly connected to the grass catcher, the uses central deck support (fi g. 28/E) is inserted in the machine frame, and the electrical connections are properly plugged in. The electrical system is protected by two main fuses, located in the fuse box near the battery: Fig. 28 • The 200 A fuse protects the plant section of the blade motor (fi g. 30/A);... -
Page 18: Battery Replacement
ull grass catcher microswitch lectronic control units The full grass catcher microswitch is fitted inside the grass catcher and is The machine is equipped with two ECUs: one controls the operated by an adjustable plate (fig. 33). It sends a signal to automatically electromechanical drive (fig. 36/A) and one controls the electric motor of disengage the blade when the grass catcher is full the cutting deck (fig. 36/B). The ECUs manage the safety features and It is important to adjust the position of the adjustable plate according to the start-up consent of the electric motors. -
Page 19: Troubleshooting Guide
TROUBLESHOOTING GUIDE FD 220E - TROUBLESHOOTING GUIDE PROBLEM CAUSE SOLUTION - Check that the battery is correctly connected to the machine via the red handle Battery not properly connected or drained - Check the charge of the battery using the battery The machine does not charger switch on - Check the integrity of the fuse and correct insertion... -
Page 20: Maintenance Schedule
FD 220E - TROUBLESHOOTING GUIDE PROBLEM CAUSE SOLUTION - Check tyre pressure and restore the correct inclination Incorrect inclination of the cutting deck of the cutting deck - Check the correct fitting of the blade and the end Blade inefficiency knives; - Sharpen or replace the end knives Irregular cutting and - Reduce the forward speed insufficient collection High forward speed in relation to the cutting height or - Place the cutting deck in a higher cutting position... -
Page 21: Storage And Prolonged Inactivity
Fig. 37 This manual provides instructions for the use of the machine and for its routine maintenance. For extraordinary maintenance, for all operations requiring technical skills and expertise, please contact your authorised Grillo dealer. 20.2 IDENTIFICATION DATA If it is necessary to contact an authorised service centre, for maintenance information, always provide: ide discharge kit machine model .................. -
Page 22: Spare Parts
Please indicate the serial number of the machine and the code of the component to be replaced. It is possible to identify the part number by consulting the Grillo website: the spare parts tables for the machine will be available by entering the serial number. -
Page 23: Declaration Of Conformity
GRILLO SPA – Via Cervese, 1701 – 47521 CESENA (FC) – ITALY declare that the following machinery: / dichiaro che la macchina di seguito indicata: / déclare que la machine suivante: / Hiermit erkläre ich, dass folgende Maschine: / declara que la siguiente máquina:... - Page 24 Tel: (+ 44) 01889569149 Website: www.grillospa.it Website: www.grilloagrigarden.co.uk E-mail: grillo@grillospa.it E-mail: info@grilloagrigarden.co.uk Grillo Australasia Pty Ltd Grillo Deutschland GmbH 14 REBECCA COURT - VIC 3943 SORRENTO - AUSTRALIA GUNTERSRIETHER STR.14 - 91224 HARTMANNSHOF - DEUTSCHLAND Tel: (+ 61) 0428206225 Tel: (+ 49) 09154949216 Website: www.grilloaustralia.com.au...
Need help?
Do you have a question about the FD 220E and is the answer not in the manual?
Questions and answers