Table of Contents
Advertisement
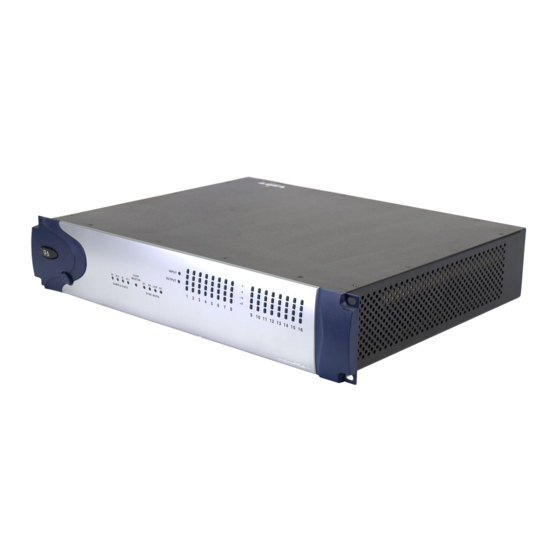
96 I/O
Guide
Digidesign
2001 Junipero Serra Boulevard
Daly City, CA 94014-3886 USA
tel: 650·731·6300
fax: 650·731·6399
Technical Support (USA)
650·731·6100
650·856·4275
Product Information (USA)
650·731·6102
800·333·2137
International Offices
Visit the Digidesign Web site
for contact information
Web Site
www.digidesign.com
Advertisement
Table of Contents

Subscribe to Our Youtube Channel
Related Manuals for DigiDesign 96 I/O


Summary of Contents for DigiDesign 96 I/O
- Page 1 96 I/O Guide Digidesign 2001 Junipero Serra Boulevard Daly City, CA 94014-3886 USA tel: 650·731·6300 fax: 650·731·6399 Technical Support (USA) 650·731·6100 650·856·4275 Product Information (USA) 650·731·6102 800·333·2137 International Offices Visit the Digidesign Web site for contact information Web Site www.digidesign.com...
- Page 2 Copyright Important Safety Instructions When using electric or electronic equipment, basic precautions This guide is copyrighted ©2002 by Digidesign, a division of should always be followed, including the following: Avid Technology, Inc. (hereafter “Digidesign”), with all rights • Read all instructions before using this equipment.
-
Page 3: Table Of Contents
Making Signal Connections to the 96 I/O ........ - Page 4 96 I/O Guide...
-
Page 5: Chapter 1. Introduction To The 96 I/O
(Slave Clock) devices. has tested and approved. For a list of Digidesign- • Simultaneous use of up to six 96 I/O units is qualified computers, operating systems, and supported, for a maximum of 96 channels of third-party devices, refer to the latest compati- I/O at 48 kHz. -
Page 6: About This Guide
News and Events Get the latest news from The following symbols are used to highlight im- Digidesign; sign up for a Pro Tools demo. portant information: To learn more about these and other resources User Tips are helpful hints for getting the available from Digidesign, visit our Web site most from your system. -
Page 7: Chapter 2. 96 I/O Hardware Overview
44.1 kHz, 48 kHz, 88.2 kHz, and 96 kHz. The sample rate can be set when you create a new This button turns the 96 I/O on and off. session, or in the Hardware Setup or Playback The LED ring around the power button lights Engine dialogs if no session is open. - Page 8 Loop Master LED LOOP (Loop Master) This LOOP LED indicates that the 96 I/O is slaving to another HD I/O The LOOP MASTER LED indicates which through Loop Sync. Pro Tools|HD-series audio interface is the master EXT (External) This setting indicates that 96 I/O Pro Tools peripheral.
-
Page 9: 96 I/O Back Panel
96 I/O Back Panel 96 I/O Back Panel The 96 I/O has the following back panel con- Analog Audio Outputs nectors: The 96 I/O has eight balanced/unbalanced, 1/4- inch TRS jacks for analog audio output connec- Analog Audio Inputs tions. These outputs feature 24-bit D/A convert- ers. - Page 10 32 I/O channels to and from the HD ing Optical (ADAT) decks, modular digital Core or Process card. As the 96 I/O is a 16-chan- multitracks (MDMs), sound cards, A/D or D/A nel only device, channels 17–32 are passed converters, and digital consoles.
- Page 11 This port is used to connect MIX-series Digide- 48 kHz. sign audio interfaces to 96 I/O. You can connect two eight-channel interfaces (such as the 888|24 or 882|20) or a single sixteen-channel interface...
- Page 12 96 I/O Guide...
-
Page 13: Chapter 3. Installation Overview
Making connections while power is on can damage your system. To connect the 96 I/O as the only interface in a new Pro Tools system: Connect one end of the included DigiLink ca- ble to the Primary port on the 96 I/O. -
Page 14: Checking Installation
To connect the 96 I/O to an existing Pro Tools|HD- Checking Installation series system: Connect one end of a DigkLink cable to the This section explains how to quickly check that Primary port of the 96 I/O. your installation was successful. -
Page 15: Powering Up Your System
In order for Pro Tools to communicate properly with audio interfaces and other peripherals, it is Depending on how you plan to use the 96 I/O, important that you start up and shut down your the way you connect it to your studio will vary. -
Page 16: Example Studio Setup With A Mixing Console
ADAT Analog Analog Audio Audio Inputs Outputs Digital Effects Device (set to external sync) Effects Devices Channel Tape Returns Outputs or Inputs Instruments Power Amp Connected to Console and Speakers Example Studio Setup with a Mixing Console 96 I/O Guide... -
Page 17: Example Studio Setup Without A Mixing Console
Example Studio Setup without a Mixing Console Mic, Preamp, Direct Box, Synth, etc. Digital Inputs/Outputs To DAT Recorder Analog Audio Inputs DAT Recorder Optical in/out ADAT to ADAT Analog Analog Audio Audio Outputs ins/outs Digital Effects Device (set to external sync) Other Effects Devices Power Amp and Speakers... -
Page 18: Setting Operating Levels
If you want to switch the input levels of the It is important that you determine which line 96 I/O from +4 dBu to –10 dBV, you can access level is appropriate for your studio. In +4 dBu these parameters, on a channel-by-channel ba- operating mode, the 96 I/O is a 24-bit digital sis, in the Hardware Setup dialog. - Page 19 Click on the Analog In tab to access the radio buttons with which to select your input operat- ing levels for each channel. Click OK to leave the Hardware Setup dialog. See the Getting Started with HD Guide for complete system configuration instructions . Chapter 3: Installation Overview...
- Page 20 96 I/O Guide...
-
Page 21: Appendix A. Card Removal And Replacement
Removing the top cover screws electricity by touching the outer casing of the power supply. Lift off the top of the 96 I/O and set aside. Gently pull the 50-pin connector off of the To remove an I/O card from the 96 I/O: edge of the card. - Page 22 Pull straight back, lifting very slightly to avoid contact between components on the underside of the card and the 96 I/O back panel faceplate. To discharge any static electricity, touch the power supply casing. It is a good idea to do this often, throughout the process.
-
Page 23: Hardware Setup Changes
To replace a card: Power off and disconnect the 96 I/O from your HD system. Make sure that the 96 I/O is plugged in so that it is grounded. Remove the top cover of the 96 I/O by extract- Placing the edge of the card into the guide rails... - Page 24 Locate the raised ridge in the middle of the 50- Place the top cover onto the 96 I/O and re- pin cable which connects to the 96 I/O chassis. place the screws that you removed with it. This ridge is only on one side of the connector, Connect the 96 I/O to your HD system.
- Page 25 Troubleshooting If the power ring does not turn from orange to green when you boot the computer, make sure you reconnected the DigiLink cable to the Pri- mary port on the rear of the unit. If the DigiLink cable is securely fastened and the other end is plugged into an HD Core or Process card in a computer that is booted, you may have inad- vertently disconnected another 50-pin cable...
- Page 26 96 I/O Guide...
-
Page 27: Index
48 kHz 3 In 4, 6 882|20 7 In port 6 888|24 7 Out 6 96 I/O Back Panel 5 Out port 6 96 I/O Front Panel 3 port 4 AC Power Input 6 Hardware Setup 3, 4, 5, 10... - Page 28 Making Signal Connections to the 96 I/O 11, 12 TOS-Link mode 6 Meters 4 Troubleshooting 21 MIDI 11 peripherals 11 MIX-series Unbalanced connections 5 audio interfaces 11 peripherals 7 word clock 4, 6 Optical (ADAT) 6 (S/PDIF) 6 Peripherals list 10...
- Page 29 Index...
Need help?
Do you have a question about the 96 I/O and is the answer not in the manual?
Questions and answers