Table of Contents
Advertisement
Available languages
Available languages
Quick Links
PL 640S P (IX) TK/HA
Italiano
Istruzioni per l'uso
PIANO
Sommario
Istruzioni per l'uso,1
Anomalie e rimedi,13
English
Operating Instructions
HOB
Contents
Operating Instructions,1
Warnings,2
Assistance,5
Description of the appliance,6
Installation,14
Troubleshooting,19
Français
Mode d'emploi
TABLE DE CUISSON
Sommaire
Mode d'emploi,1
Avertissements,3
Assistance,5
Description de l'appareil,6
Installation,20
Anomalies et remèdes,25
Portuges
Instruções para a utilização
Índice
Instruções para a utilização,1
Advertências,3
Assistência,5
Descrição do aparelho,6
Instalação,26
Türkçe
Kullanım talimatları
SETÜSTÜ
İçindekiler
Kullanım talimatları,1
Uyarı,4
Teknik Servis,5
Cihazın tanıtımı,7
Montaj,32
Advertisement
Table of Contents

Subscribe to Our Youtube Channel
Related Manuals for Hotpoint Ariston PL 640S P (IX) TK/HA


Summary of Contents for Hotpoint Ariston PL 640S P (IX) TK/HA
-
Page 1: Table Of Contents
PL 640S P (IX) TK/HA Français Mode d’emploi TABLE DE CUISSON Sommaire Mode d’emploi,1 Avertissements,3 Assistance,5 Description de l’appareil,6 Installation,20 Mise en marche et utilisation,24 Précautions et conseils,24 Nettoyage et entretien,25 Anomalies et remèdes,25 Italiano Portuges Istruzioni per l’uso Instruções para a utilização... -
Page 2: Avvertenze
Avvertenze Warnings ATTENZIONE: Questo apparecchio e le sue parti WARNING: The appliance and its accessible parts accessibili diventano molto caldi durante l’uso. become hot during use. Care should be taken to Bisogna fare attenzione ed evitare di toccare gli avoid touching heating elements. Children less than 8 elementi riscaldanti. - Page 3 Avertissements Advertências ATTENTION : Cet appareil ainsi que ses parties ATENÇÃO: Este aparelho e as suas partes accessibles deviennent très chauds pendant leur acessíveis aquecem muito durante a utilização. fonctionnement. Il faut faire attention à ne pas toucher É preciso ter atenção e evitar tocar os elementos les éléments chauffants.
-
Page 4: Uyarı
Uyarı DİKKAT: Bu cihaz ve erişilebilen bölümleri, kullanım sırasında çok sıcak olur. Dikkat etmek ve ısıtılan parçalara dokunmaktan kaçınmak gerekir. Eğer sürekli olarak gözetim altında değiller ise, 8 yaşından küçük çocukları uzak tutunuz. Bu cihaz, eğer uygun şekilde gözetim altında bulunuyorlar ise veya güvenli şekilde cihazın kullanımı... -
Page 5: Assistenza
Assistenza Assistance Comunicare: Indiquez-lui : • il tipo di anomalia • le type d’anomalie • il modello della macchina (Mod.) • le modèle de votre appareil (Mod.) • il numero di serie (S/N) • son numéro de série (S/N) Queste ultime informazioni si trovano sulla targhetta caratteristiche posta Ces informations figurent sur la plaquette signalétique apposée sur votre sull’apparecchio. -
Page 6: Descrizione Dell'apparecchio
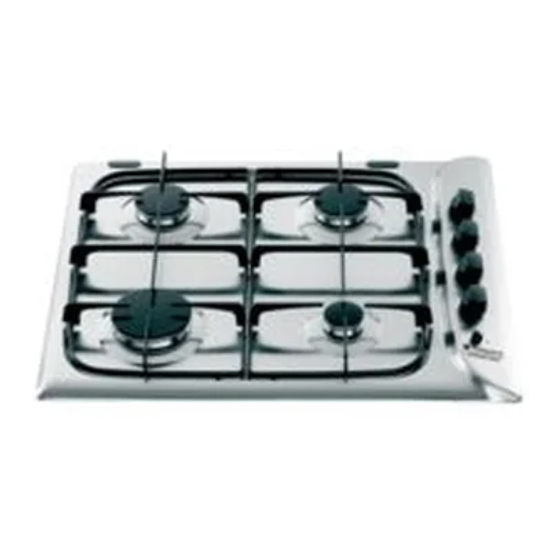
Descrizione dell’apparecchio Description de l’appareil Vista d’insieme Vue d’ensemble 1. Griglie di appoggio per RECIPIENTI DI COTTURA 1. Grilles support de CASSEROLES 2. BRUCIATORI GAS 2. BRÛLEURS À GAZ 3. Manopole di comando dei BRUCIATORI GAS 3. Manettes de commande des BRÛLEURS GAZ 4. -
Page 7: Cihazın Tanıtımı
Cihazın tanıtımı Genel görünüm 1. PİŞİRME KAPLARI için destek ızgaraları 2. GAZ BRÜLÖRLERİ 3. GAZ BRÜLÖRLERİ için kumanda düğmeleri 4. GAZ BRÜLÖRLERİ yakma düğmesi 5. GAZ BRÜLÖRLERİ yakma bujisi 6. EMNİYET DÜZENEĞİ • GAZ BRÜLÖRLERI farklı ebat ve güçlere sahiptir. Kullanacağınız kabın çapına en uygun olanı... -
Page 8: Installazione
Installazione il bidone in utilizzo, collocato in modo da non essere soggetto all’azione diretta di sorgenti di calore (forni, camini, stufe, ecc.) capaci di portarlo a temperature superiori ai 50°C. ! È importante conservare questo libretto per poterlo consultare in ogni momento. -
Page 9: Collegamento Elettrico
! Usare i ganci contenuti nella “confezione accessori” • la presa sia compatibile con la spina dell’apparecchio. In caso contrario sostituire la presa o la spina; non usare prolunghe e multiple. • Nel caso in cui il piano non sia installato su di un forno incasso, è ! Ad apparecchio installato, il cavo elettrico e la presa della corrente devono necessario inserire un pannello di legno come isolamento. - Page 10 4. Al termine dell’operazione, sostituite la vecchia etichetta taratura con quella corrispondente al nuovo gas d’utilizzo, reperibile presso i Nostri Centri Assistenza Tecnica. • Regolazione aria primaria dei bruciatori I bruciatori non necessitano di nessuna regolazione dell’aria primaria. • Regolazione minimi 1.
- Page 11 Caratteristiche dei bruciatori ed ugelli Tabella 1 Gas liquido Gas naturale Bruciatore Diametro Potenza termica By-pass Ugello Portata* Ugello Portata* 1/100 1/100 1/100 (mm) kW (p.c.s.*) (g/h) (l/h) (mm) (mm) (mm) Ridotta Nominale Rapido (R) 0,70 3,00 Semi Rapido (S) 0,40 1,90 Ausiliario (A)
-
Page 12: Avvio E Utilizzo
Avvio e utilizzo Precauzioni e consigli ! Su ciascuna manopola è indicata la posizione del bruciatore gas ! L’apparecchio è stato progettato e costruito in conformità alle norme corrispondente. internazionali di sicurezza. Queste avvertenze sono fornite per ragioni di sicurezza e devono essere Bruciatori gas lette attentamente. -
Page 13: Manutenzione E Cura
Manutenzione rubinetti gas i RAEE di “piccolissime dimensioni” (nessun lato sopra i 25 cm) possono essere consegnati gratuitamente ai negozianti anche se non si acquista Con il tempo può verificarsi il caso di un rubinetto che si blocchi o presenti nulla (solo nei negozi con superficie di vendita superiore a 400 mq). -
Page 14: Installation
Installation Fitting the appliance The following precautions must be taken when installing the hob: • Kitchen cabinets adjacent to the appliance and taller than the top of the ! Before operating your new appliance please read this instruction booklet hob must be at least 200 mm from the edge of the hob. carefully. -
Page 15: Gas Connection
! The cable must not be bent or compressed. Ventilation To ensure adequate ventilation, the back panel of the cabinet must be ! The cable must be checked regularly and replaced by authorised technicians removed. It is advisable to install the oven so that it rests on two strips of wood, or on a completely flat surface with an opening of at least 45 x 560 only (see Assistance). - Page 16 • Setting the burners to minimum 1. Turn the tap to the low flame position; 2. Remove the knob and adjust the adjustment screw, which is positioned in or next to the tap pin, until the flame is small but steady. 3.
-
Page 17: Burner And Nozzle Specifications
Burner and nozzle specifications Table 1 Liquid gas Natural gas Burner Diameter Thermal By-pass Nozzle Flow* Nozzle Flow* power (mm) 1/100 1/100 (g/h) 1/100 (l/h) kW (p.c.s.*) (mm) (mm) (mm) Reduced Nominal Rapid (R) 0,70 3,00 Semi Rapid (S) 0,40 1,90 Auxiliary (A) 0,40... -
Page 18: Start-Up And Use
Start-up and use Precautions and tips ! The position of the corresponding gas burner is shown on every knob. ! This appliance has been designed and manufactured in compliance with international safety standards. The following warnings are provided for safety Gas burners reasons and must be read carefully. -
Page 19: Maintenance And Care
Troubleshooting Consumers should contact their local authority or retailer for information concerning the correct disposal of their old appliance. It may happen that the appliance does not function properly or at all. Before Respecting and conserving the environment calling the service centre for assistance, check if anything can be done. First, •... -
Page 20: Installation
Installation ou une aération plus efficace, en augmentant la puissance d’aspiration mécanique si déjà prédisposée. • Les gaz de pétrole liquéfiés, plus lourds que l’air, se déposent et ! Conservez ce mode d’emploi pour pouvoir le consulter à tout moment. stagnent vers le bas. -
Page 21: Raccordement Gaz
! L’installateur est responsable du bon raccordement électrique de l’appareil Devant et du respect des normes de sécurité. Avant de procéder au branchement, assurez-vous que : • la prise est bien munie d’une terre conforme à la loi; • la prise est bien apte à supporter la puissance maximale de l’appareil, indiquée sur la plaquette signalétique;... - Page 22 1. Enlevez les grilles du plan de cuisson et sortez les brûleurs de leur logement. 2. Dévissez les injecteurs à l’aide d’une clé à tube de 7 mm et remplacez- les par les injecteurs adaptés au nouveau type de gaz (voir tableau 1 “Caractéristiques des brûleurs et des injecteurs”).
- Page 23 Caractéristiques des brûleurs et des injecteurs Gaz Liquides Gaz Naturel Tableau 1 Puissance Brûleur Diamètre By-pass Injecteur Débit* Injecteur Débit* thermique 1/100 1/100 (mm) 1/100 kW (p.c.s.*) (mm) (mm) (mm) Réduit Nominal Rapide (R) 0.70 3.00 Semi Rapide (S) 0.40 1.90 Auxiliarie (A) 0.40...
-
Page 24: Mise En Marche Et Utilisation
Mise en marche et utilisation Précautions et conseils ! Cet appareil a été conçu et fabriqué conformément aux normes ! La position du brûleur gaz ou correspondante est indiquée sur chaque internationales de sécurité. Ces conseils sont fournis pour des raisons de manette. -
Page 25: Nettoyage Et Entretien
! Pour ne pas endommager le dispositif d’allumage électrique, actionnez- la ‘‘poubelle barrée’’ est apposée sur tous les produits pour rappeler les obligations de collecte séparée. Les consommateurs devront contacter le uniquement lorsque les brûleurs ont été remis en place. les autorités locales ou leur revendeur concernant la démarche à... -
Page 26: Plano
Instalação colocado de maneira a não ser sujeito à acção directa de fontes de calor (fornos, chaminés, esquentadores etc.) capazes de chegar a temperaturas superiores a 50°C. ! É importante guardar este folheto para poder consultá-lo a qualquer momento. No caso de venda, cessão ou mudança, assegure-se que o Encaixe mesmo permanece com o aparelho para informar o novo proprietário sobre Para instalar correctamente o plano de cozedura é... - Page 27 ! Utilize os ganchos fornecidos dentro da “embalagem dos acessórios”. • a tensão de alimentação seja entre os valores da placa de identificação; • a tomada seja compatível com a ficha do aparelho. Em caso contrário, • Se o plano de cozedura não for instalado sobre um forno de encaixar, substitua a tomada ou a ficha;...
- Page 28 2. Desparafusar os bicos utilizando uma chave a tubo de 7mm, e substituí- los com aqueles apropriados para o novo tipo de gás (ver tabela 1 “Características dos queimadores e dos bicos”). 3. Monte outra vez as partes, realizando estas operações na ordem contrária. 4.
- Page 29 Características dos queimadores e bicos Tabela 1 Gás Líquido Gás Natural Queimador Diâmetro Potência térmica By-pass Bico Capacidade* Bico Capacidade* 1/100 1/100 1/100 kW (p.c.s.*) (mm) (mm) (mm) (mm) Reduzida Nominal Rápido (R) 0,70 3,00 Semi Ràpido (S) 0,40 1,90 Auxiliar (A) 0,40 1.00...
-
Page 30: Início E Utilização
Início e utilização Precauções e conselhos ! Em cada selector está indicada a posição do queimador de gás ! Este aparelho foi projectado e fabricado em conformidade com as normas correspondente. internacionais de segurança. Estas advertências são fornecidas por razões de segurança e devem ser lidas com atenção. -
Page 31: Manutenção E Cuidados
Manutenção das torneiras do gás em todos os produtos por forma a recordar a obrigatoriedade de recolha separada. Com o tempo pode ocorrer o caso de uma torneira que se bloqueie ou Os consumidores devem contactar as autoridades locais ou os pontos de apresente dificuldades na rotação, portanto será... -
Page 32: Montaj
Montaj Yuvaya oturtmae Set üstü ocağın doğru şekilde monte edilebilmesi için aşağıdaki şartlara uyulmalıdır: ! Her gerektiğinde başvurulabilmesi için bu el kitapçığının muhafaza edilmesi • Yan tarafta bulunan ve yüksekliği ocağın çalışma yüzeyini aşan dolaplar önemlidir. Cihazın satılması, başkasına verilmesi ya da taşınması durumunda ocağın kenarından en az 200 mm mesafede bulunmalıdır. - Page 33 ! “Aksesuar paketi” nde bulunan kancaları kullanınız. ! Cihaz monte edildikten sonra elektrik kablosu ve priz kolay erişilebilecek yerlerde olmalıdır. • Set üstü ocağın ankastre fırın üzerine monte edilmemesi durumunda, ! Kablo kıvrılmalara, bükülmelere veya ezilmelere maruz kalmamalıdır. izolasyon amacıyla bir ahşap levhanın takılması gerekmektedir. Bu levha tezgahın alt kısmından en az 20 mm.
- Page 34 • Minimum ayarlaması 1. Gaz vanasını minimum konumuna getiriniz; 2. Düğmeyi söküp vana milinin iç tarafında ya da yanında bulunan ayar vidasına küçük ve düzenli bir alev elde edene kadar müdahale ediniz. 3. Düğmeyi maksimum pozisyondan minimum pozisyona döndürünce brülörlerin sönmediğinden emin olunuz. 4.
- Page 35 Brülör ve memelerin özellikleri Çizelge 1 Sıvı gaz Doğal gaz (G20) Ocak Çap Termik güç By-pass Meme Tasima gücü* Meme Tasima (mm) kW (p.c.s.*) 1/100 1/100 gücü* 1/100 g/saat (mm) (mm) (mm) l/saat Nomin. Reduc. ***(G30) ** (G31) Hızlı (R) 3.00 0.70 1.90...
-
Page 36: Başlatma Ve Kullanım
Başlatma ve kullanım Önlemler ve tavsiyeler ! Her bir düğme üzerinde kumanda ettiği gaz brülörünün y konumu belirtilmiştir. ! Cihaz uluslararası emniyet mevzuatlarına uygun olarak projelendirilmiş ve üretilmiştir. Bu uyarılar güvenlik amaçlı olup dikkatlice okunmalıdır. Gaz brülörleri Genel emniyet Seçilmiş olan brülör, ilgili düğme vasıtasıyla aşağıdaki konumlara ayarlanabilir: •... -
Page 37: Servis Ve Bakım
Ocak yüzeyinin temizlenmes Sözleşmeden dönme veya ayıp oranında bedelden indirim hakkının seçildiği durumlarda, satıcı, malın bedelinin tümünü veya bedelden yapılan indirim • Bütün emaye ve cam parçalar, ılık su ve doğal solüsyon ile temizlenmelidir. tutarını derhal tüketiciye iade edecektir. • Paslanmaz çelik yüzeyler, uzun süre temas halinde bırakıldığında, kireçli Malın ayıpsız misli ile değiştirilmesi hakkının seçilmesi durumunda talep su veya aşındırıcı... - Page 38 Alev emniyet aygıtına sahip olan versiyonlarda yanık kalmıyor. Aşağıdaki durumları kontrol ediniz: • Düğmeye tamamen basılmamış olabilir. • Emniyet donanımının devreye girmesi için düğme yeterince basılı tutulmamış olabilir. • Brülörün emniyet donanımının karşısına gelen gaz çıkış delikleri tıkanmış. Brülör minimum pozisyonunda yanık kalmıyor. Aşağıdaki durumları...
- Page 40 195125918.03 07/2015 - XEROX FABRIANO Indesit Company S.p.A. Viale Aristide Merloni,47 60044 Fabriano (AN) www.hotpoint.eu...
Need help?
Do you have a question about the PL 640S P (IX) TK/HA and is the answer not in the manual?
Questions and answers