Table of Contents
Advertisement
Available languages
Available languages
Quick Links
TOOLS REQUIRED
Claw hammer
Safety goggles
Measuring tape
Wall hardware
Installation
1
PREPARING FOR INSTALLATION
NOTE: Before installation, make
sure all parts are present. Compare
parts with the Hardware Included list.
If any part is missing or damaged, do
not attempt to install the product.
□ Determine the desired mounting location,
and mark the wall where the unit will be
installed.
NOTE: For secure installation, the
unit must be mounted to at least one
wall stud.
4
INSTALLING THE CABINET
□ For wall stud installation, insert #12 x 3 in. screws with
washers into the stud locations (not included).
□ For drywall installation, drill holes at the appropriate
locations and insert toggle bolts with washers (not included).
□ For concrete wall installation, drill 1/4 in. holes at the
appropriate locations and insert #12 wall anchors, followed
by #12 x 3 in. screws (not included).
5
INSTALLING THE VANITY TOP
IMPORTANT: Do not use plumber's putty.
NOTE: The faucet, drain, and supply lines are not included. Install these
parts to the vanity top according to the manufacturer's instructions.
□ Apply silicone caulk/sealant (not included)
to all four corners of the cabinet.
□ Place the vanity top onto the cabinet.
□ Position the top so that it has an equal
amount of overhang on each side and use a
level to ensure the vanity top surface is level.
□ Apply silicone onto the seam between the
edge of the vanity top and the wall, smooth
the bead, and allow to cure before use.
Phillips
screwdriver
Power drill
Caulk/sealant
Keyhole saw
2
CUTTING THE OPENING FOR
PLUMBING FIXTURES
NOTE: This step applies to vanity
cabinets with full back panels only.
□ Locate and mark plumbing on the back panel.
□ Drill a pilot hole through the back panel.
□ Use a keyhole saw to cut an opening for the
plumbing fixtures.
Item # 1000 013 639
Item # 1000 013 644
Model # PPMEJVM30-GFD
Model # PPMEJVM30-YPD
Use and Care Guide
HARDWARE INCLUDED
BB - Knob CC - Short Screw DD - Long Screw
X 1
Level
6
INSTALLING THE HARDWARE
□ Attach knob (AA) to the door on vanity with
short screw (CC) and handles (BB) to the
drawers on vanity with long screws (DD).
AA
BB
Please contact 1-888-774-8062 for further assistance.
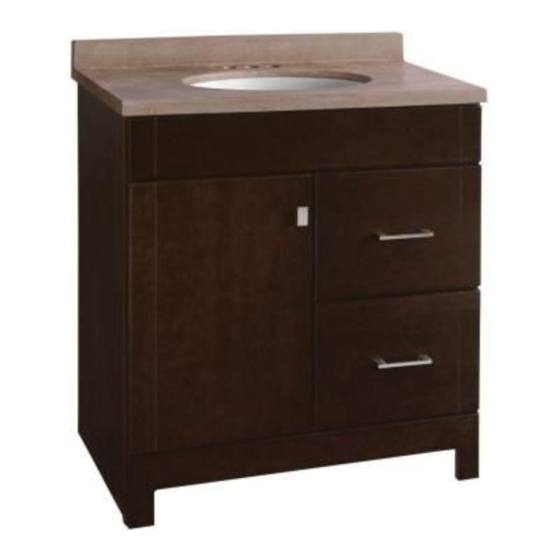
Vanity Combo
AA - Handle x 2
X 1
X 4
3
POSITIONING THE
CABINET
□ Move the cabinet into
place, and use wood
shims to level the
cabinet against the wall.
CC
DD
HOMEDEPOT.COM
Advertisement
Table of Contents

Related Manuals for Glacier bay PPMEJVM30-GFD


Summary of Contents for Glacier bay PPMEJVM30-GFD
-
Page 1: Tools Required
Item # 1000 013 639 Item # 1000 013 644 Model # PPMEJVM30-GFD Model # PPMEJVM30-YPD Use and Care Guide Vanity Combo HARDWARE INCLUDED TOOLS REQUIRED AA - Handle x 2 Phillips Claw hammer Safety goggles screwdriver Power drill BB - Knob CC - Short Screw DD - Long Screw... -
Page 2: Troubleshooting
Installation (continued) REMOVING THE DRAWER □ Press release levers in opposite directions while pulling drawer out of the vanity. Press Press upward downward RE-INSTALLING THE DRAWER NOTE: Drawer should install smoothly; however, there may be minor resistance when the drawer is approximately half to two-thirds installed. This is normal. □... - Page 3 Núm. de artículo 1000 013 639 Núm. de artículo 1000 013 644 Núm. de modelo PPMEJVM30-GFD Núm. de modelo PPMEJVM30-YPD Guía de uso y cuidado Tocadores de vanidad HERRAJE INCLUIDO HERRAMIENTAS REQUERIDAS AA - Manija x 2 Martillo de garra...
- Page 4 Instalación (continuado) EXTRACCIÓN DEL CAJÓN □ Presiona las palancas de desbloqueo en direcciones □ opuestas mientras sacas el cajón del gabinete. Presiona Presiona hacia arriba hacia abajo INSTALACIÓN DEL CAJÓN NOTA: El cajón debe instalarse suavemente aunque puede existir una pequeña resistencia cuando la instalación haya llegado aproximadamente a la mitad o a los dos tercios.
Need help?
Do you have a question about the PPMEJVM30-GFD and is the answer not in the manual?
Questions and answers