Table of Contents

Subscribe to Our Youtube Channel
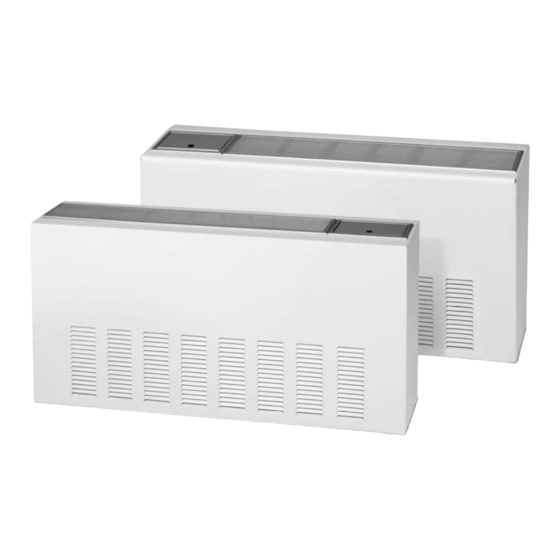
Related Manuals for Water Furnace Envision Series Console


Summary of Contents for Water Furnace Envision Series Console
- Page 1 LOW SILL CONSOLE Geothermal/Water Source Heat Pump • R-410A Refrigerant • 0.75-1.5 Ton Single Speed Installation Information Water Piping Connections Electrical Startup Procedures Troubleshooting Preventive Maintenance IM1012CN 10/13...
-
Page 3: Table Of Contents
ENVISION LOW SILL CONSOLE INSTALLATION MANUAL Table of Contents Model Nomenclature ............. . 4 General Installation Information . -
Page 4: Model Nomenclature
ENVISION LOW SILL CONSOLE INSTALLATION MANUAL Model Nomenclature... -
Page 5: General Installation Information
ENVISION LOW SILL CONSOLE INSTALLATION MANUAL General Installation Information Safety Considerations Water Piping The proper water flow must be provided to each unit WARNING: Before performing service or whenever the unit operates. To assure proper flow, use maintenance operations on a system, turn off main pressure/temperature ports to determine the flow rate. - Page 6 ENVISION LOW SILL CONSOLE INSTALLATION MANUAL Dimensional Data - Flat Top Cabinet LCW09-18 Left Hand Cabinet Right Hand Cabinet FRONT SIDE Right return cabinet shown in dimensional views Overall Cabinet Grille Flat Top Configuration Grille Grille Grille Width Depth Height Length Width 45.1...
- Page 7 ENVISION LOW SILL CONSOLE INSTALLATION MANUAL Dimensional Data - Slope Top Cabinet LCS09-18 Right Hand Cabinet Left Hand Cabinet 80° SIDE FRONT Right return cabinet shown in dimensional views Overall Cabinet Grille Slope Top Configuration Grille Grille Grille Width Depth Height Length Width...
-
Page 8: Dimensional Data
ENVISION LOW SILL CONSOLE INSTALLATION MANUAL Dimensional Data - Chassis LCC09-12 25.4 AIR FLOW WATER OUT 1/2 in. FPT 38.4 WATER IN 10.2 26.3 12.0 1/2 in. FPT BLOWER ACCESS PANEL COMPRESSOR ACCESS PANEL 21.7 17.6 CONDENSATE DRAIN CONNECTION LCC15-18 33.1 AIR FLOW 42.7 33.6... - Page 9 ENVISION LOW SILL CONSOLE INSTALLATION MANUAL Dimensional Data - Controls Detail: Flat Top Chassis Left Return Right Return Blower Option Switch Control Panel (Remove For Access To Control Box) Control Panel (Remove For Access Blower Option Switch To Control Box) Wall Mount For Chassis w/Flat Top Cabinets Wall Mount For Chassis...
-
Page 10: Physical Data
ENVISION LOW SILL CONSOLE INSTALLATION MANUAL Physical Data Console Model Compressor (1 each) Rotary Factory Charge R-410A, oz [kg] 29 [0.82] 29 [0.82] 38 [1.1] 34 [1.0] Blower Motor & Blower 3-Spd Blower Motor Type/Speeds 3 Speeds 3-Spd Blower Motor - hp [W] 1/4 [186] 1/4 [186] 3-Spd... -
Page 11: Installation Steps
ENVISION LOW SILL CONSOLE INSTALLATION MANUAL Installation Steps Step 1: Unpack Equipment and Inspect for Damage Step 2: Determine Equipment Location • Choose level flooring surface (Correctable with shims. Do not pitch towards drain.) • Location of wall support and fasteners required to secure chassis backplate. •... - Page 12 ENVISION LOW SILL CONSOLE INSTALLATION MANUAL Installation Steps cont. Step 4: Provide Water and Condensate Drain Connections • A two-pipe reverse return piping configuration is recommended as it equalizes the piping circuit lengths and delivers even water flow to each unit. A direct return piping configuration may be used, but it may be difficult to achieve and maintain proper water flow to the units.
- Page 13 ENVISION LOW SILL CONSOLE INSTALLATION MANUAL Installation Steps cont. Step 5: Provide Line Voltage Wiring • Check unit data plate located on control side of chassis for ampacity and fuse size. • Remove electrical knockouts from chassis backplate. • Run line voltage wiring through knockout and secure wiring to backplate or disconnect. Step 6: Chassis Installation •...
- Page 14 ENVISION LOW SILL CONSOLE INSTALLATION MANUAL Installation Steps cont. Field Converting Console Chassis is normally configured with controls on right end and piping on left end (see Figure 3 top view). In this position panel number 1 would be positioned against wall or back plate. Unit may also be turned 180° against wall or back plate. In this position controls will be on left end and piping on right end panel number 2 would be positioned against wall or back plate.
-
Page 15: System Cleaning And Flushing
ENVISION LOW SILL CONSOLE INSTALLATION MANUAL System Cleaning and Flushing Cleaning and Flushing Figure 7: Flushing with Water Shutoff Valve Equipped Systems Prior to start up of any heat pump, the water circulating system must be cleaned and flushed of all dirt and debris. Return Runout If the system is equipped with water shutoff valves, the supply and return runouts must be connected together at each unit location (This... -
Page 16: Open Loop Ground Water Systems
ENVISION LOW SILL CONSOLE INSTALLATION MANUAL Open Loop Ground Water Systems Always maintain water pressure in the heat exchanger by placing water control valves at the outlet of the unit to prevent mineral precipitation. Use a closed, bladder-type expansion tank to minimize mineral formation due to air exposure. Ensure proper water flow through the unit by checking pressure drop across the heat exchanger and comparing it to the figures in unit capacity data tables in the specification catalog. -
Page 17: Electrical Connections
ENVISION LOW SILL CONSOLE INSTALLATION MANUAL Electrical Connections General Be sure the available power is the same voltage and phase as that shown on the unit serial plate. Line and low voltage wiring must be done in accordance with local codes or the National Electric Code, whichever is applicable. 208 Volt Operation All Envision Series 208/230 units are factory wired for 230 volt operation. -
Page 18: Electrical Data
ENVISION LOW SILL CONSOLE INSTALLATION MANUAL Electrical Data Blower Total Compressor Rated Voltage Model Motor Unit Circ Fuse/ Voltage Min/Max HACR 115/60/1 104/127 12.5 50.0 11.5 208-230/60/1 187/253 21.0 10/15 265/60/1 238/292 22.0 10/15 115/60/1 104/127 14.8 50.0 11.0 13.4 208-230/60/1 187/253 25.0... -
Page 19: Wiring Schematics
ENVISION LOW SILL CONSOLE INSTALLATION MANUAL Wiring Schematics CCM with Remote Thermostat - 208-230-265/60/1 Compressor Blue Unit Power Supply Ground Blower 208-230/60/1 or Motor 265-277/60/1 Handi - Box Tan (33) Black (31) White (28) Black (29) Black (27) Red (30) Red (32) Brown (26) Black... - Page 20 ENVISION LOW SILL CONSOLE INSTALLATION MANUAL Wiring Schematics cont. CCM with Unit Mounted Thermostat - 208-230-265/60/1 Compressor Blue Unit Power Supply Ground Blower 208-230/60/1 or Motor 265-277/60/1 Handi - Box Tan (33) White (28) Brown (26) Black (31) Red (32) White (28) Black (29) Black...
- Page 21 ENVISION LOW SILL CONSOLE INSTALLATION MANUAL Wiring Schematics cont. Versatec with Remote Thermostat - 208-230-265/60/1 Compressor Blue Blower Motor Brn/Wht Unit Power Supply 208-230/60/1 or Black Ground 265-277/60/1 Tan (36) Handi - Box White (28) Black (29) Blower Speed Red (30) Switch High Black (31)
- Page 22 ENVISION LOW SILL CONSOLE INSTALLATION MANUAL Wiring Schematics cont. Versatec with Unit Mounted Thermostat - 208-230-265/60/1 Compressor Blue Unit Power Supply Blower Black 208-230/60/1 or Motor Brn/Wht Ground 265-277/60/1 Tan (33) Handi - Box White (28) Black (29) Blower Speed Red (30) White (28) Switch...
- Page 23 ENVISION LOW SILL CONSOLE INSTALLATION MANUAL Wiring Schematics cont. CCM with ECM and Unit Mounted Thermostat - 208-230-265/60/1 Brown (26) Motor Compressor Blue Unit Power Supply Ground Motor 208-230/60/1 or 265-277/60/1 Module Handi - Box Tan (33) Note 4 Black (31) Black Red (32) Fan Switch...
- Page 24 ENVISION LOW SILL CONSOLE INSTALLATION MANUAL Wiring Schematics cont. FX10 with ECM and Unit Mounted Thermostat - 208-230-265/60/1 Compressor Motor Unit Power Supply Motor 208-230/60/1 or Module Ground 265/60/1 Handi - Box Note 6 Fan Speed Switch High Black White Black Black Blue 240V...
- Page 25 ENVISION LOW SILL CONSOLE INSTALLATION MANUAL Wiring Schematics cont. Versatec Control Board Normal Mode Control Timing Table Versatec Logic Board Physical Layout Blower off delay 30 seconds Compressor on delay 10 seconds Blower Blower COM Compressor short cycle delay 5 minutes Minimum compressor on time 2 minutes (except for fault condition) CC Relay...
-
Page 26: Controls
ENVISION LOW SILL CONSOLE INSTALLATION MANUAL Controls Control General Description Application Display/Interface Protocol Thermostat Options CCM Control The CCM (Compressor control Residential and commercial Dial thermostat with Hi None Unit Mounted Digital module) is a more reliable applications requiring minimal and Low blower speeds, Dial Thermostat replacement for electro-mechanical... - Page 27 ENVISION LOW SILL CONSOLE INSTALLATION MANUAL Controls cont. The user selects either “Heat/Cool” or “Fan Only” on the Component Sequencing Delays mode switch, then either “High” or “Low” at the blower Components are sequenced and delayed for optimum speed switch. The temperature can be controlled by unit performance.
- Page 28 ENVISION LOW SILL CONSOLE INSTALLATION MANUAL Controls cont. Control Tables for Optional Versatec Microprocessor Logic Board DIP Switch Settings Switch SW1 - 1 Test - Selected timings sped up to facilitate troubleshooting Normal - Standard timings SW1 - 2 Loop - Closed loop freeze detection setting (15°F) Well - Open loop freeze detection setting (30°F) SW1 - 3 Commercial - Enables NS features when TA32U02 thermostat is used...
- Page 29 ENVISION LOW SILL CONSOLE INSTALLATION MANUAL Controls cont. Random Start Optional FX10 Control A delay of 1 to 120 seconds is generated after each power- up to prevent simultaneous startup of all units within a building after the release from an unoccupied cycle or power loss.
- Page 30 ENVISION LOW SILL CONSOLE INSTALLATION MANUAL Controls cont. Condensate overflow fault ..........30 seconds Zone Sensors Low pressure fault bypass ........... 2 minutes There are two options for zone sensors that can be used Freeze detection fault bypass ..........2 minutes with the FX10 control.
-
Page 31: Sequence Of Operation
ENVISION LOW SILL CONSOLE INSTALLATION MANUAL Controls cont. consecutive faults occur in 60 minutes during a single The condensate will be subjected to a (30) second heating or cooling demand, the unit will go into lockout lockout delay which requires that the fault be sensed for a mode, turning off the compressor, and enabling the alarm continuous (30) seconds before suspending unit operation. - Page 32 ENVISION LOW SILL CONSOLE INSTALLATION MANUAL Controls cont. Compressor Minimum On Delay Inputs and Outputs Configuration Field Selectable Options The compressor minimum on delay will ensure that the compressor output is enabled for a minimum of (2) Freeze Detection Limit Set Point (BI-5) minute each time the compressor output is enabled.
- Page 33 ENVISION LOW SILL CONSOLE INSTALLATION MANUAL Controls cont. FX10 User Interface (MUI) Physical Layout Power LED Alarm LED Up Arrow Right Arrow Escape (ESC) LED 1 Button Return Button LED 4 LED 8 Left Arrow Down Arrow Alarm LED - Indicates a Lock-Out or a bad Freeze Sensor LED 3 - On shows Fan running Power LED - Shows FX processor is operational LED 4 - On shows Reversing Valve in cool...
- Page 34 ENVISION LOW SILL CONSOLE INSTALLATION MANUAL Controls cont. MUI Menu Navigation for Single Compressor - Envision Water-to-Air Maintenance MinClgSetpt 60.0 ºF MaxHtgSetpt 89.9 ºF W Coil LoLim1 30.0 ºF Press right arrow key W Coil LoLim2 15.0 ºF one time from TmpOccTime 120 min Maintenance Menu...
-
Page 35: Unit Startup Notes
ENVISION LOW SILL CONSOLE INSTALLATION MANUAL Unit Startup Notes Electrical Disconnect Hydronic Loop Controller for Boiler/Tower Installations Optional field installed console disconnect provides a permanent electrical connection to the main electrical The hydronic loop controller is a microprocessor based supply branch. Wiring between the disconnect and the control panel for control of water loop heat rejector unit chassis is field supplied and allows the electrical power (tower), heat supplier (boiler), and/or water well pumps... -
Page 36: Unit Startup Checklist/Unit Startup Steps
ENVISION LOW SILL CONSOLE INSTALLATION MANUAL Unit Startup Checklist/Unit Startup Steps Before Powering Unit, Check The Following: • High voltage is correct and matches nameplate. • Fuses, breakers and wire size correct. • Low voltage wiring complete. • Piping completed and water system cleaned and flushed. •... -
Page 37: Operating Parameters
ENVISION LOW SILL CONSOLE INSTALLATION MANUAL Operating Parameters Cooling Entering Water Water Flow Suction Pressure Discharge Water Temp Rise Air Temp Drop Temp °F gpm/ton Superheat Subcooling psig Pressure psig °F °F DB 100 - 115 170 - 190 17 - 26 10 - 14 18 - 22 20 - 30... -
Page 38: Pressure Drop
ENVISION LOW SILL CONSOLE INSTALLATION MANUAL Pressure Drop Pressure Drop (psi) Model 30°F 50°F 70°F 90°F 110°F 6/10/13 Compressor and Thermistor Resistance Compressor Resistance 115/60/1 208-230/60/1 265/60/1 Model Start Start Start 0.77 - 0.89 1.79 - 2.05 3.65 - 4.19 3.75 - 4.31 3.73 - 4.27 4.45 - 5.13... -
Page 39: Refrigerant Circuit Guideline
ENVISION LOW SILL CONSOLE INSTALLATION MANUAL Refrigerant Circuit Guideline Head Suction Compressor Air Temp. Water Temp. Symptom Superheat Subcooling Pressure Pressure Amp Draw Differential Differential Under Charged System (Possible Leak) High Over Charged System High High High Normal High Normal/Low Normal Low Air Flow Heating High... -
Page 40: Heat Of Extraction/Rejection Data
ENVISION LOW SILL CONSOLE INSTALLATION MANUAL Heat of Extraction/Rejection Data Heat of Extraction (HE) Heat of Rejection (HR) Model 30°F 50°F 70°F 90°F 30°F 50°F 70°F 90°F 110°F 10.6 12.9 12.1 11.8 10.8 13.9 13.1 12.4 11.7 10.9 10.9 14.0 13.4 12.6 11.8... -
Page 41: Startup/Troubleshooting Form
ENVISION LOW SILL CONSOLE INSTALLATION MANUAL DEALER: PHONE #: DATE: PROBLEM: MODEL #: Startup/Troubleshooting Form SERIAL #: COOLING CYCLE ANALYSIS SAT °F °F Unit Amp Draw: Loop: Open Closed Line Voltage: °F °F COIL SUCTION COMPRESSOR REVERSING COAX EXPANSION VALVE SOURCE VALVE DISCHARGE... -
Page 42: Preventive Maintenance
ENVISION LOW SILL CONSOLE INSTALLATION MANUAL Preventive Maintenance Condensate Drain Water Coil Maintenance In areas where airborne bacteria produce a slime in the 1. Keep all air out of the water. An open loop system drain pan, it may be necessary to treat chemically to should be checked to ensure that the well head is not minimize the problem. -
Page 43: Service Parts
ENVISION LOW SILL CONSOLE INSTALLATION MANUAL Service Parts Low Sill Consoles Part Description Compressor 115/60/1 34P590-09 34P591-09 Compressor 208-230/60/1 34P590-01 34P591-01 34P592-01 34P593-01 Compressor 265/60/1 34P590-02 34P591-02 34P592-02 34P593-02 Run Capacitor 115/60/1 16P002D36 16P002D36 Run Capacitor 208-230/60/1 16P002D17 16P002D18 16P002D19 16P002D19 Run Capacitor 265/60/1 16P002D27... - Page 44 ENVISION LOW SILL CONSOLE INSTALLATION MANUAL Notes...
-
Page 45: Revision Guide
ENVISION LOW SILL CONSOLE INSTALLATION MANUAL Revision Guide Pages: Description: Date: Added 15 & 18 Models 09 Oct 2013 Added Revision Table 09 Oct 2013... - Page 48 Manufactured by WaterFurnace International, Inc. 9000 Conservation Way Fort Wayne, IN 46809 www.waterfurnace.com Product: Envision Series Low Sill Console Type: Geothermal/Water Source Heat Pump Size: 0.75-1.0 Ton Document: Installation Manual IM1010CN 10/13 © 2013 WaterFurnace International, Inc., 9000 Conservation Way, Fort Wayne, IN 46809-9794. WaterFurnace has a policy of continual product research and development and reserves the right to change design and specifi...
Need help?
Do you have a question about the Envision Series Console and is the answer not in the manual?
Questions and answers