Kyocera FS-1800 Service Manual
Hide thumbs
Also See for FS-1800:
- User manual (306 pages) ,
- Manual (3 pages) ,
- Quick start manual (2 pages)
Table of Contents
Advertisement
Quick Links
Download this manual
See also:
User Manual
Advertisement
Chapters
Table of Contents

Related Manuals for Kyocera FS-1800


Summary of Contents for Kyocera FS-1800
- Page 1 FS-1800/N FS-1800/N FS-3800/N FS-3800/N Page printers...
- Page 2 FS-1800/1800N/3800/3800N Series Combined Service Manual C Kyocera Corporation 2000 All rights reserved. Export Edition Notice harmful interference in a from that to which the receiver The information in this residential installation. This is connected. manual is subject to change equipment generates, uses, Consult the dealer or an w i t h o u t n o t i f i c a t i o n .
- Page 3 All other brand and product names are registered trademarks or trademarks of their respective companies. This Kyocera page printer uses PeerlessPrintXL to provide the HP LaserJet compatible PCL6 language emulation. PeerlessPrintXL is a trademark of The Peerless Group, Redondo Beach, CA 90278, U.S.A.
- Page 4 When followed by CAUTION this symbol denotes that the following paragraph(s) include the precautions which, if ignored, could result in damage to the printer. FS-1800/1800N | FS-3800/3800N...
- Page 5 The manual is comprised of the following chapters: Chapter 1: Product Information Chapter 2: Installation/Operation Chapter 3: Maintenance/Adjustments Contents Chapter 4: Operation Overview Chapter 5: Disassembly Chapter 6: Troubleshooting Appendix A: Diagrams Appendix B: Status Page Appendix C: Interface Contents Contents FS-1800/1800N | FS-3800/3800N...
- Page 6 5-37, 6-11,6-15, 6-16, 6-17, 6-18, 6-19, 6-20, 6-21, 6-22,6-23, 6-24, B-4, 1-6, 1-7, 2-18, 1.20 4-Jul-2001 2-20, 3-14, 3-15, 3-16, 3-19, 3-20 TO OBTAIN THE LATEST PRINTER DRIVERS AND UTILITIES, VISIT US AT OUR INTERNET HOME PAGE: http://www.kyocera.com/w2k FS-1800/1800N | FS-3800/3800N...
- Page 7 P r o d u c t I n f o r m a t i o n Chapter 1...
-
Page 8: Table Of Contents
(4) CDRH regulations (U.S.A.) ...................... 1-12 (5) Ozone concentration ....................... 1-12 (6) FCC statement (U.S.A.) ......................1-12 a) For the FS-1800 and FS-3800 models ..................1-12 b) For the FS-1800N and FS-3800N models ................1-13 (7) Canadian Department of Communications compliance statement .......... 1-13 (8) Avis de conformité... -
Page 9: Printer Specifications
Paper Plain paper ← Capacity of paper feed source Cassette: 500 sheets, (80 g/m [0.11 mm thickness]) MP tray: 100 sheets ← Capacity of output trays Face-up: 250 sheets, (80 g/m [0.11 mm thickness]) Face-down: 250 sheets FS-1800/1800N | FS-3800/3800N... -
Page 10: Controller
4 MB Mask (or Flash) DIMM ← Font ROM 2 MB FS-3800 model: 16 MB Main (Video) RAM FS-1800 model: 8 MB FS-3800N model: 32 MB FS-1800N model: 24 MB 272 MB (Including main RAM) Maximum: 264 MB (Including main RAM) -
Page 11: Power Requirements
220 - 240 V AC ±10 %, ← Europe/Asia: 50/60 Hz ±2 %/3.6 A Watts Average: FS-1800 model: 328 W FS-3800 model: 499 W FS-1800N model: 961 W FS-3800N model: 972 W Maximum: 120 V AC model: 961 W 120 V AC model: 972 W... -
Page 12: Available Option Memory/Device
DIMM, refer to Section 2-2-4 Expanding the memory (DIMM) on page 2-11. NOTE Availability of the memory DIMMs, manufacturers, and specifications may change without notice. No responsibility is assumed by Kyocera Mita with respect to loss or damage caused by the use of these DIMMs. Manufacturer... - Page 13 This page is intentionally blank. FS-1800/1800N | FS-3800/3800N...
-
Page 14: Memory Card (Compactflash)
(CompactFlash) on page 2-16. NOTE Availability of the following memory cards (CompactFlash), manufacturers, and specifications may change without notice. No responsibility is assumed by kyocera Mita with respect to loss or damage caused by the use of these memory card. Manufacturer Capacity... -
Page 15: Hard Disk (Microdrive)
64 MB SST48CF064 96 MB SST48CF096 LEXAR Media 16 MB 32 MB 48 MB 64 MB 80 MB (3) Hard disk (Microdrive) The following hard disk is available for the printer: IBM Microdrive 340 MB capacity type FS-1800/1800N | FS-3800/3800N... -
Page 16: Names Of Parts
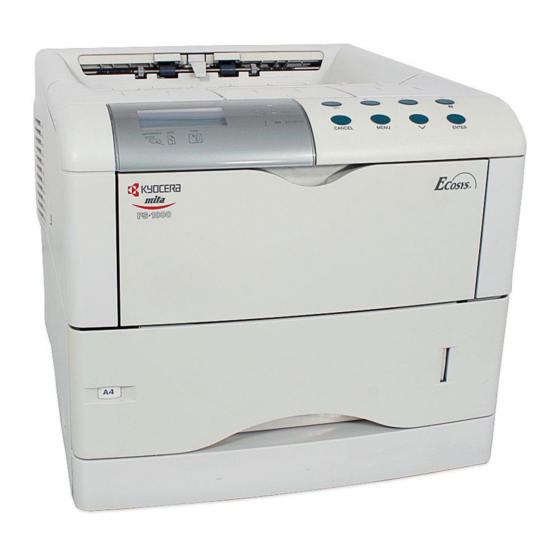
‹ Network interface card 8 Paper size dial * Rear cover 9 Waste toner bottle : Standard-installed with the FS-1800N/3800N 0 Side cover ( AC inlet models (Normally covered with a cover plate) Figure 1-2-1 Name of parts FS-1800/1800N | FS-3800/3800N 1-10... -
Page 17: Safety Information
(3) Laser caution label on the scanner unit The laser scanner unit inside the printer has the following label affixed on its top. Observe the laser radiation warning and figures when handling the laser scanner unit. FS-1800/1800N | FS-3800/3800N 1-11... - Page 18 Laser radiation warning This label is affixed atop of the laser scanner unit inside the printer. FS-3800 Europe/Pacific model FS-3800 US/Canada model FS-3800 Asian countries model Figure 1-3-1 Caution labels FS-1800/1800N | FS-3800/3800N 1-12...
-
Page 19: Cdrh Regulations (U.s.a.)
(6) FCC statement (U.S.A.) a) For the FS-1800 and FS-3800 models This device complies with Part 15 of the FCC Rules. Operation is subject to the following two conditions: (1) This device may not cause harmful interference, and (2) this device must accept any interference received, including interference that may cause undesired operation. -
Page 20: B) For The Fs-1800N And Fs-3800N Models
Any modification without prior permission may cause harmful interference. If any modification/change is introduced to this equipment without prior permission, Kyocera as the manufacturer cannot guarantee compliance with FCC rules. To use equipment which does not comply with FCC rules is prohibited. The printer may be optionally installed with the following... -
Page 21: Ce Marking Directive
Model name: FS-1800/FS-3800/FS-1800N/FS-3800N (as tested with the enhancement optional units: PF-60, DU-60 and SO-60) Description of device: This page printer model FS-3800 is the 24 ppm (FS-1800 is the 16 ppm); A4 size and utilizes plain paper; laser; dry toner, etc. The printer can be equipped with several enhancement optional units such as a paper feeder PF-60, a duplexer DU-60, a sorter SO-60, etc. -
Page 22: Environmental Requirements
Environmental requirements in chapter 1, the best print quality may not be expected and there will be an increased chance of paper jams. • Provide a sufficient clearances around the printer to ensure ventilation and ease of access. (See section Clearance on next page). FS-1800/1800N | FS-3800/3800N 1-16... -
Page 23: Clearance
Allow the necessary minimum clearance on all sides of the printer as below. Figure 1-4-1 Clearances Ref. Clearance Dimensions [Minimum] Left 30 cm (11-13/16 inches) Front 60 cm (23-5/8 inches) Right 25 cm (9-7/8 inches) Back 20 cm (7-7/8 inches) Head room 30 cm (11-13/16 inches) FS-1800/1800N | FS-3800/3800N 1-17... -
Page 24: Places To Avoid
• An easily accessible socket outlet must be provided near the equipment. WARNING As the disconnect device is not incorporated in the printer’s AC primary circuit, an easily accessible socket outlet must be provided near the equipment. FS-1800/1800N | FS-3800/3800N 1-18... -
Page 25: Removing The Printer
• Before removing the printer to a warm place, wrap it in a blanket, etc., before crating it. Allow approximately two to three hours after having moved after uncrated. Failure to observe the above may result in moisture condensation which will affect the performance of the printer. FS-1800/1800N | FS-3800/3800N 1-19... -
Page 26: About The Toner Container
1-5 About the toner container 1-5-1 Toner container The printer should use a Kyocera TK-60/TK-60E toner kit. To ensure the high print quality and long service life, the following handling precautions should apply: CAUTION As the Ecosys printers are designed to ensure the optimum print quality when used with Kyocera’s proprietary toner, Kyocera do not recommend to use any... -
Page 27: Toner Container Storage
If the printer is shipped for return, etc., do not ship it with the toner container installed. Remove the toner container from the developer and put in a plastic bag and seal the plastic bag. Otherwise, toner may leak and contamination may result in the printer. FS-1800/1800N | FS-3800/3800N 1-21... - Page 28 I n s t a l l a t i o n / O p e r a t i o n Chapter 2...
- Page 29 Chapter 2 Contents 2-1 Unpacking ............................2-3 2-1-1 Unpacking and inspection ......................2-3 2-2 Installing the printer ........................2-5 2-2-1 Installing the toner container ..................... 2-5 Removing the toner container ......................2-7 2-2-2 Installing the waste toner bottle ....................2-8 Removing the waste toner bottle ....................
-
Page 30: Unpacking
For the FS-1800N/3800N, the CD-ROM (Network library) and the manual for the network interface card are shipped together with the components listed below. 1 Printer 5 Installation manual 2 Toner container 6 Kyocera digital library CD-ROM 3 Waste toner bottle 7 Plastic bag 4 Power cord Figure 2-1-1 Unpacking... - Page 31 1 Printer 5 Installation manual 2 Toner container 6 Kyocera digital library CD-ROM 3 Waste toner bottle 7 Plastic bag 4 Power cord Figure 2-1-2 List of shipped components FS-1800/1800N | FS-3800/3800N...
-
Page 32: Installing The Printer
2. Take toner container 1 from the bag. With the label side down and pivoting on the middle of the container, thoroughly shake the toner container (in the direction of the arrows) ten times or more to loosen and mix the toner inside. Figure 2-2-1 Shake the toner container FS-1800/1800N | FS-3800/3800N... - Page 33 Figure 2-2-2 Removing the protective seal 4. Install the toner container 2 into the printer. 5. Push firmly on the top of the toner container 2 at the positions marked [PUSH HERE]. Figure 2-2-3 Installing the toner container FS-1800/1800N | FS-3800/3800N...
-
Page 34: Removing The Toner Container
To remove the toner container, pull the lock lever (green colored) 1 and gently lift the toner container. NOTE Do not remove the toner container unless you need to do so for servicing, etc. Figure- 2-2-4 Removing the toner container FS-1800/1800N | FS-3800/3800N... -
Page 35: Installing The Waste Toner Bottle
2. Open the side cover 3 and install the waste toner bottle 2 so that it is properly seated in the area under the drum unit. 3. Close the side cover 3. Figure 2-2-5 Installing the waste toner bottle FS-1800/1800N | FS-3800/3800N... -
Page 36: Removing The Waste Toner Bottle
To remove the waste toner bottle 1, while holding the waste toner bottle 1, press the lock lever 2 aside, then gently remove the waste toner bottle 1 sideways. NOTE Do not remove the waste toner bottle unless you need to do so for service, etc. Figure 2-2-6 Removing the waste toner bottle FS-1800/1800N | FS-3800/3800N... -
Page 37: Developer Initialization (Automatic)
Developer initialization takes up to 15 minutes for the original developers (DV-60 for the FS-1800 and DV-61 for the FS-3800) or 8 minutes for the service developer (DV-62 for both models). -
Page 38: Expanding The Memory (Dimm)
The FS-1800/1800N comes standard-equipped with 8 MB of main memory; the FS-3800/3800N comes with 16 MB of memory. The FS-1800/1800N can be expanded up to the maximum of 264 MB (8 MB + 256 MB), and the FS-3800/3800N can be expanded up to the maximum of 272 MB (16 MB + 256 MB). -
Page 39: Notes On Handling Dimm
• While doing the work, it is recommended that you wear an antistatic wrist strap. • Touch the main board and DIMM only by the edges, not in the middle. Figure 2-2-7 Handling DIMM FS-1800/1800N | FS-3800/3800N 2-12... -
Page 40: Installing The Dimm
3. Remove the main board 2 by removing the two (plated) screws 3. 4. Pull the main board 2 all the way out of the printer. Figure 2-2-8 Removing the main board FS-1800/1800N | FS-3800/3800N 2-13... -
Page 41: Testing The Expansion Memory
To test the expansion memory, turn printer power on and print a status page. If the installation has been successful, the Available Memory item of the status page will show the expanded memory size corresponding to the amount of memory added. FS-1800/1800N | FS-3800/3800N 2-14... -
Page 42: Installing The Option Hard Disk (Microdrive)
2. Remove the main board 1 from the printer. (See step 2 to 4, on page 2-13.) 3. Install the hard disk 2 to the hard disk slot 3. Figure 2-2-11 Installing the option hard disk FS-1800/1800N | FS-3800/3800N 2-15... -
Page 43: Installing The Option Memory Card (Compactflash)
2. Insert the memory card 1 in the memory card slot 2 at the right bottom of the printer. Insert it face up, connector end first. Push it in all the way. Figure 2-2-12 Installing the option memory card FS-1800/1800N | FS-3800/3800N 2-16... -
Page 44: Installing The Option Network Interface Card
5. Connect the network cable 5 to the network interface card 3. 6. Set the network address from the printer operator panel. (Refer to the printer’s User’s Manual) Figure 2-2-13 Installing the option network interface card FS-1800/1800N | FS-3800/3800N 2-17... -
Page 45: Using The Operator Panel
3 ATTENTION indicator Flashing The printer needs maintenance attention or the printer is warming up (Please wait). A problem or an error has occurred that the user can clear, for example, paper jam. Operations are normal. FS-1800/1800N | FS-3800/3800N 2-18... - Page 46 • Displays on-line help messages on the message display when paper jam occur. When pressed in the Ready condition, displays on-line help messages. ! ENTER key Finalizes numeric values and other selections in menu selection. FS-1800/1800N | FS-3800/3800N 2-19...
-
Page 47: Interface Indicator
Japanese postcard (10 × 14.8 cm) * Monarch (3-7/8 × 7-1/2 inches) * Return postcard (20 × 14.8 cm) * Business (4-1/8 inches) * Custom size (14.8 × 21 cm to 21.6 × 35.6 cm) * with only the MP tray feeding FS-1800/1800N | FS-3800/3800N 2-20... -
Page 48: Paper Type Indicator
PLAIN Letterhead LETTERHEA Transparency* TRNSPRNCY Color COLOR Preprinted PREPRINTE Prepunched PREPUNCH Labels* LABELS Envelope* ENVELOPE Bond BOND Cardstock* CARDSTOCK Recycled RECYCLED Custom 1 (to 8) CUSTOM1(to 8) Vellum* VELLUM * with only the MP tray feeding FS-1800/1800N | FS-3800/3800N 2-21... -
Page 49: Message Display
(The time that it takes the printer to enter Sleep mode depends on the Sleep Timer setting.) Data inside the printer is being canceled. Cancelling data The printer prints the last page after a waiting period. FormFeed Time Out FS-1800/1800N | FS-3800/3800N 2-22... -
Page 50: Menu Selection System
>TCP/IP > >>VMB Size >>DHCP Inter face > Parallel >>IP Address >Parallel I/F >>Subnet Mask Nibble (high) >Parallel I/F >>Gateway Auto >Parallel I/F >Ether Talk Normal >Parallel I/F >OPT. StatusPage High Speed Continued on next page. FS-1800/1800N | FS-3800/3800N 2-23... - Page 51 LF only >Courier >CR Action Regular CR and LF >Letter Gothic >CR Action Ignore CR Regular >Letter Gothic >Wide A4 Dark >Size >Wide A4 012.00 point(s) >Pitch 10.00 cpi >List of Fonts Continued on next page. FS-1800/1800N | FS-3800/3800N 2-24...
- Page 52 >List of Partitions Hard Disk > >Read Data >Write Data >Delete Data >List of Partitions RAM Disk Mode RAM Disk Mode >RAM Disk Size >Read Data >Write Data >Delete Data >List of Partitions Continued on next page. FS-1800/1800N | FS-3800/3800N 2-25...
- Page 53 > Custom 1 >Auto Continue Mode Off >>Paper weight Normal >Service > >>Paper weight Heavy (Thick) >>Print >>Paper weight Status Page Light (Thin) >>Toner ID >>Duplex Path Disable >>Developer >>Duplex Path Enable >>Drum >Reset Type Adjust FS-1800/1800N | FS-3800/3800N 2-26...
- Page 54 Maintenance/Adjustments Chapter 3...
- Page 55 Chapter 3 Contents 3-1 Maintenance/Adjustments ......................3-3 3-1-1 Life expectancy of modules ....................... 3-3 3-1-2 Toner container ......................... 3-4 (1) When to replace the toner container ..................3-4 (2) Notes on changing the toner container ..................3-4 (3) Toner container replacement ..................... 3-5 (4) Toner saver mode (EcoPrint) ....................
-
Page 56: Maintenance/Adjustments
FE-61 300,000 Refurbishment kit MK-60 MK-61 300,000 : User-replaceable : Includes DK, DV, and FK kits and a feed-transfer unit. : Each FK kits have two voltage type for 120 V AC and 220 - 240 VAC. FS-1800/1800N | FS-3800/3800N... -
Page 57: Toner Container
• Be sure to clean the parts as instructed in section 3-1-1 Cleaning the printer on page 3-8 at the same timing of replacing toner container. • Use of the Kyocera toner kit TK-60/TK-60E is highly recommended for the optimum operation of the printer. -
Page 58: Toner Container Replacement
(3) Toner container replacement To replace the toner container, open the top cover. Pull the lock lever 1 to the right and gently lift the old container 2. Figure 3-1-1 Removing the old toner container FS-1800/1800N | FS-3800/3800N... -
Page 59: Toner Saver Mode (Ecoprint)
The EcoPrint enables to reduce the amount of toner consumed on the page so as to save printing costs by drastically extending the toner container life. EcoPrint mode is factory-set to off and turned on by using the menu system of the printer operator panel. For details, see the printer’s User’s Manual. FS-1800/1800N | FS-3800/3800N... -
Page 60: Replacing The Waste Toner Bottle
Locate the new waste toner bottle in the toner kit, and install it in the printer according to section 2- 2-2 Installing the waste toner bottle on page 2-8. Figure 3-1-3 Removing the old waste toner bottle FS-1800/1800N | FS-3800/3800N... -
Page 61: Cleaning The Printer
Cleaning of the main charger can be done without needing any tools thanks to its self-cleaning system. Cleaning pad Main charger wire Grid Shield Cleanig knob Figure 3-1-4 Main charger unit FS-1800/1800N | FS-3800/3800N... -
Page 62: Cleaning The Main Charger Wire And Grid
2. Pull the cleaning knob (green colored) 2 slowly in and out a few times. NOTE Cleaning knob pulls a cleaning pad inside the drum unit along the main charger wire. Figure 3-1-5 Cleaning the main charger wire FS-1800/1800N | FS-3800/3800N... -
Page 63: Grid
Figure 3-1-6 Grid cleaner 2. Attach the grid cleaner 1 to the drum unit 3 with the pad uppermost as shown in the diagram. Figure 3-1-7 Attaching the grid cleaner FS-1800/1800N | FS-3800/3800N 3-10... - Page 64 The grid part underneath the main charger is cleaned by the wet pad of the grid cleaner. Figure 3-1-8 Cleaning the grid 4. Remove the grid cleaner from the printer and dispose of it. The grid cleaner is not reusable. FS-1800/1800N | FS-3800/3800N 3-11...
-
Page 65: Paper Feed Unit
7, do not use alcohol to clean this area. If the oil is completely removed, an incorrect action of the MP tray paper sensor (8, actuator) will result. Figure 3-1-9 Cleaning the upper registration roller and the paper ramp FS-1800/1800N | FS-3800/3800N 3-12... -
Page 66: Replacing The Developer
To pack the developer 1 in the packing carton, first flap down the magnet roller protective cover 2. Put the developer 1 into the supplied plastic bag 3. Put the developer 1 on the developer install position 4 of packing carton. Figure 3-1-10 Shipping the developer FS-1800/1800N | FS-3800/3800N 3-13... -
Page 67: Developer Initialization (Toner Install Mode)
When printer power is turned on again, the printer continually engages in this mode for a period of approximately 15 minutes, after which the printer reverts to the ready state. : Developer DV-60/DV-61 : Developer DV-62 FS-1800/1800N | FS-3800/3800N 3-14... -
Page 68: Developer Refreshing Mode
Print density (If the print density is too dark (gray background), change the “Print Density” setting in the menu selection to 1 or 2 steps lighter. (Default is 3.) Refer to printer’s User’s Manual for details. FS-1800/1800N | FS-3800/3800N 3-15... -
Page 69: Drum Cleaning Mode
Drum is cleaned by the cleaning blade in the drum unit. If paper is present on the MP tray, the drum is also cleaned by that the paper which is fed automatically and stops at the transfer roller. FS-1800/1800N | FS-3800/3800N 3-16... -
Page 70: Updating The Firmware
Check the type of the system DIMM [board] used on the main board by referring to the figure below. If the DIMM has a Kyocera logo and firmware version label, the DIMM is a masked-type and can not be updated. To update firmware for this type of system DIMM, replace the DIMM. -
Page 71: Firmware Program Data Format
Kyocera supplies the following types of data for updating firmware of the different purposes: • Controller firmware • Engine firmware • Operator panel message data (1) Firmware program data format The data to be downloaded are supplied in the following format: Identifies... -
Page 72: Downloading The Engine And Controller Firmware
Confirm that the status page shows the new engine firmware or controller firmware version (See Appendix B on page B-4). If the message display indicates Call service personDn (n=0, 1, ...), refer to section Downloading errors on page 3-20. FS-1800/1800N | FS-3800/3800N 3-19... -
Page 73: From The Memory Card (Compactflash)
01/03/31[1234] 2 shows the new firmware version. : Controller (System) Year/Month/Day [Checksum] : Engine page B-4). If the message display indicates Call service person Dn (n=0, 1, ...), refer to section Downloading errors on page 3-20. FS-1800/1800N | FS-3800/3800N 3-20... -
Page 74: Downloading Operator Panel Message Data
6 Check the display reverts to Ready. Ready 7 Turn power on again. Check the printer gets Ready. If the message display indicates Call service personDn (n=0, 1, ...), refer to section Downloading error on next page. FS-1800/1800N | FS-3800/3800N 3-21... -
Page 75: Downloading Errors
• Data error Call service Obtain the correct data. The data to be downloaded is perosonD3 corrupted. If the corrective action above does not solve the problem, replace engine board (KP-864). See page 5-22. FS-1800/1800N | FS-3800/3800N 3-22... - Page 76 O p e r a t i o n O v e r v i e w Chapter 4...
- Page 77 (3) Drum unit and developer ......................4-25 4-3-2 Operation of circuit boards ...................... 4-26 (1) Main board ..........................4-26 Main board KP-777 for FS-1800/1800N models ................4-26 Main board KP-858 for FS-3800/3800N models ................4-27 (2) Engine board ........................... 4-28 Eraser lamp control circuit ......................
-
Page 78: Electrophotographic System
The electrophotographic system of the printer performs a cyclic action made of six steps as follows. Each step is technically explained in the following sections. Drum unit Laser scanner unit Main charging Exposure Drum Cleaning Developer Developing Transfer Fusing Paper feed unit Fuser unit Figure 4-1-1 Electrophotographic cycle FS-1800/1800N | FS-3800/3800N... -
Page 79: Main Charging
4 Waste toner full sensor [board] (KP-766) ! Main charger shield 5 Waste toner full sensor (receiver) @ Grid 6 Cleaning blade # Main charger wire 7 Cleaning roller $ Charger wire cleaner Figure 4-1-2 Components of drum and main charger unit FS-1800/1800N | FS-3800/3800N... -
Page 80: Amorphus-Silicon Drum
The carrier block layer lies between the amorphous silicon layer and the aluminum base cylinder and prevents the backward electron flow, from the base cylinder to the drum’s outer surface, which might give adverse effect (possibly “ghost”) on the print quality. FS-1800/1800N | FS-3800/3800N... -
Page 81: Charging The Drum
Therefore, it must be cleaned periodically from time to time using the method explained in chapter 3, page 3-9. Cleaning the main charger wire B prevents print quality problems such as black streaks. FS-1800/1800N | FS-3800/3800N... -
Page 82: Exposure
Lenses D and diversion mirror E are housed in the laser scanner unit B. These lenses adjust the diameter of the laser beam (670 nm wavelength) so that the laser beam effectively focalizes on the drum A surface. FS-1800/1800N | FS-3800/3800N... -
Page 83: Laser Scanner Unit
Compensates the vertical angle at which the laser beam hits on of the polygon mirror segments. 4 Polygon motor Has six mirror segments around its hexagonal circumference. Each mirror corresponds to one scanned line width on the drum when the laser beam scans on it. FS-1800/1800N | FS-3800/3800N... - Page 84 (below). 0 Pin photo sensor When shone by the sensor mirror above, this pin photo sensor generates a trigger signal. Polygon mirror Laser diode Laser beam Primary f-theta lens Secondary f-theta lens Drum Figure 4-1-7 F-theta lens FS-1800/1800N | FS-3800/3800N...
-
Page 85: Drum Surface Potential
Note that the area to be printed black has the low potential, constituting a “positively exposed” image. Laser beam Exposed surface potential approximately 0 to +20 V Charged surface potential +230–15 V a-Si layer Drum Aluminum base Figure 4-1-8 Drum surface potential FS-1800/1800N | FS-3800/3800N 4-10... -
Page 86: Development
(3) Development Power train Toner container Developer 1 Toner motor 5 DLP B screw 2 Toner sensor 6 Blade 3 Developing roller 7 Magnet 4 DLP A screw Figure 4-1-9 Developer mechanism FS-1800/1800N | FS-3800/3800N 4-11... - Page 87 B is approximately 0.3 mm.) The non-exposed areas of the drum A repel the positively charged toner as these areas maintain the positive charge. The developing roller B is also AC-biased to ensure contrast in yielding by compensating the toner’s attraction and repelling action during development. FS-1800/1800N | FS-3800/3800N 4-12...
- Page 88 Toner container Toner hopper Toner motor Sensable level Toner sensor Diaphragm Toner Developer Figure 4-1-11 Toner sensor FS-1800/1800N | FS-3800/3800N 4-13...
-
Page 89: Transfer
-2.6 kV/-65 µA for thicker paper. On the other hand, the bias current is reduced to -2.1 kV/-65 µA for thin paper. FS-1800/1800N | FS-3800/3800N 4-14... -
Page 90: Fusing
The temperature of the heat roller A is constantly monitored by the engine board using the thermistor and triac. Should the temperature of the heat roller A exceed the predetermined value, the thermal cutout is activated to effectively disconnect the heater lamp C from power. FS-1800/1800N | FS-3800/3800N 4-15... -
Page 91: Fuser Unit Mechanism
4 Exit sensor 0 Heat gear Z36 ^ Heater lamp /Z46 5 Fuser board (KP-756) ! Exit gear Z21 6 Press roller @ Idle gear Z18 /Z28 : FS-1800/1800N : FS-3800/3800N Figure 4-1-14 Fuser unit mechanism FS-1800/1800N | FS-3800/3800N 4-16... -
Page 92: Cleaning
[board] E (See figure 4-1-15 above.) in the similar manner as described on page 4-6. This lowers the electrical conductivity of the drum A surface making the residual charge on the drum A surface escape to the ground. FS-1800/1800N | FS-3800/3800N 4-17... -
Page 93: Paper Feeding System
! Lower registration roller * FD roller 5 Paper cassette @ Transfer roller ( Pinch roller(s) 6 Feed pulley # Drum ) Face-down output tray 7 Retard roller $ Press roller Figure 4-2-1 Paper feeding components FS-1800/1800N | FS-3800/3800N 4-18... -
Page 94: Paper Feed Control
5 Paper full sensor 9 Registration clutch 2 MP tray paper sensor 6 MP tray feed solenoid 0 Face up/down solenoid 3 Registration sensor 7 Middle feed clutch 4 Exit sensor 8 Feed clutch Figure 4-2-2 Paper feed control FS-1800/1800N | FS-3800/3800N 4-19... -
Page 95: Paper Feeding Mechanism
Paper feed unit 1 Main motor 5 Feed roller 2 Registration clutch 6 Lower registration roller 3 Feed clutch 7 Upper registration roller 4 Pickup roller 8 Transfer roller Figure 4-2-3 Drive and paper feed unit FS-1800/1800N | FS-3800/3800N 4-20... -
Page 96: Mp Tray Paper Feed Unit
MP tray paper feed unit To paper feed unit MP tray 9 Middle feed clutch ! MP tray feed roller 0 MP tray feed solenoid @ Middle feed roller Figure 4-2-4 MP tray paper feed unit FS-1800/1800N | FS-3800/3800N 4-21... -
Page 97: Fuser Unit And Face Up/Down Output
Paper from paper feed unit Drive unit Fuser unit # Heat roller % Exit roller & FD roller $ Press roller ^ Exit pulley(s) * Pinch roller(s) Figure 4-2-5 Fuser unit and face up/down output FS-1800/1800N | FS-3800/3800N 4-22... -
Page 98: Electrical Control System
! High voltage unit ‹ Power switch @ Registration sensor (PH701) › Paper size switch fl Thermal cutout # Paper gauge sensor 1 (PH702) fi Thermistor ‡ Network interface card Figure 4-3-1 Circuit boards, sensors and switches FS-1800/1800N | FS-3800/3800N 4-23... -
Page 99: Motors, Solenoids, Clutches And Others
2 Polygon motor 6 MP feed solenoid 0 Heater lamp 3 Cooling fan motor 7 Middle feed clutch ! AC inlet 4 Controller unit fan motor 8 Feed clutch Figure 4-3-2 Motors, solenoids, clutches and others FS-1800/1800N | FS-3800/3800N 4-24... -
Page 100: Drum Unit And Developer
1 Drum board (KP-748) 5 Zener board (KP-768) 2 Waste toner full sensor [board] (KP-766) 6 Toner sensor 3 Waste toner full sensor (receiver) 7 Toner motor 4 Eraser lamp [board] (KP-752) Figure 4-3-3 Drum unit and developer FS-1800/1800N | FS-3800/3800N 4-25... -
Page 101: Operation Of Circuit Boards
4-3-2 Operation of circuit boards (1) Main board Main board KP-777 for FS-1800/1800N models YS01 PVIDEO [7:0], BD, FSYNC, RSTOUTN CSN2, CSN [1:0], System Image OEN0, OEN0, DIMM XLIDATA, SRCCLKN chip WEN0 WEN0 [board] U03-U05 ROMA [4:2] LA [3:2] LA [22:2]... -
Page 102: Main Board Kp-858 For Fs-3800/3800N Models
YC01 Buffer Regulator Regulator Driver INIT, 2nd Optional Engine P1284DIR Interface Board +5 V +5 V +3.3 V +3.3 V YC02 YC03 Regulator Regulator Serial Parallel Interface Interface Figure 4-3-5 Main board KP-858 circuit block diagram FS-1800/1800N | FS-3800/3800N 4-27... -
Page 103: Engine Board
VDFON1*, PDOUT*, TONSCAN 20PTRIG, SBSY* TNEMP* EGIR, VDFON1* Main board MCHON, TRCHON, RTRCHON*, SCLKIN, SOIN TRVSEL1,TRVSEL2, TRVSEL3, High FPCLK, FPDIR TRTCHON, HVCLK1, HVCLK2 voltage FPDATA unit HUNIT*, HANDS* +3.3V1 Figure 4-3-6 Engine board circuit block diagram FS-1800/1800N | FS-3800/3800N 4-28... -
Page 104: Eraser Lamp Control Circuit
Call service personE5. Engine board +24V Eraser lamp cotrol circuit U201 3 Q214 Q215 Drum board ERASE P37/SOT0CLK YC203 R249 ERASEDR ERASER ERDEAD* Q216 P40/SCK0 R251 R252 Eraser lamp [board] Figure 4-3-7 Eraser lamp control circuit FS-1800/1800N | FS-3800/3800N 4-29... -
Page 105: Toner Motor Control Circuit
(U201). Thus, CPU determines the toner motor error and lets Call service person E9 be indicated. Engine board +24V2 Toner motor control circuit 3 Q217 U204 Q218 TMOTON TMOTON R265 YC203 Q220 R266 TMOTDR Toner R267 motor TNMOC TNMOC R268 DZ206 Figure 4-3-8 Toner motor control circuit FS-1800/1800N | FS-3800/3800N 4-30... -
Page 106: Heater Lamp Control Circuit
(U204) HEATON Q204 HEATON QA201A THERM +5V1 (U201) +5V1 HTEMP* P43/PPG3 R233 U205-1 − THDEAD P34/RT04 /HRQ R228 1.3k THERM P50/AN0 +5V1 Thermisor Heater lamp Fuser board Power supply unit Figure 4-3-9 heater lamp control circuit FS-1800/1800N | FS-3800/3800N 4-31... - Page 107 When the thermistor has blown, pin #2 of U205-1 becomes zero which is well lower than the potential at pin #3 of U205-1, the comparator output becomes H, delivering THDEAD at pin #54 of CPU. CPU uses this signal to determine that the thermistor is faulty and displays Call service personE4. FS-1800/1800N | FS-3800/3800N 4-32...
-
Page 108: Sensor Board
Paper gauge gauge position output PH703 sensor 2 (PH703) PH702 approximately Empty PH702 PH703 approximately 1/4 to 1/2 2.25 V approximately 1/2 to 3/4 1.95 V approximately 3/4 to full 3.9 V Figure 4-3-10 Paper gauge sensor(s) FS-1800/1800N | FS-3800/3800N 4-33... -
Page 109: Interlock Circuit
The top cover switch (SW701) serves only the top cover. Top cover Projection Side cover interlock switch (SW703) Sensor board Actuator Projection Top cover/ feed unit Side cover interlock Paper feed unit switch (SW702) Top cover switch Projection (SW701) Figure 4-3-11 Interlock system FS-1800/1800N | FS-3800/3800N 4-34... - Page 110 Top cover open Side cover open Top cover open Feed open Side cover open Feed open Side cover open Feed open Side cover open NOTE: Message display priority is from left to right. Figure 4-3-12 Interlock circuit FS-1800/1800N | FS-3800/3800N 4-35...
-
Page 111: Paper Size Detecting Circuit
The paper size is detected. Paper size switch Paper size dial Cassette Figure 4-3-13 Paper size detecting circuit FS-1800/1800N | FS-3800/3800N 4-36... - Page 112 (Function Off) Convex (Function On) 1.94 V 1.19 V 0.42 V 2.28 V 2.92 V 3.22 V D/A converted output voltage Approximately Note: Toner install mode cancellaton signal (See page 3-14) Figure 4-3-14 Paper size detecting circuit FS-1800/1800N | FS-3800/3800N 4-37...
-
Page 113: Power Supply Unit
ZCROSS Photo- coupler HEATON* Photo- Thermal Triac Triac cutout THERM FDFUL EXITPAP* FDDR Thermistor FUDR +5V1 Face up/down Fuser +24V board solenoid Paper full Exit sensor sensor Figure 4-3-15 Power supply unit circuit block diagram FS-1800/1800N | FS-3800/3800N 4-38... -
Page 114: High Voltage Unit
Transfer roller output positive voltage circuit Driver HVCLK circuit Rectifier circuit PGND Sensor circuit +5V2 MP tray HUNIT* Option MP tray feeder paper sensor sensor HANDS* Paper Figure 4-3-16 High voltage unit circuit block diagram FS-1800/1800N | FS-3800/3800N 4-39... - Page 115 D i s a s s e m b l y Chapter 5...
- Page 116 Chapter 5 Contents 5-1 General instructions ........................5-3 5-1-1 Screw/hardware ......................... 5-3 5-1-2 Before starting disassembly ...................... 5-3 5-2 Disassembly ............................. 5-4 5-2-1 Removing the developer ......................5-4 (1) Removing the developer ......................5-4 5-2-2 Removing the paper feed unit ....................5-6 5-2-3 Removing the main charger unit ....................
-
Page 117: General Instructions
Never attempt to operate the printer with components removed. CAUTION The printer use electrostatic sensitive parts inside (circuit boards, laser scanner unit, etc.). Provide an antistatic (discharging) device, such as a wrist strap, that can effectively discharge your body before touching those components. FS-1800/1800N | FS-3800/3800N... -
Page 118: Disassembly
1. Open the top cover. 2. Remove the toner container. 3. Disconnect the developer connector 1. 4. Remove the developer 2 from the printer while sliding the developer lock lever 3 frontwards. Figure 5-2-1 Removing the developer FS-1800/1800N | FS-3800/3800N... - Page 119 Do not place the developer in a dusty area. If you ship the developer, pack it in the shipping container specifically supplied with the printer. See section Shipping the developer on page 3-13. Also do not touch the developing roller 5. Do not place floppy disks near the developer. FS-1800/1800N | FS-3800/3800N...
-
Page 120: Removing The Paper Feed Unit
5-2-2 Removing the paper feed unit 1. Draw the paper feed unit 1 while pressing the buttons in the direction of arrow A. Figure 5-2-3 Removing the paper feed unit FS-1800/1800N | FS-3800/3800N... -
Page 121: Removing The Main Charger Unit
5-2-3 Removing the main charger unit 1. Pull the main charger unit 1 upwards while pushing main charger release lever 2. Then, pull the main charger unit 1 frontwards. Figure 5-2-4 Removing the main charger unit FS-1800/1800N | FS-3800/3800N... -
Page 122: Removing The Operator Panel And Outer Covers
5-2-4 Removing the operator panel and outer covers (1) Removing the operator panel 1. Open the top cover 1 and MP tray 2. 2. Unlatch two hooks 3. 3. Pull the operator panel 4 towards the front. Figure 5-2-5 Removing the operator panel FS-1800/1800N | FS-3800/3800N... -
Page 123: Removing The Top Cover/Face-Down Output Tray
(2) Removing the top cover/face-down output tray 1. Open the top cover 1. 2. Remove two screws 2. 3. Remove the top cover/face-down output tray 3 while pressing it the direction arrows 4 (backwards). Figure 5-2-6 Removing the top cover/face-down output tray FS-1800/1800N | FS-3800/3800N... -
Page 124: Removing The Right Cover
(3) Removing the right cover 1. Remove the operator panel. See page 5-8. 2. Unlatch the four snaps 1 and three hooks 2 on the chassis. Remove the right cover 3. Figure 5-2-7 Removing the right cover FS-1800/1800N | FS-3800/3800N 5-10... -
Page 125: Removing The Left Cover
(4) Removing the left cover 1. Unlatch the four snaps 1 and three hooks 2 on the chassis. Remove the left cover 3. Figure 5-2-8 Removing the left cover FS-1800/1800N | FS-3800/3800N 5-11... -
Page 126: Removing The Drum Unit
1. Remove the paper cassette and the paper feed unit. See page 5-6. 2. Remove the developer unit. See page 5-4. 3. Remove the waste toner bottle. See page 3-7. 4. Remove the drum unit 1 while pressing the drum lock 2. Figure 5-2-9 Removing the drum unit FS-1800/1800N | FS-3800/3800N 5-12... -
Page 127: Removing The Pickup Roller And Feed Roller
3. Detach the release holder 2 by sliding it while pressing the projections A. 4. Remove the feed roller assembly 3 while pressing it in the direction of arrow B. Figure 5-2-10 Removing the feed roller assembly FS-1800/1800N | FS-3800/3800N 5-13... - Page 128 Figure 5-2-11 Remove the pickup roller and feed roller Pickup gear Z32S 8 is installed of the inside the one way clutch 9. When CAUTION refitting pickup gear Z32S 8, face the one way clutch 9 face to the feed bracket cover 4. FS-1800/1800N | FS-3800/3800N 5-14...
-
Page 129: Removing The Mp Paper Feed Unit
1. Remove the paper feed unit. See page 5-6. 2. Remove the developer. See page 5-4. 3. Remove three connectors 1. 4. Remove the engine relay board 2 while unlatching the latches 3. Figure 5-2-12 Removing the engine relay board FS-1800/1800N | FS-3800/3800N 5-15... - Page 130 5. Pull the MP tray paper feed unit 4 out while unlatching two latches 5 off of points A. Figure 5-2-13 Removing the MP paper feed unit FS-1800/1800N | FS-3800/3800N 5-16...
-
Page 131: Removing The Transfer Roller
1 can significantly deteriorate the print quality (white spots, etc.). 1. Draw the feed unit from the printer. 2. Remove the paper chute 2. 3. Remove the transfer roller 1. Figure 5-2-14 Removing the transfer roller FS-1800/1800N | FS-3800/3800N 5-17... -
Page 132: Removing The Controller Unit And The Principal Circuit Boards
3. Remove the four connectors 1 from the controller unit 2 left side. CAUTION Draw the connector straight to remove. If you draw the connector while it is slanted, the receptacle may be damaged. Receptacle Connector Figure 5-2-15 Removing the connectors from controller unit left side FS-1800/1800N | FS-3800/3800N 5-18... - Page 133 4. Remove the two connectors 3 from the controller unit 2 right side. Receptacle Connector Figure 5-2-16 Removing the connectors from controller unit right side FS-1800/1800N | FS-3800/3800N 5-19...
- Page 134 5. Remove three screws 4. 6. Remove frame unit 5 while releasing the projections from the catches on the frame unit 5. Figure 5-2-17 Removing the controller unit form the frame unit FS-1800/1800N | FS-3800/3800N 5-20...
- Page 135 7. Remove two screws 6. 8. Remove the main board 7. 9. Remove four screws 8. 10. Remove the controller unit lid 9 from the controller unit 2. Figure 5-2-18 Opening the controller unit FS-1800/1800N | FS-3800/3800N 5-21...
-
Page 136: Removing The Engine Board And Power Supply Unit
1. Remove and open the controller unit. See pages 5-18. 2. Remove two connectors 1 from the engine board 2. 3. Remove five screws 3. 4. Remove the engine board 2. Figure 5-2-19 Removing the engine board FS-1800/1800N | FS-3800/3800N 5-22... - Page 137 5. Remove the power switch rod 4. 6. Remove three screws 5, grounding wire terminal 6, and lock washer 7. 7. Remove the power supply unit 8 from the power supply unit cover 9. Figure 5-2-20 Removing the power supply unit FS-1800/1800N | FS-3800/3800N 5-23...
-
Page 138: Removing The Main Board
2. Remove the memory card that may be inserted in the memory card slot 1 at the left side of the printer. 3. Remove two screws 2. 4. Pull the main board 3 all the way out of the printer. Figure 5-2-21 Removing the main board FS-1800/1800N | FS-3800/3800N 5-24... -
Page 139: Removing The High Voltage Unit
1. Remove the top cover and left covers. See pages 5-9 and 5-11. 2. Remove the high voltage unit 1 while unlatching two latches 2. 3. Remove two connectors 3, from the high voltage unit. 1. Figure 5-2-22 Removing the high voltage unit FS-1800/1800N | FS-3800/3800N 5-25... -
Page 140: Removing The Sensor Board
2. Remove the high voltage unit. See previous page. 3. Remove two connectors 1. 4. Remove the high voltage unit cover 2. 5. Remove the sensor board 3 while unlatching two latches A. Connector Receptacle Connector Receptacle Figure 5-2-23 Removing the sensor board FS-1800/1800N | FS-3800/3800N 5-26... -
Page 141: Removing The Drive Unit And Main Motor
5. Remove three connectors 2 of the drive unit 3. 6. Remove five screws 4 and the ground wire terminal 5. 7. Remove the drive unit 3 from the frame unit. Connector Receptacle Connector Receptacle Figure 5-2-24 Removing drive unit FS-1800/1800N | FS-3800/3800N 5-27... - Page 142 8. Remove four screws 6. 9. Remove the main motor 7 from the drive unit 3. Figure 5-2-25 Removing the main motor FS-1800/1800N | FS-3800/3800N 5-28...
-
Page 143: Removing And Splitting The Fuser Unit
The fuser unit is hot after the printer was running. Wait until it cools down. 1. Remove three connectors 1. 2. Remove two screws 2. 3. Remove the fuser unit 3 from the frame unit. Figure 5-2-26 Removing the fuser unit FS-1800/1800N | FS-3800/3800N 5-29... - Page 144 4. Remove the rear cover 4 and the spring 5. 5. Remove the solenoid actuator 6. 6. Remove the change guide 7. 7. Remove one connector 8. Figure 5-2-27 Removing the rear cover and change guide FS-1800/1800N | FS-3800/3800N 5-30...
- Page 145 8. Remove two screws 9. 9. Split the fuser unit 0. Figure 5-2-28 Splitting the fuser unit FS-1800/1800N | FS-3800/3800N 5-31...
-
Page 146: Removing The Separators
2. Remove the upper exit guide 1 while unlatching three latches 2. 3. Remove the exit pulley 3. 4. Hold the separator 4 upright and remove the separator 4 and the separator spring 5. Step 1 Step 2 Figure 5-2-29 Removing the separators FS-1800/1800N | FS-3800/3800N 5-32... -
Page 147: Removing The Heater Lamp
2. Remove the lamp support 1. 3. Remove one screw 2 then remove the lamp holder 3. 4. Remove the heater lamp 4 from the heat roller 5. Gear Wattage marking Figure 5-2-30 Removing the heater lamp FS-1800/1800N | FS-3800/3800N 5-33... -
Page 148: Removing The Heat Roller
4. Pull up both heat R bush 1 and heat L bush 2 at the same time. 3, heat R bush 1, and heat L bush 2 from the heat roller 4. 5. Remove heat gear Z36 /Z26 : FS-1800/1800N : FS-3800/3800N Figure 5-2-31 Removing the heat roller FS-1800/1800N | FS-3800/3800N 5-34... -
Page 149: Removing The Thermistor And The Thermal Cutout
6. Remove two screws 3 and then remove cord plate 4. 7. Remove one screw 5 and the heater wire terminal 6. 8. Remove the thermal cutout 7. Figure 5-2-32 Removing the thermistor and thermal cutout FS-1800/1800N | FS-3800/3800N 5-35... -
Page 150: Removing The Press Roller
The press roller is extremely hot immediately after the printer was running. Allow substantial period of time until it cools down. 1. Remove and split the fuser unit. See page 5-29. 2. Remove the press roller 1 from the fuser unit 2. Figure 5-2-33 Removing the press roller FS-1800/1800N | FS-3800/3800N 5-36... -
Page 151: Removing The Laser Scanner Unit
4. Remove the laser scanner unit 3 from the frame unit. Order of fixing the laser scanner unit CAUTION When refitting the laser scanner unit, fix the four screws in the order indicated above. Figure 5-2-34 Removing the laser scanner unit FS-1800/1800N | FS-3800/3800N 5-37... - Page 152 T r o u b l e s h o o t i n g Chapter 6...
- Page 153 Chapter 6 Contents 6-1 Troubleshooting ..........................6-4 6-1-1 General error handling ....................... 6-4 (1) Maintenance messages ......................6-4 (2) Error messages ......................... 6-7 6-1-2 Diagnostic (Service error messages) ..................6-11 (1) A0 Zero cross signal error ....................6-12 (2) A2 Abnomal high temperature error ..................6-12 (3) B2 Option paper feeder PF-60 (Top) paper feed motor error ..........
- Page 154 6-1-4 Circuit board terminal voltages ....................6-30 (1) Engine board ........................... 6-30 6-1-5 Assignment of circuit board connector pins ................6-36 6-1-6 Print quality problems ......................6-37 (1) Completely blank printout ......................6-38 (2) All-black printout ........................6-39 (3) Dropouts ..........................6-40 (4) Black dots ..........................
-
Page 155: Troubleshooting
When the printer senses that the face-down output tray is empty again, it will continue printing into the face-down output tray. : Alarm buzzer sounds when an error occurs. Press the CANCEL key to stop the alarm buzzer. FS-1800/1800N | FS-3800/3800N... - Page 156 A failure has occurred with the (option) network interface card. Error Check the (option) network interface card installed on the printer. : Alarm buzzer sounds when an error occurs. Press the CANCEL key to stop the alarm buzzer. FS-1800/1800N | FS-3800/3800N...
- Page 157 Print a status page to see how much user memory is left, and try deleting unnecessary fonts and macros. : Alarm buzzer sounds when an error occurs. Press the CANCEL key to stop the alarm buzzer. FS-1800/1800N | FS-3800/3800N...
-
Page 158: Error Messages
05 : The specified file does not exist in the hard disk (Microdrive). 06 : There is no memory available to the hard disk (Microdrive) system. Increase the available memory. : Alarm buzzer sounds when an error occurs. Press the CANCEL key to stop the alarm buzzer. FS-1800/1800N | FS-3800/3800N... - Page 159 Note: We recommend that you follow the reading procedure from the beginning to ensure correct reading of the memory card. : Alarm buzzer sounds when an error occurs. Press the CANCEL key to stop the alarm buzzer. FS-1800/1800N | FS-3800/3800N...
- Page 160 If Auto Continue is set to On, printing will be automatically resumed after a preset period of time. Refer to printer’s User’s Manual. : Alarm buzzer sounds when an error occurs. Press the CANCEL key to stop the alarm buzzer. FS-1800/1800N | FS-3800/3800N...
- Page 161 The storage area for the VMB is full. Purge accumulated VMB data Virtual mail by printing or deleting them. box fail : Alarm buzzer sounds when an error occurs. Press the CANCEL key to stop the alarm buzzer. FS-1800/1800N | FS-3800/3800N 6-10...
-
Page 162: Diagnostic (Service Error Messages)
Follow the appropriate instructions provided in the following section. Call service Controller error (n=0 to 3). Follow the appropriate instructions provided personFn in the following sections. Call service Toner refreshing mode error. Follow the appropriate instruction provided person99 in the following sections. FS-1800/1800N | FS-3800/3800N 6-11... -
Page 163: A0 Zero Cross Signal Error
If the problem is not solved by this flow chart replace, the More following items: than 3 V DC over 3 Replace engine board seconds? Engine board (KP-864) (KP-864). See page 5-22. Power supply unit Fuser unit FS-1800/1800N | FS-3800/3800N 6-12... -
Page 164: B2 Option Paper Feeder Pf-60 (Top) Paper Feed Motor Error
(KP-864). 864). See page 5-22. • Defective harness (S02400) between engine paper feeder. Replace harness (S02400). board and option unit interface connector. • Defective paper feeder PF-60. Refer to option paper feeder PF-60’s Service Manual. FS-1800/1800N | FS-3800/3800N 6-13... -
Page 165: C0 Option Paper Feeder Pf-60 Communication Error
• Defective harness (S02400) between engine Replace harness (S02400). board and option unit interface connector. • Improper connector insertion. Remedy. • Defective option duplexer DU-60. Refer to option duplexer DU-60’s Service Manual. FS-1800/1800N | FS-3800/3800N 6-14... -
Page 166: C4 Option Sorter So-60 Communication Error
• Improper connector insertion. again. • Defective main board (KP-777 /KP-858 Replace main board (KP- /KP-858 ). See page 5-22. • Defective option sorter SO-60. Refer to option sorter SO- 60’s Service Manual. : FS-1800/1800N : FS-3800/3800N FS-1800/1800N | FS-3800/3800N 6-15... -
Page 167: Ce Option Bulk Paper Feeder Pf-8E Motor Error
(KP-864) and main board (KP-777 /KP- connections. • Overrun in the engine system, deactivating Replace the engine board the program flash ROM (U202) on the (KP-864). See page 5-22. engine board (KP-864). : FS-1800/1800N : FS-3800/3800N FS-1800/1800N | FS-3800/3800N 6-16... -
Page 168: E1 Main Motor Error
Harness (S02401) between engine Replace Main motor. relay board (KP-760) and engine See page 5-27. board (KP-864) Drive unit (See page 5-27.) Engine board (KP-864) and main motor (replace at the same time) FS-1800/1800N | FS-3800/3800N 6-17... -
Page 169: E2 Laser Scanner Unit (Polygon Motor) Error
Replace engine board try to replace below items. : [FS-1800/1800N] (KP-864). See page 5-22. 2,298 Hz Harness (S02404) scanner unit [FS-3800/3800N] and engine board (KP-864) 2,314.93 Hz Engine board (KP-864) and scanner unit (replace at the same time) FS-1800/1800N | FS-3800/3800N 6-18... -
Page 170: E3 Laser Scanner Unit (Pin Photo Diode Sensor) Error
(KP-742) goes high and this flow chart replace the then low? following items: Replace engine board Harness (S02404) scanner unit (KP-864). See page 5-22. and engine board (KP-864) Engine board (KP-864) and scanner unit (replace at the same time) FS-1800/1800N | FS-3800/3800N 6-19... -
Page 171: E4 Fuser Unit Error
• Defective harness between fuser unit and on for longer than seconds. power supply unit. *1: FS-1800/1800N *2: FS-3800/3800N Call service personE4:0123456 CAUTION: Fuser unit is fed directly by AC power from primary circuit on power Turn power switch off. -
Page 172: E5 Eraser Lamp Error
If the problem is not solved by this flow chart replace the Remedy pins or replace following items: sensor board (KP-754). Turn power switch on See page 5-26. Engine board (KP864) and print starus page. Sensor board (KP754) Drum unit FS-1800/1800N | FS-3800/3800N 6-21... -
Page 173: E9 Toner Motor Error
End. NOTE: If the problem is not solved by this flow chart, replace the following items: High voltage unit Harness (S02416) [Between developer and high voltage unit] Harness (S02416) [Between engine board and high voltage unit] FS-1800/1800N | FS-3800/3800N 6-22... -
Page 174: Ed Flash Rom Error
R e i n s e r t t h e s y s t e m KP-689 ] insertion to system DIMM slot DIMM [board KP-710 on the main board (KP-777 /KP-858 KP-689 : FS-1800/1800N : FS-3800/3800N FS-1800/1800N | FS-3800/3800N 6-23... -
Page 175: F2 Main Or Expanded Memory Error
(24) 99 Toner refreshing mode error Meaning Suggested causes Corrective action • Defective high voltage unit. Toner refreshing mode Replace high voltage unit. error. See page 5-25. Refer to section Toner refreshing mode on page 3- FS-1800/1800N | FS-3800/3800N 6-24... -
Page 176: Other Problems
Measure logic level #11 pin of YC701 on sensor board (KP-754). When Top cover close scurely, does pin #11 goes low to high? Replace sensor board (KP-754). See page 5-26. Replace engine board (KP-864). See page 5-22. FS-1800/1800N | FS-3800/3800N 6-25... -
Page 177: False "Side Cover Open
Check waste sensor board (KP-574). of connector (YC702) on toner bottle is the sensor board (KP-574). displayed. • Defective engine board (KP-864). Replace engine board (KP- Although waste toner bottle is not installed, 864). Ready is displayed. FS-1800/1800N | FS-3800/3800N 6-26... -
Page 178: Defective Paper Jam Detecting
• Defective paper size switch. False paper size Replace paper size switch. • Defective sensor board (KP-574). message display. Replace sensor board (KP- 574). See page 5-26. • Defective engine board (KP-864). Replace engine board (KP- 864). See page 5-22. FS-1800/1800N | FS-3800/3800N 6-27... -
Page 179: Defective Message Displaying (Lcd)
• No electricity at the power outlet. Measure the AC power voltage at the outlet. • Defective power supply unit. Replace the power supply unit. See page 5-22. : FS-1800/1800N : FS-3800/3800N FS-1800/1800N | FS-3800/3800N 6-28... -
Page 180: Defective Face Up/Down Solenoid Operating
# 2 o f c o n n e c t o r (YC831). If none, replace the face up/down solenoid and fuser board (KP-756) at the same time. Or replace fuser unit. See page 5-29. FS-1800/1800N | FS-3800/3800N 6-29... -
Page 181: Circuit Board Terminal Voltages
Power supply for LCD controller board B13 FPCLK 3.3 V/0 V DC (Pulse) Communication data clock signal with LCD controller board A14 GND Signal ground B14 FPDATA I/O 3.3 V/0 V DC (Pulse) Communication data signal with LCD controller board FS-1800/1800N | FS-3800/3800N 6-30... - Page 182 Signal ground +24V2 24 V DC Power supply SLEEP* 0 V/5 V DC Energy saving mode, On/Off ZCROSS I 5 V/0 V DC (pulse) Zero cross signal HEATON* O 0 V/5 V DC Heater lamp, On/Off FS-1800/1800N | FS-3800/3800N 6-31...
- Page 183 5 V/0 V DC (pulse) EEPROM (Drum board) clock signal REGPAP* I 0 V/5 V DC Registration sensor, Paper Detected/Not detected PVOLAN1 0 V/5 V DC Paper gauge sensor 1, On/Off TCOVOP 0 V/5 V DC Top cover switch, On/Off FS-1800/1800N | FS-3800/3800N 6-32...
- Page 184 Power supply for high voltage board YC205 OP24V 24 V DC Power supply for option unit Signal ground OP5V 5 V DC Power supply for option unit Reserved OPSCLK - 5 V/0 V DC (Pulse) Serial communication clock signal FS-1800/1800N | FS-3800/3800N 6-33...
- Page 185 0 V/5 V DC (Pulse) Laser power data sample and hold control signal Data Sampling/Not sampling POWCONT O 0 V/5 V DC Laser power level control signal, High/Low LASER* 0 V/5 V DC Laser power output signal, Enable/Disable FS-1800/1800N | FS-3800/3800N 6-34...
- Page 186 +5V1 5 V DC Power supply for engine relay board WETCK1 O 0 V/5 V DC (Pulse) Temperature/humidity sensor drive clock signal 1 WETCK2 O 0 V/5 V DC (Pulse) Temperature/humidity sensor drive clock signal 2 FS-1800/1800N | FS-3800/3800N 6-35...
-
Page 187: Assignment Of Circuit Board Connector Pins
High voltage unit [Parts side] [Solder side] High voltage unit Engine board YC204 YC203 Engine board Fuser board Fuser board YC833 YC831 Power supply unit YC902 Power supply unit Figure 6-1-1 Assignment of circuit board connector pins FS-1800/1800N | FS-3800/3800N 6-36... -
Page 188: Print Quality Problems
See page 6-42. See page 6-44. (9) Dirt on the top (10) Undulated printing edge or back of at the left edge (scanning the paper start position) See page 6-45. See page 6-46. Square drawn a line. FS-1800/1800N | FS-3800/3800N 6-37... -
Page 189: Completely Blank Printout
Replace the high voltage unit if high voltage potential is not available on the board. See page 5-25. Check the laser scanner unit. • The scanner components within the scanner may be disordered. Replace the laser scanner unit. See page 5-37. FS-1800/1800N | FS-3800/3800N 6-38... -
Page 190: All-Black Printout
• Make sure the bias from the high voltage unit correctly arrives at the drum unit. Check high voltage potential at the high voltage unit. • Check the high voltage output on the high voltage unit. Replace the high voltage unit if high voltage potential is not available on the board. FS-1800/1800N | FS-3800/3800N 6-39... -
Page 191: Dropouts
• Check the transfer bias output on the high voltage unit. This requires removal of the left cover and the test equipment. Replace the high voltage unit if high voltage potential is not available on the board. See page 5-25. FS-1800/1800N | FS-3800/3800N 6-40... -
Page 192: Black Dots
• The drum axle in the drum unit and its counter part, the grounding tab in the printer, must be in a good contact. If necessary, apply a small amount of electro-conductive grease onto the tab. The drum may be defective. • Replace the drum unit. See page 5-12. FS-1800/1800N | FS-3800/3800N 6-41... -
Page 193: Black Vertical Streaks
• A streak of toner remaining on drum after printing means that the cleaning blade (in the drum unit ) is not working properly. Replace the drum unit. See page 5-12. Defective magnet roller (in the developer). • Replace the developer. See page 5-4. FS-1800/1800N | FS-3800/3800N 6-42... -
Page 194: Unsharpness
• The EcoPrint mode can provides faint, unsharp printing because it acts to conserve toner for draft printing purpose. For normal printing, turn the EcoPrint mode off by using the operator panel. For details refer to the printer’s User’s Manual. FS-1800/1800N | FS-3800/3800N 6-43... -
Page 195: Gray Background
• If a developer which is known to work normally is available for check, replace the current developer in the printer with the normal one. If the symptom disappears, replace the developer with a new one. See page 5-4. FS-1800/1800N | FS-3800/3800N 6-44... -
Page 196: Dirt On The Top Edge Or Back Of The Paper
Clean these areas and parts to remove toner. Check the transfer roller. • If the transfer roller is contaminated with toner, clean the transfer roller using a vacuum cleaner; or by continuously printing a low-density page until the symptom has faded away. FS-1800/1800N | FS-3800/3800N 6-45... -
Page 197: Undulated Printing At The Left Edge (Scanning Start Position)
• Defective polygon motor in the laser scanner unit. Replace the laser scanner unit. See page 5-37. Replace the engine board. • Defective engine controller circuit in the engine board (KP-864). Replace the engine board (KP- 864). See page 5-22. FS-1800/1800N | FS-3800/3800N 6-46... -
Page 198: Repetitive Defects Gauge
First occurrence of defect [39 mm] Developing roller (Developer) [50 mm] Upper and Lower registration roller [62 mm] Transfer roller [72 mm] Heat roller (Fuser unit) [FS-1800/1800N] [79 mm] Press roller (Fuser unit) [94 mm] Heat roller (Fuser unit) [FS-1800/1800N] Drum (Drum unit) -
Page 199: Correcting A Paper Jam
1. While pulling the paper feed unit release lever 1, pull out the paper feed unit 2. Figure 6-1-3 Drawing the paper feed unit 2. Open the rear cover 3 and remove the jammed paper as shown in the figure. Figure 6-1-4 Jam in the rear cover FS-1800/1800N | FS-3800/3800N 6-48... -
Page 200: Jam Inside The Printer
2. If paper is jammed before the registration roller, remove it as shown figure 6-1-5. If paper jammed under the registration roller, remove it as shown in figure 6-1-6. Figure 6-1-5 Jam in the printer (1) Figure 6-1-6 Jam in the printer (2) FS-1800/1800N | FS-3800/3800N 6-49... - Page 201 Appendix A...
- Page 202 Appendix A Contents Timing charts ............................A-4 Cassette feeding, A4 size, face-down tray output ................A-4 Cassette feeding, Letter size, face-down tray output ................A-5 Cassette feeding, Legal size, face-down tray output ................A-6 MP tray feeding, Letter size, face-down tray output ................A-7 MP tray feeding, Legal size, face-down tray output ................
- Page 203 Power supply unit (120 V AC model, Sanken®) ................A-42 Power supply unit (220 - 240 V AC model, Sanken®) ..............A-43 Power supply unit (220 - 240 V AC model, Sharp®) ................. A-44...
-
Page 204: Timing Charts
Timing charts Cassette feeding, A4 size, face-down tray output FS-1800/1800N | FS-3800/3800N... - Page 205 Cassette feeding, Letter size, face-down tray output FS-1800/1800N | FS-3800/3800N...
- Page 206 Cassette feeding, Legal size, face-down tray output FS-1800/1800N | FS-3800/3800N...
- Page 207 MP tray feeding, Letter size, face-down tray output FS-1800/1800N | FS-3800/3800N...
- Page 208 MP tray feeding, Legal size, face-down tray output FS-1800/1800N | FS-3800/3800N...
-
Page 209: Wiring Diagram
Wiring diagram FS-1800/1800N | FS-3800/3800N... - Page 210 Schematic diagrams Engine board 1/8 FS-1800/1800N | FS-3800/3800N A-10...
- Page 211 Engine board 2/8 FS-1800/1800N | FS-3800/3800N A-11...
- Page 212 Engine board 3/8 FS-1800/1800N | FS-3800/3800N A-12...
- Page 213 Engine board 4/8 FS-1800/1800N | FS-3800/3800N A-13...
- Page 214 Engine board 5/8 FS-1800/1800N | FS-3800/3800N A-14...
- Page 215 Engine board 6/8 FS-1800/1800N | FS-3800/3800N A-15...
- Page 216 Engine board 7/8 FS-1800/1800N | FS-3800/3800N A-16...
- Page 217 Engine board 8/8 FS-1800/1800N | FS-3800/3800N A-17...
- Page 218 Main board (TK-777) 1/12 FS-1800/1800N | FS-3800/3800N A-18...
- Page 219 Main board (TK-777) 2/12 FS-1800/1800N | FS-3800/3800N A-19...
- Page 220 Main board (TK-777) 3/12 FS-1800/1800N | FS-3800/3800N A-20...
- Page 221 Main board (TK-777) 4/12 FS-1800/1800N | FS-3800/3800N A-21...
- Page 222 Main board (TK-777) 5/12 FS-1800/1800N | FS-3800/3800N A-22...
- Page 223 Main board (TK-777) 6/12 FS-1800/1800N | FS-3800/3800N A-23...
- Page 224 Main board (TK-777) 7/12 FS-1800/1800N | FS-3800/3800N A-24...
- Page 225 Main board (TK-777) 8/12 FS-1800/1800N | FS-3800/3800N A-25...
- Page 226 Main board (TK-777) 9/12 FS-1800/1800N | FS-3800/3800N A-26...
- Page 227 Main board (TK-777) 10/12 FS-1800/1800N | FS-3800/3800N A-27...
- Page 228 Main board (TK-777) 11/12 FS-1800/1800N | FS-3800/3800N A-28...
- Page 229 Main board (TK-777) 12/12 FS-1800/1800N | FS-3800/3800N A-29...
- Page 230 Main board (TK-858) 1/12 FS-1800/1800N | FS-3800/3800N A-30...
- Page 231 Main board (TK-858) 2/12 FS-1800/1800N | FS-3800/3800N A-31...
- Page 232 Main board (TK-858) 3/12 FS-1800/1800N | FS-3800/3800N A-32...
- Page 233 Main board (TK-858) 4/12 FS-1800/1800N | FS-3800/3800N A-33...
- Page 234 Main board (TK-858) 5/12 FS-1800/1800N | FS-3800/3800N A-34...
- Page 235 Main board (TK-858) 6/12 FS-1800/1800N | FS-3800/3800N A-35...
- Page 236 Main board (TK-858) 7/12 FS-1800/1800N | FS-3800/3800N A-36...
- Page 237 Main board (TK-858) 8/12 FS-1800/1800N | FS-3800/3800N A-37...
- Page 238 Main board (TK-858) 9/12 FS-1800/1800N | FS-3800/3800N A-38...
- Page 239 Main board (TK-858) 10/12 FS-1800/1800N | FS-3800/3800N A-39...
- Page 240 Main board (TK-858) 11/12 FS-1800/1800N | FS-3800/3800N A-40...
- Page 241 Main board (TK-858) 12/12 FS-1800/1800N | FS-3800/3800N A-41...
- Page 242 Power supply unit (120 V AC model, Sanken®) FS-1800/1800N | FS-3800/3800N A-42...
- Page 243 Power supply unit (220 - 240 V AC model, Sanken®) FS-1800/1800N | FS-3800/3800N A-43...
- Page 244 Power supply unit (220 - 240 V AC model, Sharp®) FS-1800/1800N | FS-3800/3800N A-44...
- Page 245 S t a t u s P a g e Appendix B...
- Page 246 Appendix B Contents Status page ............................. B-3 Printing the service status page ......................B-3 Service information on the status page ....................B-4 Details of service information ......................B-4...
-
Page 247: Status Page
2. Ensure that the printer is ready to print. 3. At the DOS prompt, type: echo !R! STAT 1; EXIT; >lpt1: The service status page is printed. (If you omit ‘1,’ a user status page is printed.) FS-1800/1800N | FS-3800/3800N... - Page 248 Details of service information Controller firmware version* Released date of the firmware Software version: 68.01 Released: 30/Aug/2000 Service information [0104/0330][C1*][12][01/01] Total page 9690 /t/P00/S00/F00/N00/D10:DM0301.DAN/RS2/DK-60/6C/01/[0003-0003]/BF-AD/AF.H/ 0/20/25/60 /0096/0026/1061/0811/ /AAADCFE/AAADCFE/AAADCFE/AAADCFE/AAADCFE/AAADCFE/AAADCFE/AAADCFE/ /20A11080/1020B200/20001080/81000000/00000000/10101010/10101010/ SPD1:0203040508090A0B0C0D0F101112131415161718191A1B1C1D1E1F202122235E SPD2:0203040508090A0B0C0D0F101112131415161718191A1B1C1D1E1F202122235E /8088808880808000/8088808880808000/8088808880808000/8088808880808000/ DN:SPL9200007 SN:SPL9200010 Service information FS-1800/1800N | FS-3800/3800N...
- Page 249 Parallel interface mode communication, 1: Error with bidirectional communication bit 6= 0: No ECP communication, 1: ECP communication had occurred, at least one bit 0 to 5= History of printer parallel port directional communication. 05= Nibble (High-speed), 07= ECP FS-1800/1800N | FS-3800/3800N...
- Page 250 Sorter, bit4 to 15= Reserved. & /BF-AD Threshold level for “MK replace/ (Shown only with MICR model) warning” message display * /AF.H Average print coverage (total) Two digits for integer part; one digit for decimal; unit is in percent FS-1800/1800N | FS-3800/3800N...
- Page 251 “0x00”. ) /10101010 ‡ SPD1:02030405... SPD (slot1) ° SPD2:02030405... SPD (slot2) · /8088808880808000 Engine Parameter information Hexadecimal, 32 bytes (64 digits) /..‚ DN:SPL92000007 Serial number for the drum Œ SN:SPL92000010 Serial number for the printer FS-1800/1800N | FS-3800/3800N...
- Page 252 Appendix C...
- Page 253 Appendix C Contents Parallel interface ............................ C-3 Selecting the parallel interface mode ....................C-3 Parallel interface pin assignment ......................C-4 Parallel interface signals ........................C-5 Serial interface ............................C-6 RS-232C interface voltage levels ......................C-6 Connector configurations ........................C-6 Protocol ............................C-7 RS-232C - For computers with a DB-9 connector ................
-
Page 254: Parallel Interface
To set the parallel interface mode... Type at the DOS prompt... Normal echo !R! FPRO O0, 0; EXIT;>lpt1: High-speed echo !R! FPRO O0, 1; EXIT;>lpt1: Nibble* echo !R! FPRO O0, 5; EXIT;>lpt1: Automatic echo !R! FPRO O0, 70; EXIT;>lpt1: *: Factory-set default. FS-1800/N | FS-3800/N... -
Page 255: Parallel Interface Pin Assignment
Not defined Pull-up (1 kΩ) Peri-logic H (VCC) nSelect In (SELECTI*) Maximum rated current for pin 18 is 500 mA (fused). Pin 18 can not use pin 12 (+5V) of serial connector RS-232C at the same time. FS-1800/N | FS-3800/N... -
Page 256: Parallel Interface Signals
Power Ready (Pin 35) This signal is used in some versions of the Centronics interface to Select In [NSelectIn] enable the computer to force the printer on-line. In high-speed mode, (Pin 36) it is used as an interrupt. FS-1800/N | FS-3800/N... -
Page 257: Serial Interface
+5V (Pin 12) Power supply for barcode reader. (Maximum 500 mA) DTR (Pin 20) This output is used as a buffer nearly-full handshake line. It is held high (above 3 V) when the buffer can accept more data. FS-1800/N | FS-3800/N... -
Page 258: Protocol
User’s Manual. RS-232C - For computers with a DB-9 connector Printer Computer Serial interface serial port (DB-9) connector (DB-25) RS-232C - For computers with a DB-25 connector Printer Computer serial interface serial port (DB-25) connector (DB-25) FS-1800/N | FS-3800/N...
Need help?
Do you have a question about the FS-1800 and is the answer not in the manual?
Questions and answers