
Related Manuals for Dahua DH-IPC-HDBW11A0EN-W


Summary of Contents for Dahua DH-IPC-HDBW11A0EN-W
- Page 1 IR Megapixel Wi-Fi Fixed MiniDome Camera DH-IPC-HDBW11A0EN-W, DH-IPC-HDBW13A0EN-W Quick Start Guide Version 1.0.1 Dahua Technology USA Inc.
-
Page 2: Table Of Contents
Table of Contents Welcome .......................... 1 Important Safeguards and Warnings ..............1 Electrical safety ....................1 Environmental Precautions ................. 2 Operation and Daily Maintenance ..............3 Warnings ......................3 FCC Information ....................4 ... -
Page 3: Welcome
This manual offers reference material and general information about the basic operation, maintenance, and troubleshooting of the Dahua Multi-Sensor Panoramic Camera. Read, follow, and retain the following safety instructions. Heed all warning on the unit and in the operating instructions before operating the unit. -
Page 4: Environmental Precautions
Ensure a service technician uses replacement parts specified by the manufacturer, or that have the same characteristics as the original parts. Unauthorized parts may cause fire, electrical shock, or other hazards. Dahua is not liable for any damage or harm caused by unauthorized modifications or repairs. -
Page 5: Operation And Daily Maintenance
Dahua recommends the use of a thunder-proof device in concert with the unit. Do not touch the CCD or the CMOS optic sensor. Use a blower to clean dust or dirt on the lens surface. -
Page 6: Fcc Information
1.3 Legal Notices Copyright This user guide is ©2016, Dahua Technology Company, LTD. This user guide is the intellectual property of Dahua Technology Company, LTD and is protected by copyright. All rights reserved. Trademarks All hardware and software product names used in this document are likely to be registered trademarks and must be treated accordingly. -
Page 7: Unpacking
2 Unpacking This equipment should be unpacked and handled with care. If an item appears to have sustained damage during shipping, notify the shipper immediately. Verify that all the parts listed below are included. If an item is missing, contact customer support or your local representative. -
Page 8: Camera Configuration
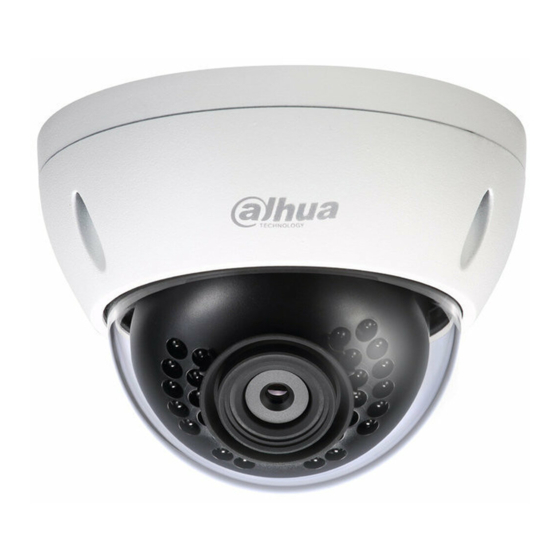
3 Camera Configuration Use the following sections to identify the camera components and status indicators. 3.1 Camera and Cables The following image depicts the main components of the camera: Figure 3-1 Description Dome cover Dome enclosure Network Port Power Port... -
Page 9: Camera Control And Indicators
3.2 Camera Control and Indicators Figure 3-2 Description Wireless Antenna Waterproof Ring Reset/ Wi-Fi Protected Setup (WPS) Button Micro SD Card Slot Indicator Light 1 Indicator Light 2 3.3 Status Indicators Indicator State Status Red Light Camera booting. Slow Blinking Network connection failure or network disconnected. -
Page 10: Framework And Dimensions
3.4 Framework and Dimensions The following figures show the dimensions of the device in mm [in.]. These images are intended as a reference only. Figure 3-3... -
Page 11: Wi-Fi Configuration
4 Wi-Fi Configuration Dahua offers the Easy4IP mobile application to assist with identifying a Wi-Fi enabled camera and associating the camera with a security system network. 1. Supply power to the camera. 2. Connect your smart phone to the security system’s Wi-Fi network. - Page 12 7. Type a name for the camera then scan the QR code on bottom of the camera. 8. Type the Wi-Fi network password and tap Next. The app accesses the Wi-Fi network and adds the camera. This process can take up to 60 seconds. 9.
-
Page 13: Device Installation
5 Device Installation This section details installing the camera to a wall or ceiling. Note that the wall or ceiling must be capable of supporting a minimum of three times the weight of the camera and a bracket (if used). DO NOT connect the camera to the power supply during installation. - Page 14 9. Adjust the lens position. a. Loosen the set screws on both sides of the lens bracket, but do not remove the screws. b. Turn the bracket horizontally and vertically until the desired scene is achieved then tighten the set screws. Note the following position range: ...
- Page 15 Dahua Technology USA Inc. 23 Hubble, Irvine, CA 92618 Tel: (949) 679-7777 Fax: (949) 679-5760 Email: sales.usa@global.dahuatech.com Rev 001.001 © 2016 Dahua. All rights reserved. Design and specifications are subject to change without notice.
Need help?
Do you have a question about the DH-IPC-HDBW11A0EN-W and is the answer not in the manual?
Questions and answers