Table of Contents
Advertisement
Advertisement
Table of Contents
Troubleshooting

Related Manuals for RIDGID MS1050


Summary of Contents for RIDGID MS1050
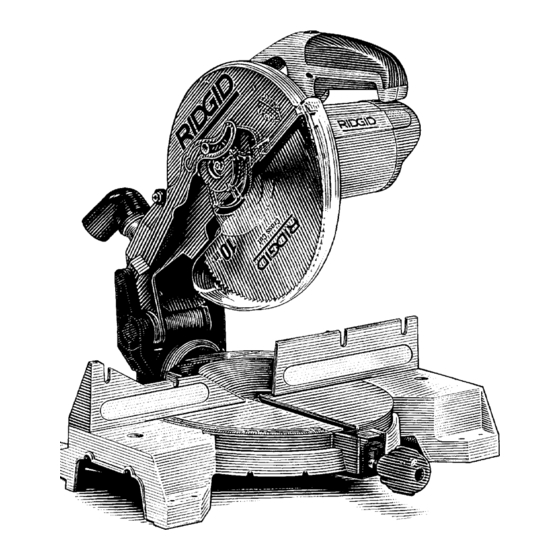
- Page 1 M S 1 0 5 0 O W N E R ’ S M A N U A L 1 0 I N C H C O M P O U N D M I T E R S A W F o r Y o u r S a f e t y : R e a d a l l i n s t r u c t i o n s c a r e f u l l y S a v e t h i s m a n u a l f o r f u t u r e r e f e r e n c e...
-
Page 2: Table Of Contents
Removing or Installing the Blade ........ 9 Lubrication ..............25 Assembling Extensions and Stop Block ....10 RIDGID Recommends the Following Accessories ..25 Assembling Dust Elbow and Dust Bag ..... 10 Recommended Accessories ........25 Getting to Know Your Miter Saw ......... 11 Prohibited Accessories .......... -
Page 3: Safety Instructions For Miter Saw
Safety Instructions for Miter Saw Safety is a combination of common sense, staying alert and knowing how your miter saw works. Read this manual to understand this miter saw. Safety Signal Words WARNING: If the safety information is not followed, someone could be seriously injured or killed. -
Page 4: Before Each Use
Safety Instructions for Miter Saw (continued) • Never Stand On Tool. Serious injury could occur if the • This Tool Is Double Insulated to give you added pro- tool tips or you accidentally hit the cutting tool. Do not tection. Double insulation does not take the place or store anything above or near the tool where anyone normal safety precautions when operating this tool. -
Page 5: Inspect Your Workpiece
CAUTION: When cutting any metals, sparks or hot fragments could cause a fire. To reduce the risk of this, disconnect any dust collecting bag or hose from the miter saw, and remove all traces of wood dust from inside dust traps in the miter saw. Dress For Safety Any power tool can throw foreign objects into the eyes. -
Page 6: Whenever Saw Is Running
Safety Instructions for Miter Saw (continued) Whenever Saw Is Running WARNING: Don't allow familiarity (gained from fre- Let the blade reach full speed before cutting. quent use of your miter saw) to cause a careless Don’t Force Tool. mistake. A careless fraction of a second is enough •... -
Page 7: Motor Specifications And Electrical Requirements
Motor Specifications and Electrical Requirements Power Supply and Motor Specifications The AC motor used in this saw is a universal, nonre- versible type having the following specifications: WARNING: To reduce the risk of electrical hazards, Amperes fire hazards, or damage, or damage to the tool, use proper circuit protection. -
Page 8: Wire Sizes
NOTE: Before beginning assembly, check that all parts Carry Handle are included. If you are missing any part, do not assem- ble the saw. Call 1-800-4-RIDGID or E-mail us at info@ridgidwoodworking.com if any parts are damaged or missing. Sometimes small parts can get lost in pack- aging material. -
Page 9: Assembly
Assembly WARNING: For your own safety, never connect Cover Cover Plate Upper Blade plug to power source outlet until all assembly Plate Stop Screw Guard steps are complete, and you have read and under- stood the safety and operational instructions. Removing or Installing the Blade WARNING: To reduce the risk of injury from a thrown workpiece or thrown pieces of blade, do not... -
Page 10: Assembling Extensions And Stop Block
Assembly (continued) Assembling Extensions and Stop Block Find the following parts: Item Description Qty. A Extension Arm ............2 B Clamp Bracket ............2 C Dust Bag..............1 D Thumb Screw 1/4 x 20 x 1/2........1 E Adjustable Stop Block..........1 F Phillips Screw 5/16-18x1-1/4 ........2 G Washer 21/64 x 5/8 x 1/16........2 1. -
Page 11: Getting To Know Your Miter Saw
Getting to Know Your Miter Saw Miter Saw Miter Saw Switch Handle Carry Handle Lock-Off Upper Blade Guard Combination Button Trigger Wrench Switch Cover Plate Warning Padlock Stop Screw Label Warning Label Hole Power Cord Dust Elbow Arbor Lock Stop Shaft Lower Blade Guard Fence with... -
Page 12: Alignment (Adjustments)
Alignment (Adjustments) WARNING: To reduce the risk of injury from unex- pected starting or electrical shock, do not plug the saw in. The power cord must remain unplugged whenever you are working on the saw. Step One - Checking and Adjusting Blade Squareness to Fence (Miter Alignment) 1. -
Page 13: Step Two - Bevel Adjustments
WARNING: To reduce the risk of injury from unex- pected starting or electrical shock, do not plug the saw in. The power cord must remain unplugged whenever you are working on the saw. Step Two - Bevel Adjustments Bevel Stop Adjustments NOTE: The miter saw was assembled, aligned, and inspected before shipment. -
Page 14: Installing The Throat Plate
Alignment (Adjustments) (continued) WARNING: To reduce the risk of injury from unex- pected starting or electrical shock, do not plug the saw in. The power cord must remain unplugged whenever you are working on the saw. Installing the Throat Plate Find the following parts: Item Description... -
Page 15: Mounting The Miter Saw
Mounting The Miter Saw Larger Holes WARNING: To reduce the risk of injury from unex- For 5/16" Bolts pected saw movement: a. Before moving the saw, lock the miter (and bevel Smaller Holes Smaller Holes if applicable) lock knob, and lock the power head For Drywall For Drywall in the lower position using the stop shaft. -
Page 16: Safety Instructions For Basic Saw Operations
Safety Instructions for Basic Saw Operations Before Using The Miter Saw switch, upper and lower blade guards, handle latch, bevel clamp, cover plate stop screw and fence clamps. WARNING: To reduce the risk of mistakes that (“See Getting To Know Your Miter Saw” Section.). could cause serious, permanent injury, do not plug •... -
Page 17: Inspect Your Workpiece
CAUTION: This machine is not designed for cut- package. Everyday eyeglasses have only impact resis- ting ferrous metals (steel, iron and iron based met- tant lenses. They are not safety glasses. Safety goggles als). Use this miter saw to cut only wood, wood like are available at many local retail stores. -
Page 18: Whenever Saw Is Running
Safety Instructions for Basic Saw Operations (continued) Whenever Saw Is Running WARNING: Don’t allow familiarity (gained from fre- • Let the blade reach full speed before cutting. quent use of your miter saw) cause a careless mis- Don’t Force Tool. take. -
Page 19: Miter Cut
Miter Cut When a miter cut is required, loosen the miter lock knob, depress the index spring, and move the saw to the desired angle. Retighten miter lock knob. Do not stand in front of the saw table. Move with the handle to the miter angle to make the cut. -
Page 20: Compound Cut
Basic Saw Operations (continued) Compound Cut When a compound cut is required, select the correct bevel and miter position. Move your feet and body with the handle to the desired miter angle to make the cut. Cutting Bowed Material Before cutting a workpiece, check to make sure it is not bowed. -
Page 21: Workpiece Support
Workpiece Support Long pieces need extra supports. The table extensions provided will support many pieces. If long supports are required they should be placed along the workpiece so the workpiece does not sag and your hand holding the workpiece is positioned 4" or more from the blade path. The support should let the workpiece lay flat on the base and work table during the cutting operation. -
Page 22: Use And Operation Of Extension Bars And Stop Block
Basic Saw Operations (continued) Use and Operation of Extension Bars and Stop Block WARNING: Avoid thrown workpieces. Avoid bind- ing the work against the blade: - Always hold or clamp your work down to the saw. - Do not hold or clamp the workpiece on both sides of the blade. -
Page 23: Cutting Compound Miters
Cutting Compound Miters Cutting Compound Miters on Picture Frames and Boxes A compound miter is a cut requiring both a miter setting and bevel setting. A compound miter is used for making frames or boxes that have sloping sides and are wide at one end and narrow at the opposite end. -
Page 24: Using Carbide Tipped Blades
Basic Saw Operations (continued) Cutting Crown Molding Angles to the Table and Crown Molding Support Jig Fence The advantage of cutting crown molding in this position is that no bevel setting is required. Small changes in the miter angle can be made without affecting the bevel angle. -
Page 25: Replacing Carbon Brushes
Miter Index Infrequent Lubrication as Required: Indents (5) RIDGID Recommends the Following Accessories Recommended Accessories use accessories such as shaper cutters or dado sets. Cutting ferrous metal (metal with iron in it) and the use of Item SKU No. -
Page 26: Wiring Diagram
Wiring Diagram Field Winding White Black Black Brake Winding Wire Wide Blade Brush #1 White Gray Armature Black Power Cord 2 N.C. Brush #2 1 COM 3 N.O. Blue SPDT Switch Troubleshooting Of Brake By Qualified 4. Check brake circuit for continuity: Remove motor cap and brushes. -
Page 27: Troubleshooting Guide
Troubleshooting Guide Motor PROBLEM PROBABLE CAUSE SUGGESTED CORRECTIVE ACTION Brake does not stop 1. Brushes not seated or lightly sticking. -Inspect/clean/replace brushes blade within 6 seconds. (see maintenance section). 2. Motor brake winding overheated from -Use a recommended blade. use of not-recommended blade or -Let cool down rapid on/off cycling. -
Page 28: Repair Parts
Repair Parts Parts List for RIDGID 10" Compound Miter Saw Model No. MS10502 RIDGID parts are available on-line at www.ridgidparts.com Figure 1... - Page 29 Repair Parts Parts List for RIDGID 10" Compound Miter Saw Model No. MS10502 RIDGID parts are available on-line at www.ridgidparts.com Figure 1 Always order by Part Number - Not by Key Number Part No. Description Part No. Description See Fig. 4...
- Page 30 WARNING: These items are important to the safety of this tool. Do not substitute common parts. • WARNING: Any attempt to repair or replace electrical parts on this unit may create a hazard unless repair is done by a qualified service technician. Repair service is available from authorized RIDGID Ser- vice Center.
- Page 31 ‡ CAUTION: See mechanical assembly caution on page 31. • WARNING: Uncontrolled spring release or misinstallation of these parts may create a hazard unless repair is done by a qualified service technician. Repair service is available from authorized RIDGID Ser- vice Center.
- Page 32 Repair Parts Parts List For RIDGID 10" Compound Miter Saw Model No. MS10502 RIDGID parts are available on-line at www.ridgidparts.com Figure 4...
- Page 33 ‡ CAUTION: See mechanical assembly caution below. • WARNING: Uncontrolled spring release or misinstallation of these parts may create a hazard unless repair is done by a qualified service technician. Repair service is available from authorized RIDGID Ser- vice Center.
-
Page 34: Notes
Notes... - Page 35 Notes...
- Page 36 What is covered RIDGID® tools are warranted to be free of defects in workman- ship and material. How long coverage lasts This warranty lasts for the lifetime of the RIDGID® tool. Warranty coverage ends when the product becomes unusable for reasons other than defects in workmanship or material.
Need help?
Do you have a question about the MS1050 and is the answer not in the manual?
Questions and answers
do you have a blade guard for the MS1050-0
Yes, the RIDGID MS1050 includes a blade guard. The manual references components such as the "lower guard" and "Retainer Guard Asm," and warns about the improper reassembly of mechanisms controlling the movement of the lower guard, indicating that a guard is part of the tool's design and safety features.
This answer is automatically generated
How do you turn the cutting blade so that it will not cut at an angle?