Table of Contents
Advertisement
Quick Links
Advertisement
Table of Contents

Related Manuals for DYNACO MARK VI


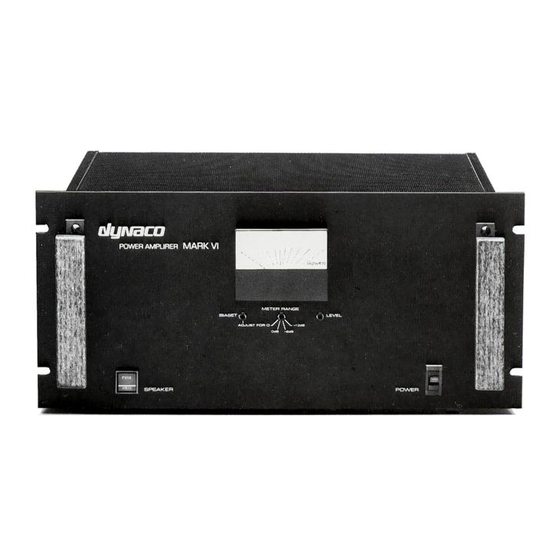
Summary of Contents for DYNACO MARK VI
-
Page 3: Table Of Contents
CONTENTS Professional Specifications ....3 Schematic ..........12 Description ..........4 Component Values ......13 Installation ........... 4 Initial Adjustment—Biaset ....18 Connections..........4 Output Meter Reading ......18 Assembly Instructions......6 In Case of Difficulty .........19 Mechanical Assembly ......7 Voltages and PC-44 Board Layout ... -
Page 4: Description
The amplifier should be installed where the front panel will be excessive heat buildup within the enclosed section of is accessible. If the Mark VI is to be mounted near a phono- the chassis. Vertical mounting is not recommended, even graph, check to make sure that the phono cartridge does not with fan cooling. - Page 5 The "c" terminal of the amplifier is connected to the parallel because of adverse audio effects. chassis, so the Mark VI may be used in multiples, if desired, with special output connections which require common grounds. If so, it will be necessary to connect together all the "c"...
-
Page 6: Assembly Instructions
ASSEMBLY INSTRUCTIONS GENERAL ASSEMBLY INFORMATION Construction of the Mark VI is very simple when com- pared to other kits. The printed circuit board for audio has been preassembled to save you some of the work, and the assembly that remains is in an open, uncluttered layout to make wiring quick and easy. -
Page 7: Mechanical Assembly
Where stranded wire is used, as on the transformer leads, WIRING THE KIT be very careful not to cut through the strands when stripping The position of all wire leads should follow the diagram the end. Where stranded wire is supplied for hookup wire closely, bearing in mind that the pictorial diagram has neces- in the kit, the strands will be bonded together to minimize sarily been distorted somewhat to show all connections... - Page 8 10( )Select the 3-pin XLR input socket, the two " #4 screws with oval heads, and two #4 nuts. Install the XLR input from the outside in the round hole at the center back so that the pin location matches the Pictorial Diagram.
-
Page 9: Wiring The Output Stage
[If the alternate (Japanese) transformer, part #454354, has The leads connected to the power and output transformers been supplied, invert the transformer on the right of your work have been precut to approximately their correct lengths. surface with its attached mounting screw studs facing up. Mount You may shorten them for neatness if you wish, but do not the transformer on the right side of the chassis so that the holes cut them too short for use, as this may void the warranty. - Page 10 15( ) Select the last 1,000 ohm, 1/2 watt resistor (brown- 27( ) Select another 22 ohm, 2 watt resistor (red-red- black-red) , bend its leads 90° to its body, and cut its black). Bend one lead 90° to its body, but do not cut leads to 1/2"...
-
Page 11: Wiring The Power And Bias Supplies
WIRING THE POWER AND BIAS SUPPLIES 13 ( ) Prepare a 4" (10 cm) yellow wire, but remove 3/8" 1( ) Strip the insulation from a 3" (7.5 cm) yellow wire. (1 cm) of insulation from one end, and the conven- Connect one end of the bare wire to C2 lug #1. -
Page 13: Component Values
COMPONENT VALUES R 1 100,000 ohms, 1 w., 10% 115104 C 1 .068 mfd, 500 v., 5%, mylar 267683 R 2 4,700 ohms, 1/2 w., 5% 113472 C 2 22 Pf, 500 v., 5%, mica 257220 1,000,000 ohms, l w, 5% 116105 C 3 68 Pf, 500 v., 5%, mica 257680... - Page 14 35( ) Prepare a 6 1/2" (16.5 cm) black wire, and connect 24 ( ) Select the violet-white lead from the power trans- one end to T-5 lug #10 at the base (S). Feed it also former, feed it under T-5, and through the grom- through hole G3.
-
Page 15: Wiring Pc-44 And Control Bracket
WIRING PC-44 AND CONTROL BRACKET The next two steps will call for the connection of the shielded audio cable. To prepare this cable for connection, first remove 3/4" (2 cm) of the outer plastic insulation. Use care doing this, so that you do not cut the fine strands of wire underneath. -
Page 16: Final Assembly
24( ) Select the line cord and the strain relief. Mark the 13( ) Prepare a 3 1/2" (9 cm) yellow wire, and connect one cord 112 1/2" (32 cm) from the stripped wire ends. end to MS lug #5 (S). The other end will be con- Bend the cord sharply back on itself at the mark- nected later. - Page 17 This completes the soldering of the underside of the 12 ( ) Select the black and the violet-white twisted pair, Mark VI. Notice that terminal strip T-6 is without con- and connect the free end of the violet-white wire to nection, unless the unit has been wired for 220 or 240 volts lamp socket lug #4 (S).
-
Page 18: Initial Adjustment-Biaset
(alternately 100 volts, 220 volts or 240 volts), and turn the to the next (—3 dB) position. power switch on. It is safe to operate the Mark VI without Although the adjustment of Biaset is semi-permanent, it connection to the input or the output. The red lamp in the is good practice to check this voltage three or four times power switch and the lights in the meter should glow. -
Page 19: In Case Of Difficulty
Try a new fuse first. wired for 120 volts or 100 volts line; use a 2.5 ampere fuse if the Mark VI is wired for 220 volts or 240 A defective 6N030T delay relay tube will also prevent volts line. -
Page 20: Voltages And Pc-44 Board Layout
± 5% meter could be off by ± 50 volts on the 1,000 volt range. In the Mark VI, this could imply an incorrect indication when measuring the high voltage +, for example, which has been specified ±... -
Page 21: International Ac Line Connections
INTERNATIONAL AC LINE CONNECTIONS The power transformer supplied in the Mark VI may be schematic on page 12, detail these alternate connections. connected for 100 volts, 220 volts, or 240 volts AC line, as well as for the standard 120 volts AC line (the transformer... -
Page 22: Service Policy And Limited Warranty
Include with the returned unit the following information: The Mark VI is warranted for a full year from the pur- chase date, including parts and labor, and shipment costs 1. Your name and complete shipping address (Post Office from the service facility to the owner (within the U.S. -
Page 23: Parts List
PARTS LIST Parts of a similar type which do not change performance will sometimes be included as a matter of expediency. This will account for slight variations in value and appearance. PART# 1 Bottom Plate, black, steel, U-shape 711049 CAPACITOR-RESISTOR ASSEMBLY 997162 1 Cover, black, perforated steel 711050...
Need help?
Do you have a question about the MARK VI and is the answer not in the manual?
Questions and answers