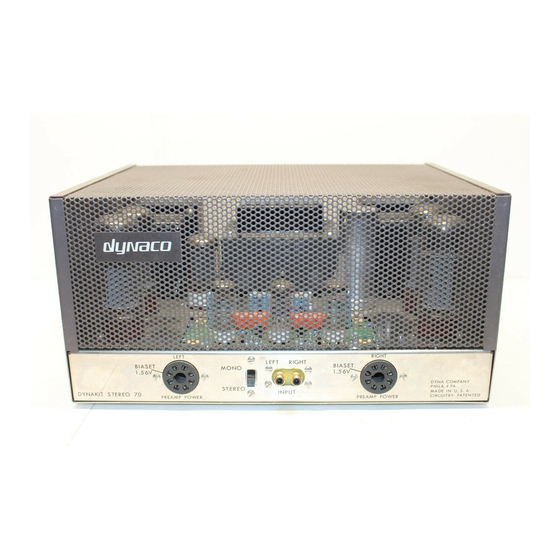
DYNACO Stereo 70 Restoration Manual
Hide thumbs
Also See for Stereo 70:
- Restoration manual (5 pages) ,
- Owner's manual (12 pages) ,
- Instructions for assembly (16 pages)
Advertisement
Quick Links
Download this manual
See also:
Owner's Manual
Dynaco Stereo 70 Power Amplifier
Restoration Manual
Detailed Procedure & Guide
Page 1
R0 4-03
I. Introduction
This document provides a step by step instruction for rebuilding and restoring the Dynaco
Stereo-70 power amplifier. It discusses most of the typical and a few atypical problems
that may be encountered with the restoration of the vintage Dynaco Stereo-70 power
amplifier and provides the solution needed to resolve these problems. Most of these
problems are age related and therefore any unit that has not been in service for over six
months should be subjected to the Post Storage Start Up Procedure (Addendum 2). If
your goal is to repair a problem with your Stereo-70 (such as hum, noise, fuse tripping,
etc.) you should review our
available at our
Stereo 70 Troubleshooting Repair Guide
website.
The most problematic components in the Dynaco power amplifiers are (in order of
severity) the Quad electrolytic capacitor, selenium rectifier, output tube sockets, output
tubes, and driver pc board. Of those, it is mandatory to replace the first three since if not
defective they are certain to be soon. In particular, the original Quad electrolytic
st
capacitor, encountering 21
century mains voltages, is operating at or near its design
limits and accordingly is simply unreliable. This is the main reason that we do not
recommend replacing it with another having the same ratings but rather one of the
aftermarket modules that extend the operating voltage and also moderately increase the
energy storage capacity. CAE offers two capacitor modules that meet these objectives
and additionally include a complete new bias circuit (that also replaces the selenium
rectifier). This is essentially a completely new power supply with higher ratings and
energy capacity.
The second most problematic component is the output tube sockets which corrode and
lose conductivity over time. These failures can be very costly since contact failures will
zero bias the output tubes causing the tube to conduct maximum current (you may have
seen the glowing red elements) dramatically shortening the life of the tube (if not
destroying it altogether). Unfortunately the degree of cleaning necessary to remove the
oxidation also removes the nickel plating (preferable to gold) thereby rendering the
cleaning process short lived. The solution is inexpensive - replace the sockets completely
using ceramic based sockets. This is a very worthwhile investment easily paying for itself
considering the cost of premium replacement tubes.
Finally the original Dynaco pc driver board is subject to failure not due to limitations of
the components (although the tube sockets are questionable) but rather due to the
substrate material of the board itself. The majority of the original boards were made from
an inexpensive and common consumer electronics composite phenolic base material. It is
prone to moisture absorption and retention and with the varying temperatures
encountered inside the Stereo-70, has expanded and contracted to the extent that the pc
foil either has or is about to delaminate. This material also becomes coated with grime
that is impossible to remove without harming the board. The symptoms of a defective
drive module are noises, popping and crackling of your amplifier. We realize that many
1
Advertisement

Related Manuals for DYNACO Stereo 70


Summary of Contents for DYNACO Stereo 70
- Page 1 This is a very worthwhile investment easily paying for itself considering the cost of premium replacement tubes. Finally the original Dynaco pc driver board is subject to failure not due to limitations of the components (although the tube sockets are questionable) but rather due to the substrate material of the board itself.
- Page 2 In this document, I hope to provide you with some methods and techniques that will guide you to resurrect a long term out of service Stereo 70 or a unit that has begun to show the effects of age and restore it to better than new operation. It is absolutely critical that you are certain that you have the skills to safely operate the tools recommended and that you always remember that you will be working with lethal voltages.
- Page 3 II. Stereo 70 Overview : Although not mandatory, it will be very helpful for you to understand the operation of your Stereo 70 and the three principal functional sections and how they interact. The next section discusses each section briefly.
- Page 4 3) The Driver Amplifier & Phase Splitter – This is perhaps the most complex part of the Stereo 70 power amplifier. It is the 7” X 4 “ (approximate) PC board located in the front center of the amp between the two pairs of output tubes. It houses two identical channels each consisting of a 7199 signal tube and associated resistors and signal capacitors.
- Page 5 Frankly, the driver stage is one of the two sections of the Stereo 70 that was not designed with longevity in mind. The board material is phonelic (really pressed paper) that absorbs moisture and does not hold up well to the typical heat / cool cycles present inside the Stereo 70.
- Page 6 8) Cut the two remaining wires connected to the terminals #3 (square symbol) and #4 (triangle symbol) of the quad electrolytic capacitor (they connect to the Dynaco pc board). The resistors connected to these terminals may remain. Finally, de-solder and remove all of the wires connected to the ground lugs of the quad electrolytic capacitor.
- Page 7 You may want to keep all of the mounting hardware for spares. If you will be retaining the original Dynaco driver pc board (not recommended) you can de-solder the wires connected to the 23...
- Page 8 We have restored many Dynaco power amplifiers and always begin by cleaning the amplifier chassis in a strong solution of dishwater detergent (Dawn) with a mild addition of ammonia (not too strong as it may lift the printing).
- Page 9 R0 4-03 IV. Reassembly You will begin to reassemble your Stereo 70 by installing the new tube sockets, and most of the hardware. To ease the wiring the transformers will be installed as late as possible thereby making orientation of the amplifier easier.
- Page 10 Dynaco Stereo 70 Power Amplifier Restoration Manual Detailed Procedure & Guide Page 10 R0 4-03 outlined in the documentation for the ASM-S7U-B module (available from www.dynaco-doctor.com). 14. Finally install the original power and output transformers. Be certain to place the left output transformer (the one with the longest red lead in the correct location).
- Page 11 Dynaco Stereo 70 Power Amplifier Restoration Manual Detailed Procedure & Guide Page 11 R0 4-03 26. Next connect a 3” black wire from pin 1 of V6 to pin 8 of V7. Locate the 15.6 ohm power resistor originally removed from your amplifier and connect one end to pin 1 of V6.
- Page 12 Dynaco Stereo 70 Power Amplifier Restoration Manual Detailed Procedure & Guide Page 12 R0 4-03 38. Trim to length and connect the four Left output transformer leads (Yellow, Orange, Brown, Black) to the Left speaker output terminals as shown in figure 1.
- Page 13 Dynaco Stereo 70 Power Amplifier Restoration Manual Detailed Procedure & Guide Page 13 R0 4-03 choke) of the 3 lug terminal strip. Locate the shorter of the two choke leads and after trimming to length connect to this same lug (#3).
- Page 14 Dynaco Stereo 70 Power Amplifier Restoration Manual Detailed Procedure & Guide Page 14 R0 4-03...
- Page 15 Dynaco Stereo 70 Power Amplifier Restoration Manual Detailed Procedure & Guide Page 15 R0 4-03...
- Page 16 Dynaco Stereo 70 Power Amplifier Restoration Manual Detailed Procedure & Guide Page 16 R0 4-03...
- Page 17 Detailed Procedure & Guide Page 17 R0 4-03 Addendum 1 Testing the Dynaco Stereo-70 Transformers A. Power Transformer 1. Remove all tubes (4X output tubes, 2X driver tubes, 1x GZ-34 rectifier tube) 2. Disconnect the Red/Black Stripe wire connected to the Selenium rectifier – cover this end with tape or 1/8”...
- Page 18 Dynaco Stereo-70 Right Channel Speaker Terminals 8 Ohm and Ground. 5. Obtain a 8 Ohm “Test” Loudspeaker and connect it to the Dynaco Stereo-70 Left Channel Speaker Terminals 8 Ohm and Ground. 6. Have the other channel of the service amplifier directly connected to another loudspeaker (control speaker) identical to the test loudspeaker.
- Page 19 Slide the heat shrink tubing upwards to completely cover the exposed any wire including the resistor lead. Connect the remaining free end of the 100K / 3Watt resistor to lug #2 of the Dynaco quad electrolytic capacitor.
- Page 20 Dynaco Stereo 70 Power Amplifier Restoration Manual Detailed Procedure & Guide Page 20 R0 4-03 floating at nearly 500 VDC relative the amplifier chassis. Most DVM’s are suitably insulated however you should be advised nonetheless and take the appropriate precautions.
Need help?
Do you have a question about the Stereo 70 and is the answer not in the manual?
Questions and answers