Table of Contents
Advertisement
Quick Links
Advertisement
Table of Contents

Subscribe to Our Youtube Channel
Related Manuals for Siemens HR74W537Y


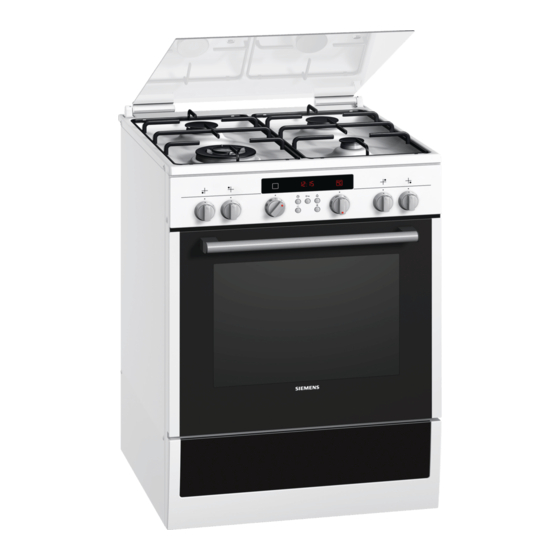
Summary of Contents for Siemens HR74W537Y
- Page 1 [en] Instruction manual HR74W237Y, HR74W537Y Free standing cooker...
-
Page 3: Table Of Contents
Inserting accessories ..............11 Additional information on products, accessories, replacement Optional accessories ..............11 parts and services can be found at www.siemens-home.com After-sales service products ............12 and in the online shop www.siemens-eshop.com Before using the oven for the first time ......... 12 Setting the clock ................ -
Page 4: Important Safety Information
: Important safety information Read these instructions carefully. Only then experience or knowledge if they are will you be able to operate your appliance supervised or are instructed by a person safely and correctly. Retain the instruction responsible for their safety how to use the manual and installation instructions for appliance safely and have understood the future use or for subsequent owners. - Page 5 Do not store any flammable objects inside During operation, the surfaces of the ■ or on top of the oven. appliance become hot. Do not touch the surfaces when they are hot. Keep children When gas hotplates are in operation Risk of fire! ■...
- Page 6 Unsuitable pan sizes, damaged or When replacing the cooking compartment ■ ■ incorrectly positioned pans can cause bulb, the bulb socket contacts are live. serious injury. Observe the instructions Before replacing the bulb, unplug the which accompany the cookware. appliance from the mains or switch off the circuit breaker in the fuse box.
-
Page 7: Causes Of Damage
Causes of damage steam. The temperature change can cause damage to the enamel. Caution! Moist food: do not store moist food in the cooking ■ Only use the burners when cookware has been placed on ■ compartment when it is closed for prolonged periods This will top. -
Page 8: Moving The Appliance By The Gas Line Or Door Handle
Moving the appliance by the gas line or door Setting up the appliance handle Do not move the appliance while holding the gas line; the gas pipe could be damaged. There is a risk of a gas leak! Do not move the appliance while holding it by the door handle. -
Page 9: Your New Cooker
Your new cooker Here you will learn about your new cooker. We will explain the You will find information on the cooking compartment and the control panel, the hob and the individual operating controls. accessories. General information Cooking area The design depends on the respective appliance model. Here is an overview of the control panel. -
Page 10: The Oven
The oven Temperature selector Use the temperature selector to set the temperature and the Use the function selector and the temperature selector to set grill setting. the oven. Function selector Settings Function Use the function selector to select the type of heating for the Zero position Oven not hot. -
Page 11: Your Accessories
Your accessories The accessories supplied with your appliance are suitable for Note: The accessories may deform when they become hot. making many meals. Ensure that you always insert the Once they cool down again, they regain their original shape. accessories into the cooking compartment the right way round. This does not affect their operation. -
Page 12: After-Sales Service Products
Optional accessories HZ number Function Enamel baking tray with non-stick coating HZ331011 The baking tray is ideal for laying out cakes and biscuits. Place the baking tray in the oven with the sloping edge towards the oven door. Universal pan HZ332003 For moist cakes, pastries, frozen meals and large roasts. -
Page 13: Advance Cleaning Of Burner Cup And Cap
Advance cleaning of burner cup and cap Clean the burner cap (1) and cup (2) with water and washing- up liquid. Dry the individual parts carefully. Place the burner cup and cap back on the burner shell (5). Ensure that the igniter (3) and flame safety pin (4) are not damaged. -
Page 14: Making Settings On The Hob
Making settings on the hob Your hob is equipped with four gas burners. The following Set the desired flame size. Between setting û Off and setting information explains how to light the gas burners and set the , the flame is not stable. Therefore, always choose a setting •... -
Page 15: Setting The Oven
Setting the oven There are various ways in which you can set your oven. Here Use the - or + button to change the cooking time. we will explain how you can select the desired type of heating Default value for + button = 30 minutes and temperature or grill setting. -
Page 16: Rapid Heating
Use the + button to set a later end time. Note: You can make changes as long as the symbol is The setting is adopted after a few seconds. flashing. When the symbol lights up, the setting has been The end time is shown in the display until the oven starts. adopted. -
Page 17: Care And Cleaning
Care and cleaning With attentive care and cleaning, your hob and oven will retain If the cover hinges become loose, note the letters marked on its looks and remain in good working order for a long time. We them. The hinge with the letter R must be fitted on the right, and will explain here how you should care for and clean them the hinge with the letter L must be fitted on the left. -
Page 18: Detaching And Refitting The Rails
Soak in hot soapy water. Clean with a brush or a sponge. Accessories Do not clean in the dishwasher. Never use oven cleaner. To avoid scratches, never touch the metal sur- Aluminium baking faces with a knife or similar sharp object. Clean horizontally with some washing-up liquid and a damp glass tray (option) cleaning cloth or a microfibre cloth. -
Page 19: Removing And Installing The Door Panels
Removing and installing the door panels Detaching the door Open the oven door fully. To facilitate cleaning, you can remove the glass panels from the oven door. Fold up the two locking levers on the left and right (figure A). Close the oven door as far as the limit stop. -
Page 20: Troubleshooting
Troubleshooting Replacing the bulb in the oven ceiling light Malfunctions often have simple explanations. Refer to the table before calling the after-sales service as you may be able to If the bulb in the oven light fails, it must be replaced. Heat- remedy the fault yourself. -
Page 21: Energy And Environment Tips
Energy and environment tips Saving energy with the gas hob Here you can find tips on how to save energy when baking and roasting in the oven and when cooking on the hob, and how to Always use a saucepan which is the correct size for your dispose of your appliance properly. - Page 22 Cakes in tins Level Type of Temperature Cooking time heating in °C in minutes Sponge cake, simple Ring tin/loaf tin 160-180 40-50 3 loaf tins 140-160 60-80 Sponge cake, delicate Ring tin/loaf tin 150-170 60-70 Flan base, sponge Flan-base cake tin 150-170 20-30 Delicate fruit flan, sponge...
-
Page 23: Baking Tips
Small baked products Accessories Level Type of Temperature Cooking time heating in °C in minutes Leavened cake Baking tray 180-200 20-30 Universal pan + baking tray 170-190 25-35 Never pour water into the hot oven. Bread and rolls When baking bread, preheat the oven, unless instructions state When baking on 2 levels, always insert the universal pan above otherwise. -
Page 24: Meat, Poultry, Fish
Meat, poultry, fish Tips for grilling When grilling, preheat the oven for approx. 3 minutes, before Ovenware placing the food into the cooking compartment. You may use any heatresistant ovenware. The baking tray is Always grill with the oven door closed. also suitable for large roasts. -
Page 25: Tips For Roasting And Grilling
For duck or goose, pierce the skin on the underside of the Poultry wings. This allows the fat to run out. The weights indicated in the table refer to oven-ready poultry (without stuffing). Poultry will turn out particularly crispy and brown if you baste it towards the end of the roasting time with butter, salted water or Place whole poultry on the lower wire rack breast-side down. -
Page 26: Bakes, Gratins, Toast With Toppings
Bakes, gratins, toast with toppings Always place the ovenware on the wire rack. How well cooked the bake is will depend on the size of the dish If you are grilling directly on the wire rack, the universal pan and the height of the bake. The figures in the table are only should also be inserted at level 1. -
Page 27: Special Dishes
Special dishes Preheat the cooking compartment as indicated. Place the cups or jars on the cooking compartment floor and At low temperatures, 3D hot air is equally useful for incubate as indicated. producing creamy yoghurt as it is for proving light yeast dough. First, remove accessories, hook-in racks or telescopic shelves Proving dough from the cooking compartment. -
Page 28: Acrylamide In Foodstuffs
After 25 to 35 minutes of residual heat, remove the preserving Preserving jars from the cooking compartment. If they are allowed to cool Fruit for longer in the cooking compartment, germs could multiply, After approx. 40 to 50 minutes, small bubbles begin to form at promoting acidification of the preserved fruit. -
Page 29: Test Dishes
Test dishes These tables have been produced for test institutes to facilitate the inspection and testing of the various appliances. In accordance with EN 50304/EN 60350 (2009) and IEC 60350. Baking Baking on 2 levels: Always insert the universal pan above the baking tray. Baking on 3 levels: Insert the universal pan in the middle. - Page 32 Siemens-Electrogeräte GmbH BSH Hausgeräte GmbH Carl-Wery-Straße 34 81739 München Germany Manufactured by BSH Hausgeräte GmbH under Trademark License of Siemens AG *9000912001* 9000912001 01 120693...
Need help?
Do you have a question about the HR74W537Y and is the answer not in the manual?
Questions and answers