Table of Contents
Advertisement
Advertisement
Table of Contents

Subscribe to Our Youtube Channel
Related Manuals for Simrad E50 Series


Summary of Contents for Simrad E50 Series
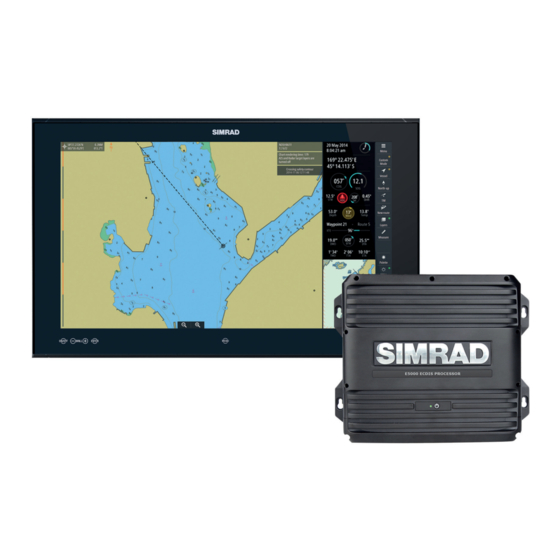
- Page 1 E50xx ECDIS System Operator Manual ENGLISH www.navico.com/commercial...
- Page 3 Preface Disclaimer As Navico is continuously improving this product, we retain the right to make changes to the product at any time which may not be reflected in this version of the manual. Please contact your nearest distributor if you require any further assistance. It is the owner’s sole responsibility to install and use the equipment in a manner that will not cause accidents, personal injury or property damage.
-
Page 4: About This Manual
About this manual This manual is a reference guide for operating the E5024 and E5027 ECDIS. It assumes that all equipment is installed and configured, and that the system is ready to use. The manual assumes that the user has basic knowledge of navigation, nautical terminology and practices. -
Page 5: Table Of Contents
Contents Introduction The ECDIS system ECDIS requirement System components 10 The user interface The main panel Shortcut buttons The Main menu The Panel menu The Settings dialogs The Instrument bar The Navigation panel The Overview map Layers Radar overlay Object information On-screen keyboard 18 Basic operation Start-up... - Page 6 Route settings Creating a new route Displaying a route Modifying routes Reversing a route Adding an event mark Displaying information about danger objects in a route Copying a route Exporting routes Importing routes Transferring routes 54 Sailing along a predefined route Starting a voyage Stopping the voyage The Navigation panel...
- Page 7 Main menu icons Route icons Chart management icons Icons in Manual update menus User chart objects menu icons System settings icons Object information icons Target symbols Contents | E50xx ECDIS Operator Manual...
-
Page 8: Introduction
The ECDIS system must have a back-up arrangement. This could be either a folio of paper charts or other non-paper, back-up solution decided by the relevant maritime administration. This could e.g. be Simrad’s type approved duplex ECDIS system (PLECDIS •... - Page 9 Two or more E5000 Processors can be connected through Ethernet to form a PLECDIS (Paperless ECDIS) system. The Monitor The E5024 system includes an M5024 monitor, the E5027 system includes an M5027 monitor. The monitors are non-touch monitors, color calibrated and type approved for ECDIS. A separate manual is delivered with the monitor.
-
Page 10: The User Interface
The user interface The main panel The main panel is divided into predefined areas as shown in the figure below. Cursor readout Chart area Alerts panel Indications Chart information Instrument bar Shortcut buttons Menu button Man Over Board button Overview map Navigation panel Selected target Zoom buttons... -
Page 11: Shortcut Buttons
Shortcut buttons Ú Note: Some of the shortcut buttons have a light indicator that can be green or yellow. Green indicates standard ECDIS mode, while yellow indicates non-ECDIS mode. One- click on a shortcut button with a yellow indicator reverts to ECDIS mode. Menu •... -
Page 12: The Main Menu
Man Over Board (MOB) • Click to create a MOB waypoint at the vessel's position • Right-click to remove single or all MOB waypoints The Main menu The Main menu is used for selecting options and for setting up the system. The menu is displayed by selecting the Menu button. -
Page 13: The Settings Dialogs
The Settings dialogs The various Settings dialogs are used for setting up the ECDIS system. All Settings dialogs are displayed as a full screen panel. Sub-dialogs are indicated in the top of a dialog as shown below. You close a Settings dialog by selecting the X button. The user interface | E50xx ECDIS Operator Manual... -
Page 14: The Instrument Bar
The Instrument bar The Instrument bar includes time and position read from an EPFS (Electronic Position-Fixing System) sensor, together with indicators for the system's main sensors. Where multiple sensors exist, the information displayed is for the sensor with the highest priority that is receiving data. -
Page 15: Radar Overlay
You turn off all layers except User chart by left-clicking the Layers shortcut button. Radar overlay If a Simrad ARGUS radar is connected to the system, you can display radar overlay on the chart. Ú Note: The Radar overlay has to be turned ON to see the radar image as an overlay on the chart. -
Page 16: On-Screen Keyboard
You display detailed object information by selecting an object item in the dialog. Different icons are available in the Object information dialog: Highlights the object in the chart, and moves chart center to the selected object Displays a txt file with additional object information in a separate window Displays an image file related to the selected object On-screen keyboard A virtual keyboard is by default displayed when required for entering user information in... - Page 17 The user interface | E50xx ECDIS Operator Manual...
-
Page 18: Basic Operation
Basic operation Start-up The system should be left with the power ON. The system is switched on using the external power switch. When power is switched on, the operating system will be started, automatically followed by the system program. When the system is switched on after the first-time initialization, the system will start with the settings that were active when the system was turned off. -
Page 19: Selecting The Chart Scale
Display palettes 4 display palettes are available for optimum color contrast under different light conditions. The Red and Black palette is not included in the ECDIS standard. When this palette is selected, this will be indicated with a yellow indicator on the Palette button. The display brightness is set by using the Palette button: •... -
Page 20: Installing Charts
Installing charts Installing charts from the NavStick The system is delivered with a pre-installed overview chart. Detailed world-wide charts are available on the NavStick USB drive included with the system. The charts are installed and maintained by using the following services: •... - Page 21 Verifying or changing your chart subscription When Navico receives the User permit from the vessel and the chart subscription is agreed, Navico creates a custom account and a customized web site in NAVTOR NavTracker. From this web site you can view and manage your subscription. You log on to this system via a web browser (http://navtracker.navtor.com/).
- Page 22 Verify that your subscription is correct, eventually request changes according to the guidelines in the NavTracker User guide When completed the NavTracker system updates your subscription information, and chart updates and Chart permit codes for the purchased charts are prepared. These chart updates and Chart permit codes are downloaded to the NavStick by using the NavSync program.
-
Page 23: Installing Charts From Other Suppliers
Installing charts from other suppliers The chart suppliers have different procedures for submitting Chart permit codes and charts. For chart suppliers other than NAVTOR it is required to install Chart permits before charts can be copied to the system. Refer to the supplier documentation for details. Ú... -
Page 24: Selecting Charts To Display
Selecting charts to display All chart databases installed in the system are listed in the Chart library. Select the Display option for the chart databases you want to use. If you have more than one database available, you can select to show multiple charts. The system will however only display one chart at the time, and it will automatically select the best chart available based on your vessel's position . -
Page 25: Setting Up The Chart Panel
Setting up the chart panel Chart settings The chart settings are divided in 3 logical groups as described in the following sections. Portrayal settings Setting up the chart panel | E50xx ECDIS Operator Manual... - Page 26 Depth display settings Various settings are available to visualize the depths and depth area: Shallow contour: Limit for shallow waters. Depth less than Shallow contour will be • displayed in dark blue color. Safety contour: Contour related to own vessel. To be used by the system to distinguish •...
- Page 27 Chart objects The system has 4 display modes. Base, Standard and Full mode have predefined standard objects that are displayed. In addition these modes includes optional objects that manually can be turned on. For the Custom mode all chart objects can be manually selected. You select display mode by right clicking the Mode shortcut button, and you use the Chart objects settings dialog to set up which optional chart object that should be displayed with each mode.
- Page 28 Navigational settings Chart orientation Several options are available for how the chart is rotated in the panel. You select the options by right-clicking the chart orientation shortcut button. North-up: Displays the chart with north upward. Corresponds to the usual orientation of •...
-
Page 29: Own Vessel's Display Settings
Ú Note: The Keep best scale option is turned off when you manually zoom the chart. You can temporarily display the best scale available by pressing the best scale zoom button, but this does not turn on the Keep best scale option. Own vessel's display settings You select how your own vessel is displayed on the chart panel from the Vessel Display settings dialog. -
Page 30: Chart Symbols
Chart symbols All chart symbols used by the system can be displayed as follows: Open the Chart library panel Open the chart catalog for the Chart1 database Select the Display Object icon for one of the datasets included in the database - The display moves and scales the chart to show all symbols included in the selected dataset Right-click a symbol to display object information... -
Page 31: Tools For Safe Navigation
Tools for safe navigation Man Over Board If an emergency situation should occur, you can save a Man Overboard (MOB) waypoint at the vessel’s current position by selecting the MOB shortcut button. Bearing and Range from the MOB to the vessel’s position are displayed on the chart. If the cursor is moved to the marker and the left cursor key pressed, the MOB position is displayed in the Object information dialog. -
Page 32: Showing Distance Lines And Zone Rings
Guard zone: Sector Guard zone: Cardioid Ú Note: If the guard zone is displayed on the chart, dangerous objects inside the zone are indicated as red, and caution objects indicated as yellow. There is no indication of dangerous objects within the guard zone if the guard zone is not displayed on the chart. Displaying information about navigational cautions Navigational cautions are displayed in the Alerts panel. -
Page 33: Measuring Distance And Bearing
Parallel index lines One or two index lines can be positioned on the chart. A single Index line is used to visualize a distance to the vessel or to land objects, either parallel to or in front of the vessel. Two index lines can be used to indicate a corridor - typically used to visualize an area you want to maneuver within. -
Page 34: Navigational Calculations
Select the Measure shortcut button to activate the EBL/VRM feature - A circle is drawn with the center at the vessel position - An information panel in the display's lower right corner shows range and true bearing from the circle center to cursor position. The first line shows range and bearing along the great circle line, the second line shows range and bearing along the rhumb line Move the cursor to the object to which you want to measure range and bearing Move the cursor to an object and press the left cursor button to move the circle center. -
Page 35: Manually Calculating Vessel Position
Datum transformation This function is used for converting position information from the active dataset format to a selected target data format. Enter latitude and longitude, and select the Forward or Inverse buttons to convert the position to the selected format. Manually calculating vessel position When no GPS is available, the Lines Of Position function (LOP) can be used to calculate your vessel's position. -
Page 36: Anchor Watch
Select the Calculate button to confirm the observation points' position and measurement - The calculated position is displayed in the upper right part of the manual observation menu, and the estimated position (EP) is indicated in the chart Select the Accept button to use the calculated position for dead reckoning - The Dead reckoning values are updated - The labelled position in the chart is changed from EP to DR Select Enable correction if you want to manually update the dead reckoning position... - Page 37 Activating the anchor watch To activate the anchor watch feature, right-click the chart when you drop your anchor and select the Activate anchor watch panel menu option. When you activate the anchor watch feature, the system displays the swing circle radius setting in the Anchor watch dialog. You can change the setting in the Anchor watch dialog.
-
Page 38: Other Vessels On The Chart Panel
Other vessels on the chart panel Other vessels’ movement can be displayed in the chart by connecting an AIS system or an ARPA radar to the system. The system can alert the user about potentially dangerous targets and loss of communication with a target. - Page 39 Symbol Description AIS SART (AIS Search And Rescue Transmitter) AIS Base station Real AtoN (Aids To Navigation) Virtual AtoN For a complete list of AIS and AtoN symbols, refer to "Target symbols" on page 81. Ú Note: A symbol is drawn with a dotted line if the collision avoidance cannot be calculated.
- Page 40 Ú Note: You specify when an AIS target should be visible on the chart using the AIS Filter, refer to "AIS functions" on page 40. Ú Note: You can select to display the distance limits. See Display settings for AIS targets. AIS functions Use the AIS Filter option to filter the AIS objects on the chart, set your vessel AIS status, and for communicating with another vessel's AIS system.
- Page 41 AIS messages Use the AIS messages option to create and view sent or received AIS messages. AIS own ship status Use the AIS own ship status to set the status of your vessel which is seen by other vessels. Other vessels on the chart panel | E50xx ECDIS Operator Manual...
-
Page 42: Radar Targets
Radar targets Radar target symbols The following symbols are used for radar targets in the system: Symbol Description Tracked Radar target with velocity vector Selected Radar target, indicated with a square (dotted line) around the target symbol Dangerous Radar target, indicated with bold line and with red color. -
Page 43: Viewing Target Information
Configuring Radar targets You specify the distance for when a Radar target should be defined as dangerous from the Radar Configuration dialog. From this dialog you also define time limits for when a target should be considered lost, and when it should be removed from the chart panel. You can use this dialog to enable AIS/Radar targets associations if your radar supports associations. -
Page 44: Finding A Target On The Chart Panel
You can view more details about a single target by right-clicking it in the chart panel. This will open the target panel on the left side of the screen. Select the + sign on the upper left side of the target panel to expand the panel to show all available information for the selected target. -
Page 45: Target Update Frequency
Target update frequency The update frequency for AIS targets and Radar targets is defined in the Targets menus. The frequency is set individually for AIS and Radar targets. From within these menus you can also select to manually update the target information. Lost target warnings A warning is automatically triggered if an AIS target or Radar target is lost. -
Page 46: Route Planning
Route planning Routes may be planned independent of the actual vessel position. The routes may be stored and recalled whenever necessary. There are no limitations to the number of waypoints in a route that can be stored in the system. The route menus Routes are managed by using the following menus: The Route list, displayed by... -
Page 47: Route Settings
Route settings When a new route is created or when a waypoint is added to a route, the system will use the vessel's performance characteristics defined in the Vessel settings. The route settings may be set individually when creating or editing a route. Turn radius: Each waypoint in a route, except the first and the last, has an associated turn •... -
Page 48: Creating A New Route
Creating a new route Two methods may be used when creating a new route: • Plotting the waypoints in the chart • Manually enter waypoints into the Route Edit dialog Plotting waypoints is used when a rough position of the waypoints is sufficient, while the waypoint’s coordinates may be exactly defined in the dialog. -
Page 49: Modifying Routes
Modifying routes Some parameters in a route may be modified from the Route dialog when the route is created or after the route has been saved. Ú Note: You need to select the Edit button to turn a saved route into edit mode. Adding and moving waypoints To add or move a waypoint by using the cursor Move the cursor to the waypoint you want to move or to the leg where you want to... -
Page 50: Reversing A Route
To add a new waypoint by entering coordinates Select the Add new waypoint option in the Route Edit dialog. Ú Note: Using this option you can only add a waypoint to the end of the route. To re-arrange waypoints Use the arrow keys in the Route Edit dialog. Deleting a waypoint A waypoint is deleted by selecting the Delete icon in the Route Edit dialog. -
Page 51: Displaying Information About Danger Objects In A Route
Displaying information about danger objects in a route The system will automatically check for danger and caution objects when you create a route or when you open a route for modification. The list of all danger and caution objects in a route is displayed in the Routes dialog. You display details about an object by selecting it. -
Page 52: Exporting Routes
Exporting routes You export a route to an SD card or to a USB drive from the Route Details dialog. When format is confirmed the route is copied to the selected media. The exported route name will be identical to the original route name. Importing routes You can import routes from an SD card or from an USB drive. -
Page 53: Transferring Routes
Transferring routes You can transfer (send) routes to another unit on the network. Select the Transfer route icon next to the route to send it to the destination unit. For destination unit ID information refer to the E50xx ECDIS Installation manual. When a route is transferred, the destination unit receives a message that a route transfer needs acceptance or rejection. -
Page 54: Sailing Along A Predefined Route
Sailing along a predefined route The Route function in the ECDIS system makes it possible to sail along any preplanned route. The system will give an alert if the vessel’s heading or position differs from predefined values defined when the route was planned. The system will also give a wheel over warning before a planned turn. -
Page 55: Managing The Chart Database
Managing the chart database The charts are managed from the Chart management option in the main menu. Ú Note: The system must use authorized charts to be ECDIS approved. When not using an official chart, this will be indicated with text in the Indication panel. The Chart database The system is designed for using approved ENC charts in S57 or S63 formats. -
Page 56: The Chart Library
The Chart library All Chart databases installed in the system are listed in the Chart Library. From the chart library you can delete a chart database, access the chart catalog for a selected database, and display the history for a selected chart database. Chart catalogs The Chart catalogs lists all datasets included in a chart database with detailed information about the charts. -
Page 57: Viewing The Chart Update History
Viewing the chart update history You can view all updates added to a database. You can show historical updates on the chart panel with highlights. You can also show history as an update tree with detailed information about each updated object sorted by agency or issue date or as a summary with brief information. -
Page 58: Manual Chart Updates
Manual chart updates You can manually edit a dataset by adding new objects and modify existing objects by using the Manual update function. Ú Note: The Manual update option is only to be used for official chart updates. Other chart information can be added to the chart by using the User chart function. - Page 59 Adding user chart objects User chart objects are added by using the User chart option in the Chart management menu. Select the Add object in the User chart menu - A list of object categories is displayed in the menu area Select a category and then the type of object you want to add - The selected object type is displayed in the menu area Select the geometry icon to display option for shape and position...
-
Page 60: Manual Updates And User Chart Objects Update History
Manual updates and User chart objects update history The History option for Manual updates and User chart (including Mariner objects) in the Chart management menu includes a list of all changes. The history options also allows for editing item details. The example shows the Manual update history menu. -
Page 61: The Log Book
The Log book System information and vessel movements are automatically logged and saved to an internal database in the system. Two log books are recorded at the same time: the 12-hour log book where records are done at 1 minute intervals, and the 3-month log book where records are done at 15 minute intervals. -
Page 62: Plecdis Systems
PLECDIS systems A Simrad PLECDIS system consists of two identical type approved E5024 or E5027 ECDIS systems via the Ethernet ports on the E5000 processor. When type approved charts are used in the system, a PLECDIS system allows the ship to operate without paper charts onboard. -
Page 63: Automatic Data Synchronization
Automatic data synchronization When two systems are interconnected, the system can be set up to automatically synchronize data between the systems. This setting is done in the System Synchronization dialog. Double-click the Node name field - The system will automatically assume a name for the first ECDIS that are to be included in the synchronization setup Re-name the node's system name if required Enter the node's IP address... -
Page 64: Manual Data Synchronization
Manual data synchronization You can manually back up data on one ECDIS system with other interconnected ECDIS systems. The back up can include the chart database with manual updates, mariner objects, routes, data permits, and configuration files. The manual update is started from the Backup arrangement dialog. -
Page 65: Maintenance
Verify that the color for the diagonal lines can be clearly distinguished from the background. If not, the monitor has to be sent to Simrad for recalibration Return to the Chart library panel and select your preferred chart database to go back to... -
Page 66: Backup And Restore Of System Data
Backup and restore of system data The system includes a backup and restore function, making it possible to back-up and restore local system data. Ú Note: This is not a backup of the full system image, merely the configuration and settings. - Page 67 Detailed instructions for how to install the software are included with the upgrade files. Maintenance| E50xx ECDIS Operator Manual...
-
Page 68: System Messages
System messages The ECDIS message system The system will continuously check for danger situations and system faults while the system is running. In the system, the alert escalation is set to 60 seconds and users are not able to change the alert escalation time. -
Page 69: Acknowledging Alerts
Type Icon State Sound Active - not None acknowledged Active - Warning None acknowledged Rectified - not None acknowledged Caution Active None Acknowledging alerts You acknowledge an alarm or a warning by right-clicking the relevant alert in the Alert panel. If several alerts are active they must be acknowledged separately in the Alert panel. -
Page 70: The Alerts List
The Alerts list You display a list of all active alarms and warnings by right-clicking an alarm or warning icon in the Alert panel. You can also display the Alerts list from the menu. You can list all active alerts, or you can list them by group selected from the drop-down list. From the Alerts list you can acknowledge alerts individually or all at the same time. -
Page 71: Fault Finding
All error messages shown on the screen should be logged for this purpose. If you are not able to correct the error situation yourself, you should contact your nearest Simrad service office for advice or to request service on board. Fault identification The fault-finding table below assumes that the problem is caused by the units included in the system or the connected sensors, and that no other external factors are involved. - Page 72 Refer to installation manual PLECDIS not synchronizing in or configuration and operational manual for PLECDIS configuration • Unplug all cables from unit Smoke coming out of E5000 Unit no longer serviceable • Simrad technician required processor unit Fault finding| E50xx ECDIS Operator Manual...
-
Page 73: Terms And Abbreviations
Terms and abbreviations Automatic Identification System. System where vessel information (location, course, speed, etc.) is broadcast by VHF radio, for use by other vessels in navigation and collision avoidance. ARGUS Simrad professional X-band radar. ARPA Automatic Radar Plotting Aid. ATON Aids To Navigation. - Page 74 In essence this is a two-wire shielded, serial data link, permitting one device to talk while other devices listen. Numerous different sentences are available, permitting communication between various different devices. Product name for a Simrad Multi-Function Display. PLECDIS Paperless ECDIS system.
- Page 75 The standard vector format for official ENC charts, stated in the International Hydrographic Organization (IHO) Special Publication S-57. The International Hydrographic Organization standard for encrypting and securing electronic navigational chart data. The International Hydrographic Organization test data set for chart data presentation. SART Search And Rescue Radar Transponder.
-
Page 76: Icons
Icons This section includes all icons used in the E50xx system. If a function or an option not is available, the icon appears greyed. Shortcut buttons Ú Note: Some of the shortcut buttons have a light indicator that can be green or yellow. Green indicates standard ECDIS mode, while yellow indicates non-ECDIS mode. -
Page 77: Chart Panel Icons
Restore defaults • Resets settings to defaults set by the IEC standard. Man Over Board (MOB) • Click to create a MOB waypoint at the vessel's position • Right-click to remove single or all MOB waypoints Chart panel icons Increases the chart scale Zooms the chart to best available scale Decreases the chart scale General interface icons... -
Page 78: Route Icons
Opens the Alerts menu. Opens the Targets menu. Opens the Settings dialogs. Route icons Transfers the route to another unit Indicates a waypoint in the route menu Indicates a leg in the route menu Deletes a selected waypoint/event mark Moves a selected waypoint up in the list of waypoints Moves a selected waypoint down in the list of waypoints Opens the waypoint/event mark edit menu Chart management icons... -
Page 79: Icons In Manual Update Menus
Icons in Manual update menus Refreshes the list of datasets currently displayed in the chart view Add Manual update object Opens the child editing menu Opens the attribute editing menu Opens the geometry editing menu Modify Manual update objects Opens the child editing menu Opens the object editing menu Opens the geometry editing menu Highlights the object in the chart, and moves chart center to the... -
Page 80: User Chart Objects Menu Icons
User chart objects menu icons Add User chart object Opens the child editing menu Opens the attribute editing menu Opens the geometry editing menu Modify User chart object Opens the child editing menu Opens the object editing menu Opens the geometry editing menu Highlights the object in the chart, and moves chart center to the selected object Deletes the selected object... -
Page 81: System Settings Icons
System settings icons SA certificates Refreshes the SA certificates list Removes the SA certificate Installs the SA certificate Grounding check Increases the value of a setting Decreases the value of a setting Object information icons Highlights the object in the chart, and moves chart center to the selected object Displays an image file related to the selected object Displays a txt file with additional object information in a separate... - Page 82 Symbol Description AIS target - Selected, indicated with a square (dotted line) around the target symbol AIS target - Sleeping, aligned with received heading information or with COG information if heading is not available AIS target, activated - True scaled outlines AIS target with heading line and SOG/COG (dotted line), and with indicated turn direction AIS target with heading line, SOG/COG (dotted line) and past track...
- Page 83 Symbol Description Physical AIS AtoN - Special mark Physical AIS AtoN - Starboard hand mark Unlit Physical AIS AtoN - Unlit (failure of lights) Physical AIS AtoN - West cardinal mark Radar target - Dangerous, indicated with bold line and with red color.
- Page 84 Symbol Description Virtual AIS AtoN - Safe water Virtual AIS AtoN - South cardinal mark Virtual AIS AtoN - Special mark Virtual AIS AtoN - Starboard hand mark Virtual AIS AtoN - West cardinal mark Missing Virtual AIS AtoN Missing Icons| E50xx ECDIS Operator Manual...
- Page 85 Index Chart orientation 11, 28, 76 Course-up 28 Abbreviations 73 Head-up 28 Acknowledging alerts 69 North-up 28 Activating Track-up 28 Anchor watch 37 Chart permit code 20, 22 AIS 38 Chart permits 23 Communicating with other vessels 40 Installing 23 Create messages 41 Chart scale 19 Filters, enabling 40...
- Page 86 Brilliance 18 Main menu 77 Display mode 11, 27, 76 Manual updates 79 Base 27 Object information 81 Custom 27 Route menus 78 Full 27 System settings 81 Standard 27 User chart objects 80 Display palettes 19 IMO 8 Display Importing routes 52 Verifying color 65 Indications 69...
- Page 87 Monitor 9 Distance from leg 26 Move chart center 16 Enable light character 26 Full light lines 26 Leg activation scale 26 Light distance 26 Navigation panel 14, 54 Paper chart symbols 26 Navigational area 28 Scale min 26 Area 28 Symbolized boundaries 26 Fixed position 28 Portrayal style 26...
- Page 88 Scale min 26 Calculating 35 Scale-dependent objects 26 View sent or received AIS messages 41 SCAMIN 26 Voyage Scrolling 19 Starting 54 Send Stopping 54 AIS message 41 VRM 33 Route to another unit 53 Sensors 14 Invalid 14 Warnings Missing 14 Lost targets 45 Valid 14...
- Page 90 www.navico.com\commercial...
Need help?
Do you have a question about the E50 Series and is the answer not in the manual?
Questions and answers