Table of Contents
Advertisement
Quick Links
Advertisement
Table of Contents

Related Manuals for Comtrend Corporation WD-1021


Summary of Contents for Comtrend Corporation WD-1021
- Page 1 Wireless-N USB Adapter User Manual Version A1.0, March 25, 2013...
- Page 2 Copyright Copyright© 2013 Comtrend Corporation. All rights reserved. The information contained herein is proprietary to Comtrend Corporation. No part of this document may be translated, transcribed, reproduced, in any form, or by any means without the prior written consent of Comtrend Corporation.
-
Page 3: Table Of Contents
Table of Contents pter I: Product Information ..............3 1‐1 Introduction..........................3 1‐2 System Requirements ......................4 1‐3 Package Contents .......................5 1‐4 Get familiar with your new wireless network adapter........6 PTER II: Driver Installation and Configuration ....... 7 2‐1 Network Adapter Installation..................7 2‐2 How to connect to a wireless access point............13 2-2-1 Using the Comtrend Configuration Utility........13 2-2-2 Using Windows Zero Configuration .......... -
Page 4: Chapter I: Product Information
Chapter I: Product Information 1‐1 Introduction This network adapter is compact in size and you can plug it into the USB port of your computer, acting like an embedded network card. In addition to common wireless standards 802.11b/g, this wireless network adapter is also 802.11n compatible, supporting data transfer rates up to 300Mbps. -
Page 5: 1-2 System Requirements
1‐2 System Requirements An available USB 2.0 port Windows XP, Vista, or Windows 7 operating system CD-ROM drive At least 100MB of available disk space... -
Page 6: 1-3 Package Contents
1‐3 Package Contents Before you start using this wireless network adapter, please check if there’s anything missing in the package, and contact your place of purchase to claim missing items: * 1 - CD-ROM (Driver/Utility/QIG/User Manual) (1) * 1 - USB Wireless Network Adapter (2) * 1 - USB Cable (3) * 1 - Printed QIG (4) -
Page 7: 1-4 Get Familiar With Your New Wireless Network Adapter
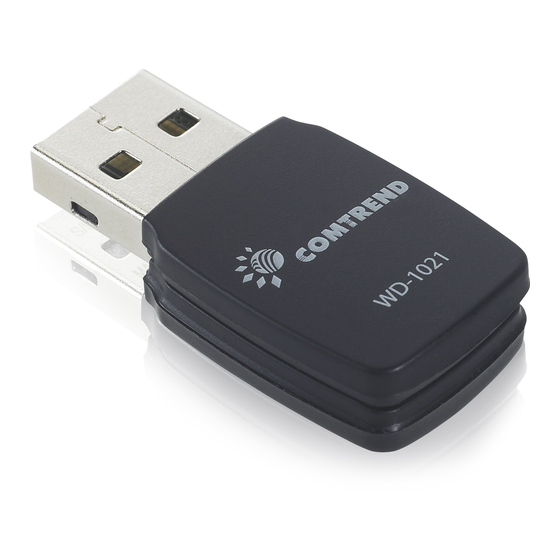
1‐4 Get familiar with your new wireless network adapter 1. USB connector 2. Link/Activity LED (Under the case) 3. WPS Button LED Name Light Status Description Link/ No wireless network adapter is installed. Activity A solid light for 5 seconds means the WPS connection is established successfully. Blinking The wireless network adapter is transferring or receiving data. -
Page 8: Cha Pter Ii: Driver Installation And Configuration
CHAPTER II: Driver Installati on and Configuration 2‐1 Network Adapter Installation Follow the instructions below to install your new wireless network adapter: Warning: If you have any other wireless utilities or adapters running on your computer, please close or uninstall them prior to installing the Comtrend Wireless Utility and Adapter in order to avoid any conflict. - Page 9 For Windows Vista / Windows 7 OS, you’ll be prompted to confirm installation. Click ‘Install this driver software anyway’ to continue. Note: if the following Window pops up during the installation process, click the ‘Continue Anyway’ button.
- Page 10 2. Select the language you wish to use, and then click ‘Next’. 3. Click ‘Next’ to start installation. The installation procedure needs few moments to complete.
- Page 11 4. Click ‘Finish’ to reboot your computer to complete the installation procedure. This is required before you can use your new USB wireless network adapter. 5. After your computer is rebooted, insert the USB wireless network adapter into an available USB 2.0 port of your computer. Never use force to insert the adapter.
- Page 12 6. The following message will appear on your computer, click ‘Cancel’ to proceed with the installation.
- Page 13 7. After the installation is complete, the Comtrend wireless configuration utility will be shown on your computer’s desktop automatically. You will also see an icon in the lower-right corner of your Windows toolbar. You can click the icon to open the configuration utility. You can refer to the icon to see the status of your wireless connection: Wireless network adapter not detected No connection with access point is established (red)
-
Page 14: 2-2 How To Connect To A Wireless Access Point
2‐2 How to connect to a wireless access point To use the wireless network, you need to connect to a wireless access point first. You can either use the Comtrend configuration utility (which comes with the network adapter driver), or the Windows Zero Config uration utility (comes with the Windows o perating system). - Page 15 3. All available wireless access points that are within range of the wireless network adapter and computer will be displayed. If the wireless access point you wish to connect to does not appear here, you can click the ‘Refresh’ button to scan for wireless access points again;...
- Page 16 Click ‘OK’ when ready. All options in this page will be filled automatically according to the access point you wish to add to the profile. However, you can still modify them to meet your requirements. Profile Name You can give a name to this profile, so you can remember its purpose or location.
- Page 17 Network Select the network authentication type from Authentication the drop-down menu. This setting must be identical to the setting of the wireless access point you wish to connect Data encryption Select the data encryption type from the drop-down menu. This setting must be identical to the setting of the wireless access point you wish to connect to.
- Page 18 Check this box and PAC (Privilege Access Certificate) will be automatically selected. 5. The network adapter will attempt to connect to the access point; this may require a few moments. When the ‘Status’ becomes ‘Associated’, your computer is connected to the access point you selected. Click ‘Close’...
-
Page 19: Using Windows Zero Configuration
2-2-2 Using Windows Zero Configuration Windows XP and Vista have a built-in wireless network configuration utility, called the ‘Windows Zero Configuration’ (WZC). You can also use WZC to configure your wireless network parameters: 1. Right-click the Comtrend configuration utility icon, and click ‘Open Config Utility.’... - Page 20 3. A message indicating that you’ve been switched to Windows Zero Configuration mode will appear. Click ‘OK’ to continue. NOTE: To return to the Comtrend utility, uncheck the ‘Windows Zero Config’ box. 4. Click the ‘Start’ button (should be located at the bottom-left corner of windows desktop);...
- Page 21 5. Double click ‘Network Connections’. 6. Right-click ‘Wireless Network Connection’ (it may have a number as a suffix if you have more than one wireless network adapter, please make sure you right-click the ‘Comtrend 802.11n Wireless LAN Adapter), then select ‘View Available Wireless Networks’.
- Page 22 7. All wireless access points in proximity will be displayed here. If the access point you want to use is not displayed here, try to move your computer closer to the access point, or you can click ‘Refresh network list’ to rescan for access points. Click the access point you want to use if it’s shown, then click ‘Connect.’...
- Page 23 9. If you can see the ‘Connected’ message, the connection between your computer and wireless access point is successfully established.
-
Page 24: 2-3 Connection Profile Management
2‐3 Connection Profile Management If you need to connect to different wireless access points at different times, like the access point of your home, office, cybercafe, or public wireless service, you can store the connection parameters (encryption, passphrase, security etc, etc.) as a profile for every access point so you don’t have to input these parameters every time when you want to connect to a specific wireless access point. -
Page 25: How To Add A New Profile
2-3-1 How to add a new profile This function allows you to setup connection parameters for a specific wireless access point in advance, without connecting to it first. If you want to create a new profile, click the ‘Profile’ tab, then click the ‘Add’... - Page 26 You’ll be prompted to input the connection parameters for the wireless access point you wish to connect to: Required parameters are: Profile name You can give a name to this profile so you can remember its purpose easily. It can be any phrase to help you remember.
- Page 27 Data encryption Select the data encryption type from drop-down menu. This setting must be identical to the setting of the wireless access point you wish to connect to. ASCII / When the encryption type is ‘WEP’, you need PASSPHRASE to input a ‘passphrase’ to connect to the wireless access point.
-
Page 28: How To Remove An Existing Profile
2-3-2 How to remove an existing profile When you no longer need an existing profile, you can remove it. If you want to remove a profile, click the ‘Profile’ tab, then select an existing profile that you wish to remove, and then click the ‘Remove’ button. -
Page 29: How To Edit An Existing Profile
2-3-3 How to Edit an existing profile If you have added a profile before, and you wish to change the content of the profile, you can use this function. Select a profile from the list first, and then click the ‘Edit’ button. You’ll be provided with the contents of the selected profile, and you can edit them. -
Page 30: How To Make A Copy Of An Existing Profile
2-3-4 How to make a copy of an existing profile If you need to make a copy of a specific profile, you can use this option. This function is very convenient when you need to build a new profile whose parameters are similar to any existing profile. To do this, select an existing profile, and then click the ‘Duplicate’ button. You’ll be prompted to input a profile name. -
Page 31: How To Set As A Default Profile
2-3-5 How to set as a default profile If you wish to use a specific profile as the default connection, you can select a profile in the list, and click ‘Set Default.’ The selected profile will become the default selection and the configuration utility will attempt to connect to the selected access point. -
Page 32: How To View General Information, Status And Network Statistics
2‐4 How to view general information, status and network statistics The Comtrend configuration utility provides information about network statistics and link status. If you want to know how your wireless network adapter works, you can use these functions to get detailed information about the wireless connection you’re using. 2-4-1 General Information If you want to know the general information of the access point you’re connected to, click the ‘General’... -
Page 33: Status
2-4-2 Status If you want to know the status of your wireless network adapter, click the ‘Status’ tab:... -
Page 34: View Network Statistics
2-4-3 View Network Statistics To view the statistical data of the wireless network adapter, click the ‘Statistics’ tab, and the statistics of the wireless connection will be displayed: All connection-related statistics are displayed here. You can click the ‘Reset’ button, to reset the statistics of all items back to 0. -
Page 35: 2-5 Miscellaneous Settings
2‐5 Miscellaneous Settings There are a few functions provided by the Comtrend configuration utility that you can access at the bottom of the configuration menu: The descriptions of these functions are listed as follows: Show Tray Icon Check this box to show an icon on the system tray. - Page 36 Disable Adapter Check this box to disable the wireless network adapter. All functionalities of the configration menu will disappear. To resume, unckeck the ‘Disable Adapter’ box. Windows Zero Config Use the Windows Zero Configuration Utility to manage the wireless connections. See section 2-2-2.
-
Page 37: 2-6 Establish A Secure Connection With The Ap By Software Wps
To connect to a wireless router (or access point) via the WPS Hardware button: 1) Press and hold the button on the WD-1021 for 2 seconds. 2) Press the WPS button on the access point you wish to connect within 2 minutes. A solid light on your WD-1021 for 5 seconds means the WPS connection has established successfully. - Page 38 2. Click the ‘Wi-Fi Protect Setup’ tab. 3. You can use PIN code or Push-Button configuration, and the WPS-compatible wireless access point must use the same type of WPS. For instructions on the setup for each type of WPS, see the next 2 sections for detailed instructions.
-
Page 39: Pin Code
2-6-1 PIN Code To use PIN Code, click the ‘Pin Input Config (PIN)’ button: You’ll be prompted to select an access point you wish to connect to. If you know its SSID, click ‘Yes’, otherwise click ‘No’. If you select ‘Yes’, a list of all WPS-compatible APs nearby will be displayed;... - Page 40 If you select ‘No’, the wireless network adapter will prompt you to enter an 8-digit PIN code into your AP, without selecting an AP in advance. After you select ‘Yes’ or ‘No’ in the previous step, the network adapter will attempt to connect to the WPS-compatible AP, and an 8-digit number will appear.
-
Page 41: Push Button
2-6-2 Push Button To use Push-Button WPS configuration, click the ‘Push Button Config (PBC)’ button. This is the easiest way to establish a secure connection by WPS, but if there is more than one WPS-compatible AP using Push-Button config, please use the PIN Code method instead. After you click the ‘Push Button Config’, a message box will appear: Activate the WPS Push-Button function on the wireless access point, and the wireless network adapter will establish a secure connection with the... -
Page 42: Cha Pter Iii: Soft-Ap Function
CHAPTER III: SoftAP Function Apart from becoming a wireless client of other wireless access points, this wireless adapter can also act as a wireless access point. You can switch this wireless adapter’s operating mode to ‘AP’ mode to simulate the function of a real wireless access point via the software, and all other computers and wireless devices can connect to your computer wirelessly, and even share the Internet connection you have. - Page 43 2. Select the tab ‘Mode’, and then select ‘Access Point’ from the drop-down menu. It requires a few moments to switch to AP mode, please be patient.
- Page 44 After the mode switch is complete, you’ll see general information about the software AP, which shows the AP’s SSID and connected wireless clients.
-
Page 45: How To Configure Ssid And Channel
3-1-1 How to configure SSID and Channel To configure a software AP, click the ‘Config’ button:... - Page 46 The ‘Wireless Network Properties’ will be displayed. Note that Ad-Hoc mode is not available when the network adapter is in AP mode. The description of the major setup items are listed below: Network Name Input the SSID (the name used to identify this (SSID) wireless access point) here.
-
Page 47: How To Setup Soft-Ap Security
3-1-2 How to Setup Soft-AP Security To setup security options for AP mode, configure the ‘Wireless Network Security’ section as follows: The descriptions are listed below: Network Select the network authentication mode from the Authentication drop-down menu. Data Encryption Select the data encryption method from the drop-down menu. - Page 48 Network key / If the network authentication mode is WPA, input Confirm network key the WPA passphrase in both boxes. To save changes, click ‘OK,’ otherwise click ‘Cancel’ to leave this menu and keep settings unchanged.
-
Page 49: 3-2 Advanced Settings
3‐2 Advanced Settings If you want to setup the advanced settings of the software access point, select the ‘Advanced’ tab. If you don’t know the meaning and affects of these settings, keep them unchanged. The descriptions of all the setup items are listed below: Beacon Interval Input the wireless beacon time interval here. -
Page 50: 3-3 Wireless Statistics
3‐3 Wireless Statistics Select the ‘Statistics’ tab and the data statistics for the software access point will be displayed. Click ‘Reset’ to reset the value of every item back to ‘0’. -
Page 51: 3-4 Internet Connection Sharing (Ics)
3‐4 Internet Connection Sharing (ICS) In this page, you can assign a network adapter installed on your computer as the path for all wireless clients to get connected to the Internet. If you have only one network adapter (except this software access point), you don’t have to select the network adapter here; if you have more than one network adapter, select the one you wish to be used as the Internet gateway. -
Page 52: Cha Pter Iv: Appendix
CHAPTER IV: Appendix 4‐1 Hardware Specification Standards: IEEE 802.11b/g/n Interface: USB 2.0 (USB 1.1 Compatible) Frequency Band: 2.4000 ~ 2.4835GHz Data Rate: 11b: 1/2/5.5/11Mbps 11g: 6/9/12/24/36/48/54Mbps 11n (20MHz): MCS0-15 (Up to 144Mbps) 11n (40MHz): MCS0-15 (Up to 300Mbps) Security: WEP 64/128, WPA, WPA2 and IEEE 802.1x Antenna: Internal Antenna (2T2R) Drivers: Windows XP/Vista/Windows 7 LED: Link/Activity...
Need help?
Do you have a question about the WD-1021 and is the answer not in the manual?
Questions and answers