Table of Contents
Advertisement
Advertisement
Table of Contents

Related Manuals for VTech T1200


Summary of Contents for VTech T1200
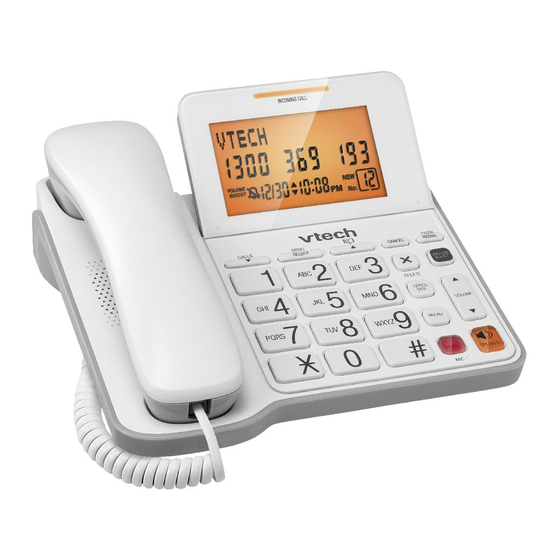
- Page 1 User Guide For product support Model: please call: 1 300 369 193 VTech T1200...
- Page 2 INTRODUCTION To your VTech T1200 Corded Phone • Phonebook –The phonebook stores up to 65 entries. • Calling Number Display* lets you see who’s calling. Your phone stores details of the last 20 callers in the Call log. * IMPORTANT You need to subscribe to a Network Calling Number Display service to be able to see the caller’s number...
- Page 3 GOT EVERYTHING? The package contains the following items: • VTech T1200 corded handset • VTech T1200 base station • Wall mount bracket • Coiled handset cord • Power adaptor • Telephone line cord and adaptor • User guide...
-
Page 4: Table Of Contents
IN THIs GUIDE Important safety instructions Getting started Location Setting up Installation options Using your VTech T1200 phone on a broadband ADSL line? Date and time Getting to know your phone Telephone base buttons Telephone base LCD display Navigating the menus... - Page 5 Line power mode (no AC power) Telephone settings Using the menu Set date and time Set contrast Add a phonebook entry Phonebook Review phonebook entries Dial a phonebook entry Edit a phonebook entry Delete a phonebook entry Speed dial Store a speed dial entry Review a speed dial entry Dial a speed dial entry Edit a speed dial entry...
- Page 6 Dial from the call log Save a call log entry to the phonebook Save a call log entry to the speed dial entry Delete an entry in the call log Delete the entire call log Network Voicemail Call waiting 3-Way chat Help General information Cleaning...
-
Page 7: Important Safety Instructions
IMPORTANT sAfETY INsTRUCTIONs When using your telephone equipment, basic safety precautions should always be followed to reduce the risk of ire, electric shock and injury, including the following: Read and understand all instructions in the user guide. Observe all markings on the product. Avoid using a telephone during a thunderstorm. - Page 8 • If the product does not operate normally by following the operating instructions. • If the product has been dropped and the outer casing has been damaged. • If the product exhibits a distinct change in performance. Avoid using a telephone during an electrical storm. There may be a remote risk of electric shock from lightning.
-
Page 9: Getting Started
GETTING sTARTED LOCATION Place your VTech T1200 within 2 metres of the mains power socket and telephone socket so that the cables will reach. -
Page 10: Setting Up
sETTING UP Telephone base installation Plug one end of the coiled handset cord into the handset jack on the left side of the telephone base. Plug the other end into the jack at the bottom of the handset. Handset Coiled handset cord Plug the power adaptor into the POWER jack at the bottom of the base station. -
Page 11: Dial Tone
Mains power wall socket Telephone wall jack Power adapter If you have ADSL high-speed Internet service, a ADSL ilter (not included) is required. TEL LINE jack POWER jack Note: Ensure power adaptor is fed through slot on base so unit sits lush with the desk. SPEAKER to check for a 4. -
Page 12: Installation Options
INsTALLATION OPTIONs If you want to mount your telephone on a wall, use the mounting bracket provided with the package to connect with a standard dual-stud telephone wall mounting plate. If you do not have this mounting plate, you can purchase one from many hardware or consumer electronic retailers. - Page 13 Insert the protruding tab of the mounting bracket into the groove at the centre of the telephone base. Press down on the small tabs of the mounting bracket and snap them into the slots at the telephone base. Remove the power adapter and the telephone line cord from the slots on the bottom of the telephone base.
- Page 14 Plug the other end of the power adapter back into the mains power jack. Plug the other end of the telephone line cord into a telephone wall jack or a ADSL ilter. A DSL ilter (not included) is required if you have DSL high-speed Internet...
- Page 15 Wall mount to tabletop installation To change the telephone base from the wall mount position to tabletop position, follow the steps below. Slide the telephone base upwards, then remove it from the wall mounting plate. Unplug the power adapter and the telephone line cord from the telephone wall jack.
- Page 16 Put the handset aside. Hold down the switch hook on the telephone base, then slide the handset tab upwards to remove it from the slot. Rotate the handset tab by 180 degrees, then replace the handset tab into the slot until it locks into position. Switch hook Handset Press on the small tabs of the mounting bracket, and...
- Page 17 Plug the power adaptor into the base station, plug the other end of the power adaptor into a mains power wall socket. Insert one end of the telephone line cord into the base station and the other end of the telephone line cord into a telephone wall jack.
-
Page 18: Using Your Vtech T1200 Phone On A Broadband Adsl Line
Check for a dial tone by lifting the handset or pressing SPEAKER. If you hear a dial tone, the installation is successful. WARNING Do not place your VTech T1200 in the bathroom or other humid areas. IMPORTANT The base station must be plugged into the mains power socket at all times. -
Page 19: Date And Time
DATE AND TIME If you have subscribed to a Network Calling Number Display service, the date and time are set automatically with each incoming call. If you have not subscribed to a Network Calling Number Display Service you can set the date and time manually. Set the date and time manually: Press MENU when the phone is not in use. -
Page 20: Getting To Know Your Phone
GETTING TO kNOw YOUR PHONE TELEPHONE bAsE bUTTONs INCOMING CALL LIGHT • Flashing when there is an incoming call. REDIAL/PAUSE • While using the handset or speakerphone, press to dial the last number dialed. • While the telephone is idle, press to display the last number dialed. - Page 21 CANCEL • Press to cancel an operation. • Press to return to the previous menu. • Press and hold to return to idle mode. • When the telephone is idle, press and hold to clear the missed call indicator. • Press to enter the phonebook.
- Page 22 6. CALLS • Press to review the call log. • While using the menu, press to scroll through the setting. • While reviewing the phonebook, speed dial memory or call log history, press to scroll down. • While entering names or numbers, press to move the cursor to the left.
- Page 23 11. MUTE • During a call, press to mute the handset or speakerphone. Press again to resume your conversation. 12. VOLUME BOOST • Press to turn on the volume boost during a call in handset earpiece mode. 13. pVOLUMEq While on a call, press to adjust the listening •...
-
Page 24: Telephone Base Lcd Display
TELEPHONE bAsE LCD DIsPLAY Icons Descriptions New call log entry- new and missed calls. Call log entry counter - call log entry number. Ringer off - the ringer is off. VOLUME Volume Boost- the Volume Boost feature is BOOST turned on. -
Page 25: Navigating The Menus
NAVIGATING THE MENUs To enter the main menu of the telephone base Press MENU repeatedly until the screen displays the desired feature. or CALLS until the screen displays the Press desired feature menu. Press SELECT to save your selection and move to the next feature. -
Page 26: Keystroke Table
kEYsTROkE TAbLE Characters by number of key press Dial Key &... -
Page 27: Using The Phone Make, Answer Or End A Call
UsING THE PHONE MAkE, ANswER OR END A CALL To make a call: SPEAKER. Lift the handset or press When you hear a dial tone, dial the number with the dialing keys. To predial a call: Enter the number with the dialing keys. Press X/DELETE to make corrections, if necessary. -
Page 28: Volume Control
To switch from the speakerphone to the handset during a call: • Lift the handset. Note: Switching between the handset and speakerphone cancels the mute function. VOLUME CONTROL To adjust the listening volume during a call: During a call, press pVOLUMEq to adjust the listening volume. -
Page 29: Redial
REDIAL The telephone stores the last number dialed (up to 24 digits). To dial the last dialed number: SPEAKER. Lift the handset or press Press REDIAL to dial the number. -OR- When the telephone is idle, press REDIAL to display the last dialed number. -
Page 30: Volume Boost
VOLUME bOOsT The Volume Boost feature makes voices sound louder and clearer. This feature works only if you are on a call using the corded handset. To turn the Volume Boost feature on: Press VOLUME BOOST while you are on a call using the handset, the VOLUME BOOST icon displays on the screen. -
Page 31: Chain Dialing
CHAIN DIALING Use this feature to initiate a dialing sequence from the numbers in the phonebook, speed dial memory or call log history while you are on a call. Chain dialing is useful if you need to access numbers other than telephone numbers (such as bank account numbers or access codes) from the phonebook, speed dial memory locations or call log. -
Page 32: Line Power Mode (No Ac Power)
LINE POwER MODE (NO AC POwER) This telephone provides minimal functionality during a power failure. When AC power is not available, the screen is blank and many telephone features do not function. Only touch-tone dialing and corded handset volume adjustment are supported. The telephone uses power from the telephone line to enable you to make and answer calls only using the corded handset and dialing keys. -
Page 33: Telephone Settings
TELEPHONE sETTINGs UsING THE MENU You can use the menu to change the telephone settings. Press MENU repeatedly until the screen displays the desired feature. or CALLS until the screen displays the Press desired feature menu. Press SELECT to save your selection and move to the next feature. -
Page 34: Set Date And Time
sET DATE AND TIME When the telephone is idle, the screen shows the date and time. If you subscribe to a Network Calling Number Display service, the date and time are set automatically with each incoming call. You may also set the date and time manually by following the steps below. -
Page 35: Add A Phonebook Entry
PHONEbOOk The phonebook stores up to 65 entries with up to 24 digits for each phone number and 15 characters for each name. ADD A PHONEbOOk ENTRY Press when the telephone is not in use. or CALLS to highlight STORE, and then Press press SELECT. -
Page 36: Review Phonebook Entries
REVIEw PHONEbOOk ENTRIEs Phonebook entries appear alphabetically. Press when the telephone is not in use. Press SELECT to select REVIEW. or CALLS to browse through the Press phonebook. -OR- • Use the keypad to enter the letters accociated with the name. Notes: •... -
Page 37: Edit A Phonebook Entry
EDIT A PHONEbOOk ENTRY Search for the desired entry in the phonebook (see Review phonebook entries). When the desired entry appears, press SELECT. Edit the name, and then press SELECT. Edit the number, and then press SELECT to conirm. The screen displays STORED briely, and then shows the store entry. -
Page 38: Speed Dial
sPEED DIAL This telephone has 7 user-programmable speed dial memory locations (4-9, and 0) where you can store telephone numbers you wish to dial more quickly. Each speed dial memory location can store a telephone number with up to 24 digits. sTORE A sPEED DIAL ENTRY Press SPEED DIAL when the telephone is not in use. -
Page 39: Dial A Speed Dial Entry
DIAL A sPEED DIAL ENTRY See Review a speed dial entry to show the desired speed dial entry. When the screen displays the desired entry, lift the SPEAKER. The telephone dials handset or press the displayed number. EDIT A sPEED DIAL ENTRY See Review a speed dial entry to show the desired speed dial entry. -
Page 40: Telephone Network Services
TELEPHONE NETwORk sERVICEs* *Subscription and/or usage charges may apply to use these services. Some features may not operate as described. Call your Network Service Provider for more information. CALLING NUMbER DIsPLAY If you have subscribed to a Network Calling Number Display service, you will be able to see your caller’s number on your telephone base display (provided it is not blocked) prior to answering the call. -
Page 41: Memory Match
answer a call before the information appears on the screen, it does not show in the call log history. Note: If the phone number has more than 15 digits, only the irst 12 digits will be saved or shown in the call log. -
Page 42: Call Log Display Screen Message
CALL LOG DIsPLAY sCREEN MEssAGE With some incoming calls, if the telephone number is not available, the telephone base may display one of the following explanations: With some incoming calls, if the telephone number is not available, the telephone base may display one of the following explanations: Unavailable This caller’s number is unavailable. -
Page 43: Review The Call Log
REVIEw THE CALL LOG Review the call log to ind out who called, to return the call, or to copy the caller’s name and number into your phonebook. Press CALLS when the telephone is not in use. or CALLS to scroll to the desired entry. Press DIAL fROM THE CALL LOG Press CALLS when the telephone is not in use. -
Page 44: Save A Call Log Entry To The Speed Dial Entry
sAVE A CALL LOG ENTRY TO THE sPEED DIAL ENTRY Press CALLS when the telephone is not in use. or CALLS to scroll to the desired call log Press entry. Press SPEED DIAL. The screen shows ASSIGN SPDIAL #. Press 0, or 4-9 to select the desired speed dial memory location. -
Page 45: Network Voicemail
NETwORk VOICEMAIL You can get messages from your ixed home phone when you are away from the phone, busy on another call or using the Internet. Callers will hear a standard greeting inviting them to leave a message. To call Network Voicemail In idle mode, press and hold 1. -
Page 46: 3-Way Chat
3-wAY CHAT This service is available on most lines ready for you to use. If you are already on a call, you can add another person and then have a 3-Way Chat. To put existing call on hold and make a new call then to 3-Way Chat Press RECALL. -
Page 47: Help
HELP My telephone doesn’t work at all. • Make sure the power adaptor is securely plugged in. • Make sure you plug the telephone line cord securely and irmly into the telephone base and the telephone wall jack. The display shows NO LINE. I cannot get a dial tone. •... - Page 48 rewired to allow all existing telephone jacks to work. Contact your service provider for more information. I get noise, static, or weak signals even when I’m near the telephone base. • If you subscribe to high-speed Internet service (ADSL - digital subscriber line) through your telephone line, you must install a ADSL ilter between the telephone line cord and the telephone wall jack.
- Page 49 • If other phones in your home are having the same problem, contact your telephone service provider (charges may apply). I hear other calls while using my phone. • Disconnect the telephone base from the telephone jack, and plug in a different telephone. If you still hear other calls, call your telephone service provider.
- Page 50 My calls cut in and out while I’m using my handset. • Other electronic products can cause interference with your phone. Try installing your phone as far away as possible from these types of electronic devices. • Do not install this phone near a microwave oven or on the same electrical outlet.
- Page 51 • If you subscribe to high-speed Internet service (ADSL - digital subscriber line) through your telephone line, you must install a ADSL ilter between the telephone line cord and the telephone wall jack. The ilter prevents noise and Calling Number Display problems resulting from ADSL interference.
- Page 52 Connect power to the telephone base. Wait for the handset to reestablish its connection with the telephone base. Allow up to one minute for this to take place. TecHelp line 1300 369 193 Call TecHelp: if you are having dificulties using your VTech T1200. •...
-
Page 53: General Information
GENERAL INfORMATION CLEANING Simply clean the handset and base with a damp (not wet) cloth, or an anti-static wipe. Never use household polish as this will damage the product. Never use a dry cloth as this may cause a static shock. ENVIRONMENTAL •... -
Page 54: Customer Service & Product Warranty
Customer Service If you require assistance in operating this product please call the TecHelp Information Line on 1300 369 193 or contact VTech by e-mail at: tcpsupport_au@vtech.com. If you are trying to access a Telephone Network Service and require assistance speciically related to the network service or would like to subscribe to the service, contact your service provider. - Page 55 VTech do not warrant that the product will be free from defects if defects are caused by an accident, misuse, abuse, improper installation or operation, vermin infestations, lack of reasonable care, unauthorised modiication, loss of parts, tampering or attempted repair by a person not authorised by VTech; or where the product has been damaged by lightning or a mains power surge.
- Page 56 Warranty in no way limit your rights which arise as a result of your Statutory Rights. This Voluntary Product Warranty is given by: VTech Telecommunications (Australia) Pty Ltd ABN 70 136 672 627 Address: 24 Gilby Road, Mount Waverley 3149...
- Page 57 IMPORTANT NOTE: THIS IS NOT A PRODUCT RETURN OR SERVICE ADDRESS – PLEASE CONTACT TECHELP BY PHONE OR EMAIL FOR PRODUCT AND WARRANTY SUPPORT. NO LIABILITY WILL BE ACCEPTED BY VTECH FOR PRODUCTS RETURNED TO THIS ADDRESS UNDER THIS VOLUNTARY PRODUCT WARRANTY.
- Page 58 VTech is the registered trademark of VTech Holdings Limited. Copyright © 2015 for VTech Telecommunications (Australia). All rights reserved. Printed in China. Version A FOR MORE INFORMATION CALL: TECHELP ON 1300 369 193 OR EMAIL: TCPSUPPORT_AU@VTECH.COM...
Need help?
Do you have a question about the T1200 and is the answer not in the manual?
Questions and answers