Table of Contents
Advertisement
Dear Customer,
Thank you for choosing this quality product from ASKO.
We hope it will meet your expectations and fulfi l your needs for many years
to come.
Scandinavian design combines clean lines, everyday functionality and high
quality. These are key characteristics of all our products and the reason
they are greatly appreciated throughout the world.
To get the most out of your new machine, we recommend that you read the
operating instructions before using the machine. The operating instructions
also include information on how you can help protect the environment.
Operating Instructions
Washing Machine
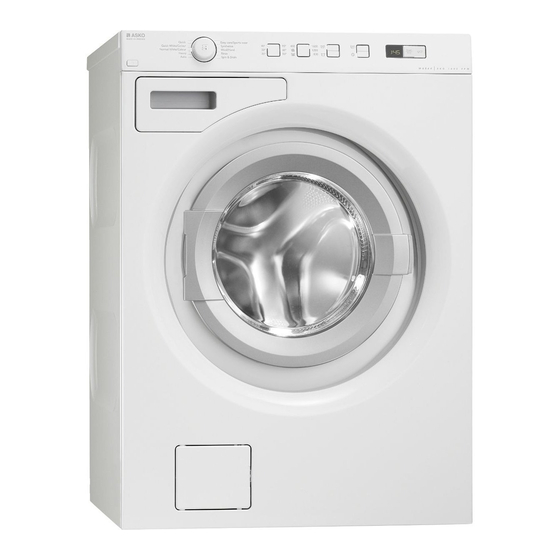
ASKO W6564W
WARNING: Read the instructions before using the machine.
Advertisement
Table of Contents

Subscribe to Our Youtube Channel
Related Manuals for Asko W6564W


Summary of Contents for Asko W6564W
-
Page 1: Operating Instructions
Dear Customer, Thank you for choosing this quality product from ASKO. We hope it will meet your expectations and fulfi l your needs for many years to come. Scandinavian design combines clean lines, everyday functionality and high quality. These are key characteristics of all our products and the reason they are greatly appreciated throughout the world. -
Page 2: Table Of Contents
Contents Before using your machine for Washing the fi rst time Sort your laundry. Transport protection Turn on the main power switch Packing material Open the washer door and load Washer door the washing Checking water hardness Add detergent and fabric softener, as required Safety instructions Select the program... - Page 3 Contents After power failure Wet washing still in the machine Error messages Technical information Information for test institute Technical data Transport protection Installation Positioning the washing machine Adjusting the feet Connection to water supply Drainage connection Electrical installation Connection on delivery Service Before contacting the service division Quick guide...
-
Page 4: Before Using Your Machine For The Fi Rst Time
Before using your machine for the fi rst time Transport protection Remove any transport protection devices before installing the machine. See the "Transport protection" chapter. Packing material Sort waste materials in accordance with local guidelines. Washer door • The washer door will not open until the machine is connected to the electricity supply. -
Page 5: Safety Instructions
• Installation should be carried out by qualifi ed to pump water out and shuts off the water ASKO technicians. intake. If the water level has not dropped within • The machine should only be used for 60 seconds, the program is terminated. -
Page 6: Child Safety
Child safety Keep an eye on children! Activate child safety catch (for detergent • Always close the door and start the compartment) programme immediately once you have On the inside of the detergent compartment is a added detergent. child safety catch. •... -
Page 7: Description Of The Washing Machine
Description of the washing machine 1. Main power switch 2. Dispenser 3. Program panel 4. Serial number plate (on inside of washer door) 5. Drainage pump cover 6. Drainage pump (behind cover) 7. Washer door... -
Page 8: Dispenser
Dispenser 1. Pre-wash 2. Main wash with liquid detergent. Use the separator (A). 3. Main wash with powder detergent. Do not use the separator. 4. Fabric softener 5. Release button 6. Child safety catch... -
Page 9: Advice And Tips Before Washing
Advice and tips before washing Here are some tips that may help you before washing. Sorting your laundry • Sort items according to: • how soiled they are • colour • material Clothing 1. Do up zips and close Velcro straps so that they don’t harm fabrics. -
Page 10: Wool
Advice and tips before washing Wool will save both water and energy. These fabrics are labelled either machine wash • If you select a fast spin speed, this reduces or hand wash. The Wool/hand wash program is energy consumption when drying in a tumble at least as gentle as washing by hand. -
Page 11: Washing
Washing Sort your laundry. Liquid detergent See the "Advice and tips before washing" When using a liquid detergent, observe the chapter. detergent manufacturer's recommendations. Place underwired bras in a laundry net. We recommend using a laundry ball with thick Empty pockets. Coins, nails and the like can detergents. -
Page 12: Select The Program
Washing Select the program 4. Everyday wash You select a program by turning the A standard program for lightly to moderately program selector. An LED lights up soiled laundry. The temperature can be selected beside the selected program and the estimated freely, so follow the washing instructions for program time is shown on the display. - Page 13 Washing 8. Wool/hand wash A gentle laundry program for wool, silk and garments that should be washed by hand. The highest temperature is 30 °C. This program has a short spin. The maximum spin speed is 800 rpm. 9. Rinse This program performs one cold rinse cycle + spin.
- Page 14 Washing Program chart Program 1. Auto 1600 2:45 2. Heavy 1600 2:40 1600 1.13 3:21 3. Normal 1600 0.47 3:06 4. Everyday wash 1600 1:40 5. Quick 1600 0:45 6. Easy Care 1200 1:40 7. Synthetics 1:20 8. Wool/hand wash 0:50 9.
-
Page 15: Select Options
Washing 40° 95° 1600 30° 60° 1200 Cold 50° Select options washing will remain covered by the water You can select options to adjust the from the fi nal rinse, stopping it from getting wash program to suit your own specifi c creased. - Page 16 Washing Super rinse Use the Super Rinse option if you want to increase the number of rinses. The maximum number of rinses is seven, and the number of rinses varies depending on the selected program. Recommended for persons with extremely sensitive skin and/or in areas with very soft water.
-
Page 17: Close The Washer Door And Press The Start/Stop Button
Washing Close the washer door and Once the program has fi nished press the Start/Stop button The text "End" is shown on the display for 2 minutes. The machine then turns off . The washer door opens automatically once the program has fi... -
Page 18: Settings
Settings You can change the following settings: • Automatic door opening. • Extra rinses. Door opening If you choose Automatic door opening the Washer door will open once the program has fi nished. 1. Turn off the machine using the main power switch. -
Page 19: Care And Cleaning
Care and cleaning Cleaning the trap and the drainage Cleaning the detergent compartment pump Pull out the detergent compartment using the The washing machine has a trap where smaller release button. objects such as coins and hairpins can collect. To clean the trap and the drainage pump, do as follows: 1. -
Page 20: Cleaning The Inside Of The Machine To Avoid Unpleasant Smells
Care and cleaning Cleaning the inside of the machine to 4. Remove any objects. avoid unpleasant smells 5. Place the agitator in the mounting hole with Modern detergents often allow clothes to be the F-mark towards you. Ensure that all the washed at low temperatures. -
Page 21: Troubleshooting
Troubleshooting The washer door will not open D Push the tool upwards to open the washer 1. Check that the main power switch is on. door. 2. Is there power? Check your home’s fuses (circuit breakers). The washer door cannot be opened with the Door opening button (with the key symbol) if power is off... -
Page 22: Error Messages
Troubleshooting Error messages F12 Water inlet fault If an error occurs during the program a Check: message is shown on the display. To exit • that the tap on the water pipe is open. the message after taking measures, turn the •... -
Page 23: Technical Information
Technical information Information for test institute Energy labelling Australian standard: AS/NZS 2040.1:1998 Washing program: Normal, 40 °C, 7 kg cotton Connection: Cold water 20 °C Test method for noise measurement: IEC-60704-2-4 Power requirement when machine turned off < 0,3 W Power requirement for Delayed Start <... - Page 24 Technical information Loading procedure for standard test: When loading the machine for testing according to AS/NZS 2040:2005 it shall be loaded according to the table below. Garments are placed on top of each other in layers and the soil swatches should be placed inside the wash drum in the direction shown in the table, seen from above.
-
Page 25: Technical Data
Technical information Technical data Height: 850 mm Width: 595 mm Depth: 585 mm Weight: 73 kg Cylinder volume: 60 l Max. washing capacity: 7 kg Spin speed (rpm): 400-1600 Rated power: See type plate. Heater output: See type plate. Water pressure: 0,1-1 MPa 1-10 kp/cm 10-100 N/cm... -
Page 26: Transport Protection
Transport protection Remove the three transport bolts and the plastic 3. Remove the plastic covers from the plugs. plugs for locking the machine for transport Push the plastic covers into the three holes before using the machine. that contained the plugs. Save the plastic plugs in case the machine is moved in the future. -
Page 27: Installation
Installation Positioning the washing machine Connection to water supply The washing machine can be installed as a Water connection should be carried out by an built-in or freestanding unit. Place the machine appropriately qualifi ed person. Connect the on a fi rm surface with easy access to the plug. machine using the accompanying supply hose. -
Page 28: Drainage Connection
Installation Drainage connection Electrical installation The machine is supplied with a drainage hose Connect the machine by plugging it into an attached, which must be connected to a drain. earthed wall socket. The electrical wall socket See the examples below. The height must be must be placed outside of the installation area 600–900 mm above fl... -
Page 29: Service
Service Before contacting the service division Model Number Before you contact the service division, make sure that you know the model number (located on the front panel), and serial number. The model designation can be found on the panel. The type designation and serial number Serial Number can be found on the type plate on the inside of the washer door. - Page 30 Your notes...
- Page 31 Your notes...
-
Page 32: Quick Guide
You select a programme by turning the programme selector. The selected programme is shown in the display. CLOSE THE WASHER DOOR AND PRESS THE START BUTTON The time remaining is shown in hours and minutes. We reserve the right to make changes. www.asko.com WM70.1 W6564W AU/NZ en (04-16)
Need help?
Do you have a question about the W6564W and is the answer not in the manual?
Questions and answers
Hej ! Centrifugeringen fungerar inte och när maskinen slutar öppnas inte luckan.