Table of Contents
Advertisement
Quick Links
Advertisement
Table of Contents

Related Manuals for minrray UV830


Summary of Contents for minrray UV830
-
Page 1: User Manual
HD Video Conference Camera User Manual 1.0 version (English)... - Page 2 Preface: Thanks for using our HD color video conference camera. This manual introduces the function, installation and operation of the HD camera. Prior to installation and usage, please read the manual thoroughly. Warning This product can be only used in specified range in order to avoid any damage or danger;...
-
Page 3: Table Of Contents
CONTENTS 1.Notes ..........4 2.Accessories ..........4 3.Fast Installation .......... 5 4.Camera Highlights ........7 5.Camera Specifications ........7 6.Camera Interface Explanation ......8 7.Remote Controller Explanation ......9 8.Usage of IR Remote Controller ......11 9.RS-232C Interface (Pin Specs) ......14 10.Menu Setting .......... -
Page 4: Notes
Notes Electric Safety Installation and operation must accord with electric safety standard Caution to transport Avoid stress, vibration and soakage in transport, storage and installation. Polarity of power supply The power supply of the product is ±12V Polarity of the power supply drawing Careful of installation Never move the camera by seizing the camera head. -
Page 5: Fast Installation
Fast Installation 1. Please check the connection before turning on the power. 2. Bottom Dial Switch Setting Set the two switches 【ON】.it is the normal working mode. SW2-2 SW2- Instructions Undefined Updating mode Debugging mode Working mode 3. The Rotary Switch Setting The choice for16 rotary switch video formats Dial-up 1080P60... -
Page 6: Camera Highlights
-------- -------- -------- -------- Display the video format set on the menu Note: Restart the camera after switching the dial code. 4.When the power supply switch is “【on】”, the indicator light is open (red color) 5, Camera initializes after powering on: horizontally turn left to the limit position, vertically turn to the bottom;... -
Page 7: Camera Specifications
2.Support sound interfaces,DVI interface (inclding YPbPr, VGA and HDMI signal) , HD-SDI interface and CVBS interface (for options). 3.IR remote controller signal transparent transmission function: camera can receive both its own remote controller signal and the one from terminal equipment, by transmitting the signal through VISCA IN to terminal equipment IR receiver. -
Page 8: Remote Controller Explanation
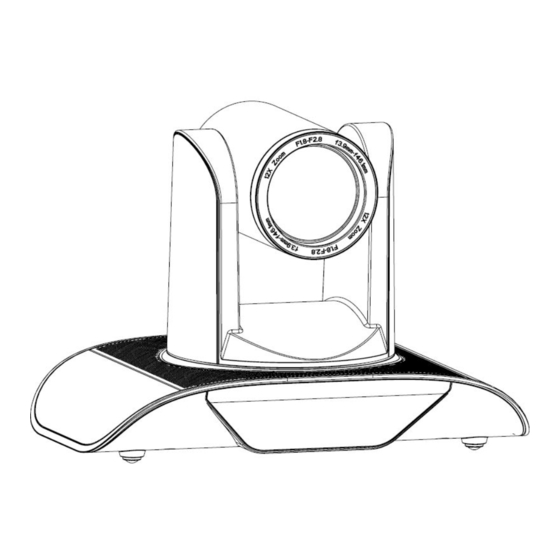
1.Camera lens 2.Camera base 3..Remote Controller Receiver light 4.Bottom dial Switch 5.Tripod screw hole 6.Installation Orientation Hole 7.Rotary Switch : video format optional 8.RS232 controller serial interface (input ) 9.RS232 controller serial interface (output ) 10.CVB interface (for selection) 11.HD-SDI interface 12.DVI-I interface(including YPbPr ,HDMIHD Digital Output and VGA interface) 13.DC12V Input Power Supply Jack 14.Power indicator light(red) - Page 9 0、Standby key After pressing the standby key, the camera will step into standby mode.Press again,the camera will open again.(Note: Standby mode power consumption is about half of the normal mode) 1、Number key Setting or locating presets 2、* key Key combination use 3、Set preset key: Set preset:...
-
Page 10: Usage Of Ir Remote Controller
9、Menu setting Open or close the OSD menu 10、Zoom Control key zoom+:lens near zoom-:lens far 11.Camera IR remote control address selection 【*】+【#】+【F1】 :Camera Address No.1 【*】+【#】+【F2】 :Camera Address No. 2 【*】+【#】+【F3】 :Camera Address No. 3 【*】+【#】+【F4】 :Camera Address No. 4 Usage of IR Remote Controller Finishing initialization, it can receive and execute the IR commands. - Page 11 1 、 In this instruction, “press the key” means a click rather than a long-press, and a special note will be given if a long-press for more than one second is required. 2、When a key-combination is required, do it in sequence. For example, “ 【*】+【#】 +【F1】”means press“【*】”first and then press“【#】”...
- Page 12 Focus (far): Press ”【focus+】” key Focus (near): Press “【focus-】“key Auto Focus: Press "【auto】" Manual Focus: Press "【manual】" Press and hold the key, the action of focus continues and stops as soon as the key is released. 4.BLC Setting BLC ON / OFF :not support 5.
- Page 13 Press a number key 0-9 directly to run a relative preset. Note: Action in vain if a relative preset position is not existed. 7.Camera Selection Select the camera address to control. 8.Camera Remote Controller Address Setting 【*】+【#】+【F1】 :Camera Address No.1 【*】+【#】+【F2】...
-
Page 14: Rs-232C Interface (Pin Specs)
RS-232C Interface (Pin Specs) VISCA OUT Function VISCA OUT Function... -
Page 15: Visca Protocol
COM control In the normal working condition, the camera can be controlled via the RS-232C/RS485 command (VISCA IN) . The parameter of the RS232C COM is as follows : Baud Rate :2400/4800/9600/115200 Bit/S Start bit:1bit ; Data bit: 8bit ; Stop bit : 1bit;... - Page 16 Command Function Command Packet Note AddressSet Broadcast 88 30 01 FF Address setting IF_Clear Broadcast 88 01 00 01 FF I/F Clear CommandCancel 8x 21 FF 8x 01 04 00 02 FF CAM_Power Power ON/OFF 8x 01 04 00 03 FF Stop 8x 01 04 07 00 FF Tele(Standard)
- Page 17 Command Function Command Packet Note Down 8x 01 04 0C 03 FF Direct 8x 01 04 0C 00 00 0p 0q FF pq: Gain Positon Reset 8x 01 04 0D 00 FF 8x 01 04 0D 02 FF Bright Setting CAM_Bright Down 8x 01 04 0D 03 FF...
- Page 18 Command Function Command Packet Note 8x 01 06 02 VV WW AbsolutePosition 0Y 0Y 0Y 0Y 0Z 0Z 0Z 0Z FF 8x 01 06 03 VV WW RelativePosition 0Y 0Y 0Y 0Y 0Z 0Z 0Z 0Z FF Home 8x 01 06 04 FF Reset 8x 01 06 05 FF 8x 01 06 07 00 0W...
- Page 19 2:1080i60 3:1080i50 4:720P60 5:720P50 6:1080P30 7:1080P25 y0 50 02 FF IR_Receive 8x 09 06 08 FF y0 50 03 FF y0 07 7D 01 04 00 FF Power ON/OFF y0 07 7D 01 04 07 FF Zoom tele/wide y0 07 7D 01 04 38 FF AF On/Off IR_ReceiveReturn y0 07 7D 01 04 33 FF...
- Page 20 Pelco-P Protocol Function Byte1 Byte2 Byte3 Byte4 Byte5 Byte6 Byte7 Byte8 0xA0 Address 0x00 0x08 Pan Speed Tilt Speed 0xAF Down 0xA0 Address 0x00 0x10 Pan Speed Tilt Speed 0xAF Left 0xA0 Address 0x00 0x04 Pan Speed Tilt Speed 0xAF Right 0xA0 Address...
-
Page 21: Menu Setting
Menu Setting 1. Main Menu In normal working mode, press 【MENU】key to display the menu, using scroll arrow to point at or highlight the selected items. LANGUAGE: Language setting, Chinese / English SYSTEM OPTION:system setting CAMERA OPTION:camera setting PT OPTION:pan tilt setting V. - Page 22 PROTOCOL:Defaulted Setting:VISCA Type of Protocol: VISCA/Pelco-P/Pelco-D ADDR:Defaulted Setting: 01 VISCA=1~7 Pelco-P/Pelco-D = 1~155 B. RATE: Defaulted Setting:9600 2400/4800/9600/115200 RS485:Defaulted Setting: OFF It is ON when using RS485 communication ARM VER./FPGA VER/CAM VER: Display the edition information,and it will update synchronously with the software upgraded. 3.CAMERA OPTION Move the pointer to the (CAMERA SET) in the Main Menu, click the【...
- Page 23 EXP. MODE:Defaulted Setting:Auto For Settings: Auto,Manual,Shutter,Iris SHUTTER:Defaulted Setting: Default For Settings: 1/60, 1/90, 1/100, 1/125, 1/180, 1/250, 1/350, 1/500, 1/725, 1/1000, 1/1500, 1/2000,1/3000,1/4000,1/6000,1/1000(only available in Manual Shutter mode) IRIS:Defaulted Setting: Default For Settings: 0~13(only available in Manual Iris mode) BRIGHT:Defaulted Setting: 1 For Settings:0~9 GAIN Defaulted Setting:: Default For Settings: 0~15(only available in Manual mode)...
- Page 24 FLICK:Defaulted Setting:50HZ For Settings:50HZ/60HZ/OFF NR LEVEL:Defaulted Setting:6 For Settings:0~9 CONTRAST:Defaulted Setting:3 For Settings:0~9 3.3 LENS SETTING Move the pointer to the (LEN SET) in the Main Menu, click the【 HOME】 and enter the (LEN SET) as follow, FOCUS:Auto,Manual,OnePush 4. PAN TILT SETTING Move the pointer to the (PT SET) in the Main Menu, click the【HOME】and enter the (PT SET) as follow, POWER ACT: Defaulted Setting:OFF...
- Page 25 Move the pointer to the (SET) in the Main Menu, click the【HOME】and enter the (SET) as follow, SYS. RESET:Protocol: VISCA; Address: 1; baud rate:9600; RS485:Off CAM. RESET:camera parameter reset PT. RESET:power action: Off; speed by zone: On; mount mode:Up; IR move speed:16; IR zoom speed: 7;MIN.SPEED 0;SCAN. SPEED 10 ALL RESET:...
- Page 26 Troubleshooting Camera Maintains If camera is not used for long time, please turn off power adapter switch and AC plug. Use soft cloth or tissue to clean the camera cover. Use soft cloth to clean the lens; Use neuter cleanser if bad smeared. No use strong or corrosive cleanser or corrosive cleanser avoiding scuffing.
Need help?
Do you have a question about the UV830 and is the answer not in the manual?
Questions and answers