Table of Contents
Advertisement
Quick Links
Advertisement
Table of Contents

Summary of Contents for minrray VA400
- Page 1 VA400 User Manual (V1.0)...
-
Page 2: Attentions
Attentions This manual introduces functions, installation and operations for this camera in details. Please read this manual carefully before installation and use. 1. How to use To prevent damage to this product or any product connected to it, this product can only be used within the specified range. -
Page 3: Table Of Contents
Content Attentions.................................. - 1 - 1. Quick Installation Instructions..........................- 3 - 1.1 Product Interface............................. - 3 - 1.2 Product Use..............................- 3 - 2. Product Overview..............................- 3 - 2.1 Product Introduction............................- 3 - 2.1.1 Dimension..............................- 3 - 2.1.2 Accessories...............................- 4 - 2.2 Product Features..............................- 4 - 2.3 Technical Parameters............................ -
Page 4: Quick Installation Instructions
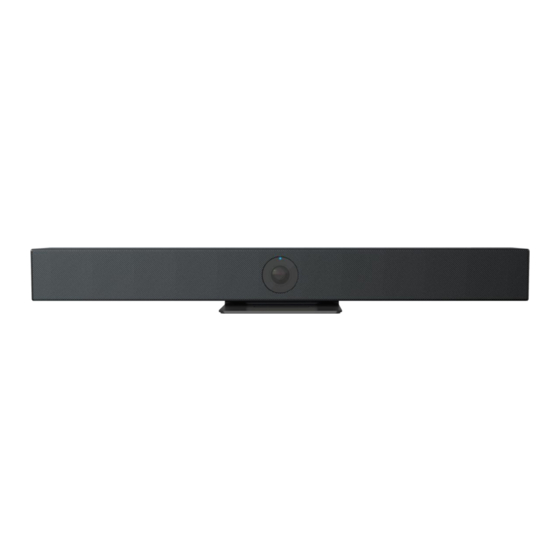
1. Quick Installation Instructions 1.1 Product Interface Figure 1.1 Product Interfaces 1. Speaker 4. Power Switch 7. USB3.0 2. Lens 5. Power 8. Bracket 3. Built-in Mic 6. Line in 1.2 Product Use 1) Installation: Fix the device to the wall, over the display screen or directly put it on the desktop. 2) Power on: Connect the DC12V power adapter to the power input socket. -
Page 5: Accessories
Figure 2.1 Dimension 2.1.2 Accessories Standard accessories in the box User Manual 5m USB2.0 Cable Remote Control Accessories Standard Power Adapter Packing List Wall Bracket 2.2 Product Features Features with compact design, crystal clear audio and excellent video quality, it uses advanced AI intelligent algorithms, integrates multiple AI intelligent framing technologies such as facial detection, sound positioning, and voice tracking. -
Page 6: Technical Parameters
It is an ideal solution for small and medium-sized meeting rooms. Integration:An one-piece design integrating camera, microphone, and speaker; Voice Tracking: Built-in 6-mic array to achieve voice tracking function and real-time tracking of each speaker, allowing remote participants to break the limitation of distance and create an immersive, face-to-face experience; Built-in speaker: Built-in high-quality double speakers, ensure every participant can hear clearly. -
Page 7: Product Use
Bracket Wall mount 3. Product Use 3.1 Remote Instructions - 6 -... -
Page 8: Menu Settings
3.2 Menu Settings 3.2.1 Main Menu Press [MENU] button in MJPG, YUY2, NV12 or H264 compression encoding formats. MENU 主菜单 ================ ================= Language English 语言/Language 中文/Chinese (设置) (Setup) (曝光) (Exposure) (颜色) (Color) (图像) (Image) (Noise Reduction) (降噪) (版本) (Verion) (Restore Default) (恢复默认)... - Page 9 Auto Framing: on/off Voice Locating: on/off Switching Mode: pan mode/movie mode Prompt Info: on/off Transmission Mode: Bulk/Synchronization 3) Explosure In the main menu, move the pointer to (Exposure), and press [HOME] to enter the exposure page, as shown below. EXPOSURE 曝光...
- Page 10 4) Color Move the pointer to (Color) in the main menu, and press [HOME] to get into the color page, as shown below COLOR 颜色 ================ ================ WB Mode Auto 白平衡模式 自动 100% Saturation 100% 饱和度 色度 AWB Sensitivity High 白平衡灵敏度...
- Page 11 Flip-H:On/Off Flip-V:On/Off B&W Mode : Color, Black and White Gamma Curve:Default.0.34.0.39.0.47.0.50 Low-light Mode:On/Off 6) Noise Reduction Move the pointer to (Noise Reduction) in the main menu, press [HOME] to get into the noise reduction page, as shown below. NOISE REDUCTION 降噪...
-
Page 12: Maintenance And Troubleshooting
RESTORE DEFAULT 恢复出厂默认值 ================ ================= Restore Default? 恢复出厂默认? 否 [↑↓]Select [← →]Change Value [↑↓]选择 [← →]修改 Notice:Color style and video format will not be restored to factory default 4. Maintenance and Troubleshooting 4.1 Product Maintenance 1) If camera is not used for long time, please turn off power adapter switch and AC plug. 2) Use soft cloth or tissue to clean the camera cover. -
Page 13: Copyright Statement
5. Copyright Statement All the contents in this manual and its copyright are owned by the company. No one is allowed to imitate, copy, or translate this manual without the company’s permission. This manual contains no guarantee, standpoint expression or other implies in any form. Product specification and information in this manual is for reference only and subject to change without notice.


Need help?
Do you have a question about the VA400 and is the answer not in the manual?
Questions and answers