Table of Contents
Advertisement
Quick Links
Advertisement
Table of Contents

Related Manuals for minrray MG200C


Summary of Contents for minrray MG200C
- Page 1 AI 4K UHD Video Conference Camera User Manual (V1.0)...
-
Page 2: Table Of Contents
Contents Attentions ........................1 1. Fast Installation ......................2 1.1 Camera Interface ....................2 1.2 Camera Operation ....................2 2. Product Overview ..................... 3 2.1 Product Introduction ....................3 2.1.1 Dimensions ......................3 2.1.2 Accessories ......................4 2.2 Main Features ......................4 2.3 Technical Specifications .................. -
Page 3: Attentions
Attentions This manual introduces functions, installation and operations for the camera in details. Please read this manual thoroughly before installation and use. How to Use To prevent damage to this product or any product connected to it, this product can only be used within the specified range. -
Page 4: Fast Installation
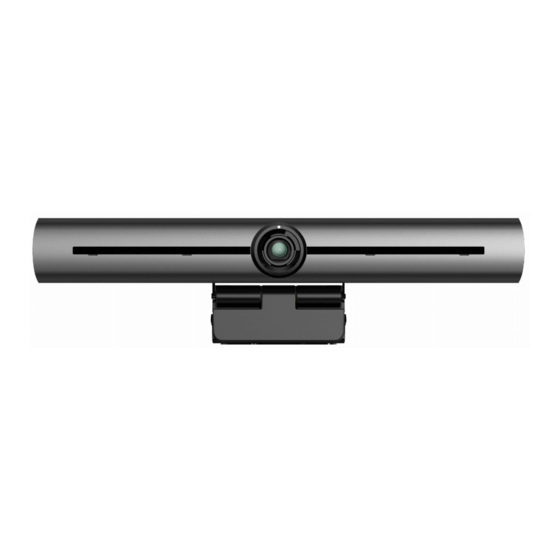
1. Fast Installation 1.1 Camera Interface Figure 1.1 camera interface 1. camera lens 3. built-in MIC 5. positioning hole 2. bracket 4. tripod fixing hole 6. USB 3.0 output interface 1.2 Camera Operation 1) Product Installation: Fix the device on LCD screen, top of computer; directly put it on desk or on tripod mounting. -
Page 5: Product Overview
2. Product Overview 2.1 Product Introduction 2.1.1 Dimensions... -
Page 6: Accessories
2.1.2 Accessories Figure 2.2 Camera Dimensions Check and confirm all accessories are provided as listed in sheet 2.1. User manual 1 Wireless remote controller 1 piece USB3.0 cable 1 piece Accessories Warranty card 1 piece Packing list Sheet 2.1 Product accessories 2.2 Main Features This product is a new 4K UHD ePTZ video conference camera. -
Page 7: Technical Specifications
Video output interface: video output interface USB 3.0; Multiple audio and video compression standards: support YUY2, NV12, 2.3 Technical Specifications Model Number Lens 1 Lens 2 Lens 3 Camera Parameter Image Sensor 1/2.8 Inch High Quality 4K CMOS Sensor Effective Pixels 8.28MP 16:9 Video output port 1* USB3.0, Type B, support audio output over USB3.0... -
Page 8: Interface Instruction
USB Feature Windows 7(1080p at the most), Windows 8.1, Windows 10 ; macOS™ 10.10 or Operation Systems higher, Linux (Require to support UVC.) Video Compression YUY2、NV12、MJPG、H264 format Audio over USB3.0 Support USB communication UVC, UAC protocol PTZ control Support EPTZ Hardware 2.4 GHz Intel@ Core 2 Duo processor or higher,2GB RAM or more,USB 2.0 requirement... -
Page 9: Application Instruction
3. Application Instruction 3.1 Remote Controller 3.1.1 Keys Instruction 1. Standby Key Press button once to enter the standby mode, and press it again to restart the output video. 2. Camera Address Selection Select the camera address 3. Number Key Set or call 0-9 presets 4. -
Page 10: Applications
Press Key: Right “HOME” Key: Return to the middle position or enter into the sub-menu 9. BLC Control Key Back Light ON / OFF: Turn on or off the back light 10. Menu Setting Open or close the OSD menu Enter / exit the OSD menu or return to the previous menu 11. - Page 11 2) Pan/Tilt Control press Down: press Left: press Right: press Back to middle position: press“【HOME】” Press and hold the up/down/left/right key, the pan/tilt will keep running, from slow to fast, until it runs to the endpoint; the pan/tilt running stops as soon as the key is released.
- Page 12 3) Presets 4) Zoom Control 5) Focus Control(This camera not support)
-
Page 13: Menu Setting
1. Preset setting: to set a preset position, the users should press the “【SET PRESET】” key first and then press the number key 0-9 to set a relative preset, Note: 10 preset positions in total are available by remote controller. 2. -
Page 14: Main Menu
3.2.1 Main Menu Press the [MENU] key, the menu content will be displayed on the screen, and use the scroll arrow to point to the selected item MENU ================ (Setup) (Exposure) (Color) (Image) (Noise Reduction) (Version) (Restore Default) [↑↓]Select [← →] Change Value 3.2.2 Setting Move the pointer to (Settings) in the main menu, and press the [HOME] key to enter the exposure page, as shown in the figure below. -
Page 15: Color Setting
Mode : Auto, Manual, SAE, Bright . EV : On/Off (only available in auto mode) Compensation Level: -7~7 (only available in auto mode when EV is ON) BLC: ON/OFF for options (only available in auto mode) Anti-Flicker: OFF/50Hz/60Hz for options (only available in Auto/ Bright modes) Gain Limit: 0~15(only available in Auto /Bright mode) DRC: Off,1~8 SAE: 1/30, 1/50, 1/60, 1/90, 1/100, 1/120, 1/180, 1/250, 1/350, 1/500, 1/1000, 1/2000,... -
Page 16: Image Setting
RG Tuning: -10~10 (valid only in automatic mode) BG Tuning: -10~10 (valid only in automatic mode) Red gain: 0~255 (valid only in manual mode) Blue gain: 0~255 (valid only in manual mode) AWB Sensitivity: high, medium, low (valid only in auto mode) Hue: settable items: 0~8 3.2.5 Image Setting Move the pointer to IMAGE in the Menu, click the【HOME】and enter the (IMAGE) as follows,... -
Page 17: Version
2D noise reduction: auto, off, 1~7 3D noise reduction: off, 1~8 3.2.7 Version Move the pointer to VERSION VERSION ================ Cam Version 1.0.3 2021-08-11 [↑↓]Select [← →]Change Value [↑↓]选择 [← →]修改 3.2.8 Restore Default Move the pointer to RESTORE DEFAULT in the Main Menu, click 【 HOME 】 and enter RESTORE DEFAULT as below: RESTORE DEFAULT ================... -
Page 18: Maintenance And Troubleshooting
4. Maintenance and Troubleshooting 4.1 Maintenance 1) Please disconnect the camera if it is not used for a long time. 2) Use soft cloth or tissue to clean the camera cover. 3) Wipe it with a soft, dry cloth when cleaning the camera lens. Wipe it gently with a mild detergent if needed. -
Page 19: Copyright Statement
Copyright Statement All the contents in this manual and its copyright are owned by the company. No one is allowed to imitate, copy, or translate this manual without the company’s permission. This manual contains no guarantee, standpoint expression or other implies in any form. Product specification and information in this manual is for reference only and subject to change without notice.
Need help?
Do you have a question about the MG200C and is the answer not in the manual?
Questions and answers