Table of Contents
Advertisement
Advertisement
Table of Contents

Related Manuals for JUKI LZ-2280A Series


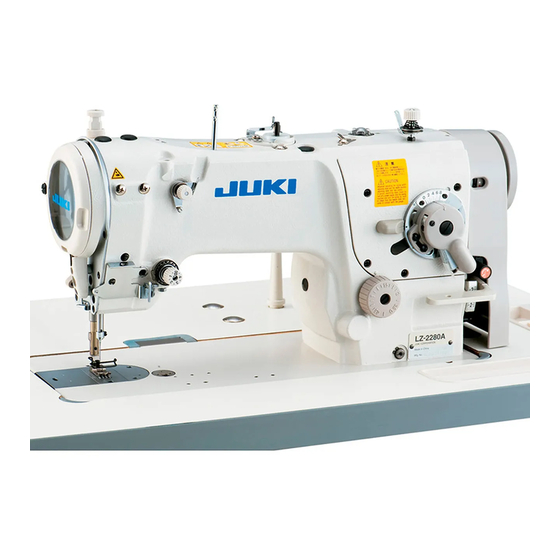
Summary of Contents for JUKI LZ-2280A Series
- Page 1 LZ-2280A Series INSTRUCTION MANUAL...
-
Page 2: Table Of Contents
CONTENTS 1. SPECIFICATIONS ......................1 2. INSTALLATION ......................4 2-1. Installation of the sewing machine....................4 2-2. Attaching the belt cover ........................ 4 2-3. Inserting the needle ........................5 2-4. Installing the control panel ......................6 3. PREPARATION OF THE SEWING MACHINE ............. 6 3-1. -
Page 3: Specifications
= more than 8 mm) Needle SCHMETZ 438SUK (Nm75) : Nm65 to 90, DP x 134 (#10) : #9 to 14 JUKI CORPORATION GENUINE OIL 7 - Equivalent continuous emission sound - Equivalent continuous emission sound pressure level pressure level (L... - Page 4 ■DRAWING OF TABLE (1) For the V-belt type – 2 –...
- Page 5 (2) For the direct-drive type – 3 –...
-
Page 6: Installation
2. INSTALLATION 2-1. Installation of the sewing machine ❶ ❹ 22.5 mm 18.5 mm ❸ ❷ Attaching the oil pan Hammer the nails ❷ on the two support rubber seats ❶ of the machine head on operators' side A of the protruding section of the table, and fix Carry the sewing machine with two persons as the two cushion seats ❸... -
Page 7: Inserting The Needle
Fix setscrews ❸ to the screw holes in the machine arm, and washers ❺ and setscrews ❻ to the belt cover supports. Insert belt cover B asm. ❼ from the rear of belt cover A ❷ and fix it at the position where rubber section C of belt cover B asm. -
Page 8: Installing The Control Panel
Put foamed polyurethane pad ❶ in the oil pan ❷. Fill the oil pan ❷ with JUKI CORPORATION GEN- UINE OIL 7 up to the level of “HIGH” mark A. -
Page 9: Adjusting The Amount Of Oil In The Hook
In addition, when the amount of oil in the hook is not obtained unless oil amount adjustment screw ❶ is near in fully-tightened state, it is considered that hook shaft oil wick (JUKI Part No. 11015906) is clogged or the like. Replace the hook shaft oil wick. 5. Never adjust screw ❷ of the hook oil quantity adjusting valve since it is fixed. -
Page 10: Adjusting The Amount Of Oil (Oil Splashes)
3-3. Adjusting the amount of oil (oil splashes) WARNING : Be extremely careful about the operation of the machine since the amount of oil has to be checked by turning the hook at a high speed. (1) Confirmation of the amount of oil in the hook ① Amount of oil (oil splashes) confirmation paper ② Position to confirm the amount of oil (oil splashes) Hook 10 mm Approx. -
Page 11: Winding The Bobbin Thread
3-4. Winding the bobbin thread WARNING : To protect against possible personal injury due to abrupt start of the machine, be sure to start the following work after turning the power off and ascertaining that the motor is at rest. Insert the bobbin deep into the bobbin winder spindle ❺... -
Page 12: Inserting The Bobbin Case And The Bobbin
3-5. Inserting the bobbin case and the bobbin WARNING : To protect against possible personal injury due to abrupt start of the machine, be sure to start the following work after turning the power off and ascertaining that the motor is at rest. Placing a bobbin into the bobbin case Take a bobbin by your right hand with the thread drawn out about 5 cm and place it into the bobbin... -
Page 13: Threading The Machine Head
3-6. Threading the machine head WARNING : To protect against possible personal injury due to abrupt start of the machine, be sure to start the following work after turning the power off and ascertaining that the motor is at rest. ❶... -
Page 14: Adjusting The Sewing Machine
4. ADJUSTING THE SEWING MACHINE 4-1. Adjusting the thread tension WARNING : In case of thread-breakage, it may occur that the thread tangles on the thread take-up lever. In such a case, turn the power off, raise the thread take-up cover and remove the thread which has twined around the thread take-up. -
Page 15: Adjusting The Zigzag Width
Release the lever, and the knob will be locked up in the given position. ❷ (3) Adjusting the needle position * JUKI models LZ-2280A, -2284A and -2287A have the needle position changing lever by which the needle position can be changed as ❶... -
Page 16: Adjusting The Pressure Of The Presser Foot
4-3. Adjusting the pressure of the presser foot WARNING : To protect against possible personal injury due to abrupt start of the machine, be sure to start the following work after turning the power off and ascertaining that the motor is at rest. Turn the presser spring regulator ❶... -
Page 17: Adjusting The Stitch Length
4-6. Adjusting the stitch length Turn the stitch length dial ❶ in the direction of the arrow so that the number corresponding to the desired stitch length meets the marker dot A engraved on the machine arm. Numbers on the stitch length dial are calibrated in “mm”. -
Page 18: Height And Inclination Of The Feed Dog
B as shown in the figure on the left. Never let A protrude from line B. The hook is exclusively designed to the LZ-2280A Series model of sewing machine. When placing an order for the hook in case of replacement or the like, designate it with its part number. -
Page 19: Adjusting Height Of The Needle Bar
4-10. Adjusting height of the needle bar WARNING : To protect against possible personal injury due to abrupt start of the machine, be sure to start the following work after turning the power off and ascertaining that the motor is at rest. Set the zigzag width to “0”. -
Page 20: Adjusting The Stop Position Of The Needle
4-12. Adjusting the stop position of the needle WARNING : 1. Turn OFF the power before starting the work so as to prevent accidents caused by abrupt start of the sewing machine. 2. Do not perform switch operations other than those described in the following explanations. 3. -
Page 21: Adjusting The Thread Trimmer
4-13. Adjusting the thread trimmer WARNING : To protect against possible personal injury due to abrupt start of the machine, be sure to start the following work after turning the power off and ascertaining that the motor is at rest. (1) Initial position of the moving knife When the moving knife is in its initial position, the moving knife pin ❶... -
Page 22: Needle Thread Feeding Device
4-14. Needle thread feeding device WARNING : To protect against possible personal injury due to abrupt start of the machine, be sure to start the following work after turning the power off and ascertaining that the motor is at rest. (1) Position of the feeding wire ❹... -
Page 23: Operation Of The Sewing Machine
5. OPERATION OF THE SEWING MACHINE 5-1. How to operate the pedal (In the case of the direct-drive type sewing machine) The pedal is operated in the following four steps: The machine runs at low sewing speed when you lightly depress the front part of the pedal. B The machine runs at high sewing speed when you further depress the front part of the pedal. -
Page 24: Changing Over The Needle-Throwing Method
5-3. Changing over the needle-throwing method WARNING : To protect against possible personal injury due to abrupt start of the machine, be sure to start the following work after turning the power off and ascertaining that the motor is at rest. For the LZ-2284A, needle-throwing method is select- LZ-2284A able between the standard zigzag stitching and 3-step... -
Page 25: Optional
6. OPTIONAL 6-1. Pedal-operated reverse feed device (RF-1) When you sew bulky materials, it is not easy to operate the feed lever with your right hand to make the machine perform reverse feed stitching. In this case, attach the RF-1 device to your sewing machine. -
Page 26: Motor Pulley And Belt
7. MOTOR PULLEY AND BELT (1) In the case of the belt type sewing machine 1) The driving motor of this machine is a 450 watts (2P) clutch motor. 2) Use the M type V belt. 3) The attainable sewing speeds are determined by the diameter of the motor pulley and the length of the belt as listed below. -
Page 27: Troubles And Corrective Measures
The thread is too thick for the needle. Use a suitable thread or needle. c. The thread is broken by heat. Use JUKI Silicone Oil Lubricant unit. ⑪ When the stitch is skipped. Refer to the following paragraphs, Stitch skipping. - Page 28 Trouble Cause Corrective measures page ① When the bobbin thread tension is too low. Irregular Increase the bobbin thread tension. stitch ② When the bobbin thread is not wound correctly. Wind up the bobbin thread evenly. tightness ③ When there is a scratch on the thread path of the Remove such a scratch or replace the sewing hook, bobbin case, thread take-up lever or any component.
Need help?
Do you have a question about the LZ-2280A Series and is the answer not in the manual?
Questions and answers