Table of Contents
Advertisement
Quick Links
Advertisement
Table of Contents

Related Manuals for TrekStor surftab breeze 9.6 quad 3g


Summary of Contents for TrekStor surftab breeze 9.6 quad 3g
- Page 1 SurfTab® breeze 9.6 quad 3G OPERATING INSTRUCTIONS...
-
Page 2: Table Of Contents
Contents 1) About the SurfTab breeze 9.6 quad 3G ………………………………… 4 2) Safety information ……………………………………………………… 5 Operational safety ………………………………………………………… 5 Repair …………………………………………………………………… 6 Intended operating conditions …………………………………………… 7 Power supply ……………………………………………………………… 7 Care and maintenance …………………………………………………… 7 Information on the memory capacities indicated ………………………… 7 3) Technical specifications …………………………………………………... - Page 3 Defining settings for 3G mode …………………………………………… 19 Removing the SIM card …………………………………………………… 20 14) Setting up/removing an email account ……………………………… 20 Setting up an email account ……………………………………………… 20 Removing an email account ……………………………………………… 21 15) Installing/uninstalling apps …………………………………………… 21 Downloading and installing apps ………………………………………… 21 Uninstalling apps …………………………………………………………...
-
Page 4: About The Surftab Breeze 9.6 Quad 3G
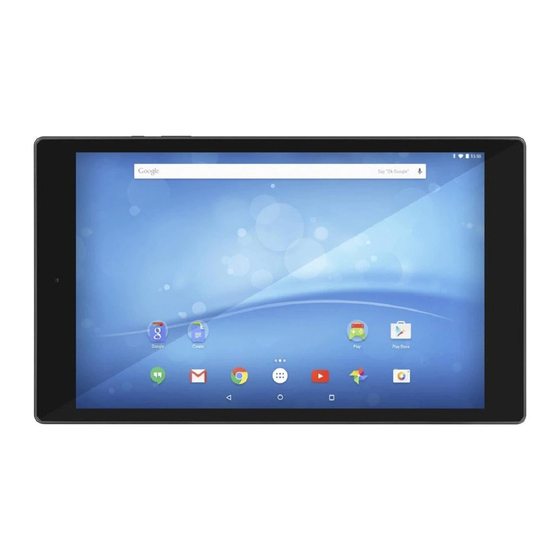
Visit www.trekstor-onlineshop.de for additional products and accessories. 1) About the SurfTab breeze 9.6 quad 3G The TrekStor SurfTab breeze 9.6 quad 3G is a tablet with 9.6-inch multi-touch IPS HD screen for surfing the Internet, using apps and playing music, videos and games. -
Page 5: Safety Information
2) Safety information These instructions use the following warning symbols and key words: DANGER Indicates possible danger to life and/or danger of severe, irreversible injuries. CAUTION Follow instructions to avoid injuries and material damage. WARNING Follow instructions to avoid material damage. NOTE Further information about the use of the device. -
Page 6: Repair
DANGER Do not cover the device or charger during operation or while charging. This may cause the device/charger to overheat and potentially catch fire! CAUTION This device can generate high sound volumes. Never listen at high volumes for long periods. Doing so can result in immediate or gradual hearing damage. -
Page 7: Intended Operating Conditions
Intended operating conditions Protect the device from extremely high or low temperatures and fluctuations in temperature. Use it at an ambient temperature between 10º C and 40º C. Do not place the device near a heat source and protect it from direct sunlight. Never expose the device to humidity, condensation or moisture. -
Page 8: Technical Specifications
3) Technical specifications Technical specifications SurfTab Processor (CPU) Intel® Atom™ x3-C3230RK processor (1 M Cache, bis zu 1,2 GHz), quad core 1 GB DDR3 Storage capacity 16 GB Graphics processing unit (GPU) Mali-450 MP4 Display type 5-point capacitive multi-touch IPS HD display Display size 9.6"... -
Page 9: Technical Specifications Usb Power Adapter
5,0 V Output current: 2000 mA Manufacturer: Shenzhen Flypower Technology Co., LTD. 4) Package contents • TrekStor SurfTab breeze 9.6 quad 3G • Micro-USB cable • USB host adapter cable • USB power adapter (100 V - 240 V) •... -
Page 11: Controls And Connections
5) Controls and connections A) Front camera B) Rear camera C) Audio port D) Micro-USB socket / Charging socket E) On/off switch F) Volume control G) SIM card slot H) Memory card slot I) Microphone J) Speaker 6) Charging the SurfTab Please fully charge your SurfTab before you use it for the first time. -
Page 12: Elements On The Home Screen
8) Elements on the home screen A) Google™ Search B) Google™ language search C) Back to the previous screen D) Home icon (back to the home screen) E) Applications menu F) View all open elements G) Quick start bar... -
Page 13: Using The Touch Screen
9) Using the touch screen Scrolling The home screen of your SurfTab extends several pages to the right of the first window. You can set up these pages by placing apps or widgets on the possible further pages (see Section 10). Slide your finger from right to left (or the reverse) across the screen to access these pages. -
Page 14: Selecting An Element
Selecting an element To open an element or select an option, briefly touch the icon you require with your finger. If you want to close a recently used element (app, widget, menu), tap the display of all open elements. Place your finger on the element that you want to close and drag the element to the left or right to close it. -
Page 15: Enlarging And Reducing The View
Enlarging and reducing the view You can enlarge the display of some views (images, websites etc.). Move two fingers apart on the screen to enlarge the display. In reverse, move two fingers towards each other on the screen to reduce the display again. Using the display keyboard If you tap a text field in order to enter text (for example, a Web address), the display keyboard appears. -
Page 16: Personalising The Home Screen
10) Personalising the home screen You can set up the home screen (as well as the additional pages) according to your wishes by adding or removing app shortcuts and widgets and altering the background. Adding apps to the home screen Tap the applications menu in the quick start bar on the home screen. -
Page 17: Changing The Screen Background
Changing the screen background Touch an empty area of the screen background until "W " appears on the allpapeRs lower edge of the screen. Tap the symbol to display the available backgrounds. b) Now scroll through the images, select a motif and confirm your selection via "s ". -
Page 18: Connecting To The Internet Via Wifi
12) Connecting to the Internet via WiFi You can connect your SurfTab to the Internet via WiFi. If you would like to establish a connection to a new wireless network, proceed as follows: Select "s " from the applications menu or the quick menu. This is where ettings you will find the "W "... -
Page 19: Defining Settings For 3G Mode
Do not insert any microSD/SDHC memory cards into the SIM slot! If a memory card does become stuck in the SIM slot, have it removed by a trained professional. Put the SIM card holder back in. When you switch on your SurfTab again after inserting the SIM card, you have to enter the corresponding PIN number. -
Page 20: Removing The Sim Card
Data usage You can limit your data usage here. Mobile data Drag the slider to the right of "m " to the right in order to activate the data obile data service and to the left to deactivate it. Set mobile data limit Drag the slider to the right of "s "... -
Page 21: Removing An Email Account
e) You can specify further account settings in the next steps. Confirm the settings that you have specified with "n ". As soon as you have set up the account according to your wishes, the email app is ready for use. Removing an email account Select "s "... -
Page 22: Uninstalling Apps
Uninstalling apps To remove apps you have installed on your SurfTab, proceed as follows: Tap "s " in the applications menu. ettings b) Drag the menu up with your fingertip until you can see "a ". Tap "a ". Drag the menu to the left with your fingertip until you reach the "d "... -
Page 23: Using The Camera
18) Using the camera Tap the camera icon in the applications menu or in the quick start bar. The following screen appears: Taking a photo Hold the SurfTab with the camera in the required direction and press the shutter button (18 A). The picture is saved and the SurfTab briefly displays a preview of the photo. -
Page 24: Recording A Video
b) The palette icon (18 B) on the bottom right allows you to access colour effect shooting options. Just tap the icon and select the desired option. To exit the camera mode, briefly tap the edge of the display to show the task bar. Editing photos Briefly tap the lower edge of the display to show the task bar. -
Page 25: Connecting Other Devices
19) Connecting other devices Connecting the SurfTab to a computer Connect the SurfTab to your computer with the Micro-USB cable provided. b) A short moment later, the memory of the SurfTab will be shown as an external drive in your computer’s file explorer. From here you can load, copy, delete or move files as usual. -
Page 26: Connecting To A Television Via Miracast
Connecting to a television via Miracast™ Miracast technology is a peer-to-peer standard for image transfer. The SurfTab supports this standard and enables wireless transfer of image and sound from the SurfTab to a WiFi and Miracast-enabled television device. The SurfTab can connect to your television via Miracast only if the television also supports Miracast technology. -
Page 27: Reset And Recovery Mode
Press the "volume control -" button and keep it pressed. Also press the on/off switch and keep it pressed. d) As soon as the TrekStor logo appears, release both buttons. e) The SurfTab now displays the recovery mode menu. -
Page 28: Notes On Copyright And Trademarks
Google Permissions. The Bluetooth word mark and logos are registered trademarks owned by Bluetooth SIG, Inc. and any use of such marks by TrekStor GmbH is under license. Other trademarks and trade names are those of their respective owners. -
Page 29: Notes On Disposal
24) Notes on disposal Disposal This symbol indicates that this product and/or the battery used contain components that are harmful to the environment and/or human health if not disposed of correctly. As the owner of a used electrical or electronic device, you may not dispose of this device together with unsorted domestic waste. - Page 30 As manufacturer and importer respectively: TrekStor GmbH, Berliner Ring 7, 64625 Bensheim, Germany I I I I I I I I I I I I I I I I I I I I I I I I I I I I I I I I I I I I I I I I I I I I I I I I I I I I I I I I I I I I I I I I I I I I I I I I I I I I I I I I I I I I I I I I I I I I I I I I I I I I I I I I I I I I I I I I I I I I I I I I I I I I I I I I I I I I I I I I I I I I I I I I I I I I I I I I I I I I I I I I I I I I I I I I I I I I I I I I...
- Page 31 Support information If you have questions about your TrekStor product or problems, please proceed as follows: • Take a look at our FAQ section, where you will find answers to the most frequently asked questions about your product. • Carefully read the operating instructions. The detailed operating instructions are available under "Downloads"...
Need help?
Do you have a question about the surftab breeze 9.6 quad 3g and is the answer not in the manual?
Questions and answers