D-Link dcs-910 User Manual
Hide thumbs
Also See for dcs-910:
- User manual (75 pages) ,
- Quick installation manual (39 pages) ,
- Quick install manual (25 pages)
Table of Contents
Advertisement
Advertisement
Table of Contents

Related Manuals for D-Link dcs-910


Summary of Contents for D-Link dcs-910
-
Page 2: Table Of Contents
D-ViewCam Installation .......... 40 Add a Camera ..............43 Live Video ..............24 Setup > Wizard ............24 Using & Configuring the DCS-910 ........48 Internet Connection Setup Wizard ....... 25 Router Set-Up and Installation ........51 Network Setup ............. 27 Troubleshooting ........... - Page 3 Table of Contents Networking Basics ..........56 Check your IP address ............. 56 Statically Assign an IP address ........57 D-Link DCS-910 User Manual...
-
Page 4: Product Overview
• DCS-910 Internet Camera • CAT5 Ethernet Cable • Power Adapter • Manual, Software and D-Link Click ‘n Connect setup utility on CD • Quick Install Guide • Camera Stand Note: Using a power supply with a different voltage than the one included with your product will cause damage and void the warranty for this product. -
Page 5: Introduction
C o n g r a t u l a t i o n s o n y o u r p u rc h a s e o f t h e D C S - 9 1 0 I n t e r n e t C a m e r a ! T h e D C S - 9 1 0 i s a v e r s a t i l e a n d unique solution for your small office or home. Unlike a PC Camera, the DCS-910 is a stand-alone system with a bui lt - i n C P U that trans mit s hi g h qual ity video i mage s fo r mo n ito r i n g. -
Page 6: Features
Features • Simple to Use: The DCS-910 is a stand-alone system with a built-in CPU, requiring no special hardware or software such as PC frame grabber cards. The DCS-910 supports both ActiveX mode for Internet Explorer and Java mode for Internet Explorer and Netscape Navigator ™... -
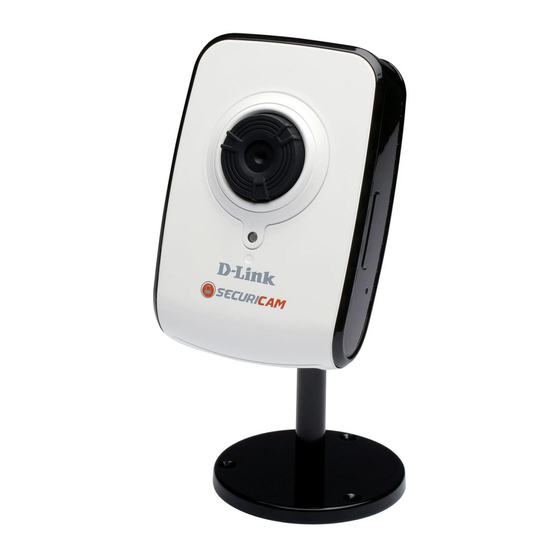
Page 7: Hardware Overview
Section 1 - Product Overview Hardware Overview Front View Camera Lens Power and Link LED Camera Stand D-Link DCS-910 User Manual... -
Page 8: Rear View
Section 1 - Product Overview Rear View Reset Ethernet Connector Power Connector Camera Stand D-Link DCS-910 User Manual... -
Page 9: Hardware Installation
Section 1 - Product Overview Hardware Installation Attach the Swivel Stand Locate the stand mount on the back panel of the DCS-910 and screw on the swivel stand to the DCS-910. Connect the Ethernet Cable Connect the included Ethernet cable to the network cable connector located on the bottom panel of the DCS-910 and attach it to the network. - Page 10 Attach the external power supply to the DC power input connector located on the bottom panel of the DCS-910 and connect it to your local power supply. Note: Power source is confirmed when the red LED Power Indicator located below the lens on the DCS-910 is illuminated.
-
Page 11: Software Installation
Software Installation Using D-Link Click ‘n Connect Turn on the computer and Insert the D-Link DCS-910 Installation CD in the CD-ROM drive. Use the D-Link Click ‘n Connect utility for initial setup. The following step-by-step instructions will be shown in Windows XP. - Page 12 Click Next If you have not yet connected the Ethernet cable to the camera, do so now. Connect the other end of the cable to your computer or to the LAN. Click Next to continue. Click Next D-Link DCS-910 User Manual...
- Page 13 If the camera is successfully located, the MAC ID you wrote down previously appears in the MAC ID List. If there are multiple MAC IDs listed, choose the MAC ID for the camera being installed. Click Next to continue. Click Next D-Link DCS-910 User Manual...
- Page 14 (Static) IP address assigned by the ISP. Click Next to continue. Click Next If you need to manually assign IP settings for a Fixed IP Address, enter the information and click Next to continue. Click Next D-Link DCS-910 User Manual...
- Page 15 “admin” leave the password entry blank and click the OK button. See below for more information on using the camera’s web interface. Click Exit to quit the D-Link Click ‘n Connect utility. Click Exit to quit or ADVANCED Options to...
-
Page 16: Install Setup Wizard Software
Install Setup Wizard Software The DCS-910 includes Setup Wizard software as an alternative to using the D-Link Click ‘n Connect utility for camera setup. Users might also want to install the Setup Wizard on their system to be able to re-install or install new camaeras in the future. - Page 17 Click the Next button to proceed with the installation of the Setup Wizard. You will be able to choose where to put the software on your computer in a menu that appears later. Click Next Read the license agreement and click Yes if you agree and want to proceed with installation. Click Yes D-Link DCS-910 User Manual...
- Page 18 Click the Finish button to complete the Setup Wizard installation. The computer will need to be restarted before the Setup Wizard can be used. A menu appears offering the option of restarting now or later. Upon restarting the Setup Wizard is ready to use. Click Finish D-Link DCS-910 User Manual...
-
Page 19: Configuration
After installing the Setup Wizard software and restarting the computer, a new folder appears in Programs containing the Setup Wizard. To launch the Setup Wizard go to Programs --> D-Link --> Setup Wizard SE and click on the D-Link Setup Wizard SE icon. - Page 20 IP Address and Subnet Mask suitable for your local network. Enter a Default Gateway IP address to access the camera from remote locations or oterh subnets. Enter DNS IP addresses if needed for remote access accross the Internet. Click Next D-Link DCS-910 User Manual...
- Page 21 Section 3 - Configuration If you need to make any changes, click Back to modify your settings. Otherwise, click Restart to save and apply your settings. Click Restart D-Link DCS-910 User Manual...
-
Page 22: Viewing Your Internet Camera
Web browser. Click Link The Setup Wizard will automatically open your web browser to the IP address of the DCS-910, in this example it is: http://192.198.0.102. Your DCS-910 may have a different IP Address. Enter admin as the default username and leave the password blank. Click OK to continue. - Page 23 • When you connect to the home page of your camera, you will be prompted to download ActiveX. If you want to use ActiveX to view your video images instead of Java, then you must download ActiveX. D-Link DCS-910 User Manual...
-
Page 24: Configuration
Setup > Wizard You may choose to configure your network by using the Internet Connection Setup Wizard that includes step-by-step instructions. Otherwise, you may manually configure your connection using the Manual Internet Connection Setup. D-Link DCS-910 User Manual... -
Page 25: Internet Connection Setup Wizard
Section 3 - Configuration Internet Connection Setup Wizard This wizard will guide you through a step-by-step process to configure your new D-Link Camera and connect the camera to the Internet. Click Next to proceed. Click Next You may configure your camera using •... - Page 26 Configure the correct time to ensure that all events triggered, captured and scheduled at the right time. Then, click Next to proceed. Click Next This page displays your configured settings. Click Apply to save and activate the setting, or Back to change your settings. Click Apply D-Link DCS-910 User Manual...
-
Page 27: Network Setup
TCP ports 80. A corresponding port must be opened on the router. For example, if the port is changed to 1010, users must type in the web browser “http://192.168.0.100:1010” instead of “http://192.168.0.100”. UPnP Settings: Enable this setting to configure your camera as an UPnP device in the network. D-Link DCS-910 User Manual... -
Page 28: Setup > Ddns
Select your Dynamic DNS Server from the pull down menu. Host Name: Enter the host name of the DDNS server. User Name: Enter your username or e-mail used to connect to the DDNS. Password: Enter your password used to connect to the DDNS server. D-Link DCS-910 User Manual... -
Page 29: Setup > Image Setup
Vertically rotates the video. If the camera is installed upside down, Flip Image and Mirror should both be checked. Mirror: Horizontally rotates the video. Brightness Control: Allows you to adjust the brightness level. Contrast Control: Allows you to adjust the contrast level. Saturation Control: Allows you to adjust the saturation level. . D-Link DCS-910 User Manual... -
Page 30: Setup > Video
Quality: Select the desired image quality from five levels: Highest, High, Medium, Low, and Lowest. Light Frequency: Select the proper frequency (50Hz or 60Hz) to reduce image flicker. D-Link DCS-910 User Manual... -
Page 31: Setup > Mail
This is the e-mail address of recipient for the SMTP server. Address: User Name: If the SMTP server uses authentication, you must enter your user name here. Password: This is the password that you use with your user name to connect to the SMTP server. D-Link DCS-910 User Manual... -
Page 32: Time Schedule
This will send a snapshot to the e-mail account that you have configured in the E-mail section. If you have configured the SMTP account correctly, Account: you will be able to send a test file to the e-mail account of the recipient. D-Link DCS-910 User Manual... -
Page 33: Setup > Ftp
Specifies the password to access the external FTP server. Directory Path: Specifies the destination folder in the external FTP server. Passive Mode: Enabling passive mode will allow access to an external FTP server if your camera is behind a router protected by a firewall. D-Link DCS-910 User Manual... -
Page 34: Time Schedule
This will send a snapshot to the FTP server that you have configured in the Upload section. If you have configured the FTP correctly, you will be able to see a test file in your FTP server. D-Link DCS-910 User Manual... -
Page 35: Setup > Time And Date
Internet time server. Choose the one that is closest to your camera, Copy your Computer’s Time Click to synchronize the time information from your PC. Settings: Set the Date and Time Select this to set the time manually. Manually: D-Link DCS-910 User Manual... -
Page 36: Maintenance > Device Management
Section 3 - Configuration Maintenance > Device Management In this section, you can change the administrator’s password and configure the server settings for your camera. You can also manage the user account(s) that access to your camera. D-Link DCS-910 User Manual... -
Page 37: Maintenance > Backup And Restore
Section 3 - Configuration Maintenance > Backup and Restore In this section, you can save and restore your configuration, restore the factory settings, and/or restart the camera. D-Link DCS-910 User Manual... -
Page 38: Maintenance > Firmware Upgrade
Maintenance > Firmware Upgrade Your current firmware version and date will be displayed on your screen. You may go to the D-Link Support Page to check for the latest firmware versions available. To upgrade the firmware on your DCS-910, please download and save the latest firmware version from the D-Link Support Page to your local hard drive. -
Page 39: Status > System
Section 3 - Configuration Status > System This section displays all the details information about your device and network settings. D-Link DCS-910 User Manual... -
Page 40: D-Viewcam Installation
D-ViewCam Installation D-ViewCam software is included for the administrator to manage up to 32 D-Link IP cameras remotely. You may now use the software to configure all the advanced settings for your cameras. D-ViewCam is a comprehensive management tool for IP surveillance. - Page 41 Section 3 - Configuration Click Next to continue. Click Next Click Browse if you would like to choose a specific folder for the installation, otherwise click Next to continue. Click Next D-Link DCS-910 User Manual...
- Page 42 Section 3 - Configuration Click Next to start the installation. Note: The D-ViewCam installation process may take several minutes to complete. Click Next Click Finish to complete the installation. Click Finish D-Link DCS-910 User Manual...
-
Page 43: Add A Camera
Add a Camera This section will show you how to start and add a camera to the D-ViewCam system. To start D-ViewCam, select Start > All Programs > D-Link > D-Link D-ViewCam. Enter Admin as the default user name and leave the password blank. - Page 44 Section 3 - Configuration Welcome to the Add Camera Wizard. Use this wizard to add your cameras to the D-ViewCam system. Note: Use the left or right arrow to navigate the wizard. Click / Next to continue. Click Next D-Link DCS-910 User Manual...
- Page 45 LAN with same subnet. The system will place all of the cameras under the default map called My Map. Click Next to continue. DCS-910-55 If you choose Add Manually, you will need to enter the IP address of the camera(s). Click Next to continue. D-Link DCS-910 User Manual...
- Page 46 • Non-Office Hours Only: Continuously monitoring during non-office hours (06:00 PM to 08:00 AM) and ONLY recording when motion is detected. Note: Excluding 24/7 Continuous Recording, other schedule recording types can ONLY do recording when motion is detected. Click Next to continue. DCS-910 DCS-910-55 D-Link DCS-910 User Manual...
- Page 47 Click Next to continue. The Add Camera wizard is now complete. Click Close to access the D-ViewCam’s main screen. Your D-ViewCam Installation is Complete! Note: Please refer to the D-ViewCam user manual for information about using D-ViewCam. D-Link DCS-910 User Manual...
-
Page 48: Using & Configuring The Dcs-910
Using & Configuring the DCS-910 D-Link’s DCS-910 is a versatile and cost effective Internet Camera offering both video and audio monitoring. It can also serve as a powerful surveillance system in security applications. DCS-910 can be used with any wired router. This section explains how to view the camera from either the Internet or from inside your internal network. - Page 49 Run the Setup Wizard program from the CD included with the DCS-910. Follow the steps in the Quick Installation Guide to configure the DCS-910. The camera will be assigned a local IP Address that allows it to be recognized by the router. Write down this IP Address for future reference.
- Page 50 Run your Internet Explorer Web browser. In the address bar, type in the IP Address that was assigned to the Internet Camera by the Installation Wizard program. The DCS-910 Home Page appears with a window displaying live video from the camera. You are able to view this screen from any PC running Internet Explorer on your LAN.
-
Page 51: Router Set-Up And Installation
Router Set-Up and Installation The following steps generally apply to any router that you have on your network. The D-Link DI-624 is used as an example to clarify the configuration process. Configure the initial settings of the DI-624 by following the steps outlined in the DI-624 Quick Installation Guide. -
Page 52: Open Virtual Server Ports To Enable Remote Image Viewing
The firewall security features built into the DI-624 router prevent users from accessing the video from the DCS-910 over the Internet. The router connects to the Internet over a series of numbered ports. The ports normally used by the DCS-910 are blocked from access over the Internet. - Page 53 Enter valid ports in the Virtual Server section of your router. Please make sure to check the box next to the camera name on the Virtual Server List to enable your settings. D-Link DCS-910 User Manual...
-
Page 54: Troubleshooting
Reposition the Internet Camera into a more shaded area immediately as prolonged exposure to bright lights will damage the CMOS sensor. D-Link DCS-910 User Manual... - Page 55 If you are using Internet Explorer with a version number of lower than 5, then you will need to upgrade your Web browser software in order to view the streaming video transmitted by the Internet Camera. D-Link DCS-910 User Manual...
-
Page 56: Networking Basics
Check your IP address After you install your new D-Link adapter, by default, the TCP/IP settings should be set to obtain an IP address from a DHCP server (i.e. wireless router) automatically. To verify your IP address, please follow the steps below. -
Page 57: Statically Assign An Ip Address
Network Connections. Windows XP - Click on Start > Control Panel > Network Connections. Step 2 Right-click on the Local Area Connection which represents your D-Link network adapter and select Properties. Step 3 Highlight Internet Protocol (TCP/IP) and click Properties.
Need help?
Do you have a question about the dcs-910 and is the answer not in the manual?
Questions and answers