
Subscribe to Our Youtube Channel
Related Manuals for 909 10CSMS


Summary of Contents for 909 10CSMS
- Page 1 INSTRUCTION MANUAL 10CSMS 15 A MP 10 " 254mm SINGL E BE V EL L ASER GUIDED SL IDE MIt ER SAW...
-
Page 2: Table Of Contents
Manual before using your new 909 Power Tool. Take Bevel lock special care to heed the Cautions and Warnings. Clamp assembly Your 909 power tool has many features that will make Spindle lock button your job faster and easier. Safety, performance, and Rotating lower blade guard... -
Page 3: Description Of Symbols
Description of symbols Specifications The rating plate on your tool may show symbols. Input power: 15 Amp These represent important information about the No load speed: 5500 RPM product or instructions on its use. Wear hearing protection. Voltage: 120V ~ 60 Hz Wear eye protection. -
Page 4: General Safety Instructions
General safety instructions 11. Always use safety glasses. Also use face or dust mask if cutting operating is dusty. Everyday eyeglasses WARNING. Read and understand all instructions. Failure only have impact resistant lenses: they are NOT safety to follow all instructions listed below, may result in electric glasses. -
Page 5: Safety Rules For Laser Lights
Safety rules for laser lights Additional safety rules for miter saws • Ensure that the lighting is adequate. • Do not use the saw unless the guards are in place. AVERTISSEMENT CAUTION • Do not use the saw to cut metal or masonry. RAYONNEMENT LASER –... -
Page 6: Additional Safety Rules For Miter Saws
• Always hold the saw on parts that are insulated. If you The manufacturer shall not be liable for any changes made accidentally cut into hidden wiring or the saw’s own cable, to the tool nor for any damage resulting from such changes. the metal parts of the saw will become ‘live’. -
Page 7: Accessories
Accessories extension cord marked “W-A” or “W”. These cords are rated for outdoor use and reduce the risk of electric shock. The 909 10CSMS Single Bevel Slide Compound Miter Saw is supplied with the following accessories as standard: WARNING: this miter saw is for indoor use only. Do not expose it to rain or use in damp locations. -
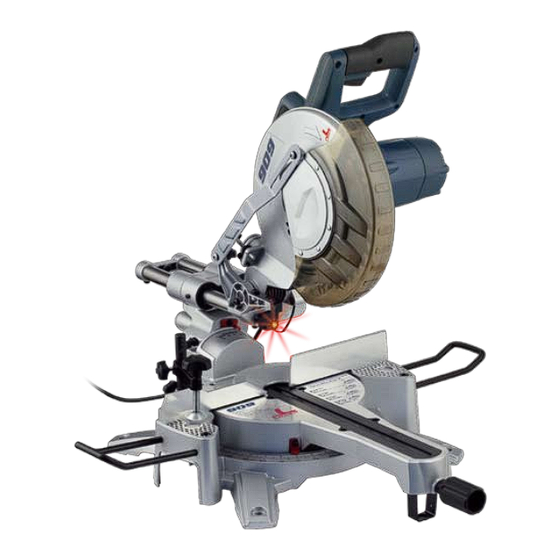
Page 8: Know Your Product
Know your product Before using the saw, familiarise yourself with all the operating features and safety requirements. 1. Laser light assembly 26. Dust extraction port 27. Slide bars 2. Laser light on/off switch 3. Laser cover 28. Slide lock 4. Saw arm 29. -
Page 10: Unpacking
Due to modern mass production techniques, it is unlikely The saw base has holes in that your 909 Power Tool is faulty or that a part is missing. each corner to facilitate bench If you find anything wrong, do not operate the tool until the mounting (Fig. -
Page 11: Miter Table Lock
Miter table lock Clamp assembly The miter table lock (24) is The clamp assembly (9) can be mounted to the fence, used to lock the table at the either side of the saw blade, to suit the task at hand (Fig. G). desired miter angle (Fig. -
Page 12: Dust Bag
Dust bag This restricts the cut to a “trench” in the workpiece. The depth of the trench can be adjusted with the trenching depth The dust bag (14) fits over adjustment screw (29) (Fig. O) and locked in position with the dust extraction port (26). -
Page 13: Setting The Table Square With The Blade
Setting the table square with the blade lock nut securing the 0° bevel adjustment screw 1. Make sure that the electrical plug is removed from (33) (Fig. V). Also, loosen the power point. the bevel lock (15). 2. Push the saw arm (4) down to its lowest position and 12. -
Page 14: Setting The Fence Square With The Table
Setting the fence square with the table Changing a blade DANGER! 1. Make sure that the electrical plug is removed from the Never try to use a blade larger than the stated power point. capacity of the saw. It might come into contact with the blade guards. - Page 15 over the upper fixed blade 12. Replace the outer blade guard (8) it is possible to washer (Fig. l). access the blade bolt 13. Depress the spindle (Fig. g). lock button (25) and 7. Hold the rotating guard (11) replace the flat washer and blade bolt.
-
Page 16: Cross-Cutting (Without Slide Action)
Cross-cutting (without slide action) 8. It is possible to remove the clamp assembly (9) When cutting a narrow piece of wood it is not necessary to by loosening the clamp use the slide mechanism. In these cases ensure that the assembly lock (10) and slide lock (28) is screwed down to prevent the saw arm moving it to the other side... -
Page 17: Bevel Cut
Bevel cut cutting operation to check that there are no problems. 11. Hold the operating handle (6) firmly and squeeze the A bevel cut is made by switch trigger (23). Allow the blade to reach maximum cutting across the grain of speed. -
Page 18: Adjusting The Laser Line
6. Place the workpiece flat on the table with one edge 4. Adjust until the laser hits the centre of the blade. securely against the fence (18). If the board is warped, 5. Switch off the laser light. place the convex side against the fence. If the concave Using the laser line generator side is placed against the fence, the board could break and jam the blade. -
Page 19: Maintenance
Maintenance Power cord maintenance WARNING. Always ensure that the tool is switched off and If the supply cord needs replacing, the task must be carried the plug is removed from the power point before making any out by the manufacturer, the manufacturer’s agent, or an adjustments or maintenance procedures.
Need help?
Do you have a question about the 10CSMS and is the answer not in the manual?
Questions and answers